Breaking

Category: Gardening

  • When Should I Cut Back My Perennials for Winter in Zone 5

    When Should I Cut Back My Perennials for Winter in Zone 5

    Every October, zone 5 gardeners face the same dilemma: shears in hand, staring at a perennial bed going dormant, wondering whether to cut everything down now or leave it standing. Your neighbor scalps her garden to the ground the day after the first frost. The garden blogger you follow says never cut anything until spring. Both are confident; both cannot be right. The truth is gloriously in-between: some perennials genuinely benefit from fall cleanup, others are better left standing, and the difference comes down to the plant, the pests, and what you want from your winter garden. Here is the zone 5 playbook.

    The General Rule: Wait for Hard Frost

    The single most important timing principle: do not cut back perennials while they are still green and growing. As long as foliage is alive, the plant is photosynthesizing and sending energy down into the roots and crown — energy that powers next spring’s growth. Cutting green foliage short-circuits this process and weakens the plant. Wait until a hard frost (temperatures in the mid-20s) has killed the top growth and it has turned brown and mushy. In zone 5 — covering much of the Midwest, New England, and the Mountain West — that typically means late October through November, though it varies by year and microclimate. Once the tops are truly dead, the plant has banked everything it can, and cleanup is safe. Cutting too early is the most common fall perennial mistake, and it is entirely avoidable: put the shears down until the frost does its work. Your patience is literally feeding next year’s flowers.

    Perennials to Cut Back in Fall

    Some perennials should be cut down in fall for genuine horticultural reasons, not just tidiness. Peonies top the list: their foliage harbors botrytis blight spores over winter, so cut stems to the ground and — critically — dispose of the foliage in the trash, not the compost. Bearded iris foliage should be cut to fans a few inches tall to discourage iris borers, which overwinter in the leaves. Daylilies with mushy, diseased-looking foliage get cut back to reduce overwintering pests and disease; healthy daylily foliage can stay. Bee balm and phlox, prone to powdery mildew, benefit from fall removal of infected foliage. Hostas turn to slime after frost and are easier to clean up in fall than as a matted mess in spring — plus fall cleanup removes slug eggs hiding in the debris. Any plant that showed serious disease or pest problems during the season should be cut back and its debris discarded, breaking the pest cycle. For these plants, fall cleanup is plant health care, not just aesthetics.

    Perennials to Leave Standing Until Spring

    A long list of perennials is better left alone, and the reasons are practical. Ornamental grasses — miscanthus, switchgrass, fountain grass — provide essential winter crown protection; their foliage insulates the growing point from freeze-thaw cycles, and cutting them in fall measurably reduces zone 5 survival. They also look magnificent in snow and ice. Coneflowers, black-eyed Susans, and asters hold seed heads that feed goldfinches and other birds all winter. Sedum ‘Autumn Joy’ keeps architectural seed heads that catch frost beautifully. Russian sage, lavender, and other woody-based perennials need their stems for winter hardiness — cut them in spring once new growth emerges. Marginally hardy plants like mums and heuchera survive zone 5 winters better with their foliage intact as insulation. Butterfly bush should wait until spring since fall pruning stimulates tender growth that winter kills. The University of Minnesota Extension’s perennial care guide offers a plant-by-plant breakdown of fall versus spring cleanup, complemented by the RHS perennial growing guide.

    The Wildlife Argument for Messy Gardens

    Beyond plant health, there is a compelling ecological case for leaving perennials standing. Hollow and pithy stems — from coneflowers, bee balm, Joe Pye weed, and many others — shelter overwintering native bees, ladybugs, and beneficial insects; cutting and discarding them destroys next year’s pollinators. Leaf litter and standing stems shelter butterfly chrysalides and moth cocoons. Seed heads feed birds through the leanest months, when natural food is scarcest. A garden cut to the ground in October is an ecological desert all winter; the same garden left standing hums with life. You do not have to leave everything — a compromise works beautifully: cut back the disease-prone plants that need it, tidy the areas visible from the street if that matters to you, and leave the back borders standing wild. Even a partial messy garden supports dramatically more wildlife than a scalped one. Fallen leaves can stay as mulch in beds rather than being bagged — they insulate crowns and feed the soil as they decompose.

    How to Cut Back Properly

    When you do cut, technique matters. Use clean, sharp pruners or shears — ragged cuts invite disease, and dirty tools spread it. Cut herbaceous perennials to 2 to 3 inches above the crown; cutting flush to the ground risks damaging the crown itself. For ornamental grasses in spring, use hedge shears or even a reciprocating saw for large clumps, cutting to about 4 to 6 inches, and wear gloves and eye protection — grass blades are razor-sharp. Do not compost diseased foliage; bag it for municipal yard waste or the trash. After cutting, apply a 2- to 3-inch layer of shredded leaf or straw mulch around (not over) crowns once the ground freezes — mulch applied before freeze-up can harbor rodents and delay dormancy. Mark the locations of late-emerging perennials like butterfly weed and balloon flower before you cut, so you do not accidentally dig them up in spring thinking they died. Clean and oil your tools before storing them; sharp tools make spring cleanup a pleasure instead of a chore.

    In zone 5, cut perennials back only after hard frost kills the tops — never while foliage is green. Cut disease-prone plants like peonies and iris in fall, but leave ornamental grasses, coneflowers, and seed heads standing until spring for winter protection and wildlife food.

    Conclusion

    Fall perennial cleanup in zone 5 is not all-or-nothing. Wait for hard frost, cut back the plants that harbor disease and pests, and leave the rest standing — the grasses for crown protection, the seed heads for birds, the hollow stems for overwintering bees. You will get a garden that survives winter better, supports wildlife, and frankly looks more interesting under snow than bare mulch ever could. Spring cleanup of what remains takes an afternoon and reveals the new growth already pushing up. For more seasonal perennial care, browse our gardening guides, meet the team, or ask us your perennial questions.

    Frequently Asked Questions

    When is it too late to cut back perennials in zone 5?

    It is rarely “too late” — if winter arrives before you finish, simply leave the rest until spring. Most perennials that prefer fall cleanup tolerate spring cleanup nearly as well; the main exception is disease-prone plants like peonies, where fall removal meaningfully reduces next year’s infection. When in doubt, leave it standing.

    Should I cut back ornamental grasses in the fall?

    No — leave them until spring. Their foliage insulates the crown against zone 5 freeze-thaw cycles, and fall-cut grasses survive winter measurably worse. They also provide winter beauty and wildlife shelter. Cut them back in early spring before new growth emerges, leaving 4 to 6 inches.

    Can I leave diseased foliage over winter?

    No. Foliage with serious disease (peony blight, iris borer damage, heavy mildew) should be cut and discarded — not composted — in fall to break the pest and disease cycle. This is one of the clearest cases where fall cleanup is genuinely important for plant health.

    Does leaving perennials standing really help wildlife?

    Significantly. Seed heads feed finches, chickadees, and other birds through winter; hollow stems shelter native bees and beneficial insects; leaf litter protects butterfly chrysalides. Research consistently shows that gardens left standing support far more overwintering wildlife than gardens cut to the ground.

    When should I mulch perennials for winter in zone 5?

    After the ground freezes — typically late November to December in zone 5. Mulching too early insulates warmth, delaying dormancy and sheltering rodents that gnaw crowns. Apply 2 to 3 inches of shredded leaves or straw around (not piled on) plant crowns once sustained freezing arrives.

  • How Can I Grow Mushrooms at Home in a Dark Basement

    How Can I Grow Mushrooms at Home in a Dark Basement

    A dark basement sounds like the last place anything would grow — but for mushrooms, it is close to paradise. Mushrooms do not photosynthesize, so they have zero need for light; what they crave is exactly what basements offer: cool temperatures, high humidity, and protection from drying winds. While your garden sleeps through winter upstairs, you can be harvesting fresh oyster mushrooms from a basement corner. Home mushroom growing has a reputation for being technical and finicky, but the beginner-friendly methods — especially ready-to-fruit kits — are genuinely easy, with first harvests in as little as two to three weeks. Here is how to turn that dark basement into a mushroom farm.

    Why Basements Are Actually Ideal

    Mushroom fruiting needs three conditions, and basements deliver all of them naturally. First, temperature: most gourmet mushrooms fruit best between 55 and 70°F, which matches an unheated or lightly heated basement for much of the year. Too warm (above 75°F) invites mold and bacteria; too cold (below 50°F) stalls growth — the basement sweet spot sits right in the productive range. Second, humidity: mushrooms are mostly water, and developing pins shrivel in dry air. Basements run naturally humid, often 60 to 80 percent relative humidity, which is close to ideal. Third, darkness is not just tolerated but preferred for many species during colonization, and fruiting needs only ambient indirect light — a basement window or a dim bulb on a timer is plenty. The one thing basements sometimes lack is fresh air exchange, and that is the variable you will manage. Stale, CO2-heavy air produces long, spindly stems and tiny caps; gentle ventilation fixes it. Work with the basement’s strengths and correct only its weakness.

    Start With a Kit: The Two-Week Victory

    Forget spores, sterile technique, and pressure cookers for now. A ready-to-fruit oyster mushroom kit — a bag or box of fully colonized substrate — is the perfect basement introduction. You cut an X in the bag, mist it a few times daily, and mushrooms emerge within one to three weeks. Kits typically produce two to three flushes (harvests) over six to eight weeks, yielding a pound or more of fresh mushrooms. Place the kit on a shelf out of direct light, tent it loosely with a plastic bag with air holes to hold humidity, and mist the emerging pins (not drench them). The psychological value of this first success cannot be overstated: you learn what healthy mycelium looks and smells like (fresh, mushroomy, white), what proper humidity feels like, and how fast mushrooms grow (astonishingly fast — pins can double daily). Once you have fruited a kit successfully, every advanced method makes intuitive sense. Buy kits from reputable mushroom suppliers, not dusty clearance shelves — freshness of the colonized substrate determines success.

    The Big Three: Humidity, Fresh Air, Temperature

    Nearly all home mushroom problems trace to three variables. Humidity: fruiting mushrooms want 80 to 95 percent relative humidity — tent kits or use a plastic-sheeted shelving unit with a cool-mist humidifier on a timer. Fresh air: mushrooms exhale CO2, and trapped CO2 deforms growth into tiny caps on long stems. Crack the tent daily or run a small fan nearby. Temperature: keep the fruiting area between 55 and 70°F; a seedling heat mat under the growing area helps in cold corners. Penn State Extension’s mushroom growing resources cover these fundamentals for home growers.

    Best Beginner Species for Basements

    Not all mushrooms suit beginners. Oyster mushrooms (Pleurotus ostreatus) are the undisputed starter species: aggressive colonizers, tolerant of imperfect conditions, fast to fruit, and delicious. Blue oysters prefer cooler temperatures (ideal for basements), while pink and yellow oysters like it warmer. Lion’s mane is the excellent second species — striking, delicious, and nearly as forgiving, fruiting well in the same conditions as oysters. Shiitake on pre-inoculated logs or sawdust blocks is a step up in patience (slower to fruit) but very reliable once established. Wine cap (Stropharia rugosoannulosa) is oddly perfect for a different basement-adjacent spot: inoculated into wood-chip mulch outdoors, it fruits with almost no care. Avoid button/portobello mushrooms as a beginner — they need casing layers and precise conditions that frustrate newcomers. Start with oysters, add lion’s mane when confident, and expand only after consistent harvests. Each species teaches you something the next one builds on.

    Harvesting and Getting Second Flushes

    Harvest oysters when the caps are still slightly curled under at the edges — just before they flatten out fully. Younger mushrooms are more tender and flavorful, and harvesting promptly triggers the next flush sooner. Twist or cut the whole cluster at the base rather than picking individual mushrooms. After the first flush, the kit needs a rest: let the substrate dry slightly for a week, then soak it (submerge the block in cold water for a few hours) to rehydrate, and return it to fruiting conditions. Most kits give two to four flushes, with each successive flush smaller than the last. When production fades, do not throw the spent substrate away — crumble it into garden beds, compost, or wood-chip mulch outdoors, where it often fruits again naturally and inoculates your soil with beneficial fungi. The spent block is also excellent compost material. One kit thus keeps giving long after its indoor career ends, which makes the already-low cost per pound of homegrown mushrooms even better.

    Leveling Up: Buckets, Logs, and Beyond

    Once kits feel easy, the natural next steps expand your harvest dramatically. The bucket method: drill holes in a 5-gallon bucket, layer pasteurized straw with oyster mushroom spawn, and fruit pounds of mushrooms from something that cost a few dollars. Pasteurization is just hot water (160 to 180°F for an hour) — no pressure cooker needed for oysters on straw. Log cultivation: drill hardwood logs (oak, maple), plug with shiitake spawn, seal with wax, and stack in a shady basement-adjacent spot or outdoors — logs fruit for years, a true long-term investment. Sawdust blocks from spawn suppliers skip the DIY substrate work entirely. Each method reuses the same big-three principles you learned with kits. Within a year, a dedicated basement corner can produce a steady weekly harvest. The North American Mycological Association’s cultivation resources connect beginners with local clubs where experienced growers share spawn and wisdom freely.

    A dark basement is ideal for mushrooms: cool temperatures, natural humidity, and no light needed. Start with a ready-to-fruit oyster kit, maintain high humidity with fresh air exchange, harvest caps young, and rehydrate for multiple flushes — fresh mushrooms in weeks, not months.

    Conclusion

    Growing mushrooms in a dark basement turns an unused space into a food-producing asset. Start with an oyster mushroom kit to learn the ropes with a near-guaranteed first harvest, dial in humidity, fresh air, and temperature, then expand to buckets or logs as confidence grows. The learning curve is gentle, the harvests are fast, and there is something deeply satisfying about picking fresh mushrooms in February while snow covers the garden. For more indoor growing projects, explore our gardening guides, meet the team, or ask us your mushroom questions.

    Frequently Asked Questions

    Do mushrooms need any light to grow?

    Essentially no. Mushrooms do not photosynthesize; mycelium colonizes substrate in complete darkness, and fruiting needs only enough ambient light to orient growth — a dim basement window or brief daily light is plenty. Darkness is an advantage, not a problem.

    How long until I harvest from a mushroom kit?

    Oyster mushroom kits typically show pins within 1 to 2 weeks of starting and are ready to harvest 1 to 2 weeks after that — so 2 to 4 weeks total. Lion’s mane is similar; shiitake kits take longer, often 4 to 8 weeks.

    Is it safe to grow mushrooms in a basement with a furnace?

    Yes, with sensible placement. Keep growing areas away from direct furnace heat and dust, ensure some ventilation, and avoid musty corners with existing mold problems. The humidity you add for mushrooms is localized to the growing tent and will not damage a normal basement.

    Why are my oyster mushrooms growing long stems with tiny caps?

    That is the classic sign of too much CO2 and not enough fresh air. Increase ventilation — open the tent more, add air holes, or run a small fan nearby. The next flush should grow normally once air exchange improves.

    Can I grow mushrooms from store-bought mushroom stems?

    Sometimes, with oysters — stem butts can be cloned onto cardboard with modest success rates. But results are unreliable compared to purchased spawn or kits. For a first attempt, a kit or commercial spawn gives vastly better odds and teaches proper technique.

  • What Should I Plant Under a Black Walnut Tree That Kills Everything

    What Should I Plant Under a Black Walnut Tree That Kills Everything

    Every gardener with a black walnut tree knows the heartbreak: you plant tomatoes, peppers, or petunias near it, they grow hopefully for a few weeks, then wilt, yellow, and die for no apparent reason. The soil is fine, the water is fine — but the tree is waging chemical warfare. Black walnuts produce juglone, a natural compound toxic to many plants, released from roots, fallen leaves, nut husks, and even rain dripping off the canopy. The result is a notorious dead zone where “nothing grows.” Except that is not quite true. A surprising number of plants tolerate or even ignore juglone, and with the right plant list plus a few smart strategies, the ground under your walnut can be lush and beautiful instead of bare.

    Why Black Walnut Kills: Understanding Juglone

    Juglone is an allelopathic chemical — a compound one plant produces to suppress competitors. Black walnut roots exude it constantly, and it concentrates in the soil within the tree’s root zone, which extends far beyond the canopy drip line (roots can reach 50 to 80 feet from the trunk). Fallen leaves, twigs, and especially the fleshy nut husks add more as they decompose. Sensitive plants absorb juglone through their roots; it disrupts their respiration and water uptake, causing wilting, yellowing, stunting, and death — symptoms easily mistaken for drought or disease. Tomatoes, peppers, eggplants, potatoes, pines, azaleas, rhododendrons, and many annuals are highly sensitive. But tolerance varies enormously between species, and many common landscape plants evolved alongside walnuts and shrug off juglone entirely. One important note: juglone breaks down in well-aerated, biologically active soil, so rich compost-amended soil with good drainage reduces toxicity compared to compacted, waterlogged ground. Ohio State University Extension maintains a thorough list of juglone-tolerant plants that is the gold standard reference, and the Morton Arboretum’s black walnut toxicity guide explains the science behind it.

    Tolerant Perennials and Groundcovers

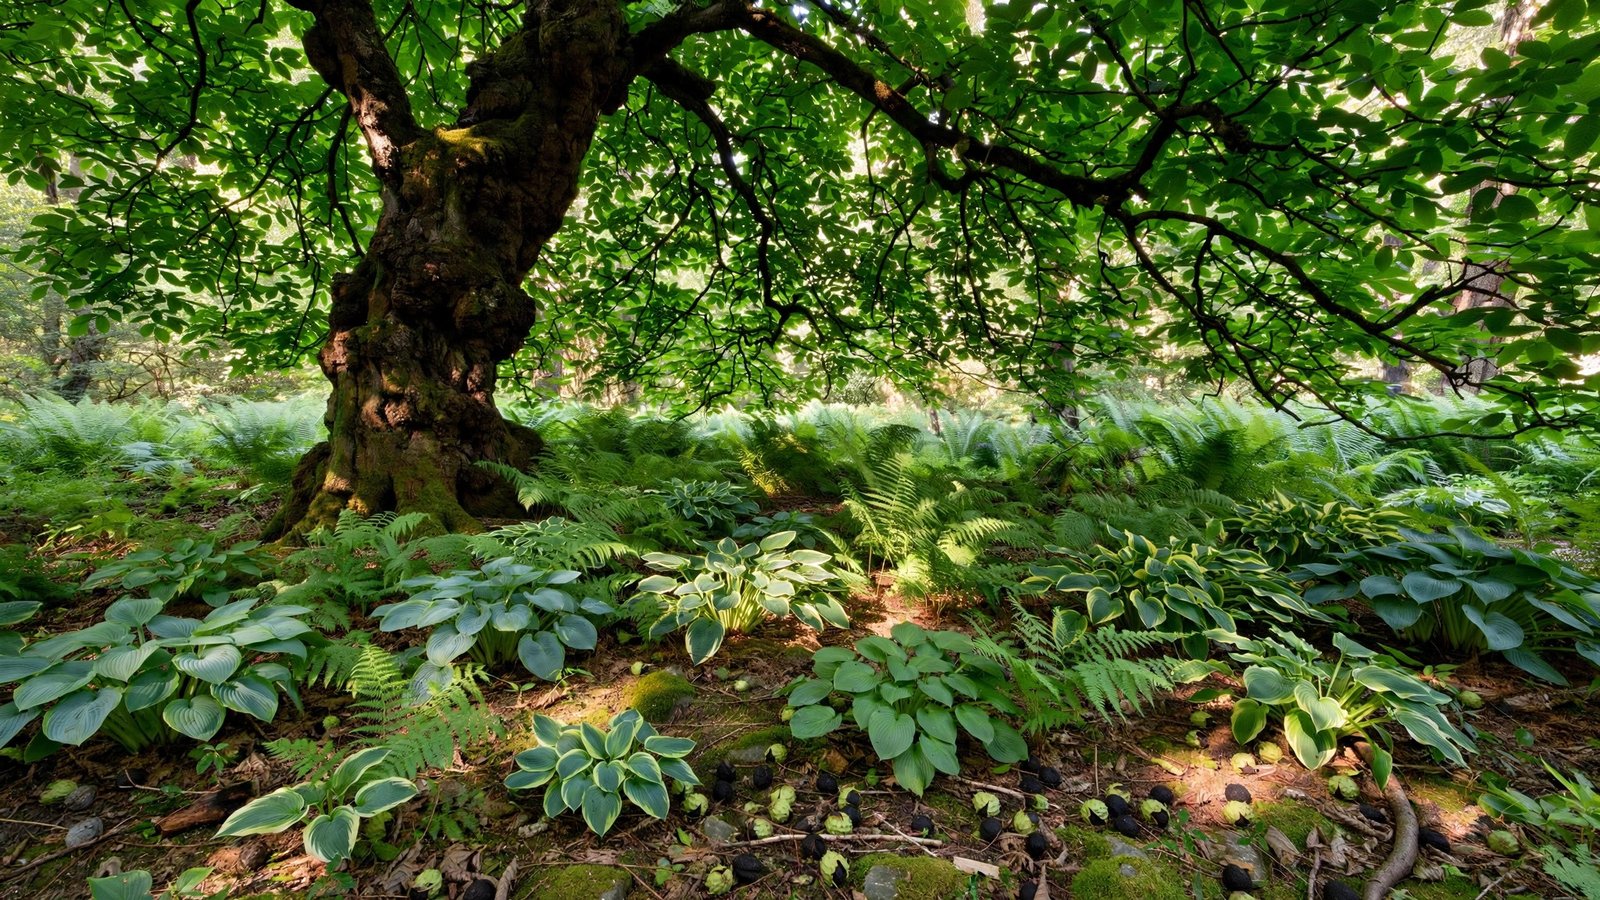
    The shade garden palette for walnut zones is richer than most people expect. Hostas — the backbone of shade gardening — are juglone tolerant and thrive under walnuts, as are ferns of nearly every type (ostrich fern, Christmas fern, Japanese painted fern). Bee balm (Monarda), daylilies, coneflowers, black-eyed Susans, astilbe, coral bells (Heuchera), lungwort (Pulmonaria), wild ginger, Virginia bluebells, and spiderwort all handle juglone well. For groundcovers, consider vinca minor, pachysandra, sweet woodruff, lamium, and barrenwort (Epimedium) — the last being nearly indestructible in dry walnut shade. Spring bulbs including daffodils, crocus, and snowdrops are tolerant and naturalize beautifully. Ornamental grasses like Japanese forest grass (Hakonechloa) add texture. The key insight: build the planting around proven survivors rather than testing sensitive favorites and mourning them. A layered planting of tolerant species looks intentional and lush, not like a compromise.

    Tolerant Shrubs, Vines, and Trees

    For structure, several shrubs coexist peacefully with black walnut. Arborvitae, yews, hemlocks, and junipers are tolerant evergreens for screening. Flowering options include forsythia, lilac, viburnum, mock orange, weigela, spirea, and red- and yellow-twig dogwoods. Climbing vines like Virginia creeper, trumpet vine, and Boston ivy tolerate juglone (though plant aggressive vines with caution for other reasons). If you want another tree nearby, choose from tolerant species: oaks, hickories, maples (most), redbud, serviceberry, dogwood, and most fruit trees except sensitive ones — though giving any new tree distance from the walnut’s root zone is wise. Notably, many native woodland plants evolved with walnuts and are the safest bets of all: bloodroot, trillium, jack-in-the-pulpit, Solomon’s seal, and wild geranium form a gorgeous native understory that asks for nothing once established. Designing with natives under a walnut is working with the ecosystem instead of against it.

    What About Vegetables and Annuals?

    Here is the honest answer: the vegetable garden does not belong under a black walnut. Most beloved edibles — tomatoes, peppers, eggplant, potatoes — are among the most juglone-sensitive plants in existence, and even “tolerant” vegetables underperform in walnut root zones due to competition for water and nutrients. Annual flowers are similarly risky: petunias, impatiens (the classic shade annual), and marigolds struggle or die. If you are determined to grow food near a walnut, use raised beds with imported soil and a root barrier (landscape fabric at the bed’s base) to physically separate crops from juglone-laden soil — this works reliably since juglone moves through soil contact. Site the beds as far from the tree as possible, ideally beyond the canopy drip line. Some herbs like mint and bee balm tolerate juglone in the ground, but for serious food production, distance plus raised beds is the answer, not wishful planting.

    Strategies Beyond Plant Selection

    Smart tactics multiply your options. First, respect the root zone: juglone concentration is highest near the trunk and decreases with distance, so your most sensitive choices go farthest out. Second, build soil health aggressively — deep compost, mulch, and good drainage accelerate juglone breakdown by soil microbes. Third, use containers: a walnut-shaded patio with potted plants sidesteps the problem entirely, since container soil has no juglone. Fourth, mulch the area under the tree with wood chips, but compost walnut leaves separately before using them as mulch — fresh walnut leaves and especially husks are juglone-concentrated; composted for a full hot cycle, they are generally safe. Fifth, remove fallen nuts promptly if you are planting nearby, since the husks are the most potent juglone source. Finally, test before investing: plant one inexpensive specimen of anything you are unsure about and watch it for a full season before committing to a large planting. Patience here saves money and disappointment.

    Black walnut trees kill sensitive plants with juglone, but many plants are immune: hostas, ferns, daylilies, bee balm, daffodils, arborvitae, lilacs, and native woodland wildflowers all thrive beneath walnuts. Plant proven survivors, build healthy soil, and use raised beds for anything sensitive.

    Conclusion

    The ground under a black walnut is not cursed — it is just selective. Understanding juglone lets you stop fighting the tree and start planting the long list of tolerant species that genuinely thrive there: hostas, ferns, daylilies, bee balm, spring bulbs, hardy shrubs, and native woodland plants. Keep the vegetable garden at a distance in raised beds, compost walnut debris before using it, and build rich soil to help microbes neutralize juglone faster. Work with the tree’s chemistry instead of against it, and the “dead zone” becomes one of the lushest spots in your landscape. For more problem-area planting guides, visit our gardening section, learn about our team, or ask us your shade-garden questions.

    Frequently Asked Questions

    How far does juglone spread from a black walnut tree?

    The toxic root zone extends well beyond the canopy, often 50 to 80 feet from the trunk in mature trees, since roots spread widely. Juglone concentration is highest near the trunk and decreases with distance. When in doubt, assume the entire root zone is affected and plant tolerant species throughout.

    Can I compost black walnut leaves safely?

    Yes, with proper hot composting. Juglone breaks down during active composting, and finished compost from walnut leaves is generally safe to use. Avoid using fresh, uncomposted walnut leaves or nut husks as mulch around sensitive plants — the husks are the most concentrated juglone source.

    Will removing the tree fix the soil?

    Mostly, with time. Juglone breaks down in soil within weeks to months once the source is gone, especially in healthy, biologically active soil. Stump and major roots should be removed since they continue releasing juglone as they decay. Most gardeners can plant sensitive species within a season or two of removal.

    Are English walnuts as toxic as black walnuts?

    No — English (Persian) walnuts produce much less juglone and rarely cause the severe planting problems black walnuts do. Butternut is intermediate. If your tree is an English walnut, your planting options are far wider, though the most sensitive plants may still struggle directly beneath it.

    Do raised beds really protect vegetables from juglone?

    Yes, when built correctly. Use imported soil, keep beds at least 12 inches deep, and lay landscape fabric or a solid barrier at the base to block root intrusion from below. Site beds as far from the tree as practical. This physical separation reliably prevents juglone exposure.

  • How Do I Protect My Garden From a Late Spring Frost Warning

    How Do I Protect My Garden From a Late Spring Frost Warning

    The forecast was perfect all week — your tomatoes are in, the peppers are thriving, the basil is finally taking off — and then the evening news drops the words every spring gardener dreads: frost warning tonight, lows in the upper 20s. A late spring frost can undo months of work in a single night, blackening tender growth you nurtured since February. But here is the reassuring truth: a frost warning is not a death sentence. With a few hours of preparation using materials you probably already own, you can carry almost everything through the night unscathed. Here is exactly what to do when the warning hits.

    Understand What You Are Fighting

    Not all cold nights are equal, and the distinction shapes your defense. A light frost (lows of 29 to 32°F) damages only the most tender plants and often just nips outer leaves. A hard freeze (below 28°F for several hours) can kill tender plants outright and damage even hardy ones. Most late-spring warnings involve radiational cooling: clear skies and calm winds let heat radiate away from surfaces, so plant leaves and the ground can freeze even when the official air temperature reads a degree or two above freezing. Low spots and open areas get hit hardest; plants near the house, under trees, or on slopes often skate through. Check the details of your warning — predicted low, duration below freezing, wind, and cloud cover all matter. A forecast of 31°F for two hours under clearing skies demands covering; 36°F with wind and clouds might need nothing. Your local National Weather Service forecast discussion, not just the headline number, tells you how serious the night will be.

    Cover Before Sunset: The Core Move

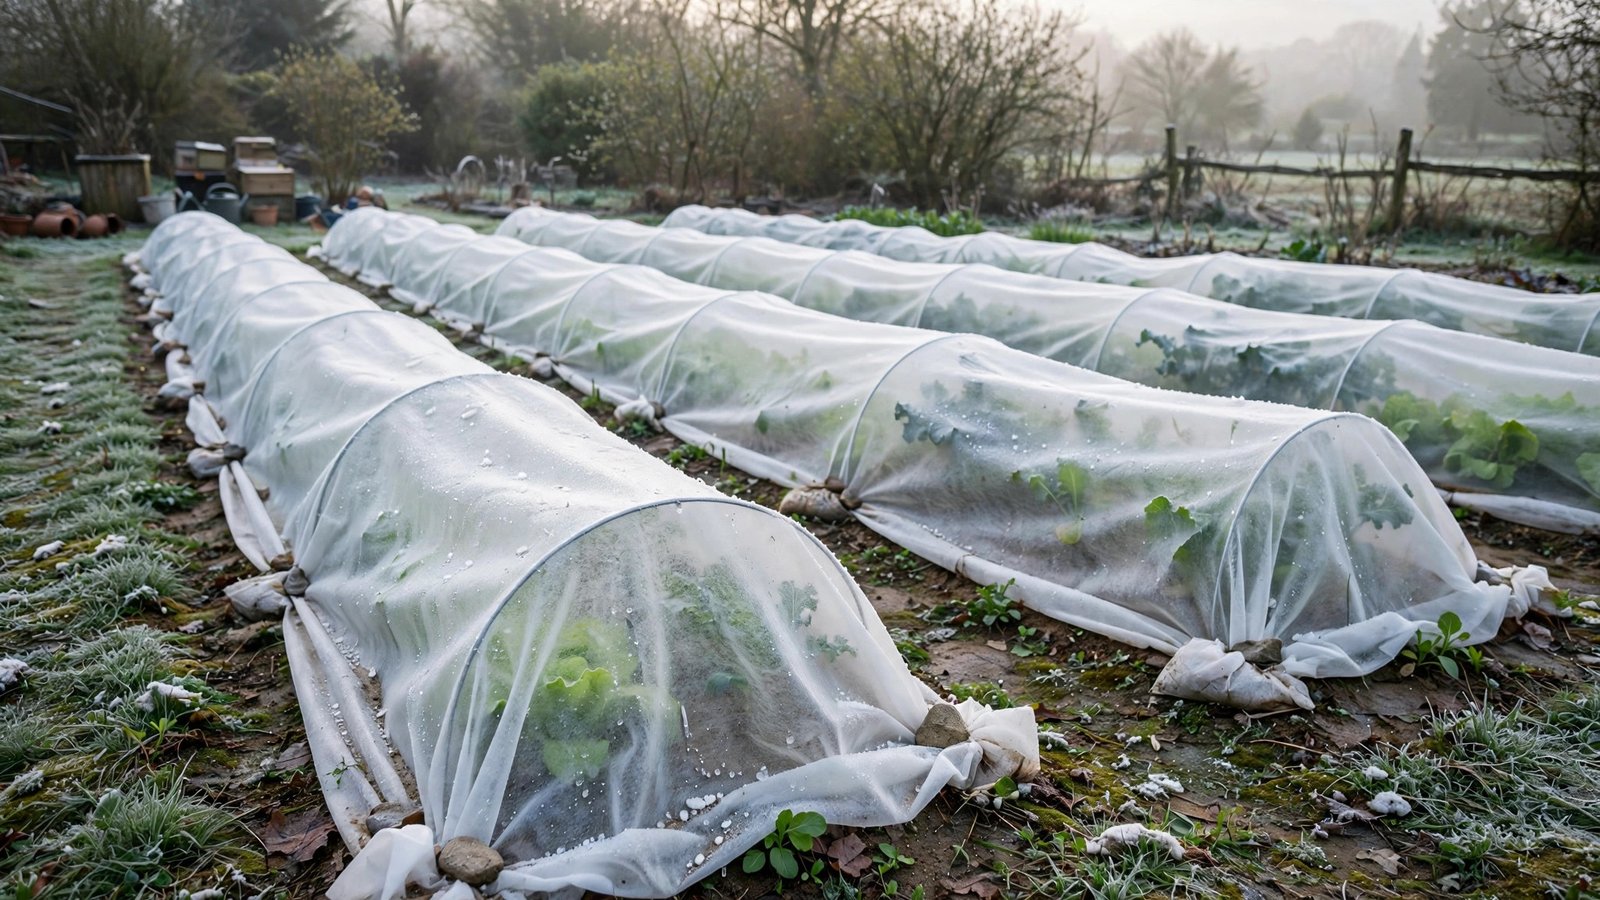
    Covering is the most effective frost defense, but timing and materials matter. Cover before sunset, not after dark — you are trapping the day’s residual ground heat. Frost cloth (floating row cover) is best: lightweight, breathable, rated for 4 to 8 degrees of protection. Old bedsheets and blankets work too. Drape loosely, extending all the way to the ground on all sides to trap earth-warmed air. Support fabric on stakes or cages so it does not crush growth, and secure edges against wind. Remove covers in the morning once temperatures rise above freezing — leaving them on cooks plants in midday sun. The University of Minnesota Extension’s frost protection guide details material choices and temperature thresholds.

    Water the Soil: Free Degrees of Protection

    Here is the trick many gardeners miss: water the soil thoroughly in the late afternoon before a frost night. Moist soil holds far more heat than dry soil, releasing it slowly through the night and keeping the air around plants several degrees warmer. This is the same principle behind commercial orchards running sprinklers during frost events. Water the ground, not the foliage — wet leaves freeze faster and suffer more damage. A deep watering also ensures roots are hydrated heading into a stressful night. Combine watering with covering and you stack two independent warming effects. One caution: do not create a swamp — waterlogged cold soil damages roots. Aim for deeply moist, the normal good-watering standard. In containers, group pots together against the house wall (which radiates stored heat) and water them too; clustered pots protect each other, and the thermal mass of the building is free frost insurance.

    What NOT to Drape Over Your Plants

    The most common frost-protection mistake is reaching for plastic sheeting laid directly on foliage. Plastic conducts cold straight to any leaf it touches — everywhere plastic contacts a leaf, that leaf freezes and dies, often worse than if left uncovered. If plastic is all you have, support it on stakes or frames so it never touches the plants, creating a tent with an air gap. Newspaper works as an emergency cover for small plants (a few layers, weighted down), and paper grocery bags slipped over individual seedlings are a classic. Avoid turning on heat lamps or string lights indiscriminately — old-fashioned incandescent Christmas lights under a frost cloth genuinely add a few degrees of warmth, but modern LEDs produce almost no heat and do nothing. And resist the urge to prune frost-damaged growth immediately afterward; wait several days to see what is truly dead, since apparently blackened stems sometimes resprout from below.

    Containers, Seedlings, and Special Cases

    Container plants are the most vulnerable and the easiest to save: simply carry pots indoors or into the garage for the night. It takes ten minutes and provides total protection. Newly transplanted seedlings, hardened off or not, deserve covers even in a light frost — their root systems are shallow and their tissue is soft. Cold frames and cloches (even a milk jug with the bottom cut off) give individual plants excellent protection. For fruit trees in bloom, the stakes are higher: open blossoms die around 28°F, and a lost bloom is a lost fruit. Cover small trees with sheets, run a sprinkler overnight for larger ones (the ice that forms actually protects blossoms at 32°F through latent heat release), or accept the loss on a big tree and thin the survivors. Tropical houseplants summering outdoors should come inside whenever nights threaten the 40s — they suffer chilling injury well above freezing. Prioritize your effort: protect the irreplaceable (grafted trees, long-season crops) first.

    After the Frost: Assess Before You Act

    Morning after, do not panic at the sight of wilted, darkened foliage — and do not immediately rip plants out. Wait until midday, when temperatures recover, to assess: some plants that look devastated at dawn perk up remarkably. Water normally and wait three to five days before pruning anything; the full extent of damage reveals itself slowly, and cutting too early removes tissue that might have recovered while stimulating tender new growth vulnerable to the next cold snap. If the growing point (the central bud) of a plant is mushy and dead but lower stems are firm, prune back to healthy tissue and the plant will usually branch out. Keep frost cloth handy — late spring often delivers multiple warnings, and the second one catches gardeners who relaxed. Note what survived uncovered; that is valuable data about your microclimate for next year’s planting decisions. The National Weather Service offers the most reliable frost and freeze warnings — sign up for alerts rather than relying on generic weather apps.

    When a late spring frost warning hits, cover tender plants with frost cloth or sheets before sunset (all the way to the ground), water the soil deeply in the afternoon, and never lay plastic directly on foliage. Remove covers in the morning — most plants survive a properly prepared frost night just fine.

    Conclusion

    A late spring frost warning is a call to action, not a funeral notice. Cover before sunset with breathable fabric sealed to the ground, water the soil to bank heat, keep plastic off leaves, haul containers inside, and assess damage patiently the next day. These simple steps routinely save entire gardens from nights in the upper 20s. Keep your frost cloth accessible through May — spring’s last cold snap is always the one that surprises people. For more seasonal garden protection guides, browse our gardening section, meet the team, or ask us your frost questions.

    Frequently Asked Questions

    What temperature actually damages garden plants?

    Tender warm-season plants (tomatoes, peppers, basil) suffer damage at 32°F and below, with death likely under 28°F for extended periods. Cool-season crops (lettuce, peas, broccoli) tolerate light frosts into the upper 20s. Duration matters as much as the low — two hours at 30°F differs greatly from six hours at 26°F.

    Can I use a tarp to cover plants in a frost?

    Only if it does not touch the foliage — drape it over stakes or frames to create a tent. Plastic laid directly on leaves conducts cold to every contact point and causes worse damage than no cover. Frost cloth, sheets, or blankets are safer choices for direct draping.

    Should I water plants before a frost?

    Water the soil, not the leaves. Moist soil stores and releases significantly more heat overnight than dry soil, buying several degrees of protection. Water in the late afternoon so it soaks in before nightfall, and avoid waterlogging.

    When should I remove frost covers in the morning?

    Once temperatures climb safely above freezing and sun hits the plants — typically mid-morning. Leaving covers on into a sunny day overheats plants quickly. If another frost is forecast the next night, you can leave the supports in place and re-cover in the evening.

    My plants look dead after the frost. Are they?

    Maybe not — wait. Assess at midday, not dawn, and give plants 3 to 5 days before pruning or replacing. If stems are firm and only leaves blackened, recovery is likely. If the central growing point is mushy, prune to firm tissue and watch for resprouting from below.

  • Why Do My Orchids Never Rebloom After the Flowers Fall Off

    Why Do My Orchids Never Rebloom After the Flowers Fall Off

    The flowers were spectacular — weeks of elegant blooms — and then they faded, the petals dropped, and you were left with a pot of green leaves and a bare flower spike. That was months ago. Or years. The plant looks healthy enough, it grows new leaves, but no matter what you do, it never blooms again. If this is your orchid story, you are in enormous company: failure to rebloom is the number-one orchid complaint, and it is almost never because the plant is broken. Orchids rebloom in response to specific environmental triggers, and the average home simply does not provide them by accident. Give the plant what it is waiting for, and reblooming becomes routine rather than miraculous.

    First, Know Which Orchid You Have

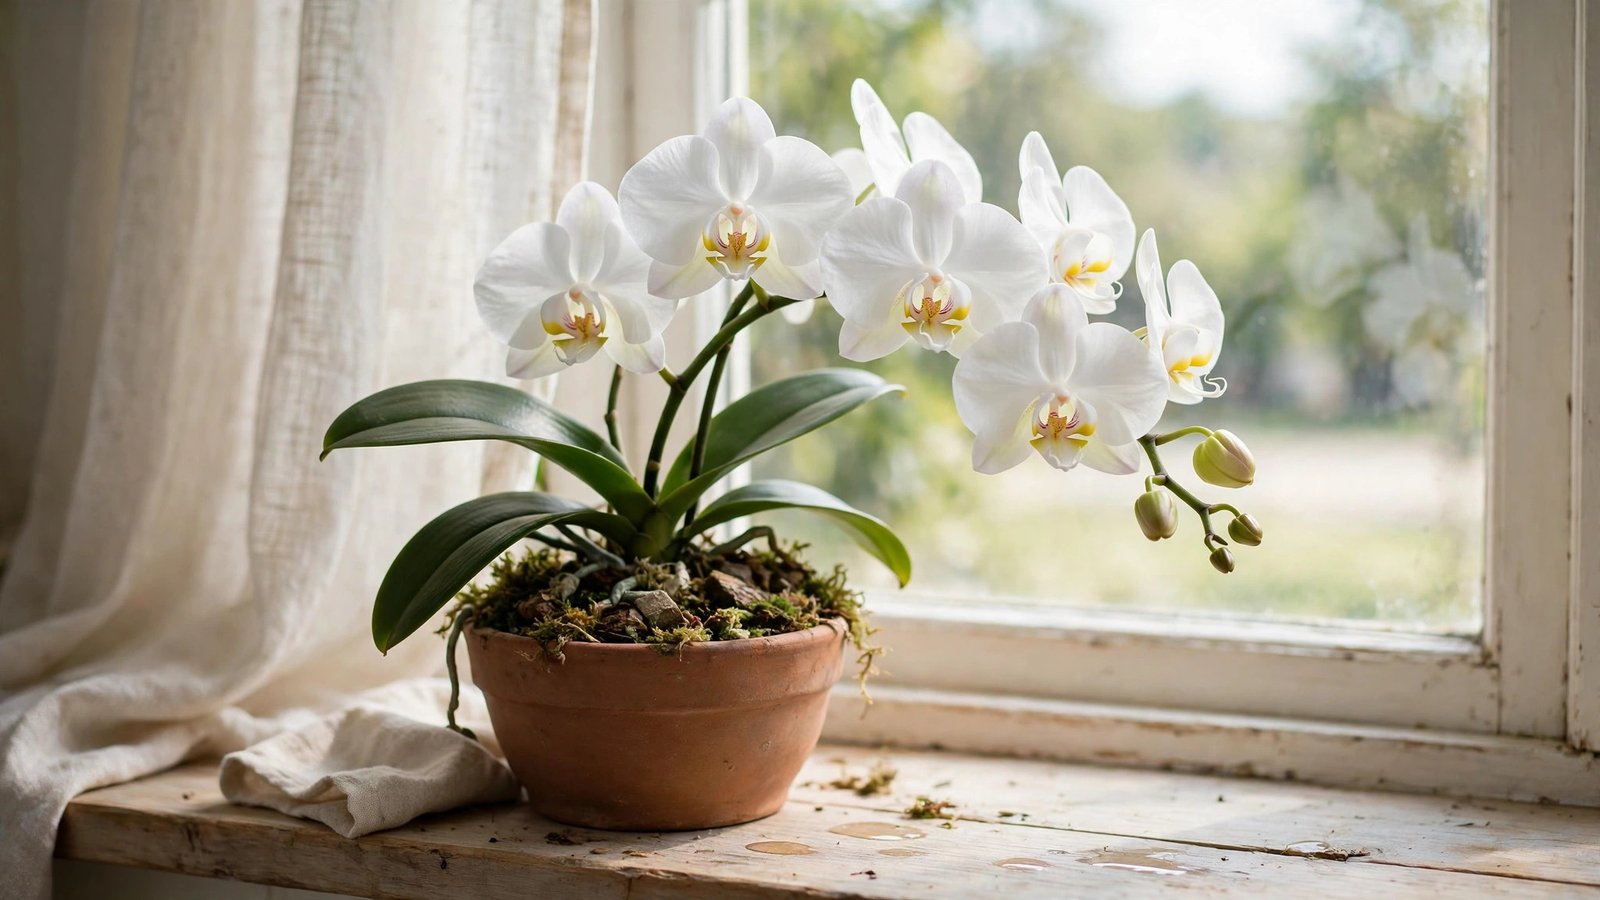
    Almost everything in this article targets the moth orchid, Phalaenopsis — the grocery-store orchid with broad flat leaves and arching sprays of blooms, which accounts for the vast majority of orchids in American homes. Phalaenopsis reblooms from the same plant readily once its triggers are met. If you have a different type, the rules change: Cattleyas need brighter light and a distinct dry rest, Oncidiums and Dendrobiums have their own seasonal rhythms, and some orchids bloom only from new growths. Check your plant against photos if you are unsure, because applying Phalaenopsis advice to a Dendrobium leads nowhere. The good news: if your plant came from a supermarket, florist, or home improvement store with no label, it is overwhelmingly likely a Phalaenopsis, and the guidance below applies directly. Healthy Phalaenopsis can rebloom annually for decades — some specimens bloom for twenty years or more.

    The Cool-Night Trigger Most Homes Never Provide

    Here is the secret: Phalaenopsis initiates flower spikes after a sustained nighttime temperature drop — roughly 10 to 15 degrees cooler than daytime, with nights around 55 to 65°F for several weeks in fall. Your thermostat holds 70°F around the clock, so the plant never gets the signal. The fix: in September or October, move the orchid somewhere nights dip into the low 60s or high 50s for 3 to 4 weeks, then watch for a tiny nub at the base — a pointed, mitten-shaped spike tip (not a rounded silvery root tip). No cool nights, no spike. The American Orchid Society’s care resources describe this temperature trigger as the key to reliable reblooming.

    Light: Almost Certainly Brighter Than You Think

    The second great rebloom blocker is dim light. Orchids sold as “low light” plants are merely low-light tolerant — they survive in dim spots but will not bloom there. A Phalaenopsis that never reblooms in a north-facing room or a dark corner is behaving exactly as expected. The target is bright, indirect light: an east-facing windowsill is ideal (gentle morning sun), a shaded south or west window works, and sheer curtains diffuse harsh rays. The leaf test tells you where you stand: healthy leaves are medium olive-green and firm; dark floppy green leaves mean too little light, while yellowish or reddish leaves with sunburn spots mean too much direct sun. If your windows are poor, a simple LED grow light 12 inches above the plant for 12 to 14 hours daily works perfectly — many dedicated orchid growers bloom plants under lights alone. Light drives the energy budget: without enough, the plant cannot afford the enormous expense of building a flower spike.

    The Spike Question: Cut It or Keep It?

    After the flowers fall, you face the classic dilemma: cut the bare spike or leave it? Both approaches work, with trade-offs. If the spike is still green and healthy, you can cut it just above a node (the little bump on the stem) — it may branch and produce a secondary flush of blooms in a few months, though the flowers are often smaller and fewer. Alternatively, cut the spike all the way to the base once it yellows; the plant then rests and channels energy into a brand-new, stronger spike later, typically with a fuller flower display. Never cut a spike that is still green and firm out of impatience — only remove it once it turns yellow and papery, or cut above a node deliberately. A common mistake is cutting the spike and then changing nothing else; the spike was never the problem. The rebloom triggers — cool nights, bright light, proper feeding — matter infinitely more than spike surgery.

    Feeding and Watering Rhythms That Support Blooming

    Orchids are light feeders, but “light” does not mean “never.” The classic advice — “weakly, weekly” — means a balanced orchid fertilizer at quarter to half strength with most waterings during active growth. Many growers switch to a bloom-booster formula (higher phosphorus) in late summer as spike season approaches, though consistent feeding matters more than the formula. Flush with plain water monthly to prevent salt buildup, which shows as brown root and leaf tips. Watering technique matters too: soak the bark medium thoroughly, then let it approach dryness before watering again — Phalaenopsis roots need the wet-dry cycle and suffocate in constant sogginess. If your orchid is still in the original sphagnum moss from the store, consider repotting into bark mix after blooming; moss stays too wet for most home conditions and is a slow root-rot machine. Healthy, silvery-green roots that turn green when watered are the sign everything below the surface is working.

    The Patience Timeline: What to Expect

    Set honest expectations and the process feels rewarding instead of anxious. After the cool-night treatment in fall, a spike typically emerges within weeks, then grows for 2 to 3 months before buds form, with blooms opening in late winter or spring — roughly 3 to 4 months from spike to flowers. The full cycle from one blooming to the next is about a year, which is completely normal. If nothing happens after a proper cool treatment plus good light, run the checklist: Is the plant actually healthy (firm leaves, good roots)? Is it getting enough light? Was the temperature drop sustained for weeks, not days? Is it being fed? Most “never rebloom” orchids are simply missing one of these, and correcting it starts the cycle. An orchid that grows new leaves and roots is alive and trying — it just needs the right signal. Give it one proper autumn, and you will likely never buy a blooming orchid again. For species-specific detail, the American Orchid Society’s Phalaenopsis culture sheet is the definitive reference.

    Phalaenopsis orchids rebloom when fall nights drop 10–15°F below daytime temperatures (55–65°F) for several weeks, combined with bright indirect light and regular weak feeding. No cool nights means no flower spike — move the plant somewhere cooler each autumn and reblooming becomes annual.

    Conclusion

    An orchid that never reblooms is not broken — it is waiting for signals your home is not sending. Provide the cool-night trigger each fall, move it into genuinely bright indirect light, feed weakly but regularly, water with a proper wet-dry cycle, and give the spike months to develop. Do this consistently and the plant will bloom year after year, often for decades. The patience the process demands is repaid every time a new spike emerges. For more houseplant care guides, explore our gardening section, meet the team, or ask us your orchid questions.

    Frequently Asked Questions

    How long after flowers fall will my orchid rebloom?

    Typically about a year: cool fall nights initiate the spike, which takes 3 to 4 months to grow and bloom by late winter or spring. This annual rhythm is normal and healthy.

    Should I cut the flower spike after blooming?

    If it stays green, you can cut above a node for a possible smaller secondary bloom, or cut to the base once it yellows so the plant builds a stronger new spike. Either works — but spike handling matters far less than providing the cool-night and light triggers for reblooming.

    Can I force my orchid to bloom out of season?

    You can approximate the trigger any time with 3 to 4 weeks of cool nights (55–65°F), but working with the natural fall cycle gives the most reliable results. The plant also needs to be healthy and well-fed — a stressed orchid will not bloom no matter the temperature.

    Why is my orchid growing leaves but no flower spike?

    It is missing the bloom trigger — almost always the sustained cool-night temperature drop, often combined with insufficient light. The plant is healthy enough for vegetative growth but has not received the seasonal signal to reproduce. Give it cool fall nights and brighter light.

    Do orchids need a rest period after blooming?

    Phalaenopsis does not need a true dormancy, but a few months of reduced feeding and steady care after blooming lets it rebuild energy. Think of it as a recovery phase, not a shutdown — keep watering and lighting normal while the plant grows the new leaves that will power the next bloom cycle.

  • How Can I Make My Own Potting Soil for Container Plants

    How Can I Make My Own Potting Soil for Container Plants

    Bagged potting soil is one of gardening’s great conveniences — and one of its great markups. A two-cubic-foot bag of premium mix can cost as much as a nice dinner out, and if you container-garden at any scale, those bags add up to real money every spring. But here is the open secret: potting soil is just a recipe, and the ingredients are cheap, widely available, and simple to combine. Making your own takes about fifteen minutes, costs a fraction of the bagged price, and — the real advantage — lets you customize the mix for exactly what you are growing. Succulents get extra grit, seedlings get a gentle fine mix, and thirsty tropicals get moisture-holding richness. Here are the recipes and the reasoning behind them.

    Why Bother? Cost, Control, and Quality

    The math is compelling. The raw ingredients for homemade potting mix — peat moss or coco coir, compost, and perlite — bought in bulk bales and bags, typically work out to one-third to one-half the cost of equivalent bagged premium mix. For a gardener filling a dozen large containers, that is serious savings. But cost is only the beginning. Homemade mix gives you control: you know exactly what is in it, with no mystery “forest products,” unlisted fertilizers, or inconsistent batches. You can tune drainage and water retention per plant type instead of forcing every plant into one generic blend. And you sidestep the quality lottery of bagged soil — anyone who has opened a bag to find sticks, clumps, and a sour smell knows the frustration. The trade-off is fifteen minutes of mixing and a little storage space for ingredients. For most container gardeners, that trade is overwhelmingly worth it.

    The Universal Base Recipe

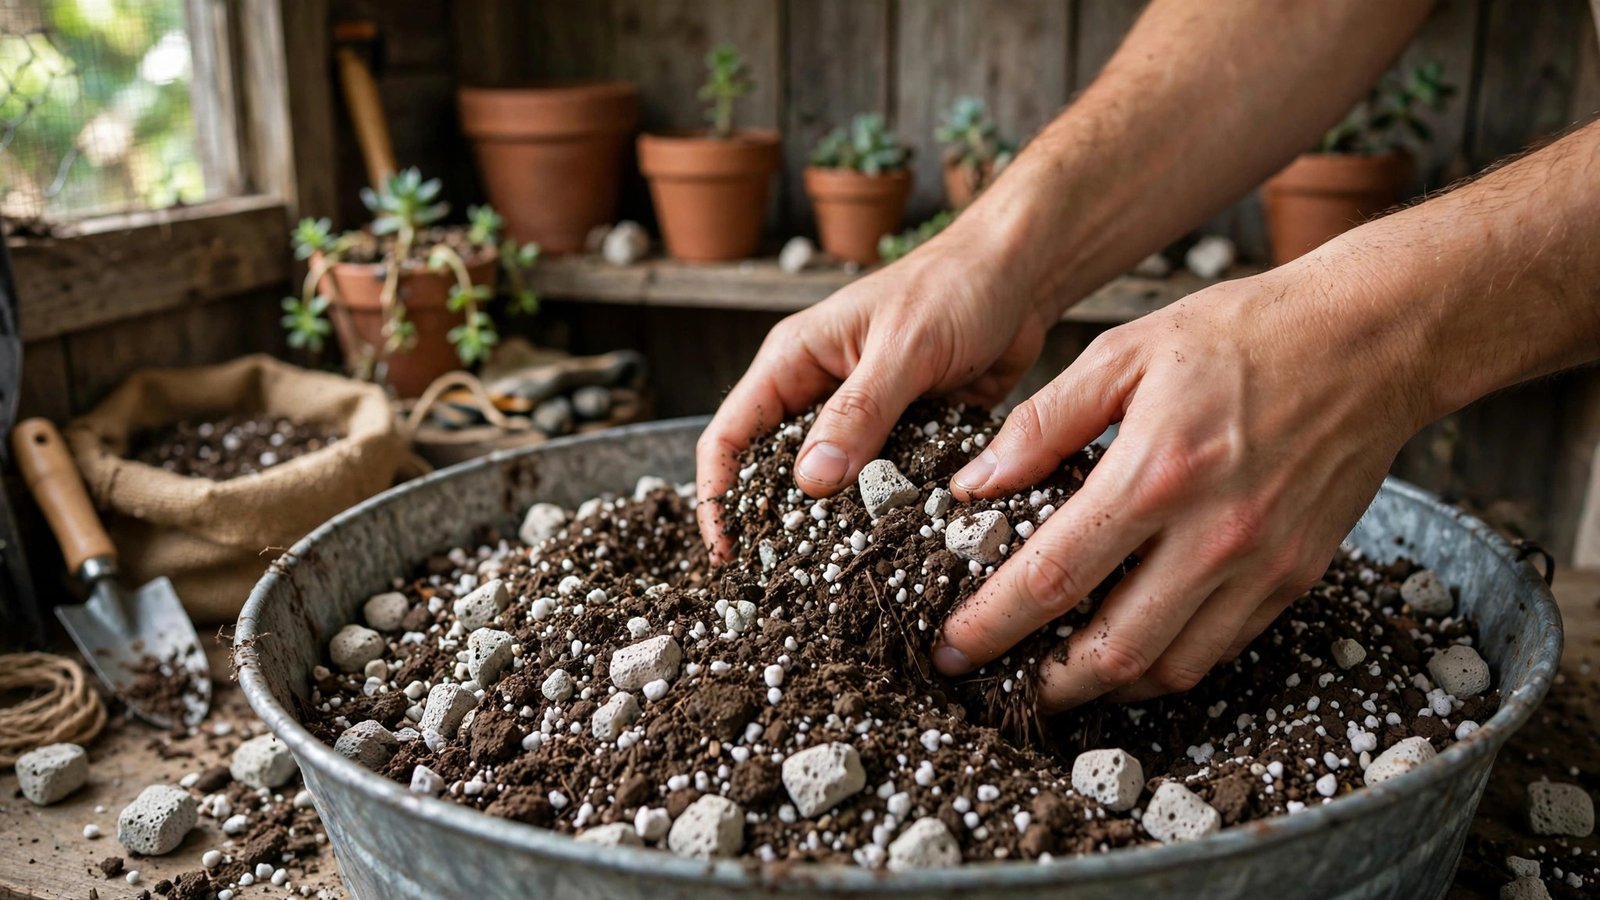
    Almost every potting mix on earth is a variation of three components, and this all-purpose recipe handles the majority of container plants beautifully. Combine: one part peat moss or coco coir (the moisture-holding base), one part finished compost or composted bark (nutrition and biology), and one part perlite (drainage and aeration). “One part” means any consistent measure — a bucket, a scoop, a bin. Mix thoroughly in a wheelbarrow or on a tarp until uniform. Then add amendments per cubic foot of mix: a quarter cup of garden lime if you used peat (peat is acidic; lime balances it — skip this with coir, which is near-neutral), and a slow-release balanced fertilizer per label rates unless your compost is rich and you prefer to feed liquid later. This mix suits vegetables, herbs, annuals, and most houseplants — free-draining yet moisture-retentive, light enough for roots to explore, and fertile enough to carry plants for weeks before supplemental feeding. It is the recipe to memorize.

    Recipe Variations for Special Plants

    Once you know the base, adapting is easy. For seedlings and seed starting, use a finer, gentler blend: one part coir or peat, one part vermiculite, one part fine compost — sifted to remove chunks — with no added fertilizer, since salts can burn germinating seeds. For succulents and cacti, go gritty: one part potting base to one or even two parts coarse mineral grit — perlite, pumice, or chicken grit — because desert plants demand instant drainage. For moisture lovers like ferns, calatheas, and thirsty tropicals, increase the coir and compost and add vermiculite (which holds water unlike perlite), reducing the perlite share. For acid-lovers like blueberries in containers, use a base of peat and composted pine bark with no lime. The principle never changes: adjust the ratios of base, nutrition, and drainage to match the plant’s native habitat, and the plants respond visibly within weeks.

    Know Your Ingredients

    Choosing between similar ingredients matters. Peat moss is the traditional base — cheap, consistent, excellent water retention — but it is harvested from slow-forming bogs, raising sustainability concerns, and it becomes hydrophobic (water-repellent) if allowed to dry completely. Coco coir, made from coconut husks, is the renewable alternative: near-neutral pH, rewets easily, and resists compaction, though quality varies by brand and it sometimes needs rinsing to remove salts. For nutrition, finished homemade compost is ideal and free, but it must be truly finished — dark, crumbly, earthy-smelling — since unfinished compost can burn plants and harbor weed seeds; bagged composted manure or mushroom compost are reliable substitutes. Perlite (the white puffy stuff) creates air pockets and drainage; vermiculite (the brown layered mineral) holds water and nutrients — they are not interchangeable, so use each where its property is wanted. A basic understanding of these ingredients turns you from recipe-follower into mix-designer. Your local cooperative extension’s potting soil and container guide covers ingredient selection with regional sourcing tips, and the RHS guide to composts and potting media is another excellent reference.

    Mixing, Storing, and the Sterilization Question

    Mixing technique is simple but worth doing right. Moisten the peat or coir first — dry peat repels water and creates dust; wear a dust mask, since perlite and peat dust irritate lungs. Combine ingredients on a tarp or in a wheelbarrow, turning the pile until no streaks of single ingredients remain, then moisten the finished blend lightly. Store unused mix in a covered bin or heavy-duty trash can with a lid — it keeps for a year or more if kept dry. As for sterilizing: commercial mixes are heat-treated to kill pathogens and weed seeds, and homemade compost can introduce both. For seed starting, sterilization matters — bake small batches of mix at 180°F for 30 minutes (it will smell, so use a garage or grill). For general containers with mature plants, most gardeners skip sterilization without issues, especially using bagged compost components. If you have battled soil-borne disease, though, sterilize or buy fresh components. Label your bins — “all-purpose,” “succulent,” “seedling” — because every mix looks identical once bagged, and future-you will thank present-you.

    Homemade potting soil is one part peat or coco coir, one part finished compost, and one part perlite, plus lime for peat-based mixes. Customize from there: grittier for succulents, finer and gentler for seedlings, richer for moisture lovers — at a fraction of bagged-mix prices.

    Conclusion

    Making your own potting soil is one of the highest-return skills in container gardening: fifteen minutes of mixing saves real money, eliminates mystery ingredients, and lets you build the perfect blend for each plant. Memorize the universal base — equal parts peat or coir, compost, and perlite — then adapt confidently for seedlings, succulents, and everything between. Your containers will drain better, your plants will grow stronger, and your spring garden budget will stretch dramatically further. For more container gardening guides, visit our gardening section, learn about our team, or send us your soil questions.

    Frequently Asked Questions

    Can I use garden soil in containers instead?

    No — garden soil compacts in pots, drains poorly, and harbors weeds, pests, and diseases. Containers need a soilless or soil-light mix engineered for drainage and aeration in a confined space. Even amending garden soil with perlite rarely matches a proper potting blend.

    Is coco coir better than peat moss?

    Each has strengths. Coir is renewable, pH-neutral, and rewets easily; peat is cheaper in some regions and very consistent. Coir quality varies more between brands. Either works as the base in the universal recipe — choose based on availability, price, and your sustainability preferences.

    How long does homemade potting mix last in storage?

    Kept dry in a covered bin, at least a year — the mineral components do not degrade, though any slow-release fertilizer mixed in loses potency over months. Moisten and fluff stored mix before use, and refresh with a little new compost if it has sat for over a year.

    Do I need to add fertilizer to homemade mix?

    Yes, unless your compost is exceptionally rich. Compost provides some nutrition but rarely enough for heavy feeders through a whole season. Add slow-release granular fertilizer at mixing time per label rates, or plan to feed with liquid fertilizer every couple of weeks once plants are growing actively.

    Why did my homemade mix grow mold on the surface?

    Surface mold usually means the mix stayed too wet with poor airflow — common with heavy compost ratios indoors. Scrape it off, let the surface dry, improve air circulation, and water less. It is typically harmless saprophytic fungus feeding on organic matter, not a plant disease.

  • When Should I Harvest Potatoes I Planted in Grow Bags

    When Should I Harvest Potatoes I Planted in Grow Bags

    Potatoes growing in grow bags are wonderfully low-drama — no digging trenches, no hilling endless rows — but they create one specific anxiety: you cannot see what is happening underground. In a garden bed you might sneak a peek; in a grow bag, the harvest is a mystery until you commit. Harvest too early and you get a handful of marble-sized tubers. Harvest too late and you risk rot, wireworm damage, or a bag of potatoes sprouting in fall rains. Fortunately, the plants telegraph exactly what is happening below through their flowers, foliage, and stems. Learn to read those signals, and you will pull perfect harvests from your grow bags every time — including the bonus early crop most gardeners miss.

    The Two Harvests: New Potatoes vs. Mature Storage Potatoes

    Every potato planting offers two distinct harvests, and grow bags make the first one easy. “New” potatoes are the small, thin-skinned, creamy tubers you steal early in the season — they are a delicacy, not an underripe mistake. The mature harvest comes later: full-sized potatoes with toughened skins built for months of storage. Most gardeners only think about the final harvest and miss weeks of new potatoes, which is a shame, because grow bags are ideal for gentle early raiding — you can feel around in the soil without disturbing the whole plant. Decide your goal upfront: if you want maximum total yield for storage, leave plants alone until full maturity; if you want the longest eating season, start stealing new potatoes early and let the rest mature. Many gardeners do both — early raids from one bag, full maturity in another. There is no wrong answer, only mistimed digging.

    Reading the Signs: Flowers, Vines, and the Skin Test

    The plants tell you everything. Flowering — typically 60 to 70 days after planting — signals that new potatoes are forming and large enough to steal; reach in gently and harvest a few of the largest, leaving the rest to keep growing. For the main harvest, watch the vines: when they yellow, wither, and die back naturally, the tubers below have finished bulking up. This usually happens 90 to 120 days after planting, depending on variety — early varieties like Yukon Gold finish sooner, late varieties like Russets take longer. Do not rush: after vine death, wait another one to two weeks before harvesting. This waiting period lets the skins “set” — thicken and toughen — which dramatically improves storage life. Test readiness with the skin-set check: rub a tuber firmly with your thumb; if the skin slips off easily, wait longer; if it stays put, they are ready. Potatoes harvested before skin set must be eaten within weeks, while properly set skins store for months. Your seed supplier’s potato growing guidance typically lists days-to-maturity per variety — use it to calibrate your expectations.

    How to Harvest From Grow Bags (The Fun Part)

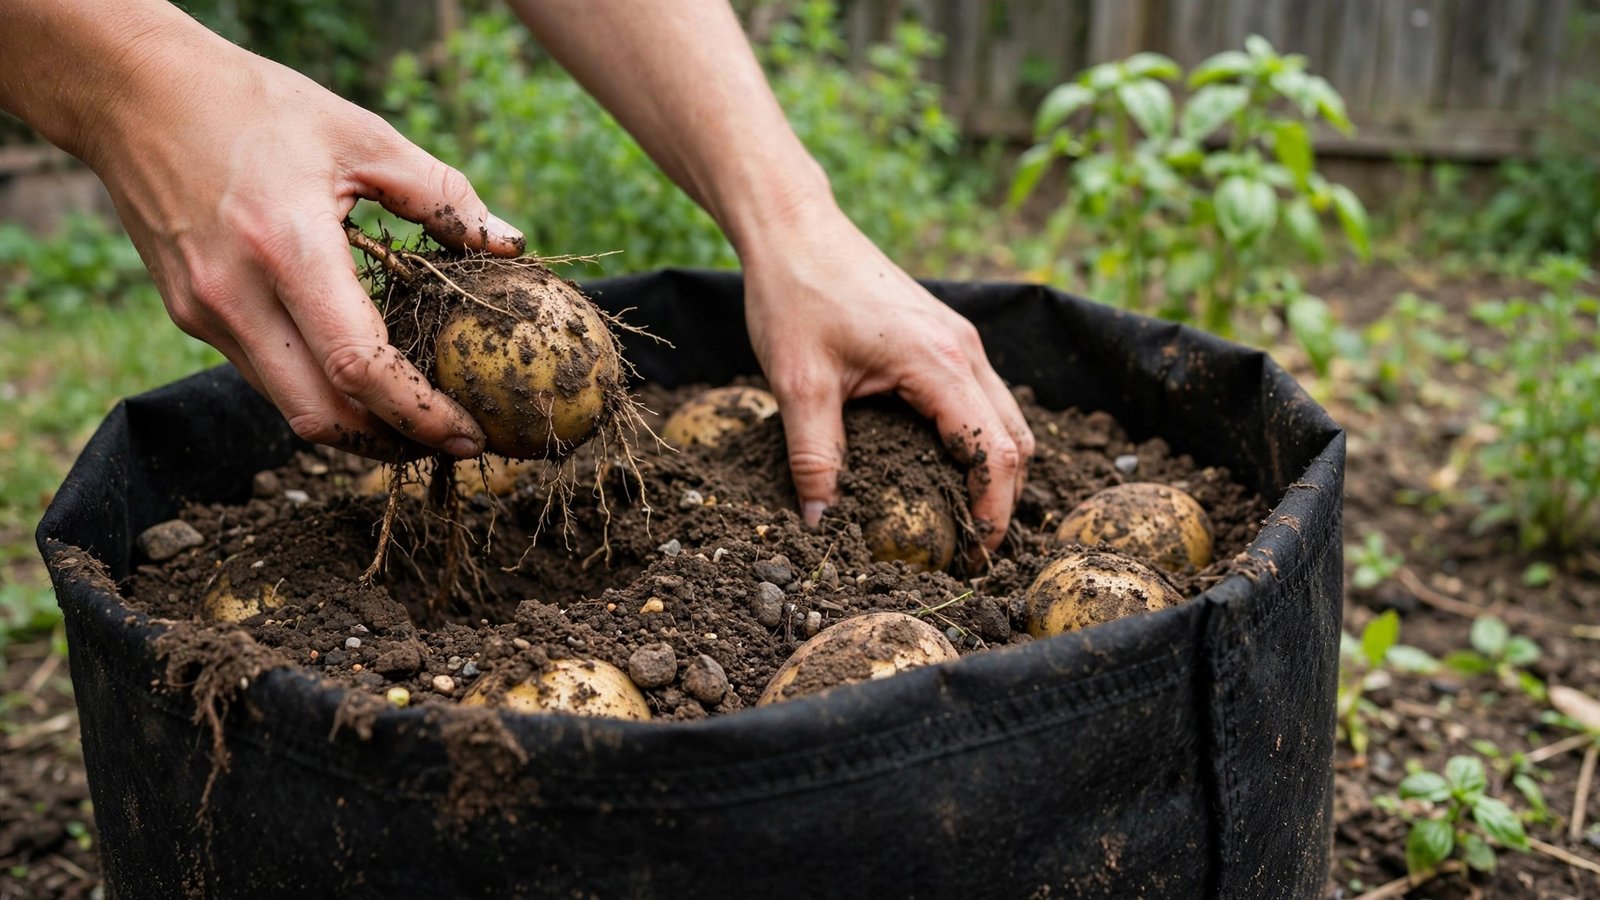
    This is where grow bags shine over in-ground beds: harvesting is clean, fast, and fork-free. For the main harvest, simply tip the entire bag on its side onto a tarp and sift through the soil with your hands — no stabbed tubers, no missed potatoes rotting underground. It is genuinely satisfying, like emptying a treasure chest. For early new-potato raids during the season, carefully push soil aside near the edge of the bag, feel for the largest tubers, twist them off, and tuck the soil back — the plant continues growing undisturbed. Harvest on a dry day if possible; wet soil clings to tubers and complicates curing. Handle potatoes gently at every stage — bruises become rot in storage. Let harvested tubers sit on the soil surface or a tarp for an hour or two to dry (but not in direct hot sun, which greens them), then brush off loose soil. Do not wash potatoes destined for storage; wash only what you will eat within days.

    Curing and Storing Your Harvest

    Curing is the step that separates potatoes that last until spring from potatoes that rot by Thanksgiving. After harvest, cure tubers for one to two weeks in a dark, humid, well-ventilated spot at 50 to 60°F — a garage or basement corner works. Curing thickens skins further and heals minor nicks, sealing out the decay organisms that cause storage rot. After curing, move potatoes to long-term storage: dark, 35 to 40°F, humid, with good air circulation. Light turns potatoes green and produces solanine (the bitter, mildly toxic compound) — darkness is essential. Never store potatoes in sealed plastic bags, which trap moisture; use paper bags, burlap, or ventilated boxes. Check stored potatoes monthly and remove any that soften or sprout before they affect neighbors. One critical rule: do not store potatoes near onions or fruit — onions’ moisture and fruits’ ethylene gas both accelerate potato sprouting and spoilage. Properly cured and stored, many varieties keep 4 to 6 months.

    Grow Bag Tips for Your Best Harvest Yet

    A few bag-specific practices maximize results. Use bags of at least 10 gallons — 15 is better — since cramped bags produce cramped potatoes. Start with just 4 to 6 inches of soil, place 3 to 4 seed potatoes per bag, and “hill” by adding soil as vines grow, keeping tubers covered; any tuber exposed to light turns green and inedible. Fabric bags air-prune roots and drain exceptionally well, which potatoes love, but they also dry out faster than plastic — check moisture regularly, aiming for consistently moist (not soggy) soil, especially during flowering and tuber bulking. Stop watering once vines begin dying back; continuing to water mature tubers invites rot. Fold down the bag’s sides early in the season for easier hilling access, then roll them up as you add soil. At season’s end, dump the soil into a compost pile or garden bed — do not reuse it for potatoes or tomatoes next year, since soil-borne diseases like blight persist. Fresh mix each spring keeps the system clean. Penn State Extension’s potato production resources cover variety selection and disease management for home growers.

    Flowering potato plants mean new potatoes are ready to steal; yellowed, dead vines plus firm skins that pass the thumb-rub test mean the mature harvest is ready. Wait one to two weeks after vine death for skins to set, tip the grow bag onto a tarp to harvest, then cure tubers before storage.

    Conclusion

    Harvesting potatoes from grow bags is simple once you read the plant’s signals: flowers for early new potatoes, dead vines and set skins for the storage harvest. Tip the bag, gather your treasure, cure the tubers in a cool dark spot, and store them properly for months of eating. The grow bag method trades backbreaking digging for a few minutes of tipping and sifting — and honestly, it is more fun. For more container vegetable guides, explore our gardening section, meet the team, or ask us your growing questions.

    Frequently Asked Questions

    Can I harvest potatoes while the plant is still green?

    Yes — those are “new” potatoes, and they are delicious. Once plants flower (around 60–70 days after planting), gently feel around in the bag for the largest tubers and harvest a few, leaving the rest to mature. Just be gentle so the plant keeps growing.

    What happens if I leave potatoes in the grow bag too long?

    Over-mature tubers risk rot in wet fall weather, wireworm and slug damage, and sprouting if temperatures stay warm. Once vines are fully dead and skins have set (1–2 weeks after vine death), harvest promptly — there is no benefit to waiting longer.

    Why did my potatoes turn green?

    Exposure to light produces chlorophyll (green color) and solanine, a bitter compound that is mildly toxic in large amounts. This happens when tubers grow exposed at the soil surface. Hill soil up around plants during the season, and cut away green portions generously before eating — or discard heavily greened potatoes.

    How many potatoes can I expect from one grow bag?

    A 10- to 15-gallon bag planted with 3 to 4 seed potatoes typically yields 5 to 10 pounds, depending on variety, soil fertility, and watering. Early varieties yield less than late-season types. Consistent moisture during tuber bulking is the biggest yield factor you control.

    Can I reuse grow bag soil for potatoes next year?

    Not for potatoes, tomatoes, peppers, or eggplant — soil-borne diseases like early blight and verticillium wilt persist in the mix. Dump it on ornamental beds or the compost pile and start with fresh mix each spring. The old soil is perfectly fine for flowers, herbs, or unrelated vegetables.

  • How Do I Stop Slugs From Eating My Lettuce Seedlings

    How Do I Stop Slugs From Eating My Lettuce Seedlings

    You tuck your lettuce seedlings into the garden bed in the evening, all tender green promise — and by morning, half of them are gone, reduced to ragged stems with telltale silvery slime trails nearby. Slugs are the night shift of garden pests: they emerge after dark, eat astonishing quantities of tender growth, and vanish into hiding spots before sunrise. Lettuce seedlings are their favorite food — soft, moist, and low to the ground. But slugs are beatable. They are slow, predictable creatures with simple habits, and a combination of barriers, traps, and smart garden hygiene can reduce seedling losses to nearly zero. Here is the full defense plan.

    Know Your Enemy: How Slugs Operate

    Understanding slug behavior is half the battle. Slugs are nocturnal and need moisture to move — they travel on a layer of mucus that dries out in sun and wind, which is why they feed at night and on damp, overcast days. During daylight they hide under boards, pots, dense mulch, leaf litter, and debris near the garden. A single slug can eat several times its body weight in a night, and they are strongly attracted to young, tender seedlings over tougher mature plants. They lay clusters of tiny translucent eggs in moist soil and debris, with each slug capable of producing hundreds of offspring per year — which is why a small problem becomes an infestation fast. The silvery dried slime trails on soil and leaves are your diagnostic evidence; if you see trails but no slugs, check under nearby hiding spots during the day. Knowing they must stay moist also reveals their weakness: anything that dries them out, blocks their path, or removes their daytime shelter works against them.

    Barriers: Make Seedlings Hard to Reach

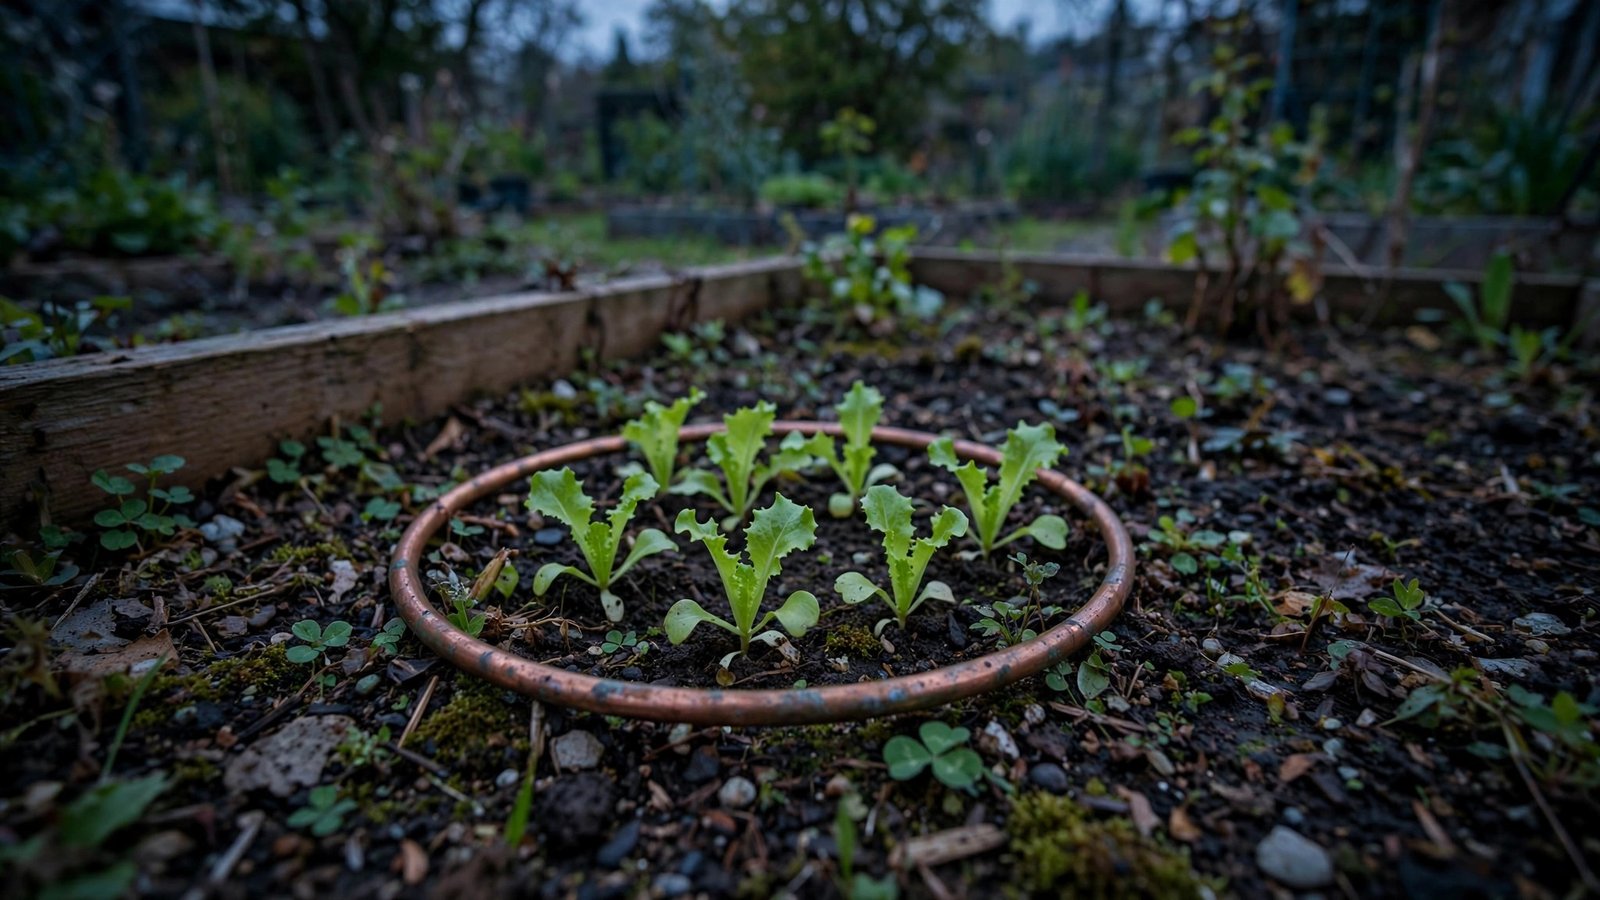
    Physical barriers exploit the slug’s slow, ground-hugging movement. Copper tape or copper mesh rings around beds and pots give slugs a mild electric shock on contact — the reaction between copper and slug slime creates a tiny charge they will not cross. Apply copper tape around raised bed edges or individual pots, keeping it clean and unbridged by leaves or debris. Diatomaceous earth (food grade) sprinkled in a ring around seedlings lacerates soft slug bodies on contact, but it stops working when wet, so reapply after rain or watering — it is best in dry climates or under cover. Crushed eggshells are popular folklore but largely ineffective; slugs glide over them without much trouble. What does work surprisingly well is a dry, scratchy mulch ring of coarse bark or wood chips right around seedlings — slugs dislike crossing dry, rough terrain. For maximum protection, combine methods: a copper ring plus a dry mulch zone creates two obstacles most slugs will not bother crossing when easier food exists elsewhere.

    Traps: Lure Them Away From Your Lettuce

    Traps turn slug habits against them. The classic beer trap — a cup or jar sunk to rim level in the soil, filled halfway with cheap beer — attracts slugs from several feet away; they fall in and drown. It genuinely works, though you will need several traps per bed, emptied and refilled every few days. (Yeast mixed with sugar water works as a cheaper substitute.) Board traps exploit their daytime hiding instinct: lay damp boards, cardboard, or old carpet pieces near the bed, and each morning flip them over to collect and dispose of the sheltering slugs — drop them in soapy water. Grapefruit halves or hollowed melon rinds placed cut-side down work the same way on a smaller scale. Place traps a few feet away from the seedlings themselves to draw slugs outward rather than inward. Trapping will not eliminate every slug, but consistent trapping through the vulnerable seedling weeks dramatically reduces feeding pressure. Oregon State University Extension’s slug control guide rates these methods with practical detail.

    Baits: The Nuclear Option, Used Safely

    When barriers and traps are not enough, iron phosphate baits (sold as Sluggo and similar brands) are the safest effective option. Slugs eat the bait, stop feeding, and die within days. Iron phosphate is OMRI-listed for organic gardening, breaks down into fertilizer (iron and phosphorus), and is far safer around pets, wildlife, and children than the older metaldehyde baits, which are toxic to dogs and should be avoided entirely. Scatter the pellets thinly around (not on) the seedlings in the evening, since slugs feed at night. Reapply after heavy rain. One caution: even “safe” baits should be used as directed and kept from becoming a buffet — targeted application around vulnerable seedlings beats broadcasting across the whole garden. Used judiciously during the 2 to 3 weeks when lettuce seedlings are most vulnerable, iron phosphate bait plus barriers gives near-complete protection, and you can stop once plants are large enough to outgrow slug damage.

    Cultural Controls: Make Your Garden Slug-Unfriendly

    Long-term slug reduction comes from habitat management. Water in the morning, not the evening — wet soil at night is a slug invitation, while morning watering lets the surface dry before their active hours. Pull mulch back a few inches from seedling stems to create a dry zone. Clear the debris, boards, and dense ground cover near beds where slugs hide by day — a tidy garden edge has far fewer slugs. Space seedlings for airflow so foliage dries quickly. Encourage slug predators: ground beetles, toads, frogs, and birds all eat slugs, and a small wildlife pond or beetle bank (a grassy mound) invites them in. Ducks are legendary slug destroyers if your setup allows poultry. And consider timing: transplanting sturdy, larger seedlings rather than direct-sowing tiny ones means plants outgrow the most vulnerable stage faster. Once lettuce has several true leaves and tougher foliage, slug damage becomes cosmetic rather than fatal. The Royal Horticultural Society’s slug management advice covers these cultural strategies comprehensively.

    Slugs feed at night and need moisture to move. Protect lettuce seedlings with copper barriers and dry mulch rings, set beer traps and board traps nearby, use iron phosphate bait during the vulnerable weeks, and water in the morning — combined, these methods stop nearly all seedling losses.

    Conclusion

    Slugs will always be part of gardening, but they do not have to eat your lettuce. Layer your defenses: make seedlings hard to reach with copper and dry barriers, lure slugs away with beer and board traps, deploy iron phosphate bait during the critical seedling weeks, and reshape garden habits — morning watering, cleared debris, predator-friendly plantings — to keep populations low year after year. No single method is perfect, but the combination is devastating to slugs and gentle on everything else. For more pest-management walkthroughs, browse our gardening guides, meet the team, or ask us your pest questions.

    Frequently Asked Questions

    Do eggshells really stop slugs?

    Not effectively. Despite their popularity, studies and gardener experience show slugs cross crushed eggshells with little difficulty. Copper barriers, dry coarse mulch, and diatomaceous earth (when dry) are far more reliable physical deterrents.

    Are slug pellets safe around pets?

    Iron phosphate baits are much safer than the older metaldehyde pellets, which are toxic to dogs and wildlife and best avoided entirely. Still, use any bait as directed, scatter thinly rather than piling it, and store products where pets cannot reach them.

    Why do slugs only eat my seedlings and not mature plants?

    Slugs prefer soft, tender, moist tissue — exactly what seedlings are. As lettuce matures, leaves get tougher and less appealing, and the plant can outgrow minor feeding damage. The vulnerable window is roughly the first 2 to 3 weeks after transplanting or germination.

    Will beer traps attract more slugs to my garden?

    Beer traps attract slugs from a radius of a few feet, so place them slightly away from the plants you are protecting to draw slugs outward. They do not summon slugs from across the neighborhood — they mostly catch the ones already nearby. Empty and refill every few days for best results.

    What eats slugs naturally?

    Ground beetles, toads, frogs, shrews, ducks, chickens, and many birds all prey on slugs. Encouraging these predators — with log piles, a small pond, beetle banks, or poultry — provides free, continuous slug control and is the best long-term strategy.

  • What Is the Best Time of Day to Water a Vegetable Garden

    What Is the Best Time of Day to Water a Vegetable Garden

    Water at the wrong time of day and you can lose half of it to evaporation before it ever reaches the roots — or worse, invite the fungal diseases that thrive on wet foliage overnight. Water at the right time, and every drop works harder: soaking deep into the root zone, drying off leaves before pathogens wake up, and setting plants up to face the day’s heat fully hydrated. The good news is that the answer is simple and backed by both plant science and generations of gardener experience. Here is when to water your vegetable garden, why the timing matters, and how to make every watering count.

    The Winner: Early Morning, Without Question

    Early morning — roughly between 5 a.m. and 9 a.m. — is the best time to water a vegetable garden, and it is not close. Three things make morning ideal. First, evaporation is minimal: the air is cool, the sun is low, and water soaks into the soil instead of vanishing into the air. Midday watering can lose a huge fraction to evaporation before roots get any of it. Second, leaves dry quickly as the morning sun strengthens, and dry foliage is the single biggest defense against fungal diseases like powdery mildew, blight, and leaf spot, which need wet leaf surfaces to infect. Third, plants head into the heat of the day fully hydrated, with turgid cells that photosynthesize efficiently and wilt less under afternoon stress. If you can only change one thing about your watering habits, make it the hour: shift evening or midday watering to early morning and watch plant health improve. A University of Minnesota Extension guide to watering vegetable gardens confirms morning as the optimal window.

    Why Midday Watering Wastes Water

    Watering between about 10 a.m. and 4 p.m. is the least efficient option. Hot sun and low humidity evaporate water from soil surfaces and leaf surfaces rapidly — in arid climates, a shocking amount never reaches the root zone. There is also a persistent myth that water droplets on leaves act as magnifying glasses and scorch foliage in bright sun; research has largely debunked this for most plants, but midday watering still has a real downside beyond evaporation: wetting foliage during peak heat creates a brief warm, humid microclimate on leaf surfaces that some pathogens exploit. That said, do not let a plant die of thirst because the “wrong” hour arrived — a severely wilted plant needs water immediately, whatever the clock says. Emergency midday watering to save wilting plants is always better than waiting for the ideal morning. But as a routine, midday is the slot to avoid.

    Evening Watering: The Risky Second Choice

    Evening watering — after the heat breaks, say 6 p.m. onward — is better than midday for water efficiency, since evaporation is low. The problem is what happens overnight: leaves stay wet for 8 to 12 hours in cool, still air, which is paradise for fungal pathogens. Blight, mildew, and damping-off all exploit prolonged leaf wetness, and evening watering hands them the perfect conditions. If evenings are your only available slot (work schedules are real), you can make it work with two adjustments: water the soil, not the plants — use soaker hoses, drip lines, or a watering wand aimed at the base — and water earlier in the evening rather than right at dark, giving foliage a head start on drying. Mulch also helps by preventing soil from splashing onto lower leaves. Evening watering done carefully beats no watering, but morning remains the gold standard for disease prevention.

    How Much: Deep and Infrequent Beats Shallow and Daily

    Timing means little without the right amount. Most vegetable gardens need about one inch of water per week from rain plus irrigation, rising to two inches during heat waves or for heavy feeders. But the delivery method matters more than the total: deep, infrequent watering trains roots to grow downward, creating drought-resilient plants, while daily sprinkles keep roots shallow and dependent. Water until the top 6 to 8 inches of soil are moist — push a trowel in afterward to check; you will be surprised how often the surface looks soaked while just two inches down is bone dry. Sandy soils need more frequent, lighter watering since they drain fast; clay soils need slower, deeper sessions to avoid runoff. A rain gauge or even an empty tuna can in the garden tells you exactly how much your sprinkler delivers, removing the guesswork. New transplants and germinating seeds are the exception — they need consistently moist (not soggy) surface soil until established.

    How to Water: Technique Multiplies Good Timing

    The best time of day pairs with the best technique. Soaker hoses and drip irrigation are the gold standard: they deliver water slowly to the root zone with zero leaf wetting, cut evaporation dramatically, and can run on a morning timer while you sleep. If you water by hand, use a watering wand or can aimed at the base of plants, and water slowly enough that it soaks in rather than running off. Mulch 2 to 3 inches deep with straw, shredded leaves, or wood chips — mulch is arguably as important as timing, cutting evaporation, suppressing weeds, and preventing soil splash that spreads disease. Water container vegetables more often than in-ground beds; pots dry out far faster, sometimes needing daily watering in summer heat. Finally, watch the plants, not the calendar: drooping leaves in the morning signal thirst, while afternoon wilting that recovers by evening is often just heat response. The USDA’s soil and water resources offer deeper guidance on efficient irrigation for home growers.

    Water your vegetable garden in the early morning, between 5 and 9 a.m.: evaporation is lowest, leaves dry quickly in the rising sun (preventing fungal disease), and plants face the day’s heat fully hydrated. Deliver about an inch per week deeply to the root zone, and mulch heavily.

    Conclusion

    The best time of day to water a vegetable garden is early morning — it maximizes every drop, keeps foliage dry, and arms plants against the day’s heat. Avoid midday’s evaporative waste and evening’s disease-friendly leaf wetness whenever you can, water deeply and infrequently to build deep roots, and let soaker hoses and mulch do the heavy lifting. Timing is one of the simplest upgrades in gardening: same water, same effort, dramatically better results. For more vegetable-growing fundamentals, browse our gardening guides, meet the team behind them, or send us your garden questions.

    Frequently Asked Questions

    Is it okay to water vegetables at night?

    It is better than not watering, but it is the riskiest routine slot because leaves stay wet for hours overnight, inviting fungal diseases. If nights are your only option, water the soil (not the foliage) with soaker hoses or a base-aimed wand, and water as early in the evening as possible.

    How do I know if I am overwatering my vegetable garden?

    Signs include yellowing lower leaves, wilting despite wet soil, mold or algae on the soil surface, and stunted growth. Push a trowel 6 inches down: if the soil is soggy days after watering, cut back. Most vegetables prefer a wet-dry cycle, not constant sogginess.

    Should I water every day in summer?

    Usually not for in-ground beds — deep watering 2 to 3 times per week builds deeper, more resilient roots than daily sprinkles. Containers are the exception and often need daily watering in heat. Always check soil moisture a few inches down rather than watering on autopilot.

    Does mulch really make a difference for watering?

    A huge one. Two to 3 inches of mulch can cut soil water evaporation substantially, keeps soil temperatures stable, prevents disease-spreading soil splash, and suppresses weeds that compete for water. It is one of the highest-return investments in any vegetable garden.

    Can I use a sprinkler for my vegetable garden?

    You can, but soaker hoses or drip lines are better — sprinklers wet foliage (disease risk) and lose more to evaporation and wind drift. If you use a sprinkler, run it in the early morning so leaves dry fast, and measure output with a rain gauge to avoid underwatering.

  • How Can I Grow a Lemon Tree Indoors in a Cold Climate

    How Can I Grow a Lemon Tree Indoors in a Cold Climate

    Growing a lemon tree in Minnesota or Maine sounds like fantasy — lemons die below freezing. But thousands of cold-climate gardeners harvest real lemons every winter from living-room trees. The secret is a dwarf variety bred for containers, the brightest spot in your home, and understanding its seasonal rhythm. A healthy tree can give you dozens of lemons a year plus glossy foliage and intoxicating blossoms.

    Choose the Right Variety: Dwarf Is Non-Negotiable

    Standard lemon trees grow 15 to 20 feet tall — obviously not houseplants. You want a true dwarf variety grafted onto dwarfing rootstock, and the undisputed champion for indoor growing is the Improved Meyer lemon. Meyer lemons are naturally smaller, more compact, and more cold-tolerant than true lemons; their fruit is sweeter, less acidic, with a distinctive herbal fragrance. A dwarf Meyer typically stays 3 to 5 feet tall in a container and begins fruiting within two to three years of purchase — buy a grafted tree from a reputable citrus nursery rather than growing from seed, since seed-grown trees take a decade to fruit and grow unpredictably large. Other workable options include the Ponderosa lemon (huge fruit, very thorny) and variegated pink lemons for ornamental interest, but Meyer remains the most forgiving for beginners. Whatever you choose, verify it is grafted onto dwarfing rootstock like Flying Dragon — that is what keeps the tree container-sized for life.

    Light: The Make-or-Break Factor

    Light is where indoor lemon growing succeeds or fails — citrus needs 8+ hours of bright light daily, and shortfalls are the most common reason indoor trees decline. Place the tree directly in front of your largest south-facing window. From October through March, supplement with a full-spectrum LED panel 12 to 18 inches above the canopy, 10 to 12 hours daily on a timer. Pale, leggy growth screams “more light.” Rotate the pot weekly, and move the tree outdoors for summer once nights stay above 50°F — real sun builds the energy reserves for winter fruiting. The University of Florida’s citrus growing resources detail the light and temperature needs of container trees.

    Watering and Humidity: Consistency Over Quantity

    Citrus hates two things: soggy roots and complete drought, and indoor winter air complicates both. Water deeply when the top two inches of soil feel dry, until water drains freely — then empty the saucer, because citrus roots suffocate in standing water. In winter, with slower growth and lower light, this might mean watering every 10 to 14 days; in a sunny summer spot, twice a week. Learn your tree’s rhythm with the finger test rather than a schedule. Humidity is the stealth challenge: heated winter homes often sit at 20 to 30 percent humidity while citrus prefers 40 to 60 percent. Dry air causes leaf drop, bud drop, and spider mite outbreaks. Run a humidifier nearby, group plants together, or set the pot on a pebble tray filled with water (the pot sits on the pebbles, above the water line). Misting helps only briefly and is no substitute for real humidity. Brown, crispy leaf edges in winter almost always mean the air is too dry, not that the tree needs more water.

    Feeding and Soil: Citrus Are Hungry Plants

    A lemon tree in a container cannot forage for nutrients, so you are its entire food supply. Use a fertilizer formulated specifically for citrus — these contain the right nitrogen ratio plus the micronutrients (iron, zinc, manganese) that citrus craves. Feed every two to four weeks during the active growing season (spring through early fall) and cut back to monthly or less in winter when growth slows. Yellowing leaves with green veins (iron chlorosis) signal either micronutrient deficiency or soil pH that is too alkaline; citrus prefers slightly acidic soil around pH 6.0 to 7.0. Plant in a fast-draining citrus or cactus mix — never dense garden soil — in a pot with ample drainage holes, and repot every two to three years in spring, going up just one pot size. Flush the soil occasionally with plain water to prevent fertilizer salt buildup, which shows as brown leaf tips. A consistently fed tree holds its deep green color and sets far more fruit than a starved one.

    Pollination and Fruiting: Lend Nature a Hand

    Here is a delightful surprise for indoor growers: Meyer lemons are self-fertile and will set fruit indoors without bees — but they appreciate help. Outdoors, wind and insects do the work; indoors, still air means less pollen transfer. When blossoms open, play bee once a day: use a small soft paintbrush or cotton swab to dab each flower’s center, moving pollen between blooms. It takes seconds and noticeably increases fruit set. Manage expectations on the fruit itself: indoor trees commonly set more baby fruit than they can support, then drop the excess — this “June drop” is normal self-thinning, not failure. Lemons take 6 to 9 months to ripen from blossom, so fruit set in spring harvests in winter, which feels like magic. Do not expect supermarket yields; a healthy indoor dwarf producing 20 to 40 lemons a year is a triumph. Prune lightly in late winter to shape the tree and remove crossing branches, keeping the center open for light and air.

    The Seasonal Rhythm: Summer Outside, Winter Inside

    Treat your lemon tree as a migrant: summers outdoors, winters in. Move it outside after the last frost once nights stay reliably above 50°F, hardening it off over a week — direct outdoor sun scorches leaves accustomed to window light. Outdoors, it will grow vigorously, shrug off minor pests with the help of beneficial insects, and build strength. Bring it back inside well before the first fall frost, checking carefully for hitchhiking pests (a preventive insecticidal soap spray is cheap insurance). Expect some leaf drop after the move indoors — the tree is adjusting to lower light, not dying. Keep it away from heating vents and cold drafts, maintain the brightest spot you have, and resist the urge to overwater in winter. This annual migration mimics the tree’s natural subtropical rhythm more closely than year-round indoor life, and trees managed this way fruit more reliably and live for decades. Specialty citrus nurseries like Four Winds Growers offer variety-specific guidance for container citrus growers.

    A dwarf Meyer lemon on dwarfing rootstock can fruit indoors in any cold climate. Give it 8+ hours of bright light (supplement with a grow light in winter), water deeply only when the top inches dry out, raise winter humidity, feed with citrus fertilizer, and hand-pollinate the blossoms.

    Conclusion

    Growing a lemon tree indoors in a cold climate is absolutely realistic — it just requires the right variety and consistent care. Start with a grafted dwarf Meyer lemon, park it in your brightest window with winter grow-light support, water on the finger test rather than a schedule, humidify the winter air, feed it properly, and play bee for the blossoms. Move it outdoors for summer when you can. Within a couple of years you will be picking fragrant, homegrown lemons in January while snow falls outside — one of gardening’s great pleasures. For more indoor and container growing guides, explore our gardening section, meet the team, or ask us your citrus questions.

    Frequently Asked Questions

    How long until my indoor lemon tree produces fruit?

    A grafted dwarf Meyer lemon from a nursery typically fruits within 2 to 3 years of purchase, sometimes sooner. Trees grown from seed take 7 to 10 years and grow too large for indoor life — always buy grafted. Once fruiting begins, a healthy tree produces annually.

    Why are the leaves falling off my indoor lemon tree?

    The most common causes are insufficient light (especially in winter), dry indoor air, overwatering, or the shock of moving between indoors and outdoors. Some seasonal leaf drop is normal. If drop is heavy, check light first — it is the culprit more often than watering.

    Can I grow a lemon tree from a grocery store seed?

    You can sprout one, but it is a 7- to 10-year project before fruit, the tree will grow large and thorny, and the fruit quality is unpredictable since grocery lemons are hybrids. For actual lemons in a cold climate, a grafted dwarf tree is vastly more rewarding.

    What temperature is too cold for my lemon tree?

    Meyer lemons tolerate brief dips to about 30°F, but damage begins below freezing and sustained cold kills them. Bring container trees indoors when nights approach 40°F to be safe. Indoors, normal room temperatures of 65 to 75°F are ideal; avoid placing near heating vents.

    Do I need two lemon trees for pollination?

    No. Meyer lemons are self-fertile — a single tree pollinates itself. Indoor growers just give nature a nudge by hand-pollinating open blossoms with a small brush, since there is no wind or bees indoors to move pollen around.