Breaking

Category: Sports

  • What to Do When Your Child Wants to Quit Their Sport Mid-Season

    What to Do When Your Child Wants to Quit Their Sport Mid-Season

    “I want to quit.” Three words that land like a punch, usually delivered in the car after a bad game or at the dinner table on a Tuesday. Your first instinct might be panic (we paid $2,000 for this season), disappointment (but you were so good last year), or negotiation (just finish the season). All understandable — and all less important than what happens next. A child wanting to quit mid-season is communicating something real, and your response in the next 48 hours will shape not just this season but their entire relationship with sports, effort, and you. Here is how to handle it well: what to ask, what not to say, when quitting is the right call, and when finishing matters more.

    First, Don’t React — Investigate

    The worst responses are instant: “No, you committed” shuts down honesty; “Fine, quit” teaches that discomfort ends effort. Buy time and get curious instead. Say: “Okay. Tell me what’s going on.” Then listen — really listen — without correcting, minimizing, or problem-solving for at least ten minutes. What you are listening for is the category of the problem, because “I want to quit” is a symptom with at least five different diseases: it is not fun anymore (burnout or bad fit), the coach is the problem (yelling, favoritism, humiliation), social pain (bullying, no friends on the team, cliques), performance shame (riding the bench, striking out, feeling like the worst player), or life overload (too much homework, exhaustion, missing a social life). Each demands a different response. A kid being humiliated by a coach needs rescue; a kid who is bored needs a different challenge; a kid who is overwhelmed needs a lighter load, not a lecture on commitment.

    The Questions That Actually Reveal What’s Wrong

    Kids rarely volunteer the real reason unprompted — you have to excavate gently. Try: “When did you start feeling this way?” (pinpoints a trigger — a specific game, a coach comment, a social incident). “What’s the worst part?” (cuts past vague “it’s boring” to the actual pain point). “Is there anything about it you still like?” (reveals whether the love is dead or just buried — a kid who lights up talking about teammates has a fixable problem). “If you could change one thing, what would it be?” (often surfaces a concrete, solvable issue like practice schedule or position). “Are you worried about letting someone down?” (many kids want to quit for months but fear disappointing parents — give explicit permission to be honest: “I won’t be mad at you for telling me the truth”).

    When the Problem Is Fixable (Most of the Time)

    Here is the hopeful truth: the majority of mid-season quit requests trace to fixable problems. Bad coach? Talk to the coach first (calmly, privately, about specific behaviors) — the Positive Coaching Alliance’s parent resources can help you navigate it — then the league director if needed. Social issues? A conversation with the coach about team dynamics, or helping your child build one friendship on the team, often transforms the experience. Performance struggles? A few private lessons or extra backyard reps rebuild confidence faster than anything, and a position change can reignite interest. Burnout from over-scheduling? Cutting one practice a week or dropping a conflicting activity restores the fun. Boredom for advanced kids? Ask the coach about more challenging roles. Before accepting the quit, run the fix-it checklist: if the core problem can be solved in two weeks, solve it and reassess. Many “I want to quit” kids become “I’m glad I stayed” kids once the actual issue is addressed.

    When Quitting Is the Right Call

    Sometimes quitting is not failure — it is wisdom, and forcing a child to stay causes real harm. Quit (even mid-season) when: the environment is abusive or humiliating and the organization will not act — no season is worth a child’s dignity. Your child’s mental health is deteriorating — anxiety, dread, tears before practice, sleep problems tied to the sport. There is a physical danger being ignored — playing through injury, unsafe conditions, concussion protocols violated. The child is simply done — they gave it a real try over multiple seasons, the love is gone, and staying teaches only resentment. In these cases, quitting mid-season is the right, brave choice: notify the coach respectfully and promptly, return equipment, and tell your child you’re proud of their honesty. How you handle a justified quit teaches more about courage than any season ever could.

    The Case for Finishing: Teaching Commitment Without Cruelty

    Between “quit instantly” and “never quit” lies the nuanced middle where most families live. There is genuine value in finishing a season: it teaches that commitments matter, that hard things can be endured, and that feelings are temporary — lessons that transfer to school, work, and relationships. The Aspen Institute’s Project Play research shows burnout — not lack of talent — is the leading reason kids quit sports, and it’s largely preventable. But “finish what you start” should be a family value discussed at enrollment, not a trap sprung mid-season. The healthy version: at sign-up, agree together that “we finish the season, then decide” — with the explicit exceptions (abuse, health, safety) named upfront. Mid-season, you can honor that agreement while still addressing the problem: fix what is fixable, reduce the misery where possible, and frame the remaining weeks as a defined, survivable stretch. And crucially, keep the end-of-season promise: when the season ends, the child gets a real, guilt-free choice about next season. Kids who trust that quitting is allowed later fight harder now; kids who feel trapped just count the days.

    Don’t react — investigate. Most mid-season quit requests come from fixable problems: a bad coach dynamic, social pain, burnout, or performance shame. Fix what’s fixable, honor the season commitment you made together, and reserve mid-season quitting for the real red lines: abuse, health, or safety.

    What Never to Say (and What to Say Instead)

    Words matter enormously here. Never: “We paid good money for this” (teaches that money outranks their wellbeing). Never: “You’re letting the team down” (weaponizes guilt). Never: “You were so good, what happened?” (implies they broke something). Instead: “Thank you for telling me” (rewards honesty). “Your feelings make sense” (validates). “Let’s figure this out together” (teams up). “Whatever we decide, I’m proud of how hard you’ve tried” (separates worth from performance). And the most powerful: “You don’t have to earn my love by playing.”

    Conclusion

    A child wanting to quit mid-season is not a crisis — it is information. Listen first, diagnose the real problem, fix what is fixable, honor commitments made together, and reserve mid-season exits for the situations that truly warrant them: harm to body, mind, or dignity. Handle it well and your child learns that hard things can be faced, that honesty is safe, and that you are on their team no matter what the scoreboard says. For more youth sports parenting guidance, explore our sports section, learn about who writes these guides, or ask us your parenting question — we read every message.

    Frequently Asked Questions

    Should I let my child quit a sport mid-season?

    Usually, work to finish the season while fixing the underlying problem — it teaches commitment and most quit urges trace to fixable issues (coach dynamics, burnout, social pain). But quit mid-season without guilt for the red lines: abusive environment, deteriorating mental health, or physical danger. No season is worth a child’s wellbeing.

    How do I find out the real reason my kid wants to quit?

    Ask open questions over several days, not in one interrogation: “When did you start feeling this way?” “What’s the worst part?” “If you could change one thing, what would it be?” Car rides and bedtime work best. Explicitly say you won’t be mad at the honest answer — many kids hide the truth fearing disappointment.

    What if the coach is the reason my child wants to quit?

    Address it directly: speak to the coach privately about specific behaviors first, escalate to the league director if needed, and explore switching teams mid-season if the organization allows it. If the environment is genuinely abusive and nothing changes, leaving mid-season is the right call.

    Does making kids finish the season teach resilience or resentment?

    It depends entirely on how it’s handled. Finishing with support, problem-solving, and a guaranteed guilt-free choice afterward teaches resilience. Forcing a miserable child through a season with no acknowledgment of their pain teaches resentment — and that quitting is the only way to be heard.

    My child quits everything. Is this a pattern I should worry about?

    Look for the common thread: is it always the same trigger (performance pressure, social anxiety, boredom after novelty fades)? A pattern suggests an underlying issue worth addressing — perfectionism, anxiety, or overscheduling — rather than a discipline problem. Consider whether activities are truly their choice, and talk to a counselor if the pattern extends beyond sports.

  • How to Build a Backyard Batting Cage for Under $300

    How to Build a Backyard Batting Cage for Under $300

    Your kid needs batting reps, the cages at the facility cost $40 an hour, and you have a backyard with 40 feet of clear space. A backyard batting cage sounds like a $2,000 project — but it does not have to be. With smart material choices and a weekend of work, you can build a fully functional 30-to-40-foot batting cage for under $300 that survives seasons of use. The secret is knowing where to spend (the net) and where to save (everything else). Here is the complete materials list, the build process step by step, and the mistakes that turn budget cages into expensive kites.

    Planning: Size, Space, and the Non-Negotiables

    Before buying anything, measure honestly. A functional cage needs to be at least 30 feet long (40 is better), 10 to 12 feet wide, and 8 to 10 feet tall — enough for a pitcher or machine at one end and a hitter with a full swing at the other. Walk your yard with a tape measure and confirm you have that footprint plus 5 feet of buffer on all sides, with no windows, fences, or neighbors’ property in the line of fire. Check HOA rules and local ordinances now — some restrict structures over a certain height or require setbacks from property lines. The non-negotiables for any cage: the net must fully enclose the hitting area (top included, because pop-ups are real), the frame must withstand wind, and nothing in the structure should be hard enough to hurt a player who runs into it. Plan the build for a dry weekend — you will need 6 to 10 hours total.

    The Materials List: Under $300, Item by Item

    Here is where the budget lives or dies. The net is your one real investment: a 40x10x10 knotted polyethylene batting cage net runs $120 to $180 online — do not cheap out here, because a net that shreds in three months is the most expensive net. Everything else goes budget: the frame is 1-inch EMT metal conduit (electrical conduit from the hardware store), roughly $6 per 10-foot stick — you will need about 14 sticks ($85). Connect them with conduit corner fittings and straight couplers ($25 total). Anchor with rebar stakes driven at an angle ($12) and secure the net to the frame with zip ties or carabiner clips ($10). A rubber home plate ($8) and a strip of outdoor turf or an old carpet remnant for the hitting area ($0-$20) finish it. Total: roughly $260 to $290. Optional upgrades if budget allows: a pitching machine pad area, L-screen for live pitching ($60+ used), or sandbags for extra wind anchoring.

    Building the Frame: The Weekend Build

    Day one is the frame. Lay out your rectangle and drive rebar stakes at each corner post location, angled outward for grip. Assemble the frame in sections on the ground: vertical posts every 10 feet along the length (so a 40-foot cage has 5 posts per side), connected by horizontal top rails running the full length on both sides, plus cross-rails across the top every 10 feet. EMT conduit connects with simple set-screw fittings — no welding, no special tools beyond a hacksaw or pipe cutter and a wrench. Keep every joint tight; a wobbly frame becomes a sail in wind. Pro tip from experienced builders: run a ridge line — a slight peak in the middle cross-rails — so rain does not pool on the net. Once the frame stands and feels rigid, guy-wire the corners to ground anchors if your area gets real wind. A cage that survives its first storm survives for years.

    Hanging the Net: The Make-or-Break Step

    Day two is the net, and technique matters more than strength. Unfold the net on the ground first and identify the top edge (usually marked, or just pick the longest dimension as the top run). Start at one end: drape the net over the frame and secure the top edge to the top rails with zip ties or clips every 2 feet — snug but not guitar-string tight, because the net needs to give when balls hit it. A net hung drum-tight tears; a net with slight sag absorbs energy. Work down the sides, then the far end, then across the top. The bottom edge should hover just above the ground or rest lightly on it — never buried, which rots the net, and never high enough for balls to escape underneath. Create a door: overlap two net panels at one corner post and clip them so they can be parted, or simply leave one side’s bottom unclipped for duck-under entry. Walk the full perimeter inside and look for gaps — a baseball will find every single one.

    Wind, Weather, and Making It Last

    A budget cage’s enemy is not baseballs — it is weather. Wind is the killer: a 40-foot net is a giant sail, and an unanchored cage will walk across your yard in a thunderstorm. Beyond the rebar stakes, add sandbags or concrete blocks at the base of each post, and consider removing or lowering the net during forecast severe storms if your design allows quick unclipping (another argument for clips over permanent zip ties). UV degrades nets over 2 to 4 years — a UV-treated net lasts notably longer, and taking the net down for winter in northern climates can double its life. Inspect monthly: check for fraying at stress points, re-tighten loose clips, and straighten any bent conduit before it kinks. With basic care, a $280 cage delivers 3 to 5 seasons of unlimited reps — compare that to $40 an hour at the facility, and the cage pays for itself in the first month.

    Spend on the net ($120-180 for real knotted polyethylene), save on the frame (EMT conduit, ~$85), anchor everything like a storm is coming, and hang the net with slight sag — not drum-tight. A $280 weekend build delivers years of unlimited batting reps.

    Safety Rules for the Backyard Cage

    A cage is only as safe as its rules. Rule one: helmets on for live pitching, always — no exceptions, no “just a few.” Rule two: one person in the cage during live balls; everyone else waits outside the net. Rule three: the L-screen (or a simple protective screen) for whoever pitches — even soft toss can produce line drives. Rule four: inspect the net before each session for holes or gaps, especially after storms. Rule five: no climbing on the frame, ever. And the often-forgotten one: establish a clear “clear!” call before anyone enters or exits while balls are live. These mirror Little League’s safety guidance and USA Baseball’s youth resources, scaled to a backyard. A $280 cage with facility-grade safety habits beats a $2,000 cage with sloppy habits every time.

    Conclusion

    A backyard batting cage for under $300 is absolutely real: a quality net, an EMT conduit frame, solid anchoring, and a weekend of work. Plan the footprint, spend on the net, build the frame rigid, hang the net with give, anchor for wind, and enforce safety rules like a facility would. The payoff — unlimited reps steps from your back door — is the best investment in a young hitter’s development that $280 can buy. For more baseball training guidance, explore our sports section, meet the team behind these guides, or send us your DIY sports question anytime.

    Frequently Asked Questions

    How big does a backyard batting cage need to be?

    Minimum 30 feet long, 10-12 feet wide, and 8-10 feet tall — 40 feet long is noticeably better for real pitching distance. Add 5 feet of buffer on all sides, and make sure no windows, fences, or neighboring property sit in the line of fire.

    What kind of net should I buy for a batting cage?

    Knotted polyethylene (HDPE) netting, at least #36 weight — a 40x10x10 net runs $120-$180. Avoid cheap knotted-nylon or “practice” nets that shred in months. UV-treated nets last 2-4 years; taking the net down in winter extends its life further.

    Can I build a batting cage frame from PVC pipe?

    You can, but EMT metal conduit is better for nearly the same money. PVC flexes too much at 40-foot spans, becomes brittle in cold and UV, and turns the cage into a sail in wind. Conduit costs only slightly more and lasts years longer.

    How do I keep a batting cage from blowing away?

    Drive rebar stakes at angles at every post, add sandbags or concrete blocks at post bases, guy-wire the corners, and use clips (not permanent ties) so you can drop the net before severe storms. Wind, not baseballs, destroys most backyard cages.

    Is it legal to build a batting cage in my backyard?

    Usually yes, but check HOA rules and local ordinances first — some restrict structure height, require setbacks from property lines, or limit “sports structures.” A quick call to your city or HOA before buying materials beats a forced teardown later.

  • Why Your Gym Membership Costs More Every January

    Why Your Gym Membership Costs More Every January

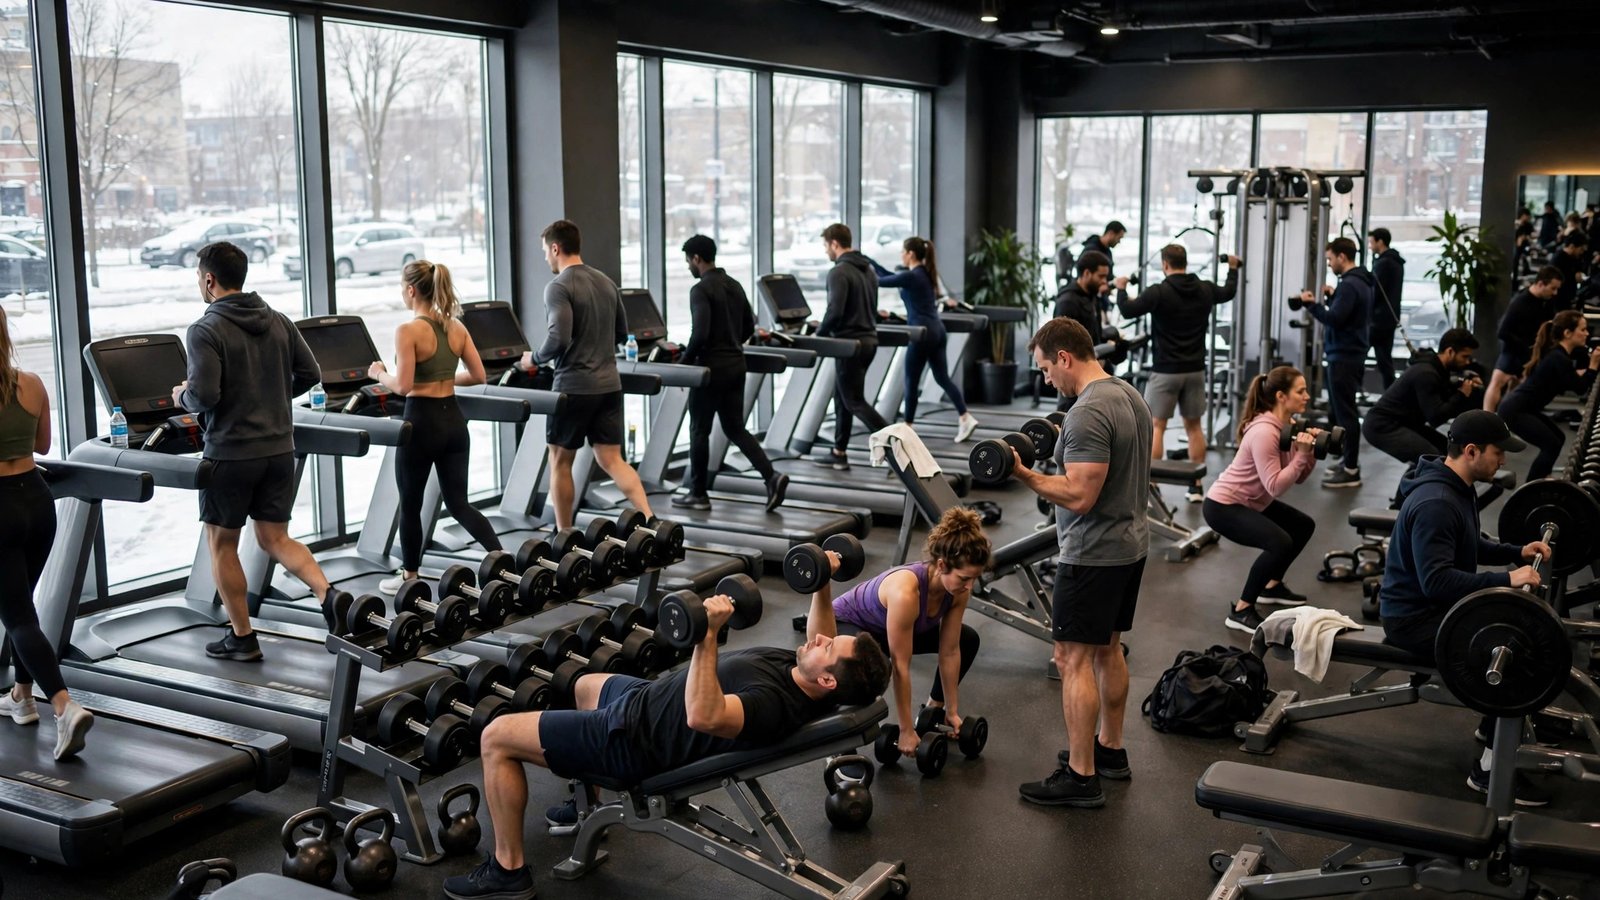
    Every January, the same mystery: your gym membership costs more than it did in December. Not a lot more — five dollars, ten dollars — just enough to notice on the credit card statement and wonder if you imagined it. You did not imagine it. Gyms raise prices in January more aggressively than in any other month, and it is not an accident or a coincidence. It is a deliberate strategy built on New Year’s resolution psychology, annual contract mechanics, and an industry business model that depends on members who pay but do not show up. Here is exactly why January costs you more, how gyms structure these increases, and what you can actually do about it.

    Reason 1: Resolution Season Is a Seller’s Market

    January is the fitness industry’s Black Friday. Gym sign-ups spike 30 to 50 percent in the first two weeks of January as resolution-makers flood in, and basic economics takes over: when demand surges, prices rise. Gyms know that January joiners are the least price-sensitive customers of the year — motivated by fresh-start psychology, they sign first and comparison-shop never. So initiation fees climb, monthly rates tick up, and “specials” get less special. The industry even has a term for these customers: they are the most profitable members a gym will ever have, because resolution joiners also have the highest quit rates — industry data suggests the majority stop going regularly by March, yet keep paying for months. A January price increase captures maximum revenue from maximum sign-ups at exactly the moment motivation (and price sensitivity) is lowest.

    Reason 2: Annual Escalator Clauses You Agreed To (Probably)

    Check your membership agreement — many gym contracts include an annual rate escalator, typically 3 to 8 percent, that kicks in on your anniversary or every January. You agreed to it in the fine print on signup day, when the salesperson emphasized the monthly rate and you skimmed the rest. These clauses are legal in most states as long as they were disclosed, and gyms count on small increases not triggering anyone to act. January is the natural enforcement point because it aligns with the gym’s annual pricing cycle and new-year rate cards. Pull out your contract (or check your email for the original agreement) and look for terms like “annual adjustment,” “rate review,” or “inflation adjustment.” Knowing whether your increase is contractual versus discretionary determines your leverage — which we will get to.

    Reason 3: The Business Model Needs Your Money, Not Your Attendance

    Here is the uncomfortable truth about gym economics: the average gym is designed for roughly 10 times more members than it can physically hold at once. The model only works if most members do not show up — industry analysts estimate the typical gym needs only a fraction of members active to stay profitable, with the rest subsidizing the facility through unused memberships. January price increases exploit this beautifully: raise rates on hundreds of thousands of members, most of whom will not notice (they do not go) or will not act (switching gyms is a hassle). The Health & Fitness Association (formerly IHRSA) industry data consistently shows membership revenue growing faster than attendance — the business is selling the idea of fitness more than the facility. Your January increase is not funding better equipment; it is harvesting the gap between intention and action.

    Reason 4: Inflation, Labor, and Real Cost Pressures (The Partial Truth)

    To be fair, some of the increase is real. Commercial rents rise, minimum wages rise (front-desk staff, trainers, cleaners), equipment and maintenance costs rise, and insurance premiums for fitness facilities have climbed. Gyms, like every business, pass costs through. But notice the timing and the asymmetry: costs rise gradually all year, yet the increase lands in January — the month you are least likely to quit — and rarely reverses when costs stabilize. Also notice what does not improve with the increase: the January price hike almost never comes with new equipment, extended hours, or better classes. If your gym cites inflation, ask what the increase funds. The honest ones will point to specific improvements; the rest are pricing to the resolution calendar, and the inflation story is the cover.

    What You Can Actually Do About It

    You have more leverage than you think, especially in January when gyms are desperate to keep existing members while acquiring new ones. Step 1: call and ask for the increase to be reversed or for a rate match to your old price — front-desk staff often have authority to grant “loyalty rates,” especially if you mention considering competitors. Step 2: ask about annual prepay options, which frequently lock a lower effective monthly rate and dodge escalator clauses. Step 3: check your contract’s cancellation terms and use them as leverage — in many states, gyms must allow cancellation with 30 days’ notice — check the FTC’s consumer guidance on gym memberships before you call — and the credible threat of leaving (backed by a competitor’s January promo in hand) is powerful. Step 4: time your negotiations — late January, when the resolution rush fades and gyms pivot to retention, is prime. And step 5, the nuclear option: actually switch. January’s competitor promos ($0 initiation, first month free) are real, and a gym that will not match its own acquisition offers does not deserve your loyalty.

    January price hikes aren’t random — they’re timed to resolution-season demand, enforced through annual escalator clauses, and built on a business model that profits when members pay but don’t show up. The fix is equally deliberate: negotiate with competitor promos in hand, ask for loyalty rates, or switch during January’s deal season.

    How to Gym-Shop Like an Insider Next Time

    Whether you stay or go, future-proof yourself. Always ask for the full contract before signing and photograph the rate-escalation clause. Prefer month-to-month over annual contracts — the flexibility is worth a few dollars more per month. Ask specifically: “What will this cost in month 13?” and get the answer in writing. Check the cancellation policy’s fine print (certified mail requirements, notice periods, and “processing fees” are the classic traps). And consider the alternatives the industry does not advertise: community centers and YMCAs with transparent pricing, employer wellness subsidies (many companies reimburse $20-$50/month — ask HR), and insurance fitness benefits like Active&Fit or SilverSneakers that slash costs. The cheapest gym membership is the one whose pricing you understood before signing.

    Conclusion

    Your gym costs more every January because January is when you are most motivated, least price-sensitive, and least likely to quit — and the industry prices accordingly, with escalator clauses and resolution-season demand doing the quiet work. But the same January that brings the hike brings the leverage: competitor promos, retention desks, and your own willingness to walk. Negotiate, lock rates in writing, or switch — and next time, read the escalator clause before you sign. For more consumer-smart fitness guidance, explore our sports section, meet the team behind these guides, or ask us your money question anytime.

    Frequently Asked Questions

    Can my gym raise my membership price without telling me?

    They must disclose increases per your contract and usually via email or posted notice — but “telling you” often means fine print you never read. Most contracts include annual escalator clauses you agreed to at signup. Check your original agreement for “annual adjustment” or “rate review” language to see what you authorized.

    How do I get my gym to lower my monthly rate?

    Call and ask directly for a loyalty rate or price match to your old rate, mentioning a competitor’s current promo. Late January is ideal timing — the resolution rush is fading and gyms shift to retention. Front-desk staff often have discount authority; if not, ask for a manager. Be prepared to actually cancel if they refuse.

    Is it cheaper to pay for a gym annually or monthly?

    Annual prepay usually lowers the effective monthly rate by 10-20% and often locks you out of escalator increases. But it reduces flexibility — if you quit in March, you have paid for December. Month-to-month costs more but lets you leave anytime. Choose based on your honest attendance history, not your January optimism.

    Why do gyms want members who don’t show up?

    Because the business model depends on it: gyms sell far more memberships than their facilities could hold simultaneously. Inactive members pay full price for zero wear on equipment and zero crowding. Industry data shows a large share of members rarely attend — they are the profit engine, which is why January pricing targets them.

    When is the cheapest time to join a gym?

    Late January (resolution promos as gyms chase stragglers), late spring (pre-summer deals), and December (year-end membership drives) typically offer the best initiation-fee waivers and rates. Avoid early January if you can — that is peak pricing disguised as motivation.

  • How to Throw a Football Spiral Consistently in 2 Weeks

    How to Throw a Football Spiral Consistently in 2 Weeks

    You can throw a football 30 yards, but it wobbles like a wounded duck — and in two weeks you have a tryout, a flag football league, or just your pride on the line. Here is the good news: a consistent spiral is not about arm strength. It is about mechanics, and mechanics are trainable fast. NFL quarterbacks are not muscled into spirals; they are engineered into them through grip, release, and follow-through that anyone can learn. Two weeks of focused, daily practice is genuinely enough to transform a wobbly throw into a reliable spiral — if you practice the right things instead of just throwing hard. Here is the exact progression.

    Days 1-3: Fix the Grip (Where 80 Percent of Wobble Lives)

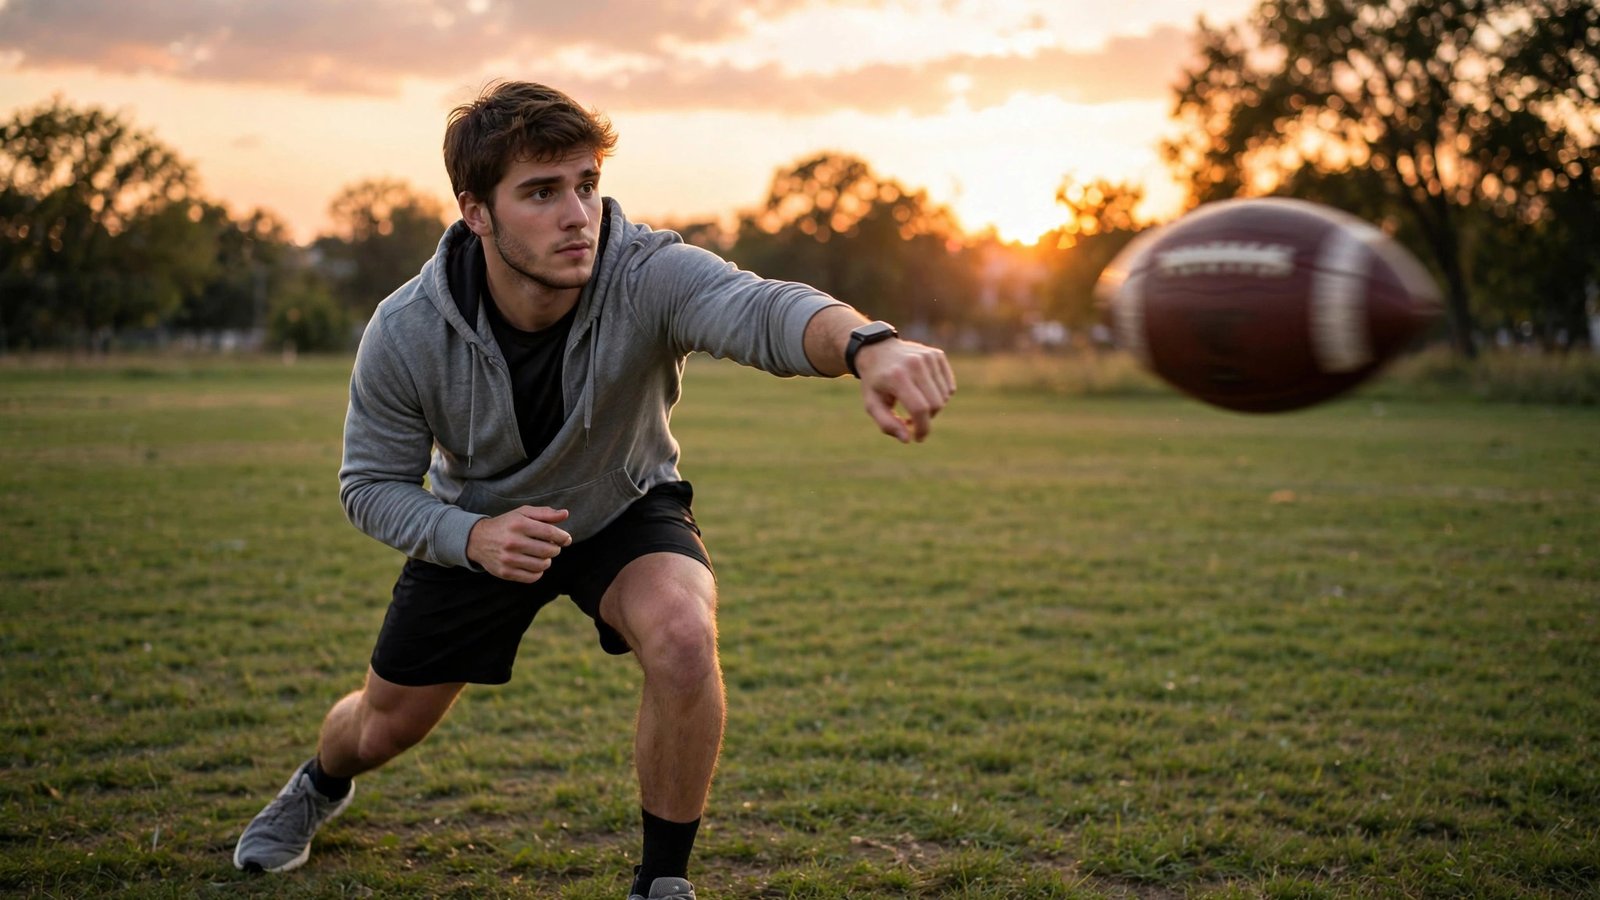
    Almost every wobbly throw traces to the grip. The correct grip: hold the ball with your fingertips, not your palm — there should be daylight between your palm and the ball. Place your ring finger between the second and third lace (or your middle finger on the laces; both work), index finger near the tip of the ball, and thumb underneath for balance. The ball should sit lightly in your fingers, tilted slightly. Common killer: palming the ball or gripping it like a shot put — this kills the finger snap that creates spin. Drill: hold the ball correctly and practice the release motion without throwing — just snap your wrist forward and let the ball roll off your index finger, spinning. Do 50 of these “dry snaps” a day for three days. Boring? Yes. This single drill fixes more spirals than any other, because the spiral’s spin comes from the fingers, not the arm.

    Days 4-7: Build the Throwing Motion

    With the grip set, build the motion from the ground up. Stance: feet shoulder-width, non-throwing shoulder pointed at the target. The throw is a kinetic chain — power flows from the legs, through hip rotation, through the torso, to the shoulder, elbow, and finally the wrist snap. Most beginners throw all-arm, which produces weak, wobbly ducks. Drill: the one-knee drill. Kneel on your throwing-side knee, and throw to a partner or target 10 yards away using only upper-body rotation and the wrist snap. This isolates the arm action and forces the rotational mechanics. Then stand and add the step: step toward the target with your non-throwing foot as you rotate. Key cue: your elbow should lead, with the ball held high and back — “elbow above the ear” is the classic coaching cue. Release point: let go when your hand passes your ear, with the index finger the last thing touching the ball, snapping down and through. Follow through with your thumb pointing toward your opposite hip.

    Days 8-11: Add Distance and Consistency

    Now extend the range while protecting the mechanics. The rule: only throw as far as you can while keeping a tight spiral — distance built on bad mechanics is just practicing wobble. Start at 10 yards with 20 throws focusing purely on spin quality, then move to 15, then 20. At each distance, your only goal is a tight spiral; if the ball wobbles, move closer until it stops. The towel drill (borrowed from baseball) works here too: snap a towel at a target to groove the release without arm stress. Introduce the “nose down” cue: a proper spiral’s nose tilts slightly down through flight — if your throws sail nose-up and stall, you are releasing late or not snapping the wrist. Film yourself from the side with your phone: compare your release to slow-motion quarterback clips on NFL Films footage. You will spot your own flaw (dropped elbow, no follow-through, palming) faster than any coach could tell you.

    Days 12-14: Pressure-Test and Polish

    The final phase is about consistency under mild pressure — because a spiral you can only throw alone in a park is not a skill yet. Drill 1: the target game. Set up targets (a trash can, a tire swing, chalk circles on a wall) at 15 and 20 yards and score yourself: 10 throws, count tight spirals on target. Drill 2: throw on the move — roll out left and right and throw, because real football never lets you set your feet perfectly. Drill 3: add a rush — have a friend count down “three-two-one” or walk toward you as you throw, simulating pressure without contact. Throughout, maintain the daily dry-snap warm-up (50 reps) — it keeps the release grooved. USA Football’s coach resources offer age-appropriate throwing progressions for youth quarterbacks. By day 14, the goal is not a 60-yard bomb; it is 8 out of 10 tight spirals at 20 yards. That is a genuinely transformed throw, and it is absolutely achievable.

    The Mistakes That Kill Spirals (Check Yourself)

    Run this diagnostic if the ball still wobbles after a week. Mistake 1: throwing with the palm — check for daylight between palm and ball. Mistake 2: no wrist snap — the throw ends at the shoulder instead of the fingers; exaggerate the snap until it feels silly. Mistake 3: dropping the elbow — the ball comes out sidearm and wobbles; keep the elbow up. Mistake 4: death-gripping the ball — tension kills the finger release; hold it firm but relaxed. Mistake 5: stopping the follow-through — the hand must finish across the body, thumb to opposite hip. Mistake 6: throwing too hard too soon — effort without mechanics just engraves bad habits; back off to 70 percent effort until the spiral is automatic, then add power. Most two-week failures come from skipping the grip phase and going straight to max-effort long throws. Do not be most people.

    A tight spiral comes from the fingers, not the arm: fingertip grip, index finger last off the ball, wrist snap, full follow-through. Two weeks of daily grip drills, progressive distance, and video self-checks will transform any wobbly throw — if you build mechanics before adding power.

    After the Two Weeks: Keeping It

    Mechanics decay without maintenance, but maintenance is cheap: 50 dry snaps and 20 quality throws three times a week keeps the spiral grooved indefinitely. If you plateau, the usual culprit is arm-only throwing creeping back — return to the one-knee drill for a session to reset the kinetic chain. And if you are preparing for a specific tryout or league, spend the last few days throwing the routes you will actually throw — slants, outs, posts — because a spiral on a stationary target and a spiral on a breaking receiver are different skills. The two-week crash course builds the foundation; game reps build the quarterback.

    Conclusion

    Throwing a consistent football spiral in two weeks is a mechanics project, not a strength project: perfect the fingertip grip, groove the wrist snap with dry reps, build the kinetic chain from one knee up, extend distance only as far as the spiral stays tight, and pressure-test at the end. Follow the progression honestly and you will throw a different ball in fourteen days. For more football skills training, visit our sports section, meet the team behind these guides, or send us your training question anytime.

    Frequently Asked Questions

    How should I grip a football to throw a spiral?

    Hold the ball with your fingertips, not your palm — there should be daylight between palm and ball. Place your ring or middle finger on the laces, index finger near the tip, thumb underneath. The spiral’s spin comes from the ball rolling off your index finger at release, so fingertip control is everything.

    Why does my football wobble when I throw?

    Almost always the grip or release: palming the ball, no wrist snap, dropped elbow, or stopping the follow-through. Check the grip first (daylight between palm and ball), then exaggerate the wrist snap. Film yourself from the side — the flaw is usually obvious on video.

    How long does it take to learn to throw a spiral?

    With focused daily practice on grip and mechanics, most beginners see a dramatically tighter spiral within two weeks. True consistency at distance takes longer — expect 4-6 weeks for reliable 25+ yard spirals. Strength is rarely the limiter; mechanics are.

    Should I throw hard to get a tighter spiral?

    No — this is the most common mistake. A tight spiral comes from spin (fingertip release and wrist snap), not velocity. Throw at 70 percent effort until the spiral is automatic, then add power. Max-effort throwing with bad mechanics just engraves wobble.

    What is the one-knee drill for quarterbacks?

    Kneel on your throwing-side knee and throw to a target 10 yards away using only upper-body rotation and wrist snap. It isolates the arm action, forces proper rotational mechanics, and eliminates the temptation to muscle the throw with the legs. It is the single best spiral-building drill.

  • When to Replace the Grip on Your Tennis Racket

    When to Replace the Grip on Your Tennis Racket

    Your forehand has started slipping at contact, there is a shiny smooth patch where your palm meets the handle, and you are squeezing harder to compensate — which is quietly wrecking your swing. The grip is the most neglected consumable in tennis: a $10 piece of material that controls every shot you hit, and most recreational players replace it about two years too late. A worn grip costs you spin, control, and eventually your elbow, because over-gripping to compensate for slip strains the forearm. Here is how to read your grip’s condition, how often to actually replace it based on how much you play, and how to do the replacement yourself in ten minutes.

    The Signs Your Grip Is Done

    Your grip talks to you; most players just do not listen. The clear signals: the surface looks shiny or smooth instead of textured (that shine is the tack worn off), the edges are peeling or lifting, you can see the bevels of the handle through thin spots, or the grip has compressed flat and feels hard rather than cushioned. The performance signals are subtler but more important: the racket twists slightly on off-center hits that it used to hold stable, you are gripping tighter than you used to, or your hand slides during serves. The ultimate test: press your thumbnail into the grip — if it does not leave a temporary dent and spring back, the cushioning is dead. Any one of these means replacement time. Two or more means you are overdue and your elbow may already be paying the tax.

    How Often to Replace: The Honest Schedule

    The pro answer (“every few matches”) is irrelevant to you; here is the recreational reality. If you play 2 to 3 times a week, replace your overgrip every 2 to 4 weeks and your base replacement grip every 3 to 6 months. If you play weekly, overgrips monthly-ish and base grips every 6 to 12 months. Heavy sweaters: cut those intervals in half — sweat and sunscreen are grip killers, breaking down tack and cushioning far faster than court time alone. Players in humid climates (Florida, the Gulf Coast) should default to the aggressive end of every range. And here is the key distinction most players miss: the overgrip (the thin wrap on the outside, $1-$3 each) is the disposable layer — replace it often and freely. The replacement grip underneath ($8-$15) lasts far longer and only needs changing when it compresses or tears. Players who use overgrips and change them regularly can go a year or more on a base grip.

    Overgrip vs. Replacement Grip: Know What You Are Wrapping

    Two different products, two different jobs. The replacement grip is the thicker, cushioned wrap applied directly to the bare handle — it defines the grip size and provides the primary cushioning. The overgrip is a thin, tacky wrap applied over the replacement grip (or over the old overgrip) — it provides the surface feel and absorbs sweat, and it is meant to be replaced frequently. If you have never changed either, you are almost certainly looking at a worn replacement grip with no overgrip. The upgrade path: put on a fresh replacement grip, then start using overgrips and replacing them every few weeks. Your hands will thank you, your wallet barely notices ($15-$25 a year in overgrips for a regular player), and your base grip lasts dramatically longer. Tacky versus dry overgrips is personal preference — tacky for humid conditions and players who like adhesion, dry/absorbent for heavy sweaters.

    How to Replace It Yourself in Ten Minutes

    Paying a shop $10 plus the grip for a ten-minute job is optional — here is the DIY method. Peel off the old grip and clean the handle with a damp cloth; remove any old adhesive residue. Start at the butt end of the handle (the wide end near your palm): peel the backing off the first few inches of the new grip, anchor the tapered starting end at the butt cap, and wrap upward toward the throat, overlapping each turn by about a quarter of the grip’s width. Keep steady, firm tension — too loose and it wrinkles, too tight and it narrows and exposes the handle. The grip’s edge should follow the handle’s bevels naturally. When you reach the top, trim the excess at an angle with scissors and secure with the finishing tape included in the package. For overgrips, the same technique applies, just thinner and quicker. Your first attempt may look slightly lumpy; your third will look professional. There are excellent video tutorials from Tennis Warehouse’s learning center if you want a visual walkthrough, and the International Tennis Federation’s equipment resources cover grip specifications for competitive play.

    Grip Size, Sweat, and the Elbow Connection

    While you are at it, check whether your grip size is even right — a wrong size accelerates wear and causes injury. The standard test: hold the racket in your playing grip; you should fit your non-dominant index finger snugly in the gap between your palm and ring finger. Too small a grip forces over-gripping (hello, tennis elbow); too large prevents proper wrist snap on serves. If you are between sizes, go smaller and build up with an overgrip or two — you can always add, you cannot subtract. For sweaters, the system is: absorbent overgrip, changed frequently, plus wristbands to stop arm sweat reaching the handle, plus a rosin bag or grip powder in extreme humidity. And the elbow point deserves emphasis: chronic over-gripping to compensate for a slick, worn grip is a genuine contributor to lateral epicondylitis. A $2 overgrip changed monthly is the cheapest tennis elbow insurance in the sport.

    A shiny, smooth, or peeling grip is costing you control on every shot — and the over-gripping it causes strains your elbow. Recreational players should replace overgrips every few weeks and base grips every 3-6 months. It’s a $10 fix that plays like a $200 upgrade.

    Choosing Your Next Grip

    When buying, match the grip to your conditions. Hot, humid climates or heavy sweaters: absorbent dry overgrips (Tourna Grip is the classic) and perforated replacement grips that breathe. Players who like tack: tacky overgrips and smooth replacement grips. Cushion lovers or players with hand/arm issues: thicker, softer replacement grips. And consider keeping two rackets gripped identically if you play competitively — switching to a differently-wrapped backup mid-match is surprisingly disruptive. Whatever you choose, write the install date on the butt cap with a marker. Future you, wondering “when did I last change this?”, will be grateful.

    Conclusion

    Tennis grip replacement is the highest-ROI maintenance in the sport: a few dollars and ten minutes for better control, more spin, and healthier elbows. Watch for the shine, the peeling, and the slip; replace overgrips every few weeks and base grips every few months; and do it yourself — it is easier than restringing and nearly as impactful. For more tennis gear wisdom, explore our sports section, meet the team behind these guides, or send us your equipment question anytime.

    Frequently Asked Questions

    How often should I replace my tennis racket grip?

    Replace overgrips every 2-4 weeks if you play 2-3 times weekly (more often for heavy sweaters), and base replacement grips every 3-6 months at that frequency. Weekly players can stretch to monthly overgrips and 6-12 month base grips. Shine, peeling, or slipping means replace immediately regardless of schedule.

    What is the difference between an overgrip and a replacement grip?

    The replacement grip is the thick, cushioned wrap on the bare handle that sets grip size — it lasts months. The overgrip is a thin, tacky wrap over it that provides surface feel and absorbs sweat — it is disposable and meant to be replaced every few weeks. Use overgrips to protect the base grip underneath.

    Can a worn grip cause tennis elbow?

    It can contribute. A slick, worn grip forces you to squeeze harder to prevent twisting, and that chronic over-gripping strains the forearm extensors involved in tennis elbow. Fresh, tacky grips let you hold the racket with a relaxed hand — the cheapest elbow insurance in tennis.

    How do I know my tennis grip size is correct?

    Hold the racket normally and slide your other index finger into the gap between your palm and ring finger — it should fit snugly. If there is no gap, the grip is too small; if there is lots of room, too big. Between sizes? Go smaller and build up with overgrips.

    Can I replace a tennis grip myself?

    Absolutely — it takes about ten minutes. Peel the old grip, anchor the new one at the butt end, wrap upward with quarter-width overlap and steady tension, trim, and tape. Your first try may look lumpy; by the third you will do it like a shop tech.

  • How to Watch Your Local MLB Team Without Blackout Restrictions

    How to Watch Your Local MLB Team Without Blackout Restrictions

    You live forty minutes from the ballpark, you pay for MLB.TV, and when your team plays at home the screen says “this game is blacked out in your area.” It is the most maddening sentence in sports streaming — paying for baseball and being blocked from watching your own team. Local blackouts exist because regional sports networks (RSNs) paid billions for exclusive local broadcast rights, and MLB enforces those territories ruthlessly. But the landscape has shifted dramatically: RSNs are collapsing, teams are launching their own streaming options, and there are more legitimate paths to watching your local nine than ever before. Here is every real option, ranked from simplest to most creative.

    Understand What You Are Actually Blacked Out From

    First, precision matters. MLB.TV blacks out games based on your location relative to each team’s territory — if you live inside your team’s designated region, their games are blacked out on MLB.TV (home and away), because your local RSN or broadcaster owns those rights. National games on ESPN, Fox, or Apple TV+ are blacked out on MLB.TV everywhere, since those networks own the national window. The blackout is determined by your IP address or GPS location, and MLB’s territories are notoriously broad — fans in Iowa have famously been blacked out from six teams. Knowing which blackout applies to you determines the fix: in-market blackouts need a local solution; national blackouts just need you to watch on the national network. Check your status on MLB’s official streaming and blackout information before spending money on any workaround.

    Option 1: The Team’s Own Streaming Service (The New Best Answer)

    The collapse of the Diamond Sports/Bally RSN empire has pushed teams toward direct-to-consumer streaming, and this is now the cleanest solution for many fans. Multiple teams now offer in-market streaming packages — typically $100 to $200 per season or $20 to $30 per month — that stream every local game with no blackouts, no cable required. The Yankees (YES), Dodgers (Spectrum SportsNet LA), and a growing list of others have launched or announced these options, and MLB itself now produces and streams games for teams whose RSN deals collapsed. Check your team’s official site first: if they offer an in-market package, it is the simplest, fully legal, highest-quality answer. This market is evolving fast — a team without an option this season may have one next season — so re-check every spring.

    Option 2: A Live TV Streaming Service With Your RSN

    If your team’s games still air on a functioning RSN, a live TV streaming bundle that carries it solves the blackout completely. The main players: DIRECTV STREAM (the priciest, but historically the most reliable for RSNs), Fubo (strong sports lineup including many RSNs), and in some markets Hulu + Live TV or YouTube TV. Expect $75 to $110 per month. The math: if you only care about baseball, six months of a streamer costs $450 to $660 — compare that against the team’s direct package above, which is usually far cheaper for baseball-only fans. But if you also want the local NBA, NHL, and everything else on that RSN, the bundle starts making sense. Warning: RSN carriage changes constantly — verify your specific RSN is currently carried before subscribing, because streaming services drop channels mid-season with minimal notice.

    Option 3: The Antenna + National Games Combo

    Do not overlook the free option. Many local games air on broadcast TV: Fox’s Saturday games, ESPN’s Sunday Night Baseball, and any postseason games are all free with a $25 to $40 over-the-air antenna in most markets. Some teams also still air a package of games on local broadcast stations. An antenna plus MLB.TV (for out-of-market games, $150-$170/season) covers a huge percentage of the season for a one-time $30 hardware cost plus the MLB.TV sub. You will miss the RSN-exclusive weeknight games, but you will watch every national broadcast in crisp free HD, and many fans find the 60-70 games they do get plenty. For the budget-conscious fan, this combo is unbeatable value.

    What About VPNs? The Honest Answer

    You will see VPNs recommended everywhere for beating blackouts: connect to a server outside your team’s territory, and MLB.TV thinks you are out-of-market. Technically, this often works — briefly. Honestly, though: it violates MLB.TV’s terms of service, MLB actively detects and blocks many VPN IP addresses (an endless cat-and-mouse game), and you are paying $150+ for a service you are using against its rules. Some fans accept that trade; others find the constant VPN troubleshooting ruins the experience. This guide cannot recommend violating terms of service, but you deserve to know the full landscape: the legitimate options above have gotten good enough that most fans no longer need the gray-area route. The trend is clearly toward teams selling directly to local fans — the blackout era is slowly ending on its own. The FCC’s history of sports blackout rules explains the regulatory backdrop that shaped these policies.

    The blackout-free path in 2026: check whether your team sells its own in-market streaming package first — it’s the cheapest fully legal option. No team package? A live TV streamer with your RSN, or an antenna plus MLB.TV for out-of-market games, covers nearly everything without gray-area workarounds.

    Radio, Highlights, and the Underrated Alternatives

    Two options deserve more respect. MLB radio broadcasts — free through the MLB app or At Bat — are never blacked out, and baseball on the radio remains one of life’s great pleasures; many fans pair the radio call with the MLB Gameday pitch tracker for a surprisingly rich free experience. And if you are time-shifted anyway, MLB.TV’s archive of every game (available 90 minutes after completion, blackout-free) means night owls and busy parents can watch full games on demand. Combine the archive with avoiding spoilers and you have effectively beaten the blackout with patience. Neither replaces live weeknight viewing, but both are legitimate, cheap, and often overlooked.

    Conclusion

    Local MLB blackouts are a legacy of the cable era colliding with the streaming era — frustrating, but increasingly solvable. Start with your team’s own streaming package, fall back to a live TV bundle or the antenna-plus-MLB.TV combo, and keep an eye on the market, because teams are launching direct options every season. The days of needing cable to watch your local team are ending. For more sports viewing guides, check our sports section, learn about who writes these guides, or ask us your streaming question — we read every message.

    Frequently Asked Questions

    Why are local MLB games blacked out on MLB.TV?

    Regional sports networks paid billions for exclusive local broadcast rights, and MLB enforces those territories by blocking in-market fans on MLB.TV. The blackout is based on your location (IP/GPS) relative to each team’s designated territory. National games on ESPN, Fox, and others are blacked out everywhere for the same reason.

    Can I watch my local MLB team without cable?

    Yes, increasingly so. Many teams now sell in-market streaming packages ($100-$200/season) with no blackouts. Otherwise, live TV streamers like DIRECTV STREAM or Fubo carry most RSNs, and an antenna gets you all national broadcasts free. Check your team’s official site first for their direct option.

    How much does MLB.TV cost and what does it include?

    MLB.TV runs roughly $150-$170 per season for all out-of-market games live and on demand, plus every game archived 90 minutes after completion. Local team games are blacked out live in-market, but become available archived. It is the best deal in sports streaming for fans who follow non-local teams.

    Do VPNs work for MLB blackouts?

    They often work technically but violate MLB.TV’s terms of service, and MLB actively blocks known VPN IPs — expect an ongoing cat-and-mouse game. With teams now selling legitimate in-market streaming packages, most fans have better legal options than they did a few years ago.

    Are MLB blackouts going away?

    Slowly, yes. The RSN business model is collapsing, and teams are increasingly selling games directly to local fans via their own streaming packages. MLB has stated it wants a more fan-friendly future. The trend favors fans, but change is happening team by team, season by season.

  • How to Recover After Playing Two Basketball Games in One Day

    How to Recover After Playing Two Basketball Games in One Day

    You just played two full basketball games in one day — tournament Saturday, doubleheader league, or an all-day run at the park — and tomorrow you have to do it again, or at least walk like a normal human. Your legs feel like concrete, your knees ache on stairs, and everything is tight. Recovery after a basketball doubleheader is a different animal from recovering after one game: the cumulative load of 80+ minutes of sprinting, jumping, and cutting creates muscle damage, glycogen depletion, and central fatigue that a single night of “just sleeping it off” will not fully fix. Here is the evidence-based recovery playbook, in priority order, for the hours between games and the day after.

    The Golden Window: The First 30 Minutes After Game Two

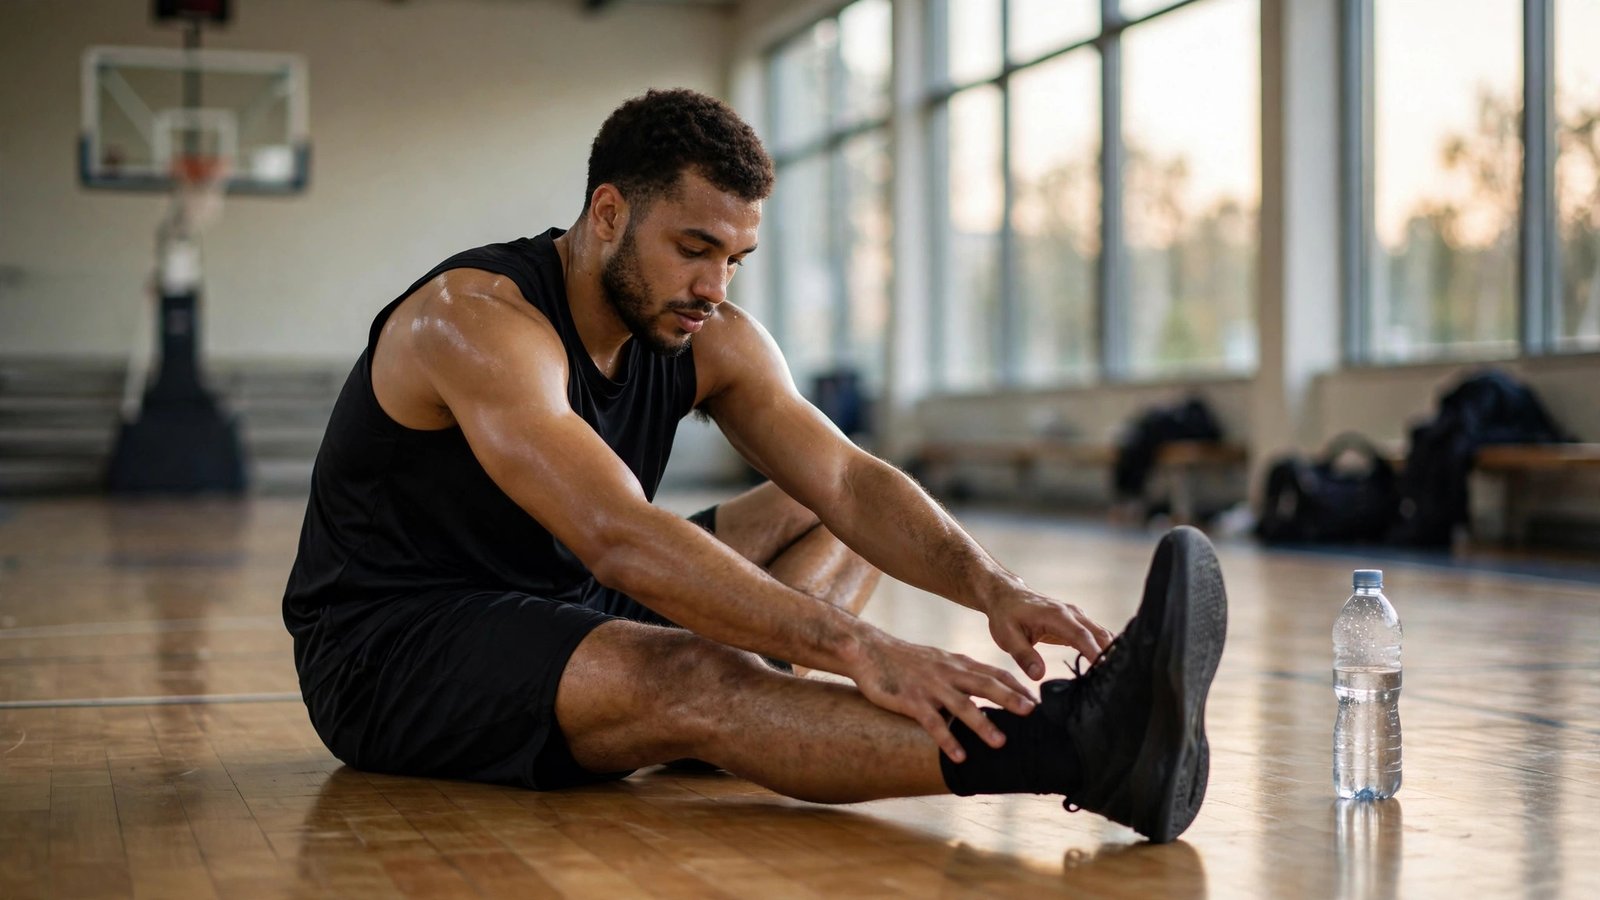
    Recovery starts the moment the final whistle blows, not when you get home. Within 30 minutes, do three things. First, keep moving for 5 to 10 minutes — easy walking, light shooting, gentle jogging — because an abrupt stop pools blood in the legs and stiffens everything faster. Second, eat: your muscles are screaming for glycogen, and the post-exercise window is when they replenish fastest. Aim for carbs plus protein in roughly a 3-to-1 ratio — chocolate milk is the classic for a reason — Gatorade Sports Science Institute research repeatedly validates it as a recovery drink — but a banana and a protein shake, a turkey sandwich, or rice with chicken all work. Third, start rehydrating aggressively: 20 to 24 ounces of fluid per pound of body weight lost, with electrolytes — weigh yourself before and after if you want precision. Players who nail this 30-minute window routinely report feeling dramatically better the next morning than players who drive home, eat nothing, and crash on the couch.

    Sleep: The Recovery Tool That Beats Everything Else

    If you do one thing, sleep. No supplement, ice bath, or massage gun compensates for short sleep after heavy exercise — growth hormone release, muscle protein synthesis, and nervous system recovery all peak during deep sleep. After a doubleheader, target 9 to 10 hours; your body is doing construction work and needs the crew on-site longer. The practical rules: get to bed at a normal time (the post-tournament adrenaline and late-night screen scrolling are the enemies), keep the room cool and dark, and avoid alcohol — it fragments sleep architecture and impairs the exact recovery processes you need. Naps count too: a 20 to 30 minute nap the next afternoon measurably improves perceived recovery. Young athletes are the worst offenders here, staying up late after tournaments; coaches who preach sleep see fewer Monday injuries, full stop.

    Active Recovery vs. Complete Rest: What the Next Day Needs

    The day after two games, total couch rest feels right and is mostly wrong. Light active recovery — 15 to 20 minutes of easy cycling, swimming, walking, or gentle shooting around — increases blood flow to damaged muscles without adding meaningful stress, and consistently outperforms complete rest for next-day soreness in sports science studies. Keep the intensity genuinely easy: conversational pace, no jumping, no sprinting. Follow it with mobility work, not aggressive static stretching on cold muscles: leg swings, hip circles, ankle mobility, and gentle hamstring and quad work. Foam rolling the quads, IT bands, and calves for 5 to 10 minutes helps perceived soreness, though the evidence for actual tissue recovery is modest — it counts as useful mainly because it gets you moving and increases blood flow. Save intense stretching for after you are warm.

    Cold, Heat, and Contrast: What Actually Works

    The recovery modality landscape is full of marketing, so here is the honest evidence. Cold water immersion (50-59°F for 10-15 minutes) has the best support for reducing soreness after tournament-style repeated efforts — it is why pro teams use ice baths between playoff games. A cold shower or bath at home approximates the effect. Compression garments show modest benefits for perceived recovery and next-day performance, and they are harmless to try. Massage — professional or massage gun — helps soreness perception and relaxation; use the gun on large muscle groups for a few minutes per area, avoiding joints and bony areas. What to skip: anti-inflammatory drugs as routine recovery (they may blunt the adaptation signal your muscles need — save them for real pain, not soreness), and expensive gadgets with no evidence. The hierarchy is clear: sleep, nutrition, and hydration do 90 percent of the work; everything else is the final 10 percent.

    Eating to Rebuild: The 24-Hour Refuel Plan

    Two games burn roughly 1,200 to 2,000 calories depending on your size and intensity, and most players under-eat afterward — then wonder why Monday feels like death. Dinner after the doubleheader should be your biggest meal: a large carb base (pasta, rice, potatoes) with 30 to 50 grams of protein and vegetables. Before bed, a protein-rich snack (Greek yogurt, cottage cheese — casein protein digests slowly overnight) supports muscle repair while you sleep. The next morning, eat a real breakfast even if you are not hungry; appetite suppression after heavy exercise is normal but the body still needs fuel. Throughout the next day, keep protein at 1.6 to 2.2 grams per kilogram of body weight and carbs generous — this is not the day for dieting. Tart cherry juice has modest evidence for reducing muscle soreness; it is a reasonable addition, not a miracle.

    Doubleheader recovery is won in the first 30 minutes (move lightly, eat carbs plus protein, rehydrate with electrolytes) and in bed that night (9-10 hours of sleep). Everything else — ice baths, massage guns, compression — is the final 10%. Nail the big three and you’ll feel human again by Monday.

    Managing Soreness, Stiffness, and Warning Signs

    Delayed-onset muscle soreness peaks 24 to 48 hours after the games — right on schedule for maximum Monday misery. Normal soreness: dull, achy, worse on stairs and sitting down, improving daily. Manage it with the active recovery above, warmth (a warm bath or heating pad on tight areas), and patience. Warning signs that are not normal soreness: sharp or stabbing pain in a joint, swelling in a knee or ankle, pain that worsens after 72 hours instead of improving, numbness or tingling, or urine that is dark brown (possible rhabdomyolysis — rare but a medical emergency after extreme exertion, especially in heat). Knee and ankle joints that feel unstable or “give way” deserve prompt evaluation. The National Athletic Trainers’ Association publishes position statements on recovery and exertional injury that inform these protocols. When in doubt, a sports medicine visit beats a week of hoping — the players who miss months are the ones who played through warning signs.

    Conclusion

    Recovering from two basketball games in one day is a system, not a single trick: nail the 30-minute refuel window, sleep 9 to 10 hours, move lightly the next day instead of going full couch, eat like you mean it for 24 hours, and use cold immersion or massage for the final edge. Do that and you will be shocked how good Monday feels. For more basketball performance guidance, explore our sports section, meet the team behind these guides, or send us your training question anytime.

    Frequently Asked Questions

    Should I ice bath after playing two basketball games?

    Cold water immersion (50-59°F for 10-15 minutes) has the best evidence among recovery modalities for tournament-style repeated efforts, reducing next-day soreness. A cold bath or shower at home approximates it. It helps, but sleep and nutrition matter far more — do those first.

    What should I eat after a basketball doubleheader?

    Within 30 minutes: carbs plus protein in about a 3:1 ratio (chocolate milk, banana plus protein shake, or a sandwich). Dinner should be your biggest meal — large carb base with 30-50g protein. Keep protein high (1.6-2.2g per kg bodyweight) and carbs generous for the full next day.

    Is it better to rest completely or stay active the day after?

    Light active recovery wins: 15-20 minutes of easy cycling, walking, or swimming plus mobility work outperforms total rest for next-day soreness. Keep it conversational and easy — no jumping or sprinting. Complete rest is only better if you have an actual injury.

    How much sleep do I need after two games?

    Target 9 to 10 hours the night after a doubleheader. Growth hormone release and muscle repair peak during deep sleep, and no supplement or modality compensates for short sleep. Avoid alcohol, which fragments the exact sleep stages recovery needs.

    When is soreness after basketball a sign of injury?

    Normal soreness is dull, achy, worst on stairs, and improves daily, peaking at 24-48 hours. See a doctor for sharp or stabbing joint pain, swelling, pain worsening after 72 hours, instability or “giving way,” numbness, or dark brown urine (possible rhabdomyolysis — seek emergency care).

  • How to Find a Personal Trainer Who Works With Seniors

    How to Find a Personal Trainer Who Works With Seniors

    You are 68, your doctor says strength training would transform your health, and every trainer at the big-box gym looks 24 and trains people for beach season. Finding a personal trainer who genuinely works with seniors — not someone who just tolerates older clients between athletes — is one of the highest-value health decisions you can make after 60. The right trainer understands aging joints, builds balance that prevents falls, and progresses you safely; the wrong one hands you a generic program that hurts you in week two. Here is how to find the real specialists, what credentials actually mean, the questions that separate experts from pretenders, and what fair pricing looks like.

    Why a Senior-Specialist Trainer Is Worth Seeking Out

    Training a 70-year-old is a different profession from training a 30-year-old, and the differences are all medical. After 60, the priorities flip: balance and fall prevention outrank aesthetics, bone density and joint-friendly loading outrank max lifts, and every program must account for common realities — arthritis, joint replacements, osteoporosis, blood pressure medications, and slower recovery. A general trainer’s default program (heavy barbell squats, high-intensity intervals, “push through it”) can injure an older adult fast. A senior specialist instead leads with functional strength — sit-to-stand power, stair climbing, carrying groceries — plus balance training, flexibility, and bone-loading exercises calibrated to the individual. The CDC’s physical activity guidelines specifically urge older adults to include balance and muscle-strengthening work, and a good senior trainer builds the entire program around exactly that.

    Credentials That Actually Mean Something

    The fitness industry’s alphabet soup is confusing, so here is what to look for. Baseline: a nationally accredited certification — NASM, ACE, ACSM, or NSCA. These require exams, continuing education, and adherence to scope of practice; a trainer with none of these is a hobbyist. Next, the senior-specific layer: NASM’s Senior Fitness Specialization, ACE’s Senior Fitness Specialist, or the Functional Aging Institute’s credentials all indicate dedicated study of older-adult training. The gold standard for clinical complexity is a trainer with experience in medical fitness or physical therapy collaboration — some hold degrees in exercise science or kinesiology. Ask directly: “What percentage of your clients are over 60?” You want someone who answers “most of them” without hesitating. A trainer whose clientele is 90 percent twenty-somethings and who “also works with seniors” is not a senior specialist, whatever the certificate on the wall says.

    Where to Look: The Best Hunting Grounds

    Start with your own medical team: ask your doctor or physical therapist for referrals. Medical professionals know which local trainers handle post-rehab clients well, and some trainers specialize in the handoff from physical therapy to independent fitness — exactly what many seniors need. Next, check community centers, YMCAs, and SilverSneakers-affiliated gyms; these facilities serve older adults by design and their trainers typically have real senior experience. The SilverSneakers program, included in many Medicare Advantage plans, is both a funding source and a trainer directory of sorts. University exercise science departments sometimes run senior fitness programs with supervised student trainers at low cost. And do not overlook independent trainers who work from private studios — they often specialize precisely because they left big-box gyms, and a private studio means no waiting for equipment and no intimidation factor.

    The Interview: Questions That Reveal Everything

    Treat the first meeting as a job interview — because it is. Ask: “Walk me through what a first session with a new 68-year-old client looks like.” A good answer includes a health history review, movement screening, and starting conservatively; a bad answer jumps straight to workouts. Ask how they handle arthritis, joint replacements, or osteoporosis specifically — vague answers (“we just take it easy”) are disqualifying; specific answers (low-impact loading progressions, balance protocols, coordination with your doctor) are what you want. Ask about their oldest client and their typical client age. Ask what happens if something hurts: the right answer is “we stop, assess, and modify or refer out” — never “push through it.” Ask for two references from clients over 65 and actually call them. And trust your gut about communication style: the trainer will be correcting your form weekly, so you need someone patient and clear, not a drill sergeant.

    What Fair Pricing Looks Like (and How to Save)

    One-on-one personal training typically runs $50 to $100+ per session depending on your city, with senior specialists sometimes at the higher end — worth it for the expertise. But full-price one-on-one is not the only path. Semi-private training (two to four clients sharing a trainer) runs $25 to $45 per session and works beautifully for seniors, adding a social element many older adults love. Small-group senior fitness classes ($10-$20 per session) at YMCAs and community centers offer professional programming at a fraction of the cost. Check your Medicare Advantage plan: many include SilverSneakers or similar fitness benefits covering gym access and sometimes training sessions — call the number on your insurance card and ask specifically. And consider a hybrid approach many savvy seniors use: four to six one-on-one sessions to learn proper form and get a personalized program, then transition to independent or small-group training with monthly check-ins. You get the expertise where it matters most without the ongoing full-price commitment.

    The right senior trainer is a specialist, not a generalist who tolerates older clients: accredited certification plus senior-specific training, a clientele that’s mostly over 60, a first session built around screening rather than sweating, and a “stop and modify” philosophy on pain. Interview like you’re hiring — because your health is the job.

    Red Flags: When to Walk Away

    A few signs should end the search immediately. The trainer dismisses your medical history or does not ask about medications, surgeries, or conditions. They prescribe a one-size-fits-all program without assessing how you move. They push supplements, “required” nutrition products, or long-term contracts before you have trained together. They cannot explain why an exercise is in your program in plain language. They brag about “no pain, no gain” or frame caution as weakness. And the subtlest one: they do not coordinate with or welcome input from your doctor or physical therapist. A great senior trainer sees themselves as part of your healthcare team, not a replacement for it. The best ones will ask for your doctor’s clearance before starting and will want to know what your PT said — that collaboration is the hallmark of a true professional.

    Conclusion

    Finding a personal trainer who works with seniors comes down to specialization, verification, and fit: look for accredited credentials plus senior-specific training, hunt through medical referrals and senior-focused facilities, interview with pointed questions, and choose the pricing model — one-on-one, semi-private, or hybrid — that you will actually sustain. The payoff is enormous: strength, balance, bone density, and the confidence that comes from a body you trust. That is worth interviewing for. For more healthy-aging guidance, browse our sports and fitness section, learn about who writes these guides, or ask us your fitness question — we answer every message.

    Frequently Asked Questions

    How much does a personal trainer for seniors cost?

    One-on-one sessions typically run $50-$100+ depending on location, with senior specialists sometimes higher. Semi-private training (2-4 clients) costs $25-$45 per session, and small-group senior classes run $10-$20. Many Medicare Advantage plans include fitness benefits like SilverSneakers that reduce or eliminate costs — check your plan.

    What certifications should a senior fitness trainer have?

    At minimum, a nationally accredited certification (NASM, ACE, ACSM, or NSCA) plus a senior-specific specialization such as NASM’s Senior Fitness Specialization or ACE’s Senior Fitness Specialist. Ask what percentage of their clients are over 60 — you want “most of them,” not “a few.”

    Is strength training safe for people over 70?

    Yes — with proper programming, it is one of the healthiest things adults over 70 can do, improving bone density, balance, metabolism, and independence. The key is a qualified trainer who starts with screening, progresses gradually, uses joint-friendly exercises, and coordinates with your doctor, especially with conditions like osteoporosis or joint replacements.

    How often should a senior work with a personal trainer?

    Two sessions per week is the sweet spot for most older adults — enough stimulus to progress, enough recovery between sessions. One session per week works if you train independently once or twice more. Many seniors start with 4-6 one-on-one sessions to learn form, then shift to semi-private or small-group training.

    Can I use my Medicare plan to pay for a trainer?

    Original Medicare does not cover personal training, but many Medicare Advantage plans include fitness benefits like SilverSneakers, Renew Active, or Silver&Fit, which cover gym memberships and sometimes group training. Call your plan directly to ask what fitness benefits you have — many seniors leave this benefit unused.

  • Why Your Hands Go Numb When You Ride Your Bike

    Why Your Hands Go Numb When You Ride Your Bike

    Forty-five minutes into your ride, your pinky and ring finger start tingling. By the hour mark, both hands feel like they belong to someone else, and you are shaking them out at every stoplight. Numb hands are one of the most common complaints in cycling — and one of the most fixable. The numbness is almost always a mechanical problem, not a medical one: pressure on the ulnar and median nerves where they pass through your wrist and palm, caused by how your weight, your handlebars, and your body position interact. Here is what is actually happening in your hands, the fit and technique fixes that resolve it for most riders, and the signs that mean it is time to see a doctor instead of adjusting your stem.

    What Is Actually Going Numb: The Two Nerves Involved

    Two nerves run through high-pressure zones in a cyclist’s hand. The ulnar nerve passes through Guyon’s canal at the base of the palm — compression here numbs the pinky and ring finger, the classic “cyclist’s palsy” or handlebar palsy. The median nerve passes through the carpal tunnel at the wrist — compression here numbs the thumb, index, and middle fingers, essentially cycling-induced carpal tunnel symptoms. Which fingers go numb tells you which nerve is complaining, and that points at the cause: ulnar symptoms usually mean too much pressure on the heel of the palm (drops or flat bars with no padding variation), while median symptoms often mean a bent-back wrist position (hoods ridden with wrists kinked). Both are pressure-over-time problems, which is why symptoms take 30 to 60 minutes to appear and resolve minutes after you stop gripping.

    Fit Fix #1: Take Weight Off Your Hands

    The root cause for most riders is simple: too much body weight resting on the hands. This usually traces to bike fit — a saddle tilted nose-down slides you forward onto the bars, a saddle set too high rocks your pelvis and pushes weight forward, or handlebars set too low and too far away force a constant push-up position. The checks: your saddle should be level (use a phone level app), saddle height should allow a slight knee bend at the bottom of the stroke, and you should be able to ride with a light grip — if removing your hands for a second feels like falling forward, your fit is dumping weight onto your palms. Core strength matters too: a weak core cannot support your torso, so your arms become structural columns. The test riders love: can you comfortably tap your fingers on the bars while riding? If not, fit first, gloves second.

    Fit Fix #2: Handlebar Position, Gloves, and Grip

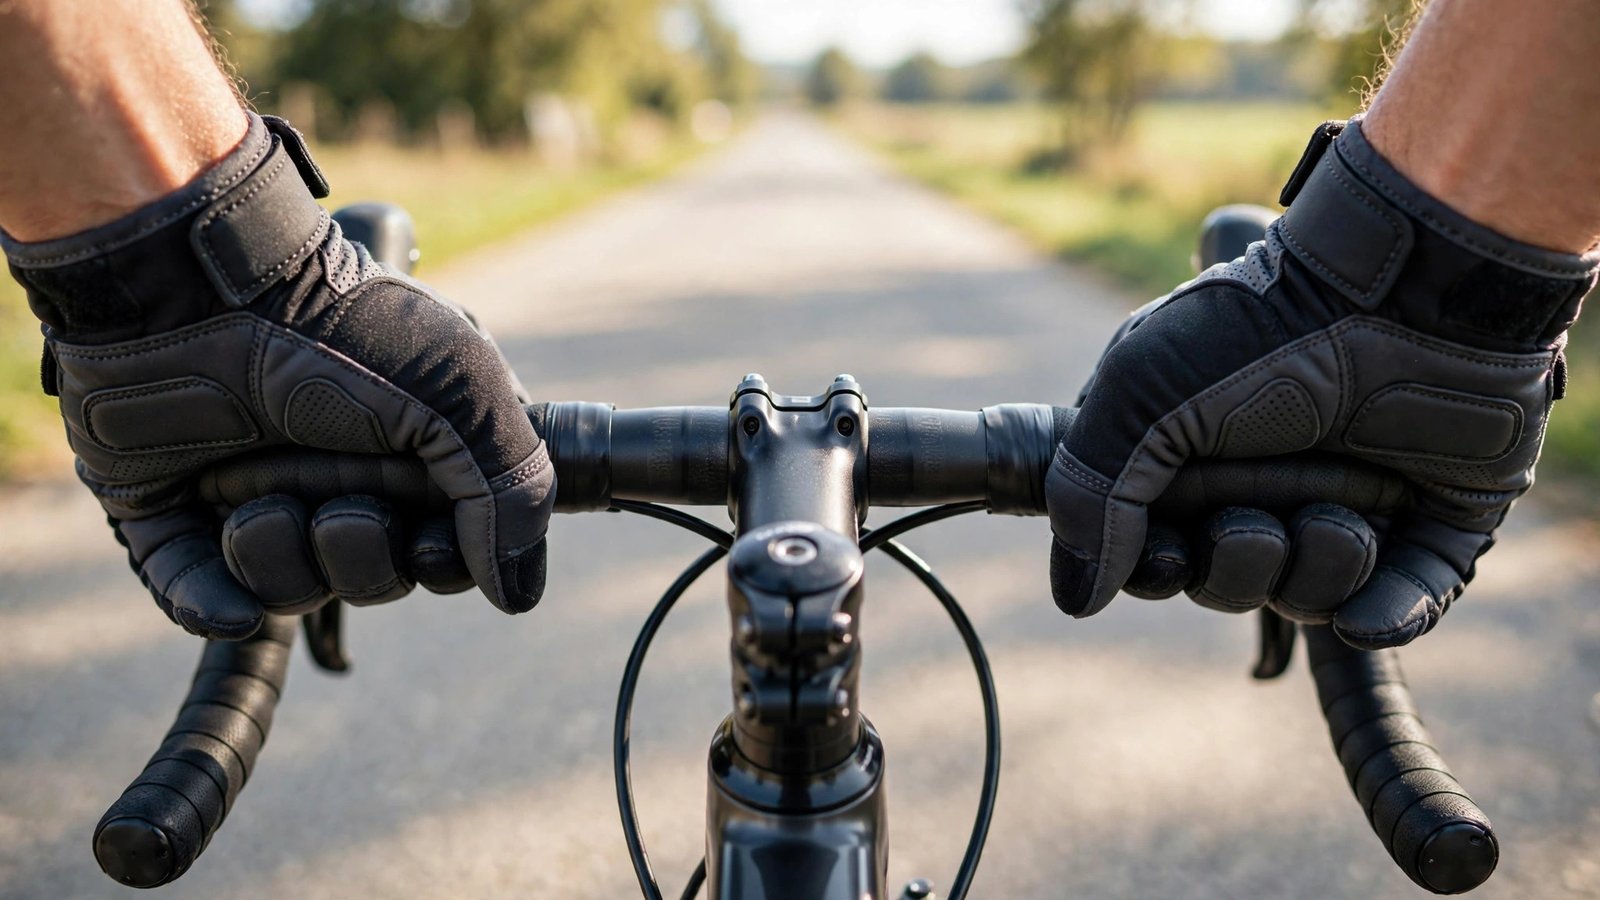
    Once weight distribution is reasonable, optimize the contact points. Rotate hand positions every few minutes — tops, hoods, drops — because the numbness is time-under-pressure, and movement is the antidote. Padded cycling gloves genuinely help by distributing pressure across the palm, but they are a supplement to fit, not a substitute; a $40 glove cannot fix a $0 fit problem. Consider bar tape with more cushion or gel inserts under the tape at the pressure points. For flat-bar riders, ergonomic grips with a winged platform spread load across the whole palm instead of concentrating it on the ulnar nerve zone — many chronic numbness cases resolve with this single change. And check your wrist angle: wrists should be roughly straight, not bent back like a waiter carrying a tray. If your brake hoods force a kinked wrist, rotating the bars or adjusting hood position flattens it.

    Technique: Relax the Death Grip

    Watch tense riders and you will see white knuckles — gripping the bars as if the bike might escape. That constant isometric contraction compresses nerves directly and fatigues the forearms, compounding the fit problem. Consciously relax: bend your elbows slightly (locked elbows transmit every bump straight to the hands and shoulders), keep a firm-but-light grip, and wiggle your fingers periodically. On rough roads, let the elbows act as suspension. Many riders find that dropping the death grip alone delays numbness by 30 minutes or more. It also helps to stand and pedal for 15 to 20 seconds every ten minutes on longer rides — it unloads the hands completely, restores circulation, and gives the nerves a pressure break. Think of it as the cycling equivalent of getting up from your desk.

    When Numbness Is Not Just a Fit Problem

    Most cycling hand numbness is mechanical and resolves with the fixes above within a few rides. See a doctor if numbness persists for hours after riding, occurs off the bike (typing, sleeping, driving), involves weakness like dropping objects, or affects only one hand asymmetrically — these patterns suggest true nerve entrapment or a cervical spine issue rather than handlebar pressure. Also seek evaluation if you develop persistent neck pain with the hand symptoms, which can indicate a pinched nerve root in the neck referring downward. A sports medicine physician or hand specialist can sort this out quickly, and early treatment of genuine carpal tunnel or ulnar neuropathy prevents permanent nerve damage. The American Academy of Orthopaedic Surgeons has excellent patient guides on both ulnar nerve and carpal tunnel issues, and the American Society for Surgery of the Hand covers handlebar-related nerve compression in depth.

    Numb hands while cycling are almost always pressure on the ulnar or median nerves from too much weight on the bars, a poor fit, or a death grip — not a fitness problem. Level the saddle, take weight off your hands, move hand positions often, and relax your grip. If numbness persists off the bike, get checked.

    The Professional Bike Fit: Worth Every Penny

    If you have adjusted the basics and numbness persists past the hour, get a professional fit — typically $150 to $300 for a comprehensive session. A fitter will measure your flexibility, observe you pedaling under load, and adjust saddle position, stem length and height, handlebar width, and cleat position as a system. Hand numbness is one of the most common complaints fitters resolve, often with changes the rider would never have tried alone (a shorter stem, a saddle moved back 5 millimeters). Many shops credit part of the fit cost toward parts. Given that the alternative is months of miserable rides or a medical bill, the fit is the highest-ROI purchase in cycling after the helmet.

    Conclusion

    Hands going numb on hour-long rides is your body’s fit complaint, not a life sentence. Identify which fingers go numb, take weight off your hands with proper saddle and bar position, rotate hand positions, relax your grip, and consider ergonomic grips or a professional fit if the basics do not solve it. Most riders fix this completely within a couple of weeks of adjustments. And if numbness follows you off the bike, let a doctor take a look — nerves deserve respect. For more cycling-smart guidance, explore our sports section, meet the team behind these guides, or send us your cycling question anytime.

    Frequently Asked Questions

    Why do only my pinky and ring finger go numb when cycling?

    That pattern points to the ulnar nerve, compressed at the base of the palm (Guyon’s canal) — classic handlebar palsy. It usually means too much pressure on the heel of your palm from weight distribution or hand position. Padded gloves, ergonomic grips, and taking weight off your hands typically resolve it.

    Will padded cycling gloves stop hand numbness?

    They help by distributing palm pressure, but they cannot fix a fit problem. Think of gloves as a supplement: get saddle position, bar height, and weight distribution right first, then add gloves for the remaining pressure. Many riders need both.

    How should I position my wrists on the handlebars?

    Keep wrists roughly straight and neutral — not bent sharply back or kinked down. On drop bars, this usually means riding the hoods with forearms nearly level; on flat bars, ergonomic grips help maintain the neutral angle. Bent wrists compress the carpal tunnel and cause thumb-side numbness.

    Is hand numbness from cycling dangerous?

    Temporary numbness that resolves minutes after riding is almost always benign pressure-related irritation. It becomes concerning if numbness lasts hours, happens off the bike, involves weakness or dropping things, or is sharply one-sided — those warrant a medical evaluation for true nerve entrapment.

    How much does a professional bike fit cost?

    A comprehensive fit runs $150 to $300 and typically takes 1-2 hours. For persistent numbness, pain, or anyone riding regularly, it is the best money in cycling — fitters resolve hand numbness complaints routinely with adjustments riders would not find alone.

  • How to Stay Hydrated During a Summer Soccer Tournament

    How to Stay Hydrated During a Summer Soccer Tournament

    It is 96 degrees, you have played two games already, game three starts in forty minutes, and your kid’s face is the color of a tomato. Summer soccer tournaments are hydration obstacle courses: multiple games in brutal heat, short turnarounds, and young athletes who will not drink unless someone hands them a bottle. Dehydration does not just cause cramps — it tanks reaction time, decision-making, and sprint speed long before anyone feels truly thirsty. The families and players who handle tournament weekends well do not have better genetics; they have a system. Here is the full system: what to drink, when to drink it, how much, and the warning signs that mean stop playing.

    Start Hydrating Before the Tournament, Not During Game One

    The biggest hydration mistake is trying to catch up on game day. By the time you feel thirsty during a match, you are already one to two percent dehydrated — enough to measurably impair performance. The fix starts 24 hours out: drink water steadily the day before, eat water-rich foods (fruit, vegetables, soups), and avoid the dehydration accelerators — excess caffeine, alcohol for adult players, and very salty fast food without matching water. The morning of the tournament, drink 16 to 20 ounces of water two to three hours before the first game, then another 8 to 12 ounces 20 minutes before kickoff. Your urine is the honest gauge: pale straw color means you are ready; dark yellow means you started behind. Coaches should say this out loud at the pre-tournament meeting, because teenagers left to their own devices will show up having drunk nothing but a soda.

    Water vs. Sports Drinks: What the Science Actually Says

    For games under an hour in moderate heat, plain water is all anyone needs. But summer tournaments mean 60 to 90 minute games in extreme heat, often twice a day — and that changes the equation. When exercise exceeds an hour, especially in heat, you lose not just water but sodium and potassium through sweat, and replacing water alone dilutes blood sodium further. That is when sports drinks earn their place: the Gatorade Sports Science Institute’s research consistently shows that carbohydrate-electrolyte drinks sustain performance better than water alone in prolonged heat exercise. Practical rule: water for warm-ups and short turnarounds, sports drinks during and after games lasting over an hour or in temperatures above 85°F. Avoid energy drinks entirely — the caffeine and sugar spike followed by a crash is the opposite of what a tournament athlete needs. And for the budget-conscious, a homemade option (water, a pinch of salt, a squeeze of orange juice, a teaspoon of honey) covers the basics surprisingly well.

    The In-Game and Between-Games Protocol

    During the game, the target is 6 to 12 ounces every 15 to 20 minutes — small, frequent sips beat occasional big gulps, which slosh and cramp. Every stoppage is a drinking opportunity: goal kicks, injuries, halftime. Halftime deserves a real refuel: 12 to 16 ounces of fluid plus easily digestible carbs (banana, pretzel sticks, orange slices — the classic tournament snacks exist for a reason). Between games is where tournaments are won and lost. With 40 to 90 minutes between matches, the priority order is: fluid first (16 to 24 ounces), then food (carbs plus a little protein — a turkey sandwich, pasta, rice), then shade and cooling. Cooling matters as much as drinking: ice towels on the neck, shade tents, and cool (not ice-cold) water for drinking. Players should weigh themselves if possible — a two percent body weight drop across the day means the drinking plan is failing and needs to intensify.

    Eating for Hydration: Food Is a Fluid Strategy

    Roughly 20 percent of daily water intake comes from food, and tournament eating should exploit that. Watermelon, oranges, grapes, cucumbers, and lettuce are all over 90 percent water — the sideline cooler should look like a produce stand, not a chip aisle. Salty snacks have a legitimate role between games: pretzels, salted nuts, or pickles help the body retain the water you are drinking, which is exactly what a sweating athlete needs. What to avoid: heavy, greasy food between games (it sits in the stomach and competes with fluid absorption), huge meals right before kickoff (eat the real meal at least two to three hours before), and the all-sugar trap of candy and soda, which spike and crash young players. For multi-day tournaments, dinner the night before day two matters enormously: a real carb-rich meal with plenty of water sets up the entire next day. The teams that eat like athletes recover like athletes.

    Know the Warning Signs: Cramps, Exhaustion, and Heat Stroke

    Every parent and coach at a summer tournament must know the escalation ladder. Heat cramps — painful muscle spasms — are the first warning: stop activity, stretch gently, drink electrolyte fluids, and do not return until cramps fully resolve. Heat exhaustion is next: heavy sweating, weakness, cool and clammy skin, nausea, headache, dizziness. Move the player to shade immediately, apply cool towels, give fluids, and do not let them return that day. Heat stroke is the emergency: hot, red skin that may be dry, confusion or altered behavior, rapid pulse, body temperature above 103°F — call 911 immediately and cool aggressively (ice bath or ice towels on neck, armpits, groin) while waiting. The CDC’s extreme heat guidance is worth every coach reading before tournament season. The rule that prevents tragedies: when in doubt, sit them out. No tournament game is worth a hospital visit.

    Tournament hydration is a 24-hour system, not a water bottle: preload the day before, sip 6-12 ounces every 15-20 minutes during games, use sports drinks for long hot matches, refuel with carbs and salt between games, and know the heat illness ladder cold. The teams that hydrate like professionals play like them in game four.

    Gear That Makes Hydration Automatic

    Systems beat willpower, and gear creates systems. Every player needs their own large water bottle — 32 ounces minimum — labeled with their name, because communal jugs breed both confusion and germs. Insulated bottles keep water cool through a four-game day; warm water does not get drunk. Coaches should bring a team cooler with ice, extra water, and sports drinks, plus a pop-up shade tent — the $60 tent is the best heat-safety purchase in youth sports. Cooling towels (the evaporative kind) cost a few dollars each and genuinely help between games. And the simplest system of all: scheduled drink breaks. Do not rely on kids to self-hydrate; build water breaks into warm-ups, halftime, and every between-game routine until it is automatic.

    Conclusion

    Staying hydrated through a summer soccer tournament is not about chugging water at halftime — it is a full-day system of preloading, steady sipping, smart sports drink use, water-rich food, shade, and knowing when heat illness is starting. Set the system up before the first whistle, enforce it like any other game plan, and your team will be the one still sprinting in the final. For more tournament-smart sports guidance, visit our sports section, meet the team behind these guides, or send us your sports health question anytime.

    Frequently Asked Questions

    How much water should my child drink during a soccer tournament?

    Aim for 6 to 12 ounces every 15 to 20 minutes during play, 12 to 16 ounces at halftime, and 16 to 24 ounces between games. Over a full tournament day, most youth players need 60 to 100 ounces total depending on heat and game count. Pale-yellow urine is the best ongoing gauge.

    Are sports drinks better than water for young athletes?

    For games over an hour or temperatures above 85°F, yes — sports drinks replace the sodium and potassium lost in sweat and provide carbs for energy, which water alone does not. For shorter games in moderate heat, plain water is sufficient. Avoid energy drinks entirely for youth athletes.

    What are the signs of heat exhaustion in a soccer player?

    Heavy sweating, weakness, cool or clammy skin, nausea, headache, and dizziness. Move the player to shade, cool with wet towels, give fluids, and keep them out for the rest of the day. Confusion, hot dry skin, or fainting signals heat stroke — call 911 immediately.

    What should players eat between tournament games?

    Easily digestible carbs plus some protein and salt: turkey sandwiches, bananas, pretzels, orange slices, pasta, or rice. Eat the bigger meal at least two hours before the next game. Avoid greasy food, candy binges, and soda between games.

    Can you drink too much water during a tournament?

    Yes — drinking extreme amounts of plain water without electrolytes during prolonged exercise can cause hyponatremia (dangerously low blood sodium). The fix is simple: drink to thirst plus a sensible schedule, and use sports drinks or salty foods during long, hot tournament days rather than water alone.