Breaking

Category: Food

  • Best Cheap Wine to Cook With for Italian Recipes

    Best Cheap Wine to Cook With for Italian Recipes

    Every Italian recipe that calls for “a glass of dry red wine” raises the same question at the store: which bottle, and how cheap can I go? Cooking wine is one of those ingredients surrounded by myths — that you should never cook with a wine you would not drink, that expensive wine makes better sauce, that “cooking wine” from the grocery aisle is fine. The truth is simpler and cheaper. For Italian cooking, the right bottle usually costs under ten dollars, and knowing the two or three rules below will improve your sauces more than any fancy label.

    The Only Real Rule: If You Would Not Sip It, Do Not Cook With It

    This is the one piece of conventional wisdom that holds up — with a caveat. It does not mean the wine must be good; it means it must not be flawed. A wine that tastes vinegary, oxidized, or corked will concentrate those flaws as it reduces in the pan. But a simple, clean, unremarkable five-dollar bottle is perfectly fine — in fact, it is ideal. Cooking burns off the delicate aromatics that make expensive wine worth its price, leaving behind acidity, fruit, tannin, and alcohol-soluble flavor compounds. A pricey Barolo’s nuances vanish into the sauce; a basic Chianti’s structure does the same job for a tenth of the cost. Drinkable, not distinguished, is the target.

    Red Wines: What Works in Italian Cooking

    For tomato sauces, braised meats, ragù, and mushroom dishes, reach for dry, medium-bodied Italian reds. Chianti is the classic all-rounder — bright acidity that lifts tomato sauce, modest tannins, and widely available under ten dollars. Montepulciano d’Abruzzo is another excellent workhorse: soft, fruity, and reliably cheap. Sangiovese-based blends in general suit Italian food because they evolved alongside it. Avoid big, oaky, high-tannin reds like heavy Cabernet Sauvignons or oaked Malbecs for delicate sauces — concentrated tannins turn bitter and astringent when reduced. And skip anything labeled “sweet” or with noticeable residual sugar unless the recipe specifically calls for it; sweetness in a savory ragù tastes wrong. Wine Folly’s cooking-with-wine guide breaks down how tannin and acidity behave under heat.

    White Wines: What Works in Italian Cooking

    For risotto, seafood pasta, white wine sauces, and deglazing, you want a dry, crisp, unoaked white with good acidity. Pinot Grigio is the default for a reason — neutral, affordable, and everywhere. Sauvignon Blanc brings more citrus punch, which suits seafood beautifully. Dry vermouth is the sleeper pick: it keeps for months after opening (unlike wine, which fades in days), costs little, and its herbal notes complement Italian flavors. What to avoid: oaky Chardonnays, which turn heavy and bitter when reduced, and sweet whites like Moscato, which belong in dessert. A three-dollar difference at the shelf rarely matters in the pan — grab the cheapest dry, unoaked bottle from a reputable producer.

    Never Buy “Cooking Wine”

    The bottles labeled “cooking wine” in the grocery aisle — usually near the vinegar — are the one thing to avoid completely. They are low-quality wine loaded with salt and preservatives so they can be sold without a liquor license, and that salt throws off your seasoning while the base wine is typically harsh and unpleasant. Real wine from the wine aisle, even the cheapest bottle, is dramatically better. If your grocery store cannot sell wine, buy your cooking bottles on your next liquor-store trip and keep them on hand — an opened bottle stays usable for cooking for about a week in the fridge (whites and reds alike), and you can freeze leftover wine in ice cube trays for months of ready-to-toss-in portions.

    How Much Wine, and When to Add It

    For most sauces, half a cup to a cup per recipe is the range — enough to matter, not so much that the dish tastes boozy. Add wine early and let it simmer at least 20 to 30 minutes; despite the myth, alcohol does not fully “cook off” in a few minutes — studies show a simmered dish retains a meaningful percentage of alcohol even after an hour, though the harsh raw-alcohol flavor mellows much faster. Deglazing is wine’s highest-value move: after searing meat, pour in a splash and scrape up the browned bits (the fond) — that is concentrated flavor you would otherwise leave in the pan. For risotto, add the wine after toasting the rice and before the broth, letting it absorb almost completely. And finish with a fresh splash only if you want a brighter wine note; late additions taste more strongly of wine itself.

    Matching Wine to the Dish

    A few classic pairings to internalize: tomato-based sauces and ragù want Chianti or Montepulciano; creamy or mushroom sauces do better with a dry white or even a splash of dry Marsala; seafood pastas call for Pinot Grigio or Sauvignon Blanc; osso buco and braised short ribs can handle a bolder red like a Barbera. Marsala deserves special mention — dry Marsala is essential for chicken marsala and veal dishes, while sweet Marsala belongs in zabaglione and desserts. Keep one dry red, one dry white (or dry vermouth), and a bottle of dry Marsala on hand, and you can cook 90 percent of Italian recipes without a special trip. For pairing theory beyond these basics, Jancis Robinson’s wine education articles are the enthusiast’s reference.

    The best cheap wine for Italian cooking is any clean, dry, unoaked bottle under ten dollars — Chianti or Montepulciano for reds, Pinot Grigio or dry vermouth for whites. Never buy salted “cooking wine,” and add it early enough to simmer and mellow.

    Conclusion

    Cooking wine does not need to be expensive — it needs to be real wine, dry, and free of flaws. A cheap Chianti for your ragù, a Pinot Grigio or dry vermouth for your risotto, and dry Marsala for the classics will cover nearly every Italian recipe you will ever make. Skip the salted cooking wine, freeze leftovers in ice cube trays, and remember that the wine’s job is acidity and depth, not prestige. For more kitchen wisdom and Italian cooking guides, browse our food section, meet the team, or send us your cooking questions.

    Frequently Asked Questions

    Can I cook with expensive wine?

    You can, but it is wasted money. Heat destroys the delicate aromatics that make fine wine expensive, leaving only acidity, tannin, and fruit — all present in a decent $7 bottle. Save the good wine for the glass alongside dinner.

    How long does opened wine last for cooking?

    About a week in the refrigerator, for both reds and whites — recorked and chilled. After that it turns vinegary. For longer storage, freeze leftover wine in ice cube trays; the cubes keep for months and go straight into the pan.

    Does the alcohol really cook out of food?

    Not as fast as people think. Studies show simmered dishes retain significant alcohol even after 30–60 minutes, though the harsh raw flavor mellows quickly. If serving people who avoid alcohol entirely, skip the wine rather than relying on cooking to remove it.

    What is a good substitute if I do not want to use wine?

    For deglazing and acidity, use stock with a splash of vinegar or lemon juice. For the fruity depth, unsweetened grape or cranberry juice works in some sauces. The result will not be identical, but it beats using spoiled or salted cooking wine.

    Is dry vermouth really a good substitute for white wine?

    Yes — many chefs prefer it. Dry vermouth is a fortified, aromatized wine that stays fresh for months after opening, costs little, and its herbal notes suit Italian cooking. Use it anywhere a recipe calls for dry white wine.
  • How to Make Copycat Chick-fil-A Chicken Sandwiches at Home

    How to Make Copycat Chick-fil-A Chicken Sandwiches at Home

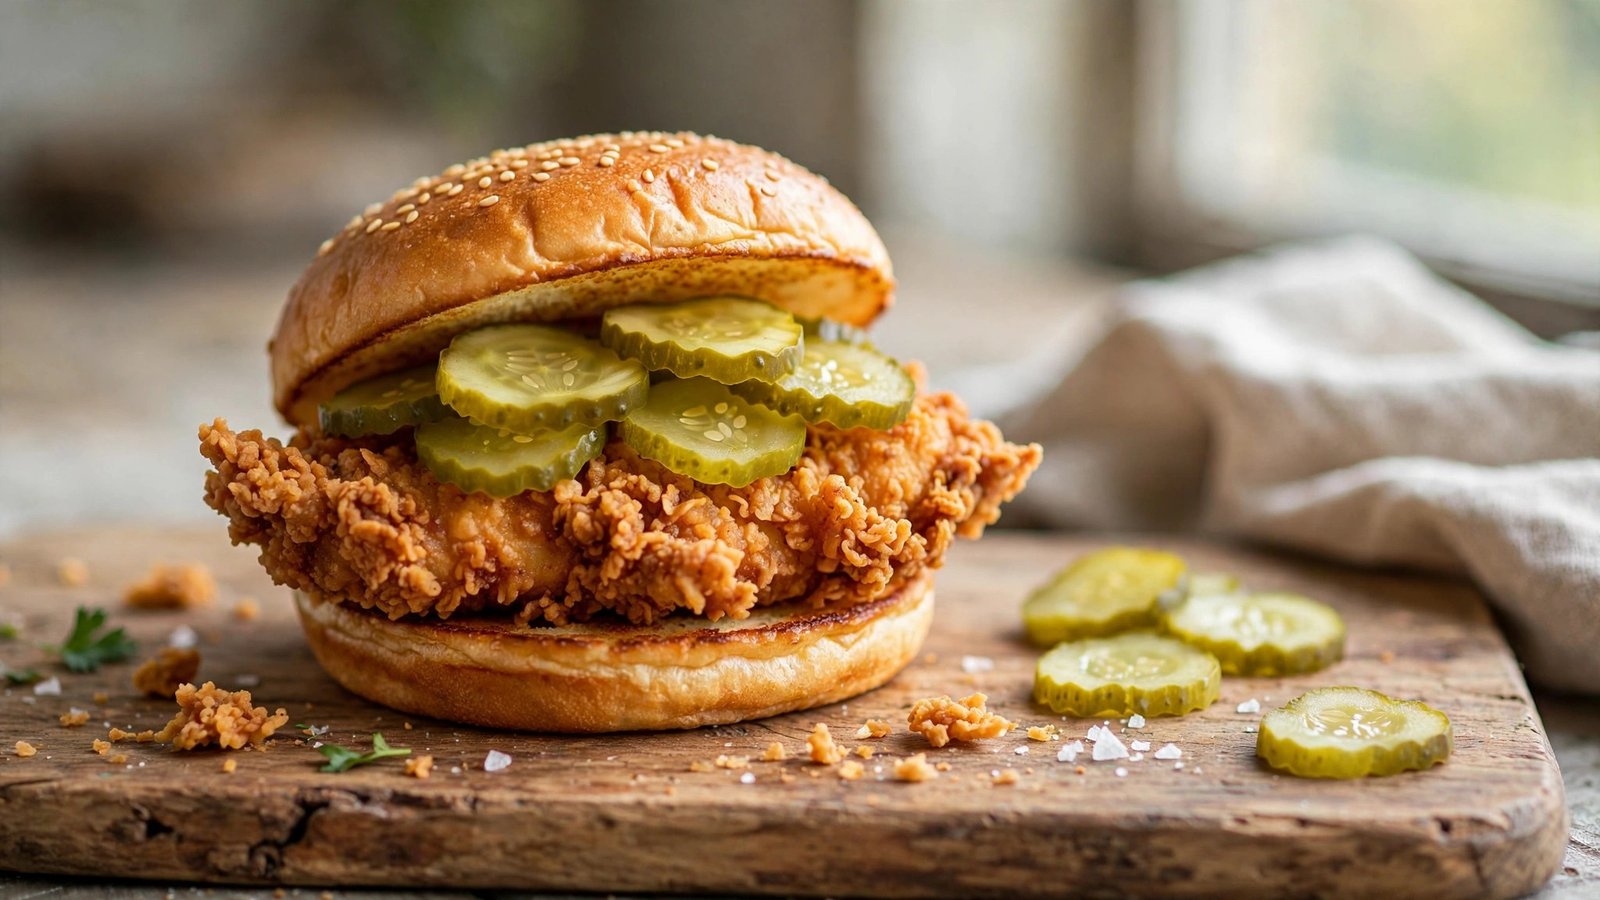
    Every Sunday, Chick-fil-A’s closed doors launch a thousand cravings — and a thousand home attempts at that shatteringly crisp, juicy, pickle-kissed chicken sandwich. The good news is that the sandwich is reverse-engineerable: its magic comes down to four things anyone can replicate, a pickle-juice brine, a seasoned flour dredge, a quick double-coating, and a hot peanut-oil fry. Nail those four and your homemade version will stand shoulder to shoulder with the drive-thru original. Here is the full method, with the details that separate a good copycat from a great one.

    The Pickle Brine: The Non-Negotiable First Step

    The signature tang in every bite starts long before the fryer. Submerge your chicken breasts in dill pickle juice — straight from the jar — for at least four hours, or overnight in the refrigerator. The acidic brine does two things: it seasons the meat all the way through, and it begins to tenderize the protein so the finished chicken stays juicy. Use thin-cut chicken breasts or pound thicker ones to an even half-inch thickness so they cook through quickly without drying out; uneven breasts are the top reason homemade versions come out dry in the middle or raw near the bone-side. If you are out of pickle juice, a brine of water, salt, sugar, and a splash of vinegar works, but real pickle juice is the authentic flavor — save the juice from every pickle jar from now on.

    The Egg Wash With a Secret

    After brining, pat the chicken dry and dip it in an egg wash — one beaten egg thinned with a tablespoon or two of milk. Here is the detail most copycat recipes miss: whisk a splash of the pickle juice into the egg wash too. It reinforces that background tang and helps the breading cling. Some dedicated copycats also add a teaspoon of the dry seasoning mix to the egg wash, which layers flavor into the coating rather than leaving it all in the outer crust. Let the excess drip off for a few seconds; a thick, gloppy egg layer makes the breading slide off in the fryer.

    The Seasoned Flour Dredge

    The breading is seasoned flour, and the seasoning blend is where you tune the flavor. Start with all-purpose flour and add paprika (for color and warmth), garlic powder, onion powder, salt, black pepper, and a pinch of cayenne for background heat. The much-discussed “secret” ingredient in many copycat circles is a small amount of powdered sugar — it aids browning and adds the faint sweetness people detect in the original. Dredge each brined, egg-washed breast thoroughly, pressing the flour on firmly, then — and this is the crunch multiplier — dip it back in the egg wash and dredge a second time. That double coating builds the craggy, extra-crispy crust. Let the coated chicken rest on a rack for ten to fifteen minutes before frying; the resting step hydrates the flour so the coating adheres instead of falling off in the oil.

    The Fry: Peanut Oil at the Right Temperature

    Chick-fil-A famously cooks in peanut oil, and it matters: peanut oil has a high smoke point and a clean, neutral flavor that lets the chicken shine. Heat about an inch and a half of peanut oil in a heavy skillet or Dutch oven to 350°F — use a thermometer, because temperature is everything here. Too cool and the coating absorbs oil and turns greasy; too hot and the crust burns before the interior cooks. Fry the breasts for three to four minutes per side until deeply golden and the internal temperature hits 165°F. Do not crowd the pan — frying more than two breasts at once drops the oil temperature and steams the coating instead of crisping it. Drain on a wire rack set over a sheet pan, not on paper towels, which trap steam and soften the crust you just built.

    The Assembly: Simplicity Is the Point

    The original sandwich is almost aggressively simple: a toasted, buttered bun, two dill pickle chips, and the chicken breast. That is it — no lettuce, no tomato, no sauce. Toast the buns in butter until golden, which adds richness and a barrier against sogginess. Use crinkle-cut dill pickle chips for authenticity, placed directly on the bottom bun so their brine kisses the chicken. If you want the spicy version, add cayenne and a touch of extra paprika to the dredge rather than adding hot sauce — the heat should live in the crust. Serve immediately; a fried chicken sandwich waits for no one, and the crust is at its peak in the first ten minutes out of the oil. Serious Eats’ fried chicken sandwich method validates the double-dredge and resting technique for maximum crunch.

    Make-Ahead and Reheating Tips

    Brine the chicken up to 24 hours ahead — longer than that and the acid starts to make the texture mushy. You can also bread the chicken, rest it, and refrigerate the coated breasts on a rack for a few hours before frying; some cooks swear the chilled coating fries up even crispier. Leftovers reheat best in a 400°F oven or air fryer for eight to ten minutes, which re-crisps the coating — the microwave turns it rubbery and should be avoided. Cooked chicken keeps three to four days refrigerated, per FoodSafety.gov storage guidelines, and the brined raw chicken should be cooked within two days.

    The copycat formula is four steps: pickle-juice brine for tang and juiciness, seasoned double-dredge flour for the craggy crust, peanut oil at 350°F for the fry, and a buttered bun with pickle chips for assembly. Rest the coating before frying and drain on a rack, not paper towels.

    Conclusion

    A great copycat Chick-fil-A sandwich is not about one secret ingredient — it is about executing four simple steps well. Brine in pickle juice, double-dredge in seasoned flour with a rest, fry in 350°F peanut oil to 165°F internal, and assemble on a buttered toasted bun with dill pickle chips. Master that sequence and Sundays will never feel like a deprivation again. For more restaurant copycats and kitchen guides, explore our food section, meet the team, or send us your recipe requests.

    Frequently Asked Questions

    How long should I brine chicken in pickle juice?

    At least 4 hours, ideally overnight (8–12 hours), refrigerated. Do not go past 24 hours — the acid will start breaking down the meat’s texture and turn it mushy instead of juicy.

    Can I use an air fryer instead of deep frying?

    You can, but the crust will not be identical. Spray the breaded chicken generously with oil and air fry at 400°F for about 12–15 minutes, flipping halfway. The coating crisps well but lacks the deep, even crunch of a true peanut-oil fry.

    What oil is best for frying the copycat sandwich?

    Peanut oil, matching the original — high smoke point, neutral flavor. If peanut allergies are a concern, refined canola or vegetable oil works; avoid olive oil, whose low smoke point and strong flavor do not suit this fry.

    Why does my breading fall off in the fryer?

    Three usual causes: the chicken was too wet going into the flour, you skipped the 10–15 minute resting step that hydrates the coating, or the oil was not hot enough (below 325°F), which steams the crust loose instead of setting it fast.

    Can I make the spicy version at home?

    Yes — add extra cayenne pepper and paprika to the flour dredge so the heat lives in the crust, the way the original does. Start with a teaspoon of cayenne per cup of flour and adjust to your heat tolerance.

  • Why Your Bread Machine Loaf Collapses in the Middle

    Why Your Bread Machine Loaf Collapses in the Middle

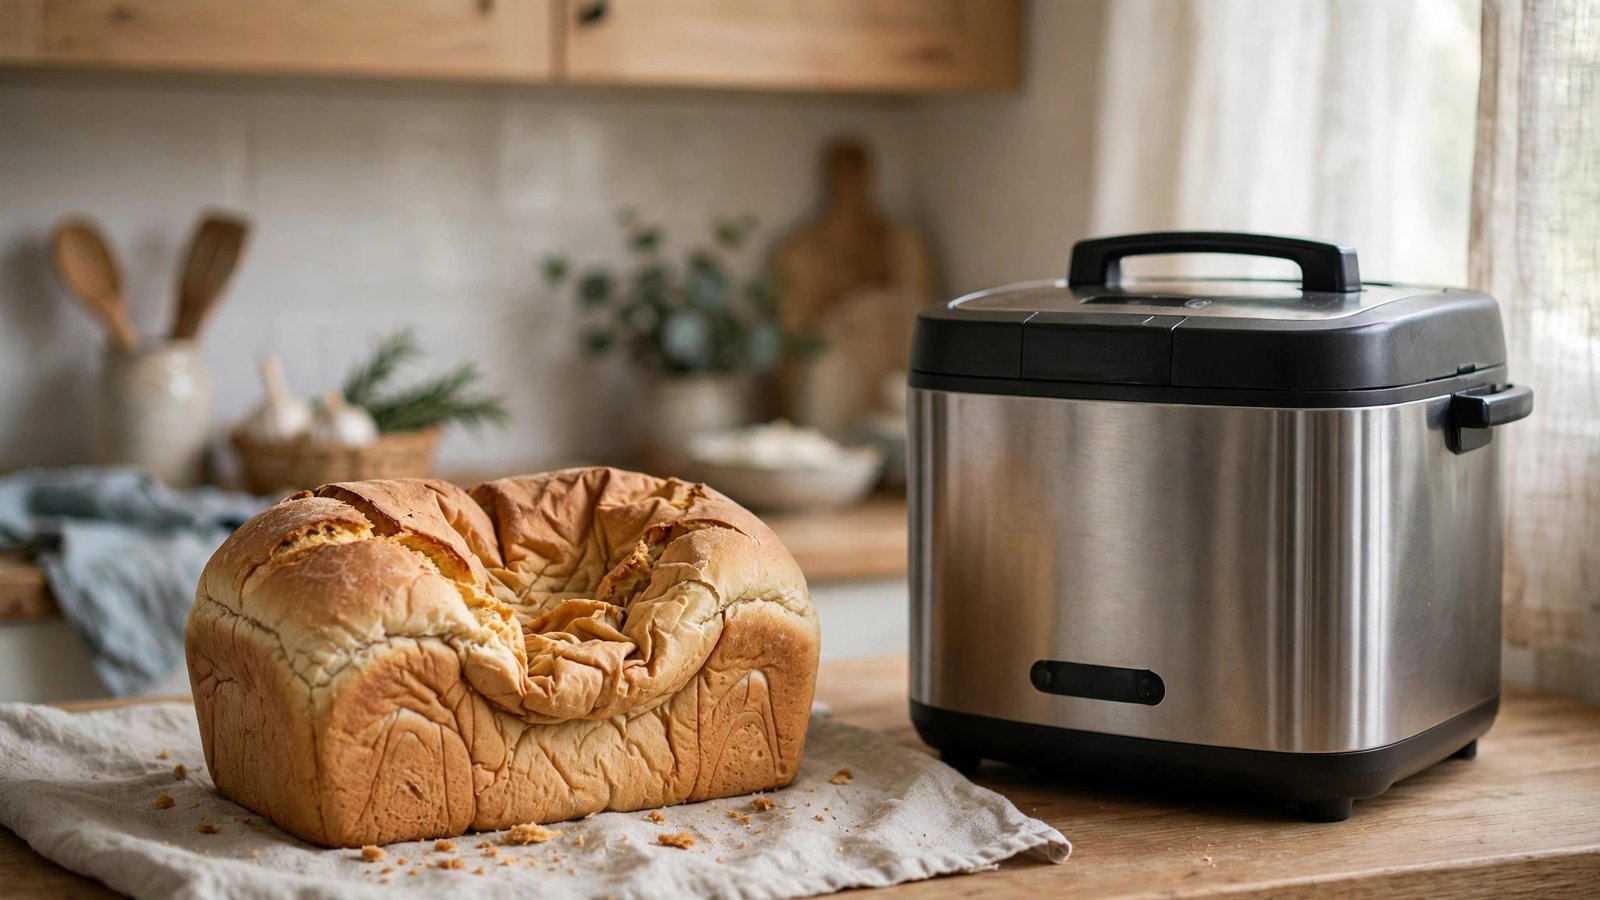
    There is a special heartbreak in opening your bread machine after the full cycle to find a loaf with a crater in the middle — risen proudly, then caved in like a failed soufflé. The collapsed top is the single most common bread machine complaint, and it is almost never the machine’s fault. A sunken loaf is the machine telling you something about your formula: too much yeast, too much liquid, too little structural strength in the flour, or a rise that outran the bake. Here is how to read the crater and fix it for good.

    Too Much Yeast Is the Number One Cause

    The classic collapsed loaf rises beautifully and then falls — which is exactly what over-yeasted dough does. Excess yeast produces more gas than the gluten structure can hold, so the dome inflates, overextends, and collapses under its own weight, often during the bake. If your recipe calls for a full tablespoon of yeast for a one-and-a-half-pound loaf, that is likely too much; most bread machine recipes do best with two to two-and-a-quarter teaspoons. Cut the yeast by a quarter teaspoon at a time until the loaf holds its dome. Also check your yeast’s freshness: proof a teaspoon in warm water with a pinch of sugar — if it does not foam within ten minutes, it is dead, and dead yeast causes the opposite problem (a brick). But old, half-active yeast can also behave unpredictably, so when in doubt, open a fresh jar.

    Too Much Liquid Weakens the Structure

    Dough that is too wet cannot support itself. If your dough looks like thick batter rather than a soft, tacky ball during the knead cycle, there is too much liquid — and a wet dough rises fast and collapses faster. The fix is simple: hold back two tablespoons of the recipe’s liquid, then watch the dough during the first knead. It should form a smooth ball that pulls away from the sides of the pan but still sticks slightly to the bottom. If it is shaggy and sticking everywhere, add flour a tablespoon at a time. If it is stiff and the machine is straining, add water a teaspoon at a time. Measuring flour correctly matters enormously here: spoon flour into the measuring cup and level it off rather than scooping, which can pack in 20 to 30 percent extra. A kitchen scale is even better — King Arthur Baking’s flour measuring guide shows why weight beats volume for consistent loaves.

    Weak Flour Cannot Hold the Rise

    Bread flour contains more protein (typically 12 to 14 percent) than all-purpose flour, and that protein becomes the gluten network that traps gas and holds the loaf’s shape. If you are using all-purpose flour in a bread machine, switching to bread flour alone may fix your collapse — the stronger gluten simply holds up better. Whole wheat flour is even trickier: the bran particles cut through gluten strands, which is why 100-percent whole wheat loaves are dense and prone to sinking. For whole grain loaves, add a tablespoon of vital wheat gluten per cup of flour to reinforce the structure. Salt matters too — it tightens gluten and regulates yeast activity. Never omit the salt, and keep it away from direct contact with the yeast when layering ingredients (liquids first, then dry, yeast last on top).

    Too Much Sugar or Fat Overstimulates the Yeast

    Sugar feeds yeast, which sounds helpful until the yeast party gets out of control. Recipes heavy on sugar or honey ferment fast and hard, producing a rapid rise followed by the familiar crater. The same goes for very rich doughs loaded with butter or oil beyond what the recipe intends. If your sweet bread keeps collapsing, reduce the sugar by a tablespoon or two — you will barely taste the difference, but the yeast will behave. This is also why doughs with added fruits or sweet mix-ins sometimes sink: the extra sugars join the feast.

    The Machine’s Own Settings Can Contribute

    Sometimes the formula is fine and the cycle is the problem. A loaf that rises perfectly but collapses right as baking starts may be facing too long a rise time for the dough — try the shorter or “quick” cycle, which gives the yeast less time to overinflate. Opening the lid during the rise lets heat escape and can cause a partial collapse, so resist peeking after the kneading stops. Altitude matters as well: above about 3,000 feet, lower air pressure lets dough rise faster and higher, so high-altitude bakers typically need less yeast and slightly more liquid. And check your machine’s size rating — baking a one-pound recipe’s worth of dough on a two-pound setting can produce odd rise behavior.

    Diagnosing by the Crater

    The shape of the collapse is a clue. A loaf that rose high and then sank in the center with a wrinkled, pale top is the classic over-risen signature — cut yeast or liquid. A loaf that never rose much and has a dense, sunken top likely had dead yeast or too-cool liquid that never activated the yeast properly (liquids should be lukewarm, about 80°F — hot liquid kills yeast). A loaf with a sunken top and a gummy, underbaked line just beneath the crust may be underbaked — try the darker crust setting or check that the machine’s heating element is working evenly. Keep notes on each bake: yeast amount, flour type, and result. Bread machine baking rewards the scientific method, and two or three adjusted bakes usually nail it. For deeper dives into the fermentation science behind these fixes, Serious Eats’ baking guides explain the why alongside the how.

    A collapsed bread machine loaf almost always means the rise outran the structure: too much yeast, too much liquid, or flour too weak to hold the gas. Reduce yeast a quarter teaspoon at a time, check your dough ball during kneading, and switch to bread flour.

    Conclusion

    A sunken bread machine loaf is a formula problem with a formula fix. Start by cutting the yeast slightly, verify your liquid by watching the dough ball form during the knead, switch to bread flour for stronger gluten, keep sugar in check, and avoid opening the lid during the rise. Adjust one variable at a time, keep notes, and your third or fourth loaf will come out with the proud, even dome you were promised. For more baking troubleshooting and kitchen guides, explore our food section, meet the team, or send us your baking questions.

    Frequently Asked Questions

    How much yeast should I use in a bread machine?

    For a standard 1.5-pound loaf, 2 to 2¼ teaspoons of bread machine or instant yeast is the sweet spot. A full tablespoon is often too much and causes the rise-then-collapse pattern. Reduce by ¼ teaspoon increments until the dome holds.

    Can I use all-purpose flour in a bread machine?

    Yes, but bread flour works better — its higher protein content builds stronger gluten that holds the loaf’s shape. If your all-purpose loaves keep collapsing, switching to bread flour is the single easiest fix.

    Why does my bread machine loaf have a dense layer at the bottom?

    A dense bottom layer usually means too much flour or too little liquid — the kneading blade could not fully incorporate the dry ingredients. Watch the dough ball during the first knead and add liquid a teaspoon at a time until it forms a soft, tacky ball.

    Should I open the bread machine lid to check the dough?

    Checking during the knead cycle is fine and even recommended, so you can adjust flour or liquid. But do not open the lid during the rise or bake cycles — the escaping heat can cause the loaf to collapse.

    Does altitude affect bread machine baking?

    Yes. Above about 3,000 feet, lower air pressure makes dough rise faster and higher, increasing collapse risk. High-altitude bakers typically reduce yeast by about ¼ teaspoon per loaf and add slightly more liquid. Adjust gradually and keep notes.

  • How to Keep Kitchen Knives Sharp Without a Whetstone

    How to Keep Kitchen Knives Sharp Without a Whetstone

    A whetstone is the gold standard for sharpening knives, but it is far from the only way to keep a working edge. Most home kitchens lose sharpness not because they lack stones, but because the edge folds over with use and nobody straightens it back — and straightening a rolled edge requires no stone at all. Between honing, pull-through sharpeners, stropping, and a few household tricks, you can keep your knives genuinely sharp for years without ever soaking a stone. Here is what actually works, in order of usefulness.

    First, Know the Difference: Honing vs. Sharpening

    This distinction explains most knife confusion. Honing straightens the microscopic edge of a blade that has folded over during cutting — it does not remove metal. Sharpening grinds away metal to create a brand-new edge. A knife that has gone slightly dull from regular use usually just needs honing; a knife that cannot cut a tomato even after honing needs actual sharpening. If you hone regularly — every few uses — you will need true sharpening far less often. Most “dull” home knives are simply un-honed, which is great news because honing is fast, easy, and stone-free.

    The Honing Rod: Your Daily Driver

    That long steel rod that came with your knife set is not a sharpener — it is a honing steel, and used correctly it is the single most valuable stone-free tool you own. Hold the rod vertically with the tip planted firmly on a folded towel on the counter. Place the heel of the knife against the top of the rod at about a 15- to 20-degree angle, then sweep the blade down and across as if slicing a thin layer off the rod, heel to tip. Repeat five or six times per side, alternating sides, using light pressure — you are straightening the edge, not grinding it. Serious Eats’ honing guide demonstrates the angle and motion clearly. Do this every few cooking sessions and your knives will stay noticeably sharper with almost no effort. Ceramic honing rods work the same way and are slightly more abrasive, giving a bit of actual sharpening along with the honing.

    Pull-Through Sharpeners: The Easy Button

    Handheld pull-through sharpeners — the kind with crossed carbide or ceramic wheels in a plastic housing — genuinely sharpen by removing a small amount of metal. They are not as precise as a stone and they remove more metal than necessary, which shortens a knife’s lifespan over many years, but for a busy home cook they are fast, foolproof, and dramatically better than a dull knife. Draw the blade through the coarse slot three to five times, then the fine or ceramic slot five to eight times, pulling heel to tip with steady, moderate pressure. Keep the blade vertical and let the tool set the angle. These cost under twenty dollars and live in a drawer — no soaking, no mess, no skill curve.

    The Ceramic Mug Trick (It Really Works)

    Flip over a ceramic coffee mug and look at the unglazed ring on the bottom — that rough ceramic is effectively a small sharpening stone, around the equivalent of a medium-coarse grit. Place the mug upside down on a towel, hold your knife at roughly 20 degrees to the ring, and draw the blade across it heel to tip, a dozen strokes per side with light, even pressure. It will not reprofile a damaged edge, but it puts a serviceable working edge on a dulled knife in a pinch. This is the trick to remember at a vacation rental or a friend’s house with a drawer full of dull knives. Any unglazed ceramic works — the bottom of a plate, a broken tile, even the unglazed rim of a terracotta pot.

    Stropping: The Barber’s Secret for Kitchen Knives

    Stropping — dragging the blade backward across leather — is the final step in traditional sharpening, and it works beautifully as standalone maintenance. You do not need a fancy paddle strop: a leather belt nailed to a board, or even a strip of cardboard or denim, does the job. Lay the blade flat against the strop, then pull it backward (edge trailing, never edge-first or you will cut the strop) with light pressure, a dozen strokes per side. Stropping polishes away the microscopic burr left by sharpening and aligns the very apex of the edge. Knives finished with a strop slice noticeably cleaner. Old jeans stretched over a cutting board make a perfectly good improvised strop.

    Habits That Keep Knives Sharp Longer

    The best sharpening strategy is needing it less often. Cut on wood or soft plastic boards — glass, granite, ceramic plates, and stainless counters destroy edges on contact. Never put good knives in the dishwasher: the harsh detergent dulls edges, the heat damages handles, and blades rattle against everything inside. Hand wash and dry immediately. Store knives on a magnetic strip or in blade guards, not loose in a drawer where edges bang against other metal. And use the right knife for the job — prying open cans or cutting frozen food with a chef’s knife is how edges get chipped. Wüsthof’s knife care guidance echoes these fundamentals: proper cutting surfaces and hand washing extend edge life dramatically.

    When You Actually Need a Professional

    Some damage is beyond home methods: chips in the edge, a broken tip, a blade that has been sharpened so many times the profile is wrong, or a knife so dull it will not bite into a tomato skin even after honing and pull-through sharpening. For these, a professional sharpening service — many farmers’ markets, kitchen stores, and mail-in services offer it for a few dollars per knife — restores the edge properly without you buying stones or learning technique. Think of it like an oil change: routine maintenance you do yourself, major service you outsource once a year or two.

    Most dull home knives do not need a whetstone — they need honing. A steel rod used every few cooking sessions, plus a pull-through sharpener for real touch-ups and good habits (wood boards, hand washing, proper storage), keeps edges sharp indefinitely.

    Conclusion

    You can absolutely keep kitchen knives sharp without a whetstone. Hone regularly with a steel or ceramic rod to straighten the edge, use a pull-through sharpener when honing no longer restores the bite, strop on leather or denim for a polished finish, and remember the ceramic mug trick for emergencies. Protect the edge with wood or plastic boards, hand washing, and proper storage, and send genuinely damaged blades to a professional once in a while. For more practical kitchen skills, explore our food guides, meet the team, or send us your cooking questions.

    Frequently Asked Questions

    Does a honing steel actually sharpen a knife?

    Not exactly — honing straightens a rolled microscopic edge without removing metal, which restores cutting performance on a knife dulled by normal use. True sharpening removes metal to create a new edge. Hone often; sharpen only when honing stops working.

    How often should I hone my kitchen knives?

    Every few uses for knives you cook with regularly — it takes under a minute. Professional chefs hone before nearly every task. If you wait until the knife is truly dull, honing alone will not bring it back and you will need actual sharpening.

    Are pull-through sharpeners bad for knives?

    They remove more metal than a whetstone and offer less angle control, so they can shorten a knife’s lifespan over many years of heavy use. But they are fast, consistent, and far better than cooking with a dull knife — a reasonable trade for most home cooks.

    What angle should I hold the knife when honing?

    About 15 to 20 degrees from the rod — roughly the thickness of two stacked quarters between the blade’s spine and the steel. Consistency matters more than exactness; pick an angle and repeat it on every stroke.

    Can I sharpen serrated knives without a whetstone?

    Serrated knives need a tapered diamond rod worked through each serration individually — pull-through sharpeners and flat honing steels do not fit the scallops. Many people simply replace inexpensive serrated knives when they dull, since professional serrated sharpening is cheap.

  • Best Time to Pick Tomatoes for Maximum Flavor

    Best Time to Pick Tomatoes for Maximum Flavor

    The difference between a tomato picked at the perfect moment and one picked a day too early is the difference between summer in your mouth and a red water balloon. Tomatoes develop their full flavor — the sugars, the acids, and the hundreds of aromatic compounds that make a homegrown tomato taste like anything at all — only in the final stretch of ripening. Pick too early and the fruit never quite catches up; pick too late and it turns mealy. Here is how to read your tomatoes like a farmer and harvest each one at its absolute peak.

    What “Ripe” Actually Looks Like

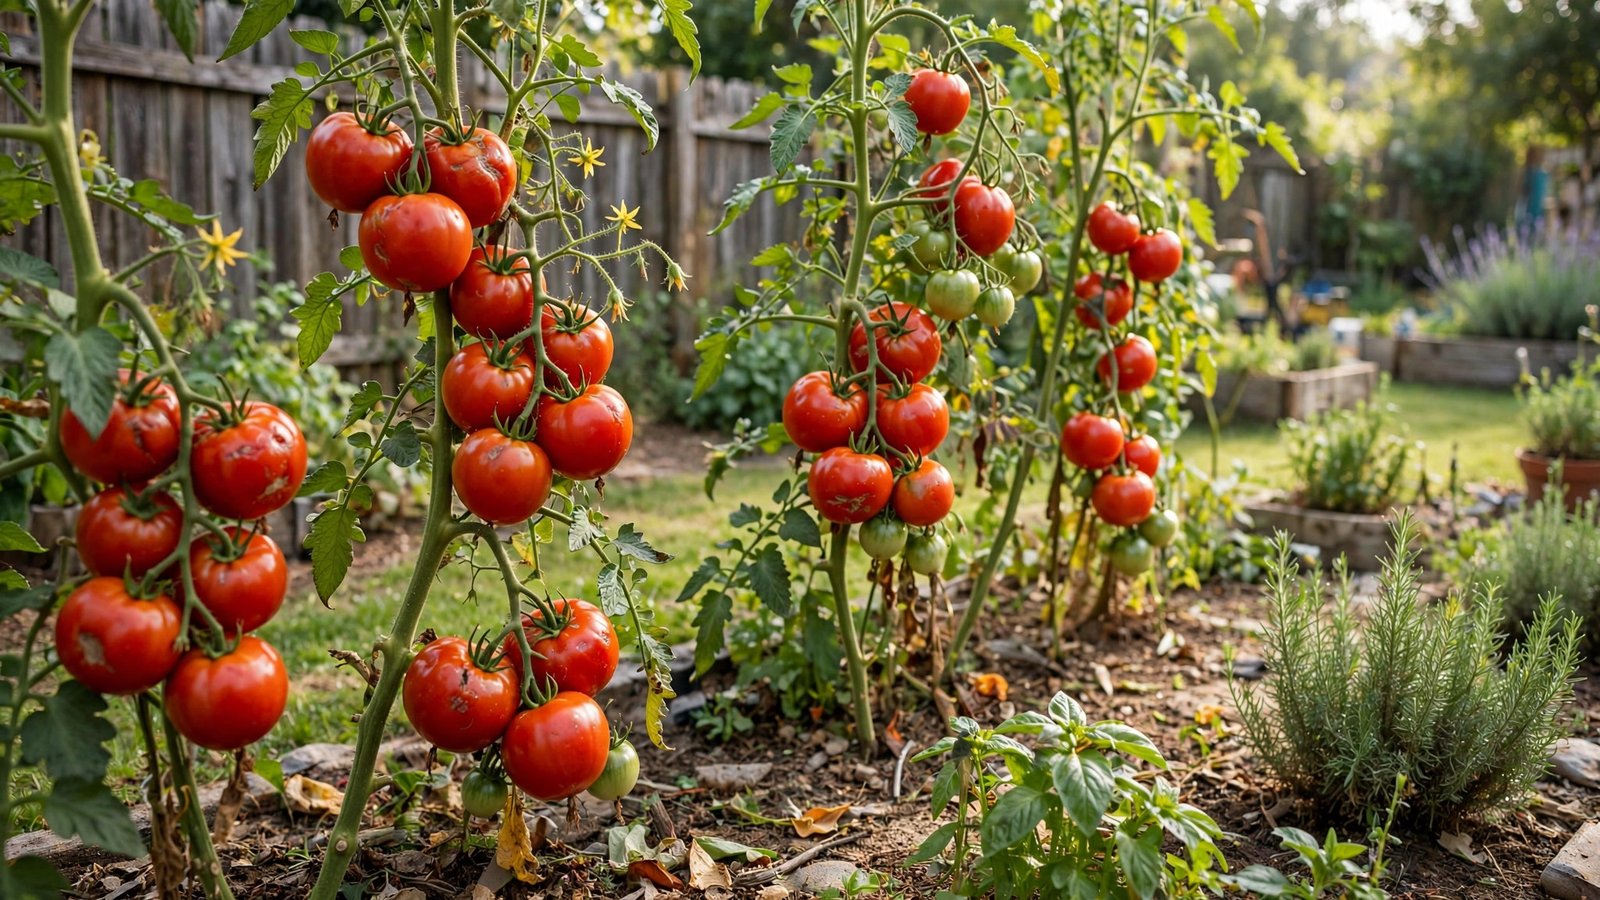
    A tomato at peak flavor gives you three signals at once: color, feel, and smell. Color should be full and even for the variety — deep red for a Beefsteak, golden for a Yellow Pear, nearly black-purple for a Cherokee Purple. Check the shoulders near the stem, which ripen last; if they are still green, give it another day or two. Feel matters just as much: the fruit should yield slightly to gentle pressure, like the fleshy part of your palm below the thumb. Rock-hard means unripe; mushy means overripe. And smell the stem end — a ripe tomato releases a strong, sweet, earthy tomato-leaf fragrance. No smell usually means not ready, no matter what the color says.

    The Breaker Stage: Your Insurance Policy

    Commercial growers pick tomatoes at the “breaker stage” — when the first blush of color appears — and ripen them with ethylene gas. Home gardeners can do better, but the breaker stage is still useful knowledge: a tomato picked at first blush and ripened indoors at room temperature will develop decent flavor, roughly 80 to 90 percent of vine-ripened quality. Why does this matter? Because a tomato left fully ripening on the vine is a sitting duck for birds, squirrels, cracking after rain, and blossom-end pests. Many experienced gardeners pick at breaker stage or just past it — full color developing but still firm — and finish ripening on the kitchen counter. You dodge the pests and lose only a whisper of flavor. For peak eating, let cherry tomatoes go fully vine-ripe (birds bother them less); for big slicers in pest-heavy areas, breaker-plus is the smart play.

    Pick in the Morning for the Best Flavor

    Time of day genuinely affects taste. Tomatoes accumulate sugars during the day through photosynthesis, but they also lose moisture and aromatic compounds in afternoon heat. Picking in the cool morning — after the dew dries but before the sun gets strong — captures the fruit at its most flavorful and firmest. Afternoon-picked tomatoes, especially on scorching days, can taste comparatively flat. This is one of those small habits that separates good garden tomatoes from unforgettable ones, and it costs nothing. Bring a shallow basket or bowl rather than a deep bucket so the bottom fruits do not get crushed.

    Water Less Before Harvest

    Here is the counterintuitive trick behind intensely flavored tomatoes: mild water stress concentrates everything good. A tomato plant that gets slightly less water in the final days before harvest produces fruit with higher sugar and acid concentration — more flavor per bite. Overwatered tomatoes, especially after a heavy rain, taste diluted and are more prone to splitting. Ease off watering a few days before you plan a big harvest, and always harvest before a forecasted downpour if the fruits are near ripe — that sudden gulp of water is what cracks skins. University of Minnesota Extension’s tomato growing guide covers watering practices that balance plant health with fruit quality.

    Ripening Indoors the Right Way

    Sometimes you must pick early — an early frost is coming, or pests found your patch. To ripen indoors, keep tomatoes at room temperature, stem-side down, out of direct sunlight (sunlight heats unevenly and can cause blotchy ripening). A paper bag with a ripe banana or apple speeds things along: those fruits release ethylene gas, the natural ripening hormone. Check daily and pull each tomato as it reaches full color and slight give. What you should never do is refrigerate unripe tomatoes — cold below about 50°F permanently damages the flavor-producing enzymes, and no amount of counter time afterward fully restores them. The Cornell food science research on tomato flavor has shown that chilling injury to fresh tomatoes is irreversible, which is why the fridge is flavor’s enemy.

    Handle the Harvest Gently

    A perfectly timed tomato can be ruined in the basket. Twist or snip the fruit with a bit of stem attached rather than yanking, which can tear the plant. Do not stack them deep — the weight bruises the bottom layer, and bruises turn to rot spots within a day or two. At the peak of season, harvest daily or every other day; a tomato can go from perfect to overripe in 48 hours of hot weather. And taste as you go. The single best ripeness indicator ever invented is your own mouth — sample one from each plant when you think they are ready, and calibrate from there.

    End of Season: Do Not Waste the Green Ones

    When frost threatens, strip every tomato with a hint of size — even fully green ones. Mature green tomatoes (full-sized, with a waxy sheen) will ripen indoors over one to three weeks if kept at 65 to 70°F; wrap them individually in newspaper and check weekly, removing any that soften or spot. Truly immature tiny ones will not ripen, but they make excellent fried green tomatoes, green tomato salsa, or chow-chow relish. A frost deadline is not the end of your harvest — it is just a change of venue.

    Peak tomato flavor lives in a narrow window: full variety color, slight give under gentle pressure, and a strong sweet fragrance at the stem. Pick in the cool morning, ease off water before harvest, and never refrigerate a tomato you plan to eat fresh.

    Conclusion

    Maximum tomato flavor is not luck — it is timing. Watch for full color, test the gentle give, smell the stem end, and pick in the morning after easing off the water. Use the breaker stage as your pest insurance, ripen early picks at room temperature with a banana nearby, and keep every fresh-eating tomato far from the refrigerator. Do this consistently and your harvest will taste like the reason you planted in the first place. For more garden and kitchen guidance, browse our food section, meet the team, or send us your gardening questions.

    Frequently Asked Questions

    Should I pick tomatoes when they first turn red or wait?

    Wait until the color is full and even for the variety, the fruit yields slightly to gentle pressure, and the stem end smells sweet and tomatoey. Picking at first blush is fine if pests are a problem — the tomato will ripen indoors to about 80–90% of vine-ripened flavor.

    Why do my homegrown tomatoes taste bland?

    Common causes: picking too early, overwatering near harvest (which dilutes sugars), refrigerating fresh tomatoes (cold permanently damages flavor enzymes), or a variety bred for shipping rather than taste. Pick at full ripeness in the morning and ease off water before harvest.

    Can tomatoes ripen after picking?

    Yes, if picked at the breaker stage (first blush of color) or later. Ripen at room temperature, stem-side down, optionally in a paper bag with a banana to supply ethylene. Fully green, immature tomatoes generally will not ripen properly indoors.

    Why do my tomatoes crack near the stem?

    Cracking comes from sudden water uptake — typically a heavy rain or deep watering after a dry spell — when fruits are near ripe. Harvest before forecasted rain, water consistently rather than in bursts, and pick cracking-prone varieties slightly early to finish indoors.

    Should I store ripe tomatoes in the refrigerator?

    No, not if you plan to eat them fresh. Temperatures below about 50°F destroy the enzymes that create tomato flavor, and the damage is irreversible. Keep ripe tomatoes at room temperature and eat within a few days. Only refrigerate to prevent spoilage once fully ripe, and accept some flavor loss.

  • How to Make Homemade Yogurt Without a Yogurt Maker

    How to Make Homemade Yogurt Without a Yogurt Maker

    You do not need a yogurt maker to make genuinely good homemade yogurt. A yogurt maker is just an insulated box that holds milk at a warm temperature for several hours — and your oven, a cooler, or even a slow cooker can do exactly the same thing. What yogurt actually requires is simple: milk, a live-culture starter, and a steady warm environment around 110°F for four to eight hours. Get those three things right and you will pull thick, tangy, creamy yogurt out of your own kitchen for a fraction of the store price, with no single-use appliance taking up counter space.

    What You Actually Need

    The ingredient list is wonderfully short. You need milk — whole milk makes the creamiest yogurt, but 2%, 1%, and skim all work with slightly thinner results. You need a starter: two to three tablespoons of plain yogurt with live active cultures, either from a previous homemade batch or a small container of good store-bought plain yogurt (check the label for “live and active cultures”). And you need a thermometer — a basic instant-read kitchen thermometer is non-negotiable, because the temperatures below genuinely matter. Beyond that: a heavy pot, a whisk, clean jars with lids, and your chosen warm spot. That is the whole equipment list.

    The Base Method, Step by Step

    Start with a half gallon of milk in a heavy-bottomed pot. Heat it gently, stirring occasionally, until it reaches 180°F. This step denatures the milk proteins, which is what gives the finished yogurt a thick, custardy body instead of a thin, drinkable texture — do not skip it, even though some shortcuts suggest you can. Then cool the milk down to 110°F. You can speed this along with an ice bath in the sink; just stir and watch the thermometer, because overshooting below 100°F means sluggish fermentation and overheating past 120°F will kill your starter cultures.

    Once the milk hits 110°F, whisk in your starter until fully dissolved — temper it first by stirring the starter with a ladleful of the warm milk, then whisk that mixture back into the pot. Pour into clean jars, cap them loosely, and move them to your warm spot. That is the entire active process: about twenty minutes of hands-on time.

    Three Warm Spots That Work Without a Yogurt Maker

    Now the incubation — four to eight hours of steady warmth between roughly 105°F and 115°F. The oven method is the most popular: heat your oven to its lowest setting for a few minutes, turn it off, then place the jars inside with the oven light left on. The light bulb generates just enough heat to hold the temperature. Wrap the jars in a towel for extra insulation. Check with your thermometer that the oven interior sits near 110°F before committing.

    The cooler method is even more reliable: place the jars in a small insulated cooler, fill the empty space with towels, and add a couple of jars of hot (not boiling) water. Close the lid and leave it alone — a good cooler holds temperature for hours. The slow-cooker method works too: heat the empty cooker on low for about 30 minutes, turn it off, wrap your jars in towels inside it, and put the lid on. Some slow cookers run hot, so verify with the thermometer first. Whichever method you choose, do not jostle or stir the jars during incubation — agitation breaks the delicate protein network as it forms and thins the final yogurt.

    The Temperatures That Make or Break It

    Yogurt-making is really temperature management wearing an apron. Heat the milk to 180°F to thicken it. Cool to 110°F before adding cultures. Incubate between 105°F and 115°F. Above 120°F, the beneficial bacteria die and nothing happens. Below 100°F, fermentation crawls and undesirable bacteria can get a foothold. If your first batch fails, temperature is the culprit nine times out of ten — usually an oven that ran too hot or a cooler that cooled too fast. The Cultures for Health yogurt-making guide walks through these temperature stages with helpful detail for beginners, and the National Center for Home Food Preservation covers safe handling for homemade cultured dairy.

    How Long to Incubate, and How to Tell It Is Done

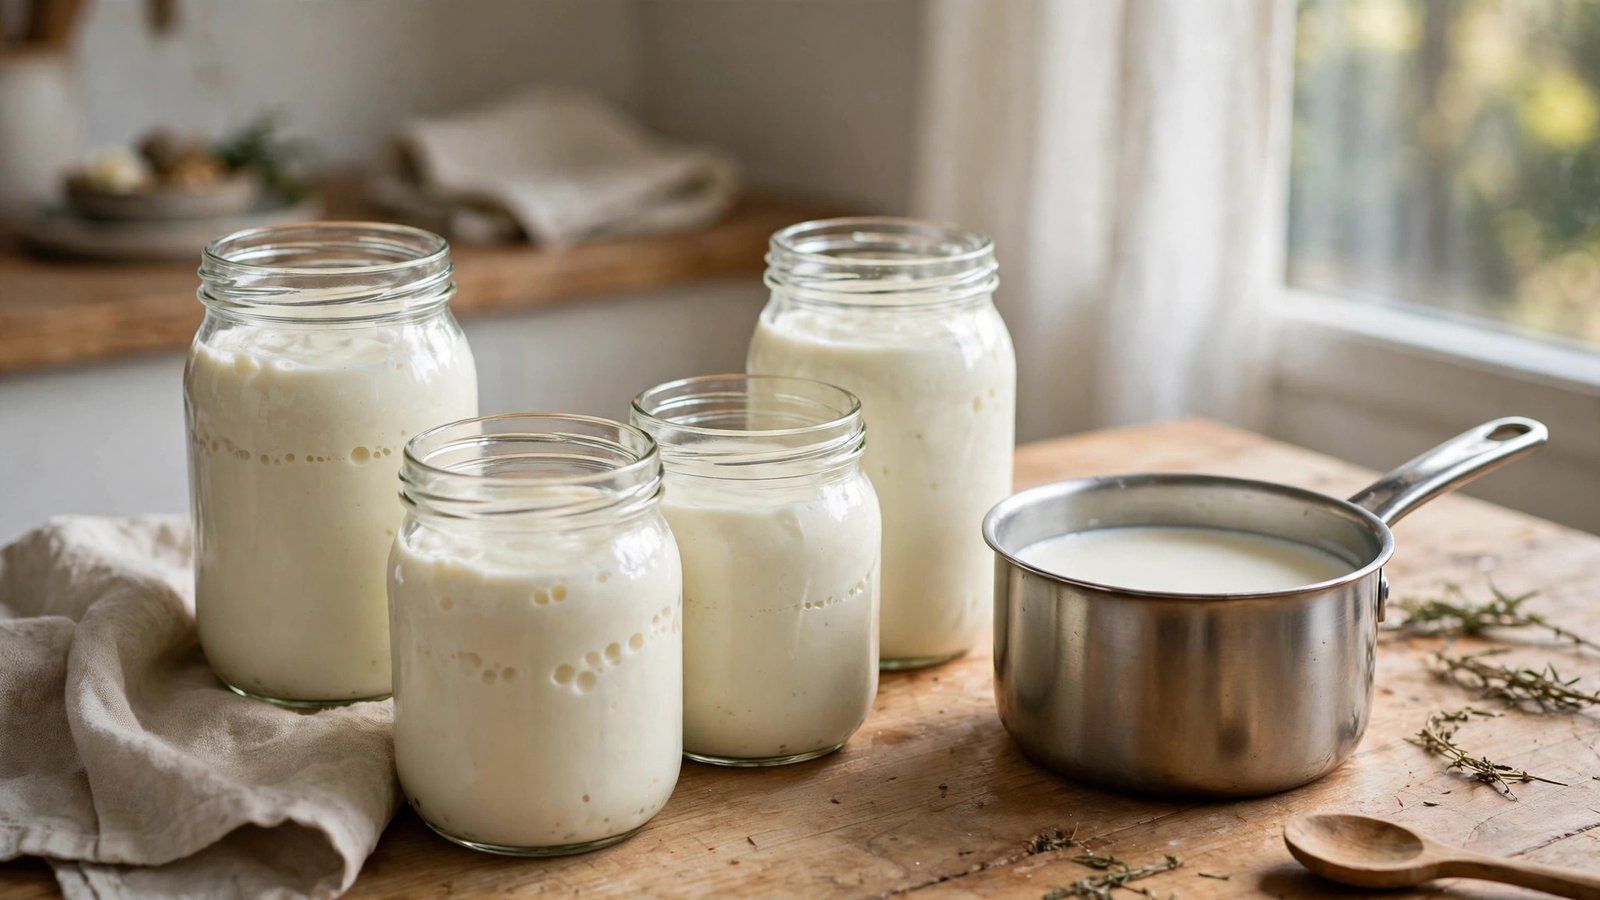
    Time and tanginess are directly linked: four to five hours gives mild, sweet yogurt; seven to eight hours gives pronounced tang. Start checking at four hours by gently tilting a jar — the yogurt should pull away from the sides in a single mass with a little whey (clear liquid) on top. That whey is normal; stir it back in or pour it off. Once it is set, refrigerate the jars for at least six hours before eating — chilling firms the texture dramatically, and yogurt that seems slightly soft at room temperature often sets up perfectly in the fridge. Resist the urge to judge the batch before it has chilled.

    Troubleshooting: When Batches Go Wrong

    Runny yogurt is the most common disappointment, and it usually traces to skipping the 180°F heating step, incubating too cool, or judging before chilling. Next time, heat fully, verify your warm spot with a thermometer, and chill overnight before deciding. Lumpy or grainy yogurt comes from heating the milk too fast or too hot — keep the heat moderate and stir. If the batch did not set at all, your starter was likely dead (old store-bought yogurt loses viable cultures) or the milk was too hot when you added it. A slimy texture occasionally happens with certain starter strains; switching to a different brand of plain yogurt as your starter usually fixes it. None of these failures are dangerous — a batch that did not culture properly is just milk, and you can discard it and try again.

    Making It Thick: The Greek-Style Trick

    If you want thick, spoon-standing Greek-style yogurt, the secret is not a different recipe — it is straining. Line a colander with cheesecloth or a clean flour-sack towel, set it over a bowl, pour in your chilled yogurt, and refrigerate for two to four hours. The whey drains away and what remains is dense, creamy, high-protein Greek-style yogurt. The drained whey is nutritious — use it in smoothies, bread dough, or soups instead of pouring it out. Straining also concentrates the tang, so mild-incubated yogurt strains into the best-tasting thick yogurt.

    Keeping Your Starter Going

    Save two to three tablespoons from each successful batch to start the next one, and you may never buy starter yogurt again. Reculturing works well for about five to seven generations; after that, the culture balance drifts and batches get less reliable, so start fresh with a new store-bought starter. Always use your freshest, best batch as the starter for the next round, and never reculture from a batch that tasted off. Kept refrigerated, your starter portion stays viable for about a week.

    Homemade yogurt without a yogurt maker comes down to three numbers: heat milk to 180°F, cool to 110°F before adding starter, and hold it between 105°F and 115°F for four to eight hours. Your oven with the light on does the holding just fine.

    Conclusion

    Making yogurt without a yogurt maker is one of those kitchen skills that sounds technical and turns out to be mostly waiting. Heat the milk to 180°F, cool it to 110°F, whisk in live-culture starter, and let it sit undisturbed in a warm oven, cooler, or slow cooker until it sets — then chill it overnight. Strain it if you want it thick, save a spoonful to start the next batch, and enjoy yogurt that costs pennies per serving. For more from-scratch kitchen guides and food projects, explore our food section, meet the team, or send us your fermentation questions.

    Frequently Asked Questions

    Can I use any store-bought yogurt as a starter?

    Only plain yogurt labeled “live and active cultures” works as a starter. Flavored, heat-treated, or long-expired yogurts may not contain enough viable bacteria. Greek yogurt with live cultures also works and tends to produce thicker results.

    Why is my homemade yogurt runny?

    The most common causes are skipping the 180°F heating step, incubating below 105°F, or judging the texture before chilling — refrigeration firms yogurt considerably. Use whole milk, verify temperatures with a thermometer, and chill at least six hours before deciding.

    How long does homemade yogurt last in the fridge?

    About one to two weeks in clean, sealed jars at 40°F or below. Some whey separation on top is normal — just stir it back in. Discard it if you see mold, or if it smells yeasty or unpleasant instead of pleasantly tangy.

    Can I make yogurt with non-dairy milk?

    It is trickier. Soy milk cultures most reliably because of its protein content; almond and coconut milks often need added thickeners and produce inconsistent results. Use a starter specifically intended for non-dairy yogurt for the best chance of success.

    Is the whey on top of my yogurt safe?

    Yes — that clear liquid is whey, a normal byproduct of fermentation, rich in protein and probiotics. Stir it back into the yogurt or drain it off for thicker yogurt. Save it for smoothies, soups, or bread dough.

  • What to Do With 10 Pounds of Zucchini From Your Garden

    What to Do With 10 Pounds of Zucchini From Your Garden

    Every zucchini grower knows the moment. You planted two innocent seedlings in May, and by August your kitchen counter is buried under ten pounds of dark green torpedoes — with more coming tomorrow. Zucchini is famously productive, which is a polite way of saying one healthy plant can outproduce your entire family’s appetite. Before you start leaving anonymous bags on neighbors’ porches, know this: ten pounds of zucchini is not a problem, it is a pantry opportunity. Here is how to eat it, freeze it, bake it, and share it before a single squash goes soft.

    First, Harvest Smarter to Slow the Flood

    Most zucchini gluts are a harvesting problem, not a growing problem. Zucchini tastes best — and stays tender — when picked young, at six to eight inches long. Once a squash balloons into a baseball bat, the skin toughens, the seeds harden, and the plant pours its energy into that one giant fruit instead of producing more. Check your plants every single day during peak season and pick anything that hits that six-to-eight-inch window. Smaller squash also means you are dealing with manageable daily harvests instead of a weekly avalanche. If you already have the ten-pound pile, pick everything big immediately to reset the plant, then stay on the daily-pick routine so the next wave arrives in usable sizes.

    Freeze It: Shredded Zucchini Is Winter Gold

    Freezing is the fastest way to process bulk zucchini, and shredded zucchini is the most versatile form. Grate it on a box grater, squeeze out as much water as you can through a clean kitchen towel (this step matters — skip it and you get mush), then pack it in one- or two-cup portions in freezer bags, flattening them so they stack and thaw fast. Label with the date. Frozen shredded zucchini keeps for eight to twelve months and goes straight into breads, muffins, soups, and sauces without thawing first.

    For slices and chunks, blanching is worth the effort: it stops enzyme activity that degrades flavor and color in the freezer. Cut the squash into half-inch slices, boil for one minute, plunge into ice water, drain thoroughly, and freeze in a single layer on a sheet pan before bagging. The National Center for Home Food Preservation’s blanching guidelines confirm this one-minute treatment for summer squash. Do not freeze whole raw zucchini — it thaws into a watery, spongy mess.

    Cook It Now: Volume Recipes That Actually Use Pounds

    Some recipes treat zucchini as a garnish; you need the ones that treat it as the main event. Stuffed zucchini boats — halved lengthwise, hollowed, filled with sausage, rice, or ground turkey, and baked — can absorb three to four pounds in one dinner. A big batch of ratatouille swallows another two or three pounds of zucchini alongside tomatoes, eggplant, and peppers, and it freezes beautifully. Zucchini fritters, crisped in a hot skillet, turn a pound per batch into something your family will actually fight over. And do not overlook the simplest option: a massive tray of roasted zucchini with olive oil, garlic, and parmesan. Roasting concentrates the flavor and shrinks the volume dramatically — ten pounds raw becomes a very manageable few trays.

    For the truly oversized specimens, embrace them: scoop out the seedy centers of the baseball bats and use them as natural soup bowls, or slice them into thick planks for the grill. University of Minnesota Extension’s squash growing guide notes that oversized fruit is still perfectly edible — just adjust your expectations and your recipes.

    Bake It Into the Freezer

    Zucchini bread is the classic glut-buster for a reason: a single double batch of the sweet, spiced loaf uses about four cups of shredded zucchini, and the loaves freeze perfectly for months. Make three or four loaves in one afternoon and you have banked two pounds of squash into breakfasts and lunchbox snacks for the fall. The same logic applies to zucchini muffins, chocolate zucchini cake (the cocoa completely masks the vegetable — skeptical kids never notice), and savory zucchini-cheddar biscuits. Wrap cooled loaves tightly in plastic wrap, then foil, and freeze. Thaw at room temperature and they taste freshly baked.

    Dehydrate It Into Chips and Powder

    If you have a dehydrator or an oven that goes down to 170°F, zucchini chips are a revelation. Slice thin — an eighth of an inch — toss lightly with olive oil and salt, and dehydrate until crisp. They shrink to almost nothing, store for months in jars, and satisfy the salty-crunch craving. Keep going and you can grind fully dried zucchini into a fine powder, which stirs invisibly into soups, smoothies, and pasta sauce as a stealth vegetable boost. A full dehydrator tray can hold two to three pounds of fresh slices, making this one of the highest-volume-per-effort options on the list.

    Pickle It and Sauce It

    Quick refrigerator pickles are a ten-minute project with a big payoff: slice zucchini thin, pack into jars with garlic, dill, and peppercorns, and cover with a hot vinegar-sugar-salt brine. They are ready in 24 hours and keep for a month in the fridge. Zucchini relish — cooked down with onions, peppers, and vinegar — is another classic that cans well and makes a terrific burger topping all winter. And if you are drowning in both zucchini and tomatoes, cook them together into a chunky summer sauce, simmer until thick, and freeze in meal-sized containers. Future-you, making pasta in January, will be grateful.

    Share the Surplus Without Being Weird About It

    There is no shame in giving zucchini away — gardeners have done it forever. But a little presentation goes a long way: a bag of mixed-size squash with a printed zucchini-bread recipe attached gets taken; a mystery bag of giants gets left on the porch. Offer some to coworkers, bring a box to church or the office break room, and check whether your local food bank accepts fresh garden produce — many do, and they are often thrilled to get it. One well-timed donation can move five pounds in an afternoon and genuinely help someone.

    Ten pounds of zucchini is a weekend project, not a crisis: freeze the shredded bulk, bake two or three loaves of bread, cook one big volume dinner, dehydrate a tray of chips, and give away the rest with a recipe card. Process it within two or three days of harvest and nothing goes to waste.

    Conclusion

    A ten-pound zucchini harvest looks overwhelming only until you divide it into jobs. Shred and freeze what you cannot eat this week, bake a few loaves of zucchini bread for the freezer, cook one big stuffed-squash or ratatouille dinner, dehydrate a tray into chips, and pass the rest along to neighbors or the food bank. And start picking daily at six to eight inches so the next wave arrives in kitchen-friendly sizes. For more garden-to-table ideas and seasonal food guides, browse our food section, meet the team, or send us your harvest questions.

    Frequently Asked Questions

    How long does fresh zucchini last before it goes bad?

    Fresh zucchini keeps about one to two weeks in the refrigerator’s crisper drawer. Do not wash it until you are ready to use it — moisture speeds up decay. Once the skin wrinkles or soft spots appear, use it immediately in cooked dishes or discard it.

    Can I freeze zucchini without blanching it?

    Shredded zucchini freezes fine without blanching if you squeeze out the excess water first — it is destined for cooked dishes anyway. But slices and chunks should be blanched for one minute to protect flavor and color during long freezer storage.

    What size zucchini tastes best?

    Six to eight inches long, about one to two inches in diameter. At this size the skin is thin, the seeds are tiny, and the flesh is sweet and tender. Oversized zucchini is still edible but better suited to stuffing, baking, or shredding than eating fresh.

    Can you eat zucchini raw?

    Yes — young, small zucchini is delicious raw, sliced thin in salads or cut into sticks for dipping. Its flavor is mild and slightly sweet. Larger, older squash is better cooked, as the skin and seeds get tough.

    How much shredded zucchini equals one medium zucchini?

    One medium zucchini (about 7–8 inches) yields roughly 1 to 1.5 cups of shredded zucchini. For recipes, plan on about three medium zucchini per four cups shredded — handy math when you are working through a ten-pound pile.

  • How to Tell If Ground Beef Has Gone Bad in the Fridge

    How to Tell If Ground Beef Has Gone Bad in the Fridge

    Standing in front of the fridge, holding a package of ground beef you bought a few days ago, and wondering whether it is still safe — that moment of doubt is one every home cook knows. Food poisoning from bad beef is no joke: the CDC estimates millions of Americans get sick from contaminated food each year, and ground meat is one of the riskier items because grinding spreads bacteria through the entire batch. The good news is that your senses — especially your nose — are remarkably reliable spoilage detectors. Here is exactly how to tell if ground beef has gone bad, in the order you should check.

    The Smell Test Is Your Most Reliable Tool

    Fresh ground beef has a very mild, almost neutral smell — slightly metallic, like iron, and nothing more. Spoiled ground beef smells unmistakably wrong: sour, rotten, or like ammonia or sulfur. If you open the package and the odor hits you immediately, or even if a faint sour note lingers after the first whiff, do not taste it and do not try to “cook it out.” That sour smell comes from bacteria breaking down the meat, and while cooking kills many bacteria, some produce heat-stable toxins that survive high temperatures. Trust your nose here — it evolved for exactly this job. A package that smells off belongs in the trash, not in the skillet.

    What Color Changes Actually Mean

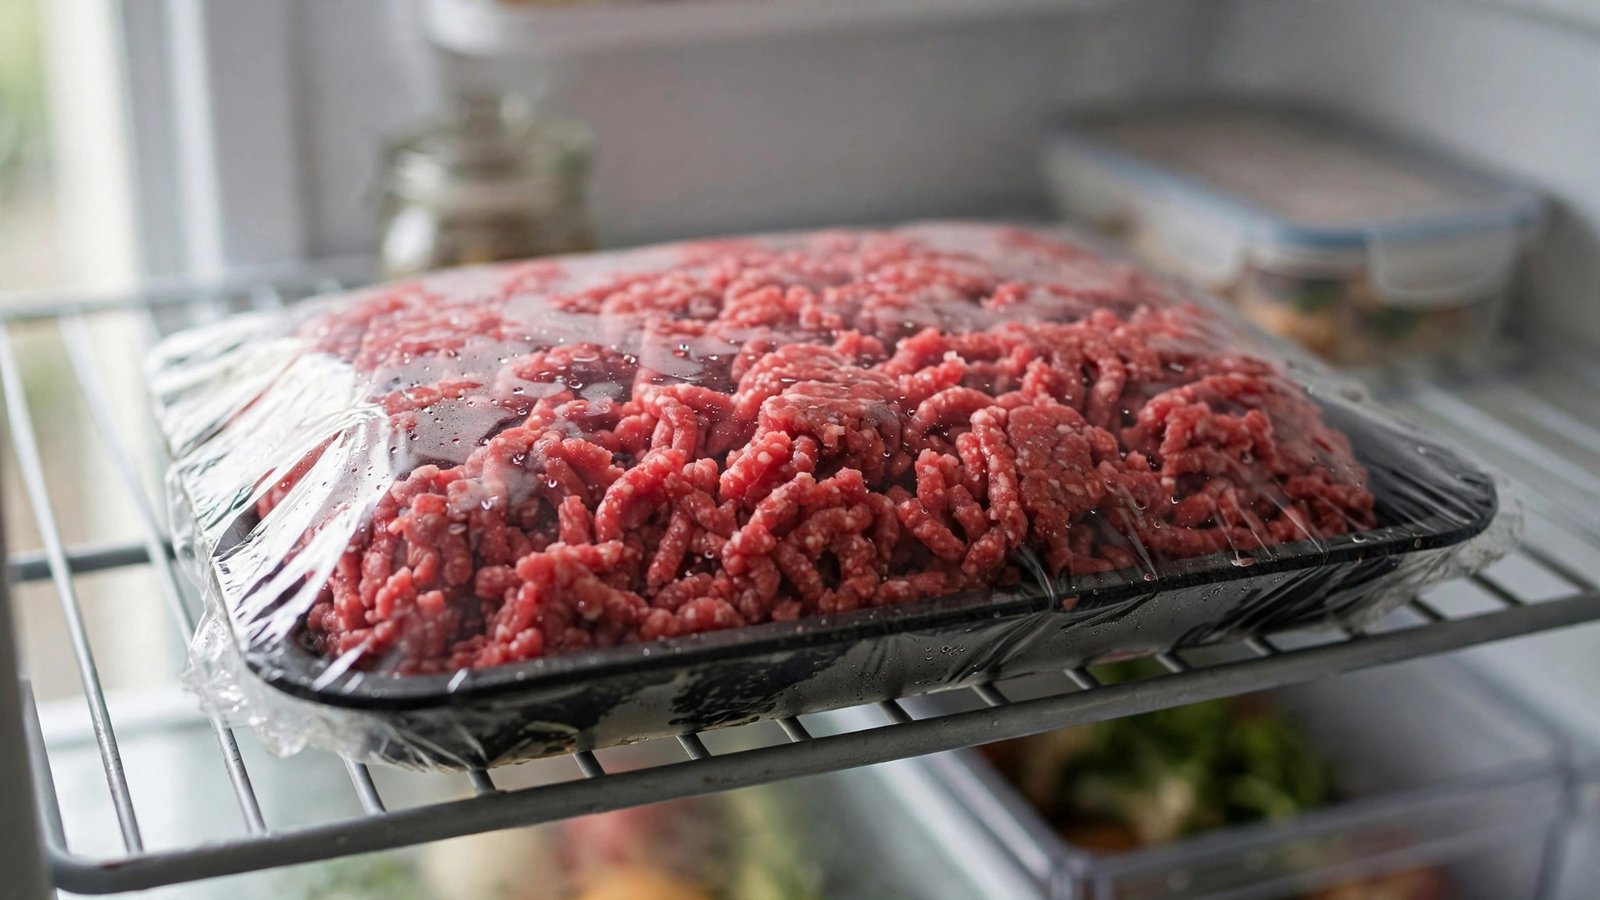
    Color confuses more people than any other spoilage sign, so let us clear it up. Fresh ground beef is bright cherry red on the outside, but the inside of the package is often grayish-brown — and that is completely normal. The red color comes from myoglobin reacting with oxygen; where oxygen cannot reach, like the center of a tightly packed tray, the meat stays darker. That brown patch in the middle is not spoilage.

    What actually matters is gray or brown color spreading across the entire surface, especially when combined with other signs. If the whole package has turned an even grayish-brown and the meat looks dull and lifeless rather than vibrant, the meat is oxidizing and aging — possibly still okay if it just happened and the smell and texture check out, but use it today or discard it. If you see green, blue, or iridescent patches, or any visible mold, the decision is made for you: throw it out. Green discoloration means bacterial activity has gone far past the point of safety.

    The Texture Check: Slimy Means Spoiled

    Fresh ground beef feels slightly moist but not sticky. Spoiled ground beef develops a slimy, tacky film on the surface — a bacterial biofilm that you can feel before you can always see it. Wash your hands, press a finger into the meat, and pull away. If your finger feels coated with a slick, mucous-like residue that washes off only with soap, the meat has turned. Fresh meat may leave a little moisture on your fingers, but it should rinse away easily and never feel gluey. Texture alone can condemn a package even when the smell seems borderline, so do not skip this step.

    Date Labels: What “Sell By” and “Use By” Really Mean

    The dates on meat packaging cause a lot of unnecessary waste — and occasionally, false confidence. In the United States, “sell by” dates are set for the store, not for you: they tell the retailer when to pull the package from the shelf. Ground beef is typically good for one to two days past the sell-by date if it has been kept at or below 40°F the whole time. A “use by” date is the manufacturer’s estimate of peak quality and safety, and for ground beef you should respect it more closely — but even then, the sniff and texture tests are the final word.

    The USDA’s beef safety guidance is explicit: ground beef should be refrigerated and used within one to two days of purchase, regardless of what the label says. If you are not sure how long a package has been sitting in your fridge, err on the side of caution. The FoodSafety.gov FoodKeeper guidelines back this up with specific storage timelines for every common meat.

    How Long Ground Beef Actually Lasts in the Fridge

    Here are the numbers worth memorizing. Raw ground beef: one to two days in the refrigerator at 40°F or below. Cooked ground beef: three to four days. Frozen ground beef: three to four months at peak quality, and safe indefinitely as long as it stays at 0°F — though texture declines over time. These timelines assume your fridge is actually cold enough; many home refrigerators run warmer than the dial suggests, especially older ones or ones that get opened constantly. A cheap fridge thermometer is one of the best ten-dollar food safety investments you can make. If your fridge has been above 40°F for more than two hours — after a power outage, for example — perishables including ground beef should be discarded, because bacteria double roughly every twenty minutes in the “danger zone” between 40°F and 140°F.

    How to Store Ground Beef So It Lasts Longer

    If you want your ground beef to make it safely to the full two days, storage matters. Keep it in the coldest part of the fridge — usually the back of the bottom shelf, not the door, where temperatures swing with every opening. Leave it in its original sealed packaging until you are ready to use it; if the package is torn, transfer it to an airtight container or wrap it tightly in plastic wrap to slow oxidation. Never leave ground beef on the counter to thaw — thaw it in the fridge overnight, in cold water changed every thirty minutes, or in the microwave followed by immediate cooking. And once you have cooked it, get leftovers into the fridge within two hours, or one hour if the kitchen is above 90°F in summer.

    What to Do If You Are Not Sure

    When in doubt, throw it out. This sounds wasteful, and it stings when a three-dollar package of beef goes in the trash — but a single bout of food poisoning costs far more in misery, missed work, and potential medical bills. The bacteria that make ground beef dangerous — E. coli O157:H7, Salmonella, Listeria — do not always produce obvious smell or appearance changes early on, which is exactly why the one-to-two-day rule exists as a backstop for your senses. If the beef passes the smell, color, and texture tests and is within the safe window, cook it thoroughly to 160°F internal temperature, verified with a food thermometer. That temperature kills the pathogens that matter. If any single test fails, do not negotiate with it — discard the meat, wash your hands, and sanitize anything the package touched.

    Smell is the strongest spoilage signal, color is the most misunderstood (brown inside the package is normal), and slime is an automatic no. Combined with the one-to-two-day rule, those three checks will keep you safe every time.

    Conclusion

    Knowing how to tell if ground beef has gone bad comes down to three senses and one rule: it should smell mild, look reasonably red on the surface, feel moist but not slimy, and be used within one to two days of purchase. Respect the 40°F threshold, store it in the coldest part of the fridge, and never try to salvage meat that smells sour or feels tacky — cooking cannot fix what bacteria have already done. For more practical kitchen and food safety know-how, explore our food guides, learn about our team, or send us your food safety questions — we answer them all.

    Frequently Asked Questions

    Can I cook ground beef that smells slightly sour to make it safe?

    No. While thorough cooking to 160°F kills most bacteria, some bacteria produce heat-stable toxins that survive cooking. A sour or off smell means bacterial breakdown has already happened — discarding it is the only safe choice.

    Is brown ground beef in the middle of the package safe to eat?

    Yes, this is normal. The red color comes from myoglobin reacting with oxygen, so the oxygen-starved center of a packed tray stays grayish-brown. Judge the whole package by smell, surface color, and texture instead.

    How long can ground beef sit in the fridge past the sell-by date?

    About one to two days past the sell-by date if it was kept at or below 40°F continuously. The sell-by date is for the store, but ground beef is highly perishable, so do not push it further — use the smell and texture tests to confirm.

    What temperature should my fridge be for storing ground beef?

    At or below 40°F. Between 40°F and 140°F, bacteria can double every 20 minutes. Use a fridge thermometer to verify, since many refrigerators run warmer than the dial suggests.

    Can I freeze ground beef that is about to go bad?

    Freezing stops bacterial growth but does not reverse spoilage. If the beef still passes the smell, color, and texture tests, freeze it for later — but if it already smells off or feels slimy, freezing will not make it safe. Discard it.

  • Why Does My Air Fryer Smoke When I Cook Bacon in It?

    Why Does My Air Fryer Smoke When I Cook Bacon in It?

    Crispy bacon from the air fryer is a revelation — until white smoke starts pouring out and the smoke alarm joins in. Air fryer bacon smoke is alarming but almost always benign: it is vaporized bacon grease, not an electrical fire. The mechanism is simple: bacon renders a lot of fat fast, the air fryer’s powerful fan whips tiny grease droplets up onto the super-hot heating element, and the grease smokes on contact. Understanding that chain of events gives you the fixes, which range from a slice of bread to a temperature adjustment. Here is why your air fryer smokes with bacon and how to stop it.

    Why Bacon Makes Air Fryers Smoke

    Air fryers cook with intense circulating hot air, and their heating element sits directly above the food — inches away, running at 400°F. Bacon is roughly 40 to 50 percent fat, and as it cooks it releases that fat as liquid grease plus aerosolized droplets that the convection fan carries upward. When grease hits the 400°F element, it smokes — sometimes a lot. Leaner foods do not produce enough airborne grease to cause this, which is why bacon (and fatty burgers, and chicken wings) are the classic smoke offenders while vegetables never are. A little wispy smoke is normal; billowing white smoke means enough grease is hitting the element to warrant intervention. The air fryer testing at America’s Test Kitchen identifies high-fat foods near the heating element as the top cause of smoking across all models.

    Fix #1: The Bread Trick

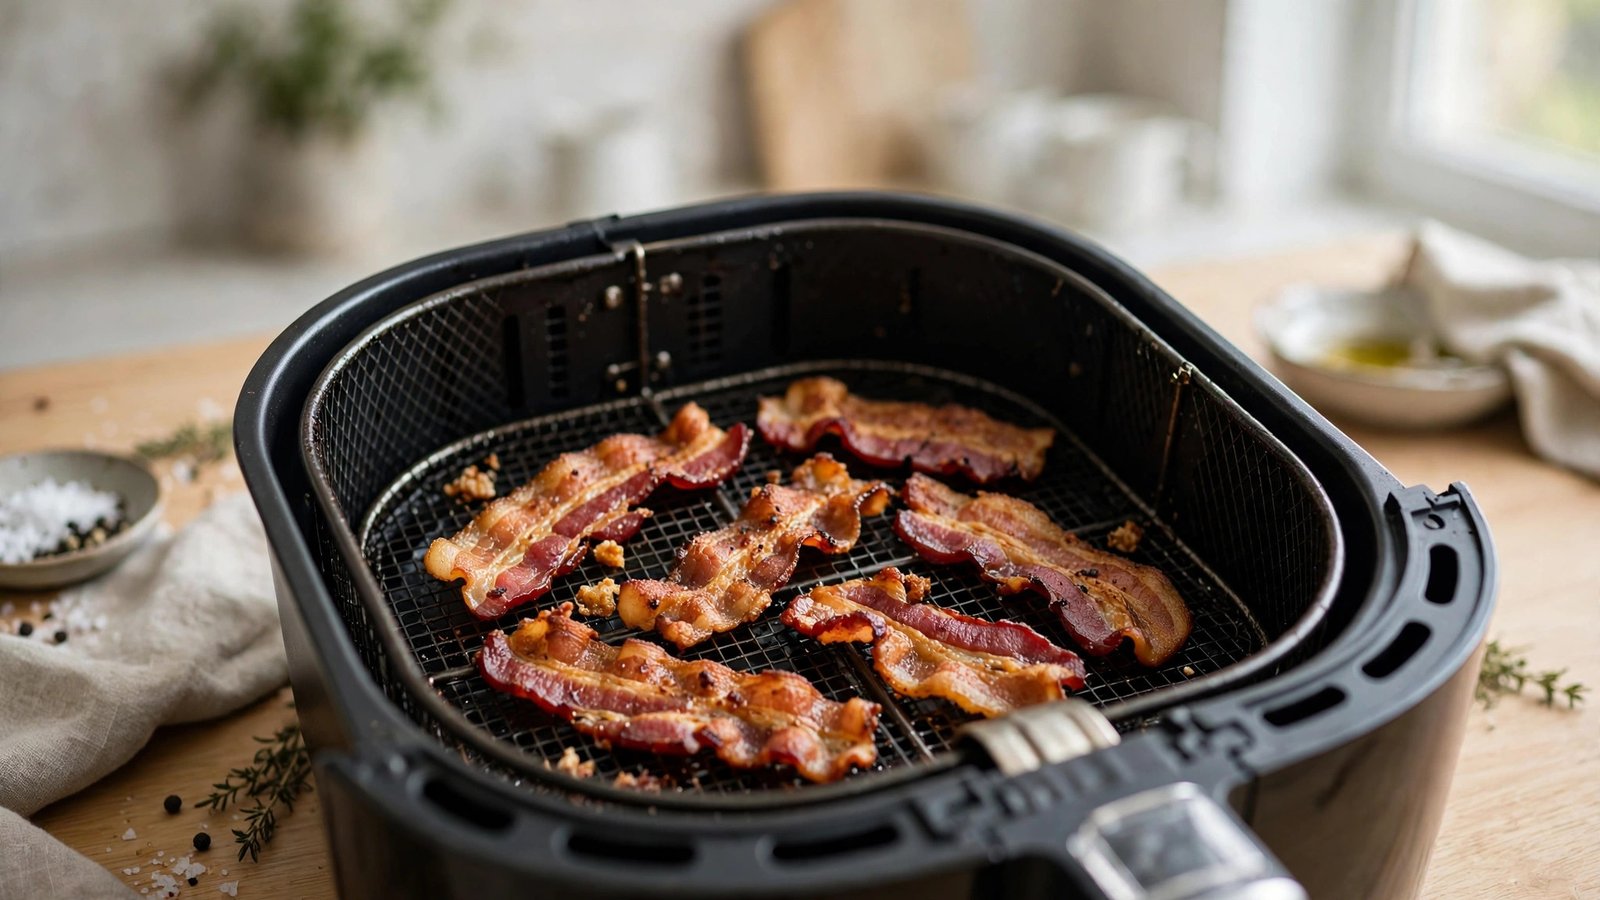
    The most famous fix works beautifully: place a slice or two of plain bread in the bottom drawer, underneath the basket. The bread absorbs the rendered bacon grease before the fan can whip it upward onto the element — no airborne grease, no smoke. As a bonus, you get bacon-infused toast, which is either a perk or a heart attack depending on your perspective. Replace the bread if cooking multiple batches, since saturated bread stops absorbing. Stale bread works best; fresh soft bread can get soggy and less absorbent. This single trick eliminates smoking for most people most of the time, and it costs essentially nothing.

    Fix #2: Water in the Drawer

    The alternative to bread: pour a quarter to half cup of water into the bottom drawer beneath the basket. Rendered grease drips into the water instead of sitting in hot grease, which keeps the drippings cooler and dramatically reduces smoking — water cannot exceed 212°F, so grease landing in it stays below smoking temperature. This method also makes cleanup easier, since the grease does not bake onto the drawer. Do not overfill; you need far less water than you think, and sloshing water around a hot appliance is its own hazard. Empty and refresh between large batches. Some cooks combine both methods — bread for absorption plus a splash of water — for maximum smoke suppression during big bacon batches.

    Fixes #3-5: Temperature, Batches, and Bacon Choice

    Lower the temperature to 350°F instead of 400°F — bacon still crisps beautifully, just a few minutes slower, and the cooler element smokes far less grease on contact. Cook in smaller batches without overlapping; crowded bacon renders a flood of grease at once, while spaced strips render gradually. Drain the drawer between batches — accumulated grease from batch one becomes batch two’s smoke source. Choose thicker-cut bacon, which renders more slowly and splatters less than thin slices, and consider turkey bacon or center-cut (leaner) options if smoke is a persistent problem. Pat bacon dry before cooking; surface moisture creates steam that carries grease droplets upward more aggressively.

    Bonus: Save That Bacon Grease

    All that rendered fat dripping into your drawer is liquid gold — do not waste it. Strain the cooled grease through a fine mesh sieve into a jar and refrigerate; it keeps for months and is a phenomenal cooking fat. Use it for roasting potatoes, frying eggs, making cornbread, or seasoning cast iron. Bacon grease was a staple cooking fat for generations before it fell out of fashion, and it is delicious. Just strain out the browned bits, which burn easily on reuse, and never pour hot grease down the drain — it solidifies in pipes and causes expensive clogs. Let it cool, jar it, and cook with it all month.

    Cleaning: The Smoke Source You Forgot

    Often the smoke is not from today’s bacon at all — it is yesterday’s grease. Residue baked onto the heating element, the basket, or the drawer walls smokes every time the fryer heats up, regardless of what you are cooking. After bacon sessions, clean the basket and drawer with hot soapy water once cooled. For the heating element itself (unplug first, obviously), wipe gently with a damp cloth or soft brush to remove grease film — never spray cleaner directly onto it. If your air fryer smokes with every food, not just bacon, accumulated grease is the likely culprit, not the bacon. A clean air fryer barely smokes at all. The National Fire Protection Association’s kitchen fire safety resources remind that grease accumulation is also the real fire risk in any cooking appliance — cleaning is safety, not just convenience.

    Air fryer bacon smoke comes from rendered grease hitting the super-hot heating element via the convection fan. Stop it by placing bread slices in the drawer to absorb grease, adding a quarter cup of water beneath the basket, cooking at 350°F instead of 400°F, not overcrowding, and draining grease between batches. If it smokes with every food, clean baked-on grease off the heating element.

    Conclusion

    Smoking air fryer bacon is a grease-management problem with simple fixes: bread or water in the drawer, moderate temperature, sensible batches, and a clean machine. Bacon stays on the air fryer menu — it just needs a little engineering. More appliance troubleshooting? Browse our food guides, meet our team, or send us your questions.

    Frequently Asked Questions

    Is it dangerous when my air fryer smokes?

    White smoke from grease is unpleasant but not immediately dangerous — it is vaporized cooking fat, not an electrical fire. However, heavy smoking means significant grease near the heating element, so reduce it with the fixes above and keep the appliance clean. Black smoke or burning plastic smells mean unplug immediately.

    Can I put water in my air fryer?

    A small amount (quarter to half cup) in the bottom drawer beneath the basket is safe and widely recommended for fatty foods. Never pour water directly on the heating element or fill the basket area — the water goes under the food, catching drips.

    What temperature is best for bacon in the air fryer?

    350°F for 8-12 minutes depending on thickness, flipping halfway. It crisps fully with far less smoking than 400°F. Thick-cut bacon may need the full 12 minutes; start checking at 8.

    Why does my air fryer smoke even without bacon?

    Baked-on grease from previous cooks is smoking on the heating element. Deep-clean the basket, drawer, and element (unplugged, with a damp cloth). If a clean fryer still smokes with lean foods, contact the manufacturer — that is abnormal.

    Should I use the bread trick every time?

    For bacon and other very fatty foods, yes — it is cheap insurance. For lean foods it is unnecessary. Replace saturated bread between batches, and do not use the bacon-grease toast if that crosses your personal dietary lines.

  • How to Make a Roux for Gumbo Without Burning the Flour

    How to Make a Roux for Gumbo Without Burning the Flour

    A gumbo roux is a high-wire act: you are deliberately browning flour in hot fat to the color of dark chocolate, and the line between “deeply nutty” and “bitter and burnt” is terrifyingly thin. Every Louisiana cook has a story about the roux they had to throw out and start over — because a burnt roux cannot be saved, and it will ruin the entire pot. But burning is not bad luck; it is heat management failure, and it is entirely preventable. Here is how to make a dark, flavorful gumbo roux without burning the flour, including the nearly foolproof oven method.

    What a Roux Is and Why Gumbo Needs It Dark

    A roux is simply flour cooked in fat, and its color determines both flavor and thickening power. A blonde roux (cooked 5 minutes) tastes mildly nutty and thickens strongly. A peanut-butter roux (15-20 minutes) brings deeper flavor. Gumbo demands a dark chocolate roux (30-45 minutes), which contributes the dish’s signature earthy, complex base flavor — but the darker the roux, the less thickening power it has, which is why gumbo also relies on okra or filé. The darkening comes from the Maillard reaction and caramelization in the flour’s proteins and starches. Push past dark chocolate toward black and you cross into burnt: bitter, acrid flavors that no amount of stock can fix. The roux science at Serious Eats maps each color stage to flavor compounds so you know exactly what you are tasting for.

    Fat Choice and Equipment: Setting Up for Success

    Use a neutral oil with a high smoke point — vegetable, canola, or peanut oil — not butter. Butter’s milk solids burn long before flour reaches dark-roux color, which is why butter roux is for béchamel, not gumbo. Traditionalists use bacon drippings or lard for flavor; both work if you manage the heat. The ratio is roughly equal parts fat and flour by volume (a cup each makes plenty for a big gumbo pot). Equipment matters enormously: use a heavy-bottomed pot or Dutch oven that distributes heat evenly — thin pots create hot spots that scorch flour while the rest lags behind. A flat wooden spatula or wooden spoon that scrapes the entire bottom surface is essential; a round spoon misses the corners where burning starts. Mise en place everything before the flour hits the fat, because you cannot walk away once you start.

    Heat Control: Low and Slow Wins

    The number one rule of roux: medium-low heat, never high. The flour should sizzle gently when it hits the fat — if it smokes or darkens in the first minute, your heat is too high; pull the pot off the burner, let it cool, and start the heat lower. Stir constantly but not frantically: slow, steady figure-eights that scrape the entire bottom, reaching the edges and corners every pass. The roux will progress through blonde, peanut butter, copper penny, and finally chocolate — each stage taking longer than the last as the color deepens. Expect 30 to 45 minutes for a proper dark roux; anyone promising it in 10 minutes is selling burnt flour. If you see black specks, smell acrid bitterness instead of nuttiness, or notice smoking, it is burnt — throw it out and start over. There is no rescue for burnt roux, and experienced cooks consider the restart a badge of honor, not a failure.

    The Oven Method: Nearly Foolproof

    Here is the method that removes most of the risk: make your roux in the oven. Combine the fat and flour in a Dutch oven, stir well, and bake uncovered at 350°F, stirring every 15 to 20 minutes. The oven’s even, ambient heat browns the flour uniformly with zero hot spots and a fraction of the attention — total time is about 90 minutes to 2 hours for a dark roux, but it is 90 minutes of freedom versus 40 minutes of slavery. The color develops beautifully and burning is nearly impossible at this temperature. The trade-off is time and slightly less of the toasty depth that stovetop stirring develops, but for nervous beginners it is transformative. The instructors at the New Orleans School of Cooking teach both methods and recommend the oven version for anyone who has ever burnt a roux (which is everyone, once).

    Using Your Roux in Gumbo

    Once the roux hits dark chocolate, work quickly: add your diced trinity (onion, bell pepper, celery) directly to the hot roux. The vegetables’ moisture stops the cooking instantly — this is intentional, freezing the color exactly where you want it — and they soften in the flavorful fat. Stir a minute or two, then add stock gradually, whisking to prevent lumps. From here, gumbo is a simmer, not a race: let it bubble gently for at least an hour so the flavors marry. Taste before salting aggressively; the roux and stock concentrate as they reduce. And remember the thickening reality: dark roux thickens modestly, so let okra or a filé addition at the end do their traditional work. For more Louisiana cooking, browse our food guides.

    A perfect dark gumbo roux without burning comes down to medium-low heat in a heavy pot, constant corner-to-corner stirring for 30-45 minutes, and high-smoke-point oil (never butter). Black specks or acrid smell mean it is burnt — throw it out and restart. For a nearly foolproof alternative, bake the roux uncovered at 350°F, stirring every 15-20 minutes, until it reaches dark chocolate color.

    Conclusion

    Burnt roux is a heat management problem, not a skill ceiling: heavy pot, medium-low heat, constant stirring, and the discipline to throw out a burnt batch and restart. Or sidestep the stress entirely with the oven method. Either way, the dark, nutty foundation is what makes gumbo transcendent. Ready to stir? Meet our team or send us your cooking questions.

    Frequently Asked Questions

    How do I know when my roux is done?

    Judge by color and smell, not time: you want the color of dark chocolate (or a well-worn copper penny for a slightly lighter gumbo) and a deeply nutty, almost coffee-like aroma. If it smells acrid or you see black specks, it is burnt — start over.

    Can I save a burnt roux?

    No. Burnt flour tastes bitter and acrid, and no amount of stock, seasoning, or simmering removes it. Every Louisiana cook has thrown out a burnt roux; consider it tuition and start fresh. The pot itself just needs washing.

    Can I make roux ahead of time?

    Yes — roux keeps beautifully. Refrigerate for up to a month or freeze for 6 months in portions. Many Louisiana cooks keep a jar of dark roux ready, which turns weeknight gumbo into a realistic proposition.

    Why did my roux seize into a ball?

    Usually the fat-to-flour ratio is off or the heat spiked. A proper roux stays fluid and stirrable; if it clumps, add a little more warm fat and keep stirring over low heat. Starting with equal volumes of fat and flour prevents this.

    Is the oven method as good as stovetop?

    Nearly — it produces an excellent dark roux with far less risk and attention. Stovetop devotees claim slightly deeper flavor from the constant stirring, but blind tastings rarely distinguish them. For beginners, the oven method wins on reliability.