Breaking

Category: Food

  • Why Does My Cheesecake Always Crack on Top?

    Why Does My Cheesecake Always Crack on Top?

    You followed the recipe to the letter, the cheesecake looked perfect through the oven window, and then — as it cooled — a fault line opened across the top like a tiny earthquake. Cracked cheesecake is the most dispiriting baking failure because it happens at the very end, after hours of work. But cracks are not random: they are the visible result of specific, preventable mistakes — overbaking, cooling too fast, overmixing, or skipping the water bath. Understand the physics and your next cheesecake comes out flawless. Here is why cheesecakes crack and how to prevent every cause.

    Cause #1: Overbaking (The Biggest Culprit)

    Most cracked cheesecakes were simply baked too long. Cheesecake is a custard, and custards continue cooking from residual heat after leaving the oven — so a cheesecake that looks “done” in the oven is already overdone. The target is the jiggle test: the outer 2 to 3 inches should look set while the center 2 to 3 inches still wobbles like gelatin when you gently shake the pan. That wobble firms up as it cools. If you bake until the center looks fully set, the proteins overcook, tighten, and contract as they cool — and that contraction tears the surface open. Start checking 10 minutes before the recipe’s stated time, since ovens vary wildly. A cheesecake pulled at the right jiggle and cooled properly will never crack from overbaking, because overbaking is what you just avoided. The cheesecake guides from King Arthur Baking demonstrate the jiggle test with photos.

    Cause #2: Cooling Too Fast

    The second great crack-maker is thermal shock. A cheesecake yanked from a 325°F oven into a 70°F kitchen contracts rapidly — the exterior sets and shrinks while the interior is still expanded, and the surface splits under the tension. The fix is gradual cooling in stages: when the bake is done, turn off the oven, crack the door open, and let the cheesecake sit inside for an hour. Then move it to a wire rack at room temperature for another hour or two before refrigerating. This slow descent lets the whole cake contract evenly. Never ever put a warm cheesecake directly in the fridge, and never cool it near an open window or air conditioning vent. Patience at this stage is as important as any ingredient — the cheesecake needs at least 4 hours of chilling (overnight is better) to set fully anyway.

    Cause #3: Overmixing and Too Much Air

    Cheesecake batter should be mixed gently and minimally once the eggs go in. Overbeating incorporates air, and air is the enemy: it makes the cheesecake puff up in the oven like a soufflé, then collapse and crack as it cools and the air escapes. Mix the cream cheese and sugar until just smooth, then add eggs one at a time on low speed, mixing only until each disappears. Scrape the bowl between additions rather than running the mixer longer. Room-temperature ingredients blend faster with less mixing — cold cream cheese demands extended beating that whips in air. Some bakers even tap the filled pan firmly on the counter a few times before baking to pop large air bubbles. If your cheesecakes rise dramatically and then fall with cracks, overmixing is your culprit.

    The Water Bath: Your Insurance Policy

    A water bath (bain-marie) addresses two crack causes at once: it keeps the oven environment humid, preventing the surface from drying and cracking, and it moderates the heat so the edges do not overbake while the center catches up. Wrap the outside of your springform pan in two layers of heavy-duty foil (or use a silicone wrap) to prevent leaks, place it in a large roasting pan, and pour in boiling water to halfway up the sides. Bake as directed. If water baths intimidate you, the cheat version works nearly as well: place a pan of boiling water on the rack below the cheesecake to humidify the oven. Either way, the moist heat produces a creamier texture and dramatically fewer cracks. The cheesecake technique testing at Serious Eats confirms the water bath as the highest-impact single intervention.

    Choosing the Right Pan and Ingredients

    Equipment and ingredients play supporting roles in crack prevention. A light-colored aluminum springform pan heats more gently than a dark nonstick one, reducing the edge-overbaking that contributes to cracks. Full-fat, brick-style cream cheese is non-negotiable — low-fat or tub-style spreads contain stabilizers and extra water that bake up unevenly and crack more readily. Bring every dairy ingredient to true room temperature before mixing; cold cream cheese forces the overbeating that whips in crack-causing air. These details seem fussy until you have pulled a flawless cheesecake from the oven — then they become permanent habits.

    Crack First Aid and Prevention Checklist

    If a crack appears despite your best efforts, all is not lost: cover it with sour cream topping (a classic — bake a sweetened sour cream layer for 5 minutes), fresh fruit, ganache, or whipped cream. Nobody will know, and the cheesecake tastes identical. For the prevention checklist: use room-temperature ingredients, mix gently after adding eggs, do not overbake (trust the jiggle), use a water bath or humid oven, cool gradually in stages, and run a thin knife around the edge of the pan after baking — this releases the cake so it can contract without tearing the top. That last trick is free and takes ten seconds. Together, these habits turn crack prevention from luck into routine. For more baking rescue missions, browse our food guides.

    Cheesecakes crack from overbaking, rapid cooling, overmixed batter, or a dry oven. Prevent cracks by pulling the cake when the center still jiggles, cooling it gradually (one hour in the turned-off oven, then room temperature, then fridge), mixing eggs in gently on low speed, and baking in a water bath. A thin knife around the edge after baking lets the cake contract without tearing.

    Conclusion

    A crack-free cheesecake is a process victory: gentle mixing, the jiggle test instead of the clock, humid oven heat, and staged cooling. Master those four habits and the top stays glassy-smooth every single time — and on the rare occasion a crack sneaks through, sour cream and berries are the delicious cover-up. More baking science? Meet our team or send us your questions.

    Frequently Asked Questions

    How do I know when cheesecake is done baking?

    Use the jiggle test: gently shake the pan — the outer ring should look set while the center 2-3 inches wobbles like gelatin. It firms as it cools. An instant-read thermometer should read about 150°F in the center. If the whole surface looks set, it is overbaked.

    Can I fix a cracked cheesecake?

    Cosmetically, yes: top with sweetened sour cream (baked 5 minutes to set), ganache, fruit, or whipped cream. The crack does not affect flavor or food safety at all — it is purely visual, and toppings hide it completely.

    Do I really need a water bath?

    It is the most effective crack prevention, but the cheat version — a pan of boiling water on the rack below — gets you most of the benefit with less fuss. If you skip both, be extra careful about overbaking and cooling gradually.

    Why did my cheesecake puff up and then sink?

    Too much air from overmixing, often combined with too-hot oven. The air expands in the heat (the puff), then escapes during cooling (the sink and crack). Mix eggs in gently on low speed and verify your oven temperature.

    Should I use a springform pan?

    Yes — cheesecake’s delicate texture needs the removable sides. Wrap the pan well for water baths, or use the pan-of-water-below cheat to avoid leak anxiety entirely. Let the cake cool completely before releasing the sides.

  • How to Make Cold Brew Coffee That Does Not Taste Bitter

    How to Make Cold Brew Coffee That Does Not Taste Bitter

    Cold brew should taste like chocolate and caramel had a smooth, mellow baby — not like bitter medicine. Yet homemade cold brew so often comes out harsh, astringent, and mouth-puckering. The irony is that cold brewing was supposed to prevent bitterness: cold water extracts fewer bitter compounds than hot water. When your cold brew still tastes bitter, something in your process is over-extracting — too fine a grind, too long a steep, too dark a roast, or too much coffee for the water. Every one of those is fixable. Here is how to make cold brew that is genuinely smooth.

    Why Cold Brew Turns Bitter Anyway

    Bitterness in coffee comes primarily from over-extraction — pulling too many compounds out of the grounds, including the harsh, woody, astringent ones that extract late. Cold water extracts slowly, which is normally an advantage, but “slowly” becomes “too much” when the grind is too fine (massive surface area), the steep runs too long (24+ hours), or the ratio is too concentrated. Dark roasts compound the problem: they contain more bitter, carbonized flavors to begin with, and cold brewing concentrates them. The good news is that cold brew is forgiving — small adjustments produce big improvements, and a batch that is slightly too strong can be diluted while a bitter batch usually cannot be saved. The cold brew testing at Serious Eats found that grind size and steep time matter more than any other variables.

    Grind Coarse — Coarser Than You Think

    The number one cause of bitter cold brew is grinding too fine. Cold brew needs the coarsest grind your grinder produces — think raw sugar or coarse breadcrumbs, visibly chunky. Fine grounds over-extract in the long steep and also clog filters, leaving silty, bitter sludge in the cup. If you buy pre-ground coffee, choose a bag labeled coarse or French press grind; standard drip grind is too fine for cold brew and will taste harsh no matter what else you do right. A burr grinder beats a blade grinder here because uniformity matters — blade grinders produce a mix of boulders and dust, and the dust over-extracts bitterly while the boulders under-extract sourly. If your cold brew is bitter, coarsen the grind before changing anything else.

    Ratio and Time: The Two Dials

    Start with a 1:8 coffee-to-water ratio by weight (about 1 cup of coarse grounds to 4 cups of water) for ready-to-drink strength, or 1:4 for a concentrate you dilute later. Too much coffee for the water extracts harshly and wastes beans. Steep 12 to 16 hours at room temperature — not 24. Beyond 16 hours, extraction keeps pulling bitter compounds with diminishing returns on the good flavors; the difference between 14 and 24 hours is almost entirely additional bitterness. Taste at 12 hours; if it is smooth but weak, extend slightly next batch rather than overshooting now. Room temperature steeping extracts more evenly than fridge steeping for most palates, though fridge brewing (16 to 20 hours) works if you prefer it — just keep the time in check. Write down your ratio and time; cold brew rewards consistency. And use reasonably fresh beans — coffee more than a month past its roast date tastes flat and woody in cold brew, since the long steep exposes staleness that hot brewing can mask. Fresh beans plus the right process is what makes café-quality cold brew at home.

    Choose the Right Roast and Water

    Medium roasts make the smoothest cold brew — they have the chocolate and caramel notes that shine in cold extraction without the bitter carbon flavors of dark roasts. Very light roasts can taste sour or grassy when cold-brewed, since cold water under-extracts their delicate acids. If you love dark roast hot coffee, try a medium-dark for cold brew as a compromise. Water matters more than people expect: heavily chlorinated tap water adds off flavors, so use filtered water if your tap tastes like a pool. You do not need fancy mineral water — clean, neutral-tasting filtered water is the target. The brewing standards from the Specialty Coffee Association confirm that water quality measurably affects extraction and flavor clarity.

    Dialing In Your House Recipe

    Think of your first few batches as experiments, not failures. Change one variable at a time — grind size first, then steep time, then ratio — and keep notes on what each batch tastes like. Most home brewers land on a personal sweet spot around 14 hours with a coarse grind and a 1:8 ratio, but your beans, water, and taste buds are your own. Once you find your formula, it becomes muscle memory: same scoop, same jar, same timer, same smooth result every week. Cold brew is one of the most forgiving coffee methods precisely because the variables are few and the feedback is immediate.

    Filter Thoroughly and Serve Right

    Bitterness often hides in the sludge. Strain first through a fine-mesh sieve, then through a paper coffee filter or cheesecloth — the paper catches the fine sediment that makes cold brew taste muddy and harsh. This second filtration is the step most home brewers skip, and it makes a remarkable difference in clarity. Serve over ice, which dilutes slightly as it melts (cold brew concentrate should be cut roughly 1:1 with water or milk). If a batch still tastes too strong, dilute it rather than suffering through it — strength and bitterness are different problems, and dilution fixes strength instantly. Store concentrate in the fridge for up to two weeks in a sealed container; the flavor stays stable far longer than hot-brewed coffee. For more coffee craft, browse our food guides.

    Smooth, non-bitter cold brew needs four things: the coarsest grind your grinder makes, a 1:8 coffee-to-water ratio, a 12-16 hour steep (never 24), and a medium roast brewed in filtered water. Strain twice — mesh sieve then paper filter — to remove bitter sediment, and dilute concentrate to taste. If your cold brew is bitter, coarsen the grind and shorten the steep first.

    Conclusion

    Bitter cold brew is over-extraction, and over-extraction is a process problem with process fixes: coarser grounds, saner ratios, shorter steeps, and better filtration. Dial those in once and every single batch comes out smooth, sweet, and chocolatey — the iced coffee that ruins café lines for you. More brewing questions or coffee gear advice? Meet our team or send them our way.

    Frequently Asked Questions

    How long is too long for cold brew?

    Beyond 16 to 18 hours at room temperature, you gain mostly bitterness, not flavor. Taste at 12 hours and extend only if it is weak. Fridge brewing can go slightly longer (up to 20 hours) since cold slows extraction.

    Can I use regular ground coffee for cold brew?

    You can, but standard drip grind is finer than ideal and tends toward bitterness. If pre-ground is your only option, shorten the steep to 10-12 hours and filter extra carefully to compensate.

    Why is my cold brew sour instead of bitter?

    Sourness means under-extraction — too coarse a grind, too short a steep, or too light a roast for cold brewing. Grind slightly finer or extend the steep a few hours. Sour and bitter are opposite problems with opposite fixes.

    Should I brew cold brew in the fridge or on the counter?

    Both work. Room temperature (12-16 hours) extracts a bit more fully and is the standard recommendation. Fridge brewing (16-20 hours) is slightly more forgiving and convenient — just keep it sealed so it does not absorb fridge odors.

    How long does cold brew concentrate last?

    Up to two weeks refrigerated in a sealed container — far longer than hot-brewed coffee. Diluted ready-to-drink cold brew is best within a few days. If it tastes off or looks cloudy, discard it.

  • When Should I Use Olive Oil Versus Vegetable Oil for Frying?

    When Should I Use Olive Oil Versus Vegetable Oil for Frying?

    Two bottles by the stove, two very different jobs — but most home cooks reach for whichever is closest. Olive oil and vegetable oil are not interchangeable, and using the wrong one costs you in flavor, performance, or money. The choice comes down to three factors: how hot you are cooking, whether you want the oil’s flavor in the dish, and what you are willing to spend. Get these right and every single sauté, fry, and salad dressing improves. Here are the clear rules for when to use each.

    Smoke Points: What They Mean and What They Do Not

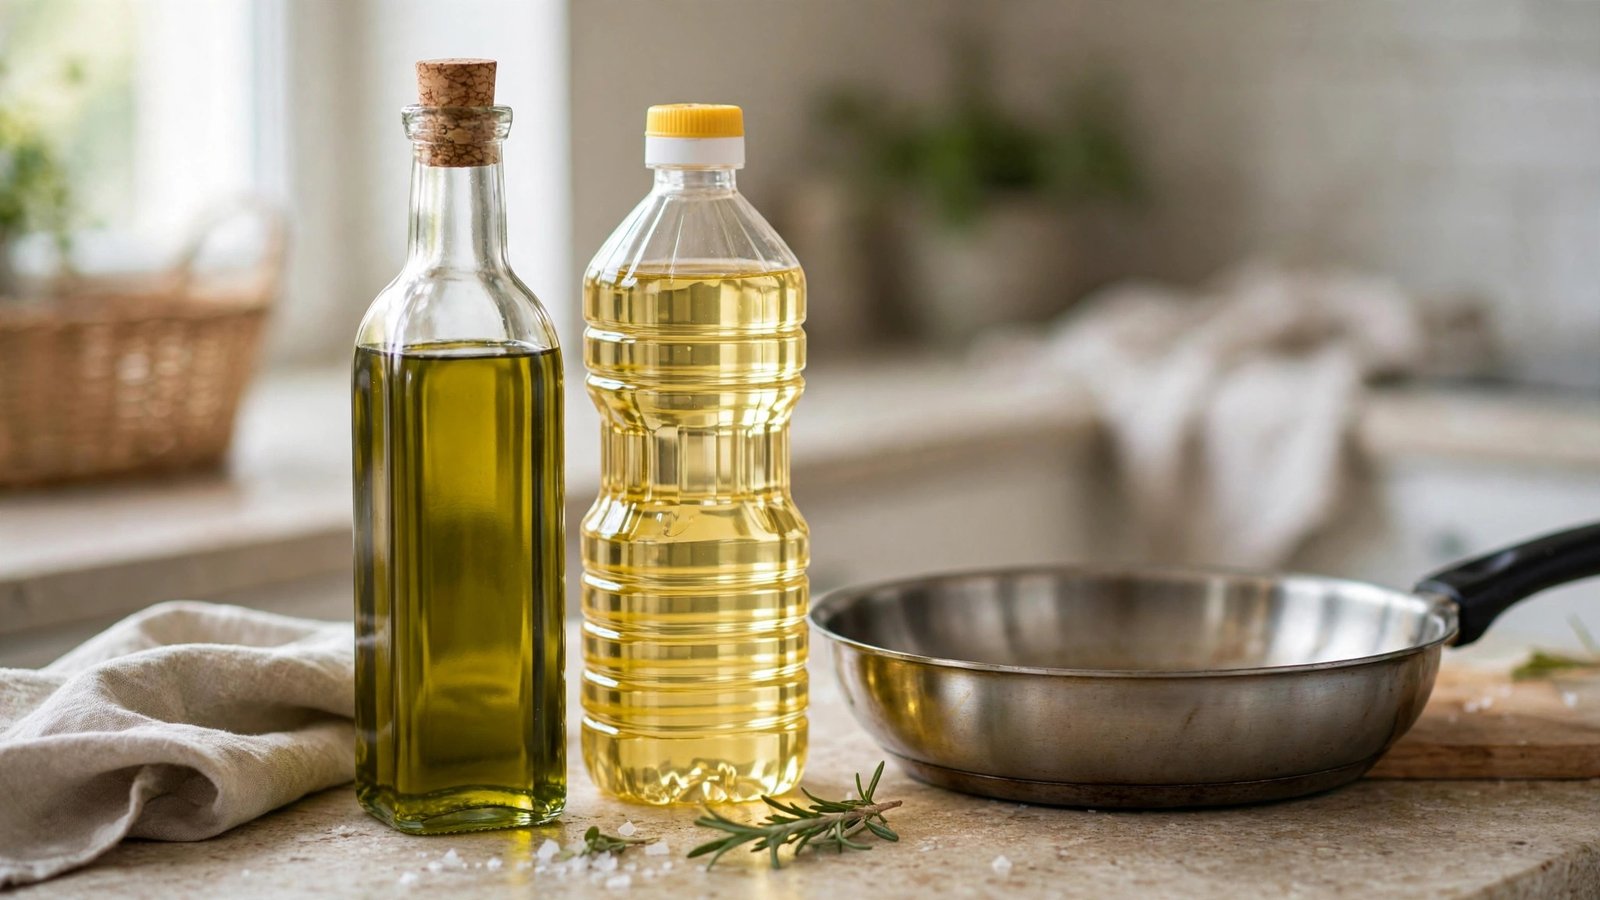
    Smoke point — the temperature where an oil starts visibly smoking — is the most quoted and most misunderstood oil fact. Refined vegetable oils (canola, soybean, generic “vegetable oil”) smoke around 400°F to 450°F. Extra-virgin olive oil smokes lower, roughly 375°F to 410°F depending on quality. Here is what the smoke point actually tells you: the temperature ceiling for clean cooking, beyond which flavor degrades and the oil breaks down. Here is what it does not tell you: that olive oil is “unsafe” at high heat. Recent research, including work reviewed by the UC Davis Olive Center, shows extra-virgin olive oil is remarkably stable at typical cooking temperatures thanks to its antioxidants — the old advice that it becomes toxic when heated is a myth. Still, for the hottest cooking, higher smoke points give more margin, which is where refined oils earn their place.

    Deep Frying: Vegetable Oil Wins

    For deep frying — french fries, fried chicken, tempura — refined vegetable oil (or peanut oil) is the clear choice, for three reasons. First, the high smoke point handles 350°F to 375°F frying with margin to spare. Second, the neutral flavor lets the food’s taste shine; frying delicate fish in robust extra-virgin olive oil would bulldoze it. Third, cost: deep frying needs quarts of oil, and good olive oil at that volume is extravagant. Peanut oil is the traditional restaurant fryer oil for its clean taste and high smoke point; canola and soybean work nearly as well for less money. Save the olive oil for applications where you will actually taste it — at frying temperatures and volumes, its flavor mostly cooks off anyway, so you are paying for nuance that heat destroys.

    Sautéing and Everyday Cooking: Olive Oil’s Home Turf

    For sautéing, pan-frying, and roasting at moderate temperatures — the vast majority of home cooking — olive oil is excellent. Most sautéing happens between 300°F and 375°F, comfortably within extra-virgin olive oil’s range, and its flavor genuinely improves vegetables, eggs, and proteins. Mediterranean cooking built entire cuisines on this principle. Use regular or “light” olive oil (more refined, higher smoke point, milder flavor) for higher-heat searing, and save the peppery, expensive extra-virgin for moderate heat where its character survives. The cooking oil testing at Serious Eats confirms that for typical stovetop temperatures, olive oil performs beautifully and the smoke-point anxiety is overblown. If your olive oil smokes the moment it hits the pan, your burner is simply too hot for what you are cooking.

    Dressings, Dips, and Finishing: Always Olive Oil

    Anywhere oil is tasted raw — salad dressings, dips, drizzles over soup, bread dipping — extra-virgin olive oil is non-negotiable. Its fruity, peppery complexity is the point of the dish; neutral vegetable oil contributes nothing but calories. This is where spending on good olive oil pays off most visibly: a $20 bottle of fresh, high-quality extra-virgin transforms a simple vinaigrette, while the same bottle wasted in a deep fryer is money burned. Finish cooked dishes with a thread of your best olive oil — over grilled vegetables, beans, or pasta — to add fresh flavor that cooking would have muted. Buy smaller bottles of the good stuff so it stays fresh; olive oil degrades with heat, light, and time. A simple homemade vinaigrette — three parts extra-virgin olive oil to one part vinegar, plus mustard, salt, and pepper shaken in a jar — will permanently retire the bottled dressing in your fridge door.

    Refined vs. Extra-Virgin: Know What You Are Buying

    “Olive oil” on a label covers a wide range. Extra-virgin is cold-pressed, unrefined, flavorful, and the healthiest choice — look for harvest dates and buy from the most recent harvest. “Light” or “pure” olive oil is refined: neutral, higher smoke point, cheaper, better for high heat. On the vegetable oil side, “vegetable oil” is usually soybean; canola is a specific, slightly healthier-feeling neutral oil; both are refined and interchangeable for frying. Avoid reusing frying oil too many times — strain it, store it dark and cool, and discard when it darkens, smells off, or smokes early. And store all oils away from the stove; heat and light are the enemies of freshness for every oil you own.

    Use vegetable (or peanut) oil for deep frying — high smoke point, neutral flavor, affordable in volume. Use olive oil for sautéing, roasting, and everyday cooking up to medium-high heat, where its flavor improves the dish. Reserve good extra-virgin olive oil for dressings, dips, and finishing, where you taste it raw. The “olive oil is unsafe when heated” claim is a myth; match the oil to the heat and the flavor job.

    Conclusion

    The olive oil versus vegetable oil question resolves into simple rules: fry hot and neutral with vegetable oil, cook everyday meals with olive oil, and dress and finish with your best extra-virgin. Buy the good olive oil in small bottles, keep all oils cool and dark, and stop worrying about olive oil at sauté temperatures. More kitchen fundamentals? Browse our food guides, meet our team, or send us your questions.

    Frequently Asked Questions

    Is it bad to cook with extra-virgin olive oil at high heat?

    No — this is a persistent myth. Research shows extra-virgin olive oil is quite stable at normal cooking temperatures due to its antioxidants. It smokes around 375-410°F, so for the very hottest searing, a refined oil gives more margin, but everyday sautéing is completely fine.

    Can I mix olive oil and vegetable oil for frying?

    You can, but there is little point — the blend takes on the lower smoke point and you lose the olive oil’s flavor to the heat anyway. For frying, just use the neutral oil; save the olive oil for where you will taste it.

    What is the healthiest oil for frying?

    For deep frying, peanut and high-oleic canola oils are good choices — stable at high heat with reasonable fat profiles. Olive oil’s health halo applies most to unheated uses; at frying temperatures and volumes, stability and smoke point matter more.

    How should I store cooking oils?

    Cool, dark, and sealed — a cabinet away from the stove, not the countertop next to it. Heat and light degrade all oils. Buy olive oil in quantities you will use within a few months, and check harvest dates on extra-virgin.

    What is the difference between light and extra-virgin olive oil?

    Extra-virgin is cold-pressed and unrefined, with full flavor and the most antioxidants. “Light” olive oil is refined — neutral in flavor with a higher smoke point. They are different tools: extra-virgin for flavor, light for high-heat cooking.

  • How to Get the Smell of Fish Out of My Cast Iron Skillet

    How to Get the Smell of Fish Out of My Cast Iron Skillet

    You seared salmon in your cast iron skillet on Tuesday, and now everything you cook tastes faintly of fish — including this morning’s pancakes. Cast iron’s greatest strength, its porous seasoned surface, is also why it grabs onto odors: the polymerized oil layers that make it nonstick absorb aromatic compounds from strongly flavored foods. The good news is that fish smell is a surface problem, not a ruined pan. With the right deodorizing methods — none of which require stripping your hard-earned seasoning — you can get your skillet smelling neutral again in under an hour. Here is how.

    Why Cast Iron Holds Onto Fish Smell

    Seasoning is not a glass-smooth coating; it is layers of polymerized oil bonded to the iron, microscopically textured and slightly porous. When you sear fish, volatile aromatic compounds — including trimethylamine, the chemical behind that classic fishy smell — work their way into those layers, especially if the pan was not screaming hot when the fish went in or if the fish sat in the pan while it cooled. The smell then re-releases into whatever you cook next, because heat reactivates the trapped compounds. This is normal cast iron behavior, not damage, and it happens with garlic, curry, and peppers too — fish is just the most notorious offender. Understanding this tells you the goal: draw the compounds back out without destroying the seasoning layers underneath. The cast iron care guides from Lodge confirm that odor absorption is expected and reversible.

    Method 1: The Coarse Salt Scrub

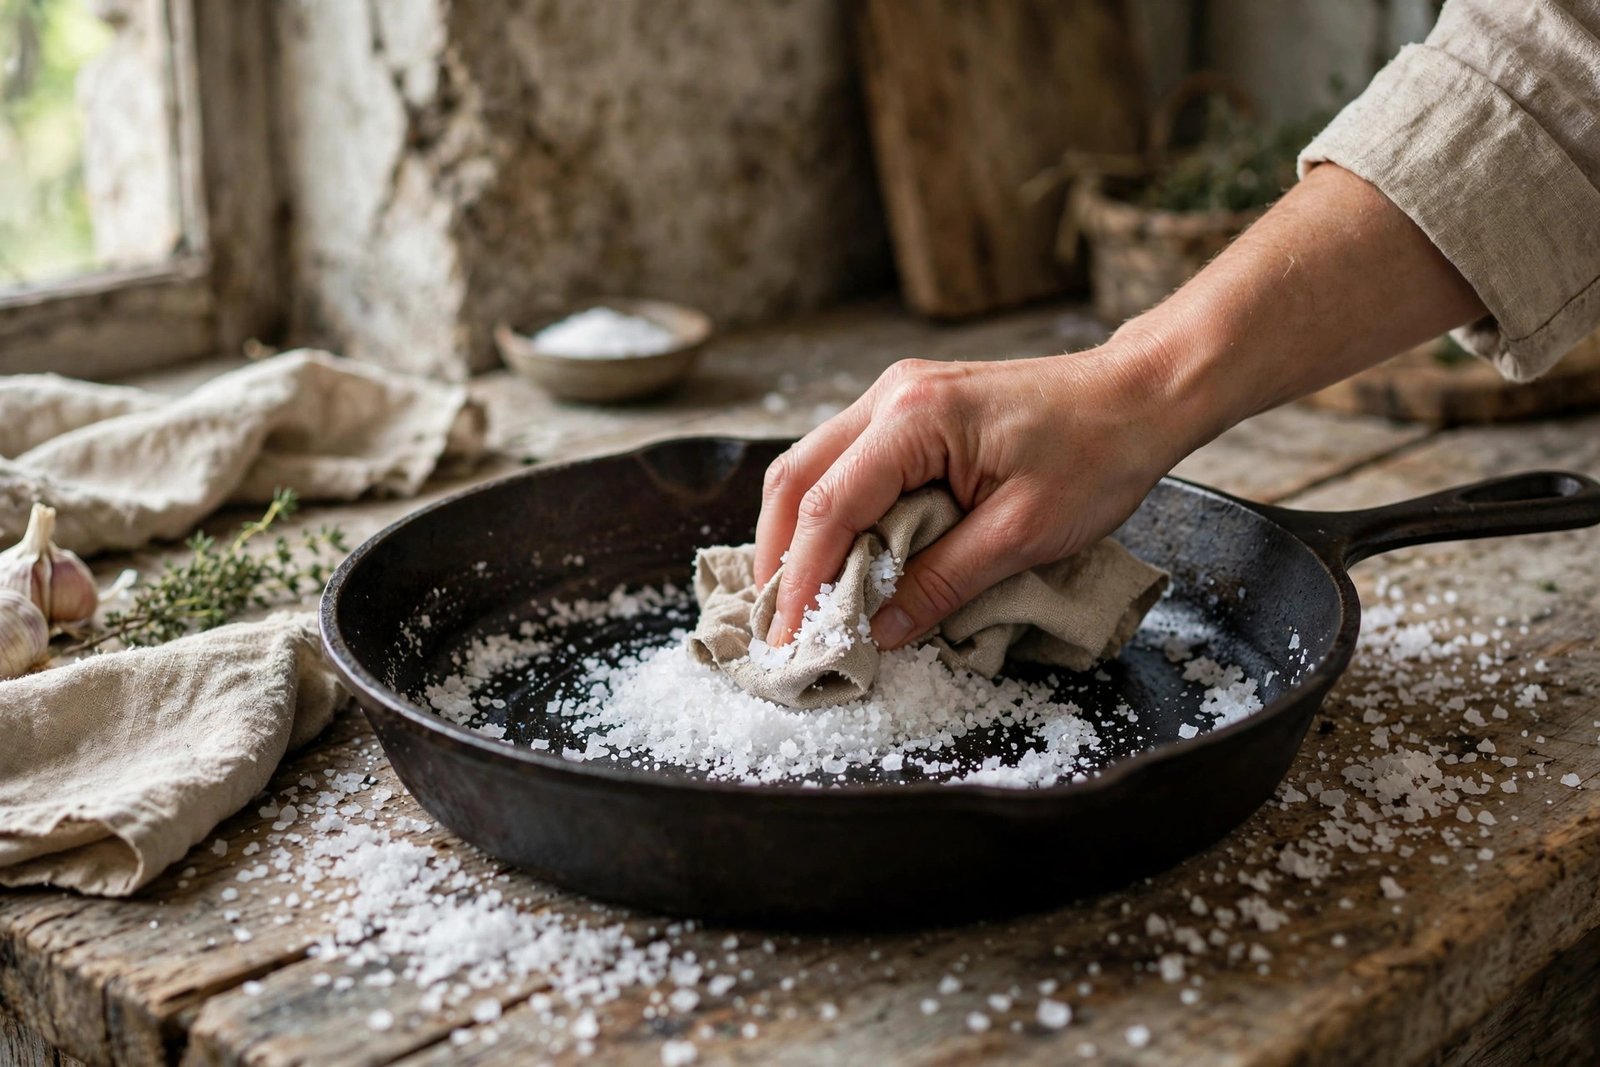
    Start with the gentlest effective method. While the skillet is still warm (not screaming hot), pour in half a cup of coarse kosher salt and scrub vigorously with a folded paper towel or a stiff brush, using the salt as an abrasive. The salt does double duty: it physically scrubs the surface and absorbs oils and odor compounds. You will see the salt discolor as it picks up residue. Dump the dirty salt, wipe the pan clean, and sniff — for mild fish smell, this alone often solves it. If odor lingers, repeat with fresh salt. Finish by warming the empty pan on the stove for a few minutes to evaporate all moisture, then wipe in a whisper-thin layer of neutral oil while it is warm. This method removes odor without touching your seasoning, which is why it should always be your first attempt.

    Method 2: The Vinegar Steam

    For stubborn smells the salt scrub cannot reach, simmer them out. Fill the skillet about a third full with equal parts water and white vinegar, bring to a gentle simmer on the stove, and let it bubble for 5 to 10 minutes. The steam and mild acid draw odor compounds out of the seasoning layers — you will literally smell the fish leaving the pan as it simmers. Dump the liquid, rinse with hot water, and dry immediately and thoroughly on heat. Vinegar is acidic enough to deodorize but used briefly like this will not meaningfully damage established seasoning; do not, however, soak the pan in vinegar for hours, which absolutely can strip seasoning. Follow with the thin oil wipe while warm. This method handles the deep fish-fry funk that salt alone cannot touch.

    Method 3: Baking Soda Paste and the Oven Bake

    For the truly persistent cases — the pan that has smelled like a dock for a week — bring out baking soda. Make a thick paste of baking soda and water, spread it over the interior, and let it sit 15 to 20 minutes; baking soda neutralizes acidic odor compounds chemically rather than just scrubbing them. Scrub off, rinse, dry on heat. If a ghost of fish remains, do the oven bake: place the clean, dry skillet upside down in a 400°F oven for an hour. Sustained high heat volatilizes remaining odor compounds out of the seasoning — the same principle as self-cleaning, minus the drama. Let it cool in the oven, then apply your thin oil layer. Between these three methods, no fish smell survives. The cast iron maintenance testing at Serious Eats validates that heat is the ultimate deodorizer for seasoned iron.

    What Not to Do

    A few common “fixes” cause more harm than the smell. Do not soak the skillet in water — prolonged soaking rusts bare spots and lifts seasoning. Do not use oven cleaner or lye-based strippers for a mere odor problem; that is amputation for a splinter. Dish soap is actually fine in small amounts on modern well-seasoned pans (the “never use soap” rule dates to lye-heavy vintage soaps), but it will not deodorize — it cleans surface oil without reaching absorbed odors, so it is simply the wrong tool here. And do not cook something strongly flavored hoping to “cover” the fish smell; you will just get fish-curry pancakes. Address the odor directly with the methods above, in order of gentleness.

    Prevention: Keeping the Next Fish From Lingering

    A few habits minimize future odor absorption. Get the pan properly hot before the fish goes in — a good sear means less contact time and less compound absorption. Do not let fish sit in the cooling pan; transfer it to a plate immediately. Clean the pan while it is still warm, when residue releases easily. And consider dedicating your most-used skillet to everyday cooking while keeping a second pan for fish — many cast iron enthusiasts naturally develop a “fish pan” and a “everything else pan.” A well-maintained seasoning also absorbs less odor than a patchy one, so keep up with regular cooking and light oiling. For more cookware care, browse our food guides.

    To get fish smell out of cast iron, work from gentle to strong: scrub with coarse kosher salt while the pan is warm, simmer equal-parts water and white vinegar for 10 minutes for stubborn odors, or use a baking soda paste followed by an hour in a 400°F oven for the worst cases. Dry thoroughly on heat and wipe in a thin oil layer after each method — never soak the pan or strip seasoning for a mere smell.

    Conclusion

    Fish smell in cast iron is a surface problem with reliable solutions: salt scrub first, vinegar simmer second, baking soda and oven heat for the stubborn cases. Your seasoning survives all three, and the pan comes out neutral and ready for pancakes. Cook the fish hot, clean the pan warm, and the smell never gets a foothold. More cookware questions? Meet our team or send them our way.

    Frequently Asked Questions

    Will cooking fish ruin my cast iron seasoning?

    No — fish does not damage seasoning, it just leaves odor in it. The seasoning layers remain intact. Deodorize with the methods above and keep cooking; regular use maintains seasoning better than anything.

    Can I use dish soap on cast iron?

    A small amount of modern dish soap is fine on well-seasoned pans and will not strip seasoning — but it will not remove absorbed fish odor either. Use soap for routine cleaning, not deodorizing.

    Why does my pan still smell after washing?

    Because the odor compounds are absorbed into the seasoning layers, not sitting on the surface. Surface washing cannot reach them — you need the salt scrub’s absorption, the vinegar simmer’s steam extraction, or the oven’s sustained heat.

    Should I have a separate pan just for fish?

    It is a popular solution among cast iron enthusiasts. A dedicated fish pan means your daily driver never picks up the smell. It is optional, not required — the deodorizing methods work fine on a single pan.

    Does the oven method damage seasoning?

    No — an hour at 400°F is well within what seasoning tolerates (it was created at higher heat). It drives off volatile odor compounds without harming the polymerized layers. Just oil lightly afterward.

  • What Is the Difference Between Baking Soda and Baking Powder in Biscuits?

    What Is the Difference Between Baking Soda and Baking Powder in Biscuits?

    Two white powders, nearly identical in the tin, but swap them in a biscuit recipe and you get either a hockey puck or a metallic-tasting mess. Baking soda and baking powder are both chemical leaveners — they make dough rise by producing carbon dioxide — but they work through completely different chemistry, and biscuits are where the difference shows most clearly. Understanding what each one does, and why buttermilk changes the equation, is the key to tall, tender, fluffy biscuits every time. Here is the full explanation.

    What Each One Actually Is

    Baking soda is pure sodium bicarbonate — a base, and nothing else. It does nothing on its own; it needs an acid plus moisture to react and release carbon dioxide. Baking powder is baking soda plus its own built-in acid (usually cream of tartar) plus a starch filler to keep them from reacting in the tin. Most baking powder sold today is “double-acting,” meaning it releases some gas when it gets wet and more when it gets hot — two bursts of lift. Think of it this way: baking soda is half a leavener waiting for an acid partner, while baking powder is a complete, self-contained leavening system. The leavening guides from King Arthur Baking lay out this chemistry with practical baking examples.

    How They Work in Biscuit Dough

    In biscuits, leavening has to work fast — there is no long rise, just the blast of oven heat. When liquid hits the dough, baking soda immediately starts reacting with any acid present, producing gas bubbles that the heat then expands. Baking powder contributes its first reaction on mixing and its second, bigger reaction in the oven’s heat, giving sustained lift as the biscuit sets. This is why most great biscuit recipes use both: the soda reacts with the buttermilk’s acid for immediate lift and browning, while the powder provides the reliable oven-spring that builds tall layers. Using only soda risks a soapy, metallic taste from unreacted base; using only powder misses the tenderness and browning that the soda-acid reaction provides.

    Why Buttermilk Changes Everything

    Buttermilk is the acid that baking soda is waiting for. Its lactic acid reacts vigorously with soda, producing abundant lift — which is why traditional Southern buttermilk biscuits rise so beautifully. But the acid does more than activate leavening: it weakens gluten strands, producing a more tender crumb, and it promotes the Maillard browning that gives biscuits their gorgeous golden tops. This is also why you cannot simply swap regular milk for buttermilk without adjusting leavening — no acid means the soda has nothing to react with, leaving unreacted soda that tastes metallic and soapy. If you must use plain milk, either use only baking powder or add an acid (a teaspoon of lemon juice or vinegar per cup of milk). The partnership between buttermilk and baking soda is one of baking’s great chemical romances.

    What Happens When You Swap or Substitute

    The substitution rules are asymmetric. You can replace baking powder with baking soda only if you add an acid: roughly quarter-teaspoon of soda plus half-teaspoon of cream of tartar approximates a teaspoon of powder, or use buttermilk/lemon juice as the acid. Going the other direction — replacing soda with powder — requires about three times as much powder and still misses the browning and flavor effects of the soda-acid reaction. Using too much of either causes problems: excess soda gives a yellow crumb, soapy taste, and coarse texture; excess powder gives a bitter, metallic tang. Measure carefully — leaveners are potent in small amounts, and “a little extra for good rise” reliably backfires. The baking science at Serious Eats has quantified exactly how over-leavening collapses texture.

    Practical Biscuit Tips Beyond Leavening

    Leavening is only half the biscuit equation. Keep everything cold — cold butter, cold buttermilk, even cold flour in summer — because cold fat creates the steam pockets that form flaky layers. Cut the butter in coarsely, leaving pea-sized pieces; those chunks are future layers. Handle the dough minimally and fold it a few times (the “lamination” that builds height), but never knead it — kneading develops gluten and makes biscuits tough. Cut straight down without twisting the cutter; twisting seals the edges and prevents rise. Place biscuits touching on the pan for soft sides or spaced for crisp sides. And get them into a fully preheated 425°F to 450°F oven fast — that initial heat blast is when the double-acting powder does its best work. For more baking fundamentals, browse our food guides.

    Storing Leaveners So They Stay Active

    Both leaveners die quietly in the pantry, and dead leavener is the most common cause of flat biscuits. Baking soda lasts about 6 months once opened (longer unopened); baking powder lasts 6 to 12 months. Store both in cool, dry places with lids tightly closed — moisture triggers premature reactions, so never store them above the stove. Date the container when you open it. Test before any important bake: soda should fizz vigorously in vinegar, powder should bubble hard in hot water. If the reaction is weak, replace it — a $3 box of fresh leavener is cheaper than a ruined batch of biscuits.

    Baking soda is pure base that needs an acid (like buttermilk) to work; baking powder is soda plus its own built-in acid, giving two bursts of lift. Great biscuits usually use both — soda for the immediate acid reaction, tenderness, and browning, powder for reliable oven-spring. Never swap them 1:1, keep everything cold, and bake fast in a fully preheated oven.

    Conclusion

    The difference between baking soda and baking powder in biscuits is chemistry you can taste: soda needs buttermilk’s acid to shine, powder brings its own, and the best biscuits use both for lift, tenderness, and browning. Pair the right leavening with cold butter, minimal handling, and a hot oven, and tall fluffy biscuits become routine. More baking science? Meet our team or send us your questions.

    Frequently Asked Questions

    Can I use only baking powder in biscuits?

    Yes, and many recipes do — use about 1 tablespoon per 2 cups of flour. You will get good lift, though you will miss some of the tenderness and browning that the baking soda-buttermilk reaction provides. It is the safer single-leavener choice with plain milk.

    How do I test if my baking powder is still good?

    Drop half a teaspoon into hot water — vigorous bubbling means it is active. For baking soda, add a splash of vinegar instead. Replace baking powder every 6 to 12 months after opening; old leavener is the silent killer of flat biscuits.

    Why do my biscuits taste metallic?

    Too much leavener, usually — excess baking soda leaves unreacted base (soapy-metallic), and excess baking powder leaves bitter compounds. Measure precisely with proper measuring spoons and resist the urge to add “a little extra.”

    Can I substitute lemon juice for buttermilk?

    For the acid function, yes: 1 tablespoon of lemon juice or white vinegar per cup of milk, rested 5 minutes. It activates baking soda properly, though cultured buttermilk adds flavor complexity the substitute lacks.

    Why did my biscuits not rise?

    The usual suspects: dead leavener (test it), twisted cutter sealing the edges, overworked dough developing too much gluten, or an oven that was not fully preheated. Cold ingredients and fast oven entry matter as much as the leavening itself.

  • How to Meal Prep 5 Healthy Lunches for Under $30

    How to Meal Prep 5 Healthy Lunches for Under $30

    Six dollars per lunch. That is the math that makes meal prepping worth it: five healthy, genuinely good lunches for under $30 total, in about two hours on a Sunday. No sad desk salads, no $15 takeout, no 3 p.m. vending machine run. The secret is not exotic ingredients or complicated recipes — it is a tight shopping list, batch cooking built around one protein and one grain, and sauces that make the same base taste different every day. Here is the complete plan, with the shopping list, the recipes, and the storage rules that keep everything fresh through Friday.

    The $30 Budget: Where the Money Goes

    Here is a realistic breakdown at typical US grocery prices: a family pack of chicken thighs ($7), a bag of brown rice or quinoa ($3), dried black beans or lentils ($2), a dozen eggs ($3), seasonal vegetables — broccoli, carrots, bell peppers, spinach ($7), a can of chickpeas and a can of tomatoes ($2), plus pantry staples you already own (oil, spices, soy sauce). Total: roughly $24 to $28, leaving a few dollars of buffer. Chicken thighs beat breasts on price and stay juicier through reheating; dried beans cost a fraction of canned; and buying one versatile vegetable set in bulk beats five specialty items. Shop store brands, check the weekly ad, and hit the frozen aisle — frozen broccoli and bell peppers are nutritionally equal to fresh and often half the price. The USDA’s MyPlate guidance confirms this plate formula: half vegetables, a quarter protein, a quarter whole grains.

    The Shopping List (Print This)

    Protein: 2.5 lbs chicken thighs, 1 dozen eggs, 1 bag dried black beans (or 2 cans). Grains: 2 cups dry brown rice. Vegetables: 1 head broccoli, 1 bag baby spinach, 3 bell peppers, 1 bag shredded carrots, 1 onion, 1 bunch cilantro. Flavor: 1 can diced tomatoes, 1 can chickpeas, soy sauce, peanut butter, sriracha or hot sauce, limes. Pantry (assumed on hand): olive oil, garlic, cumin, chili powder, salt, pepper. That is the whole list — one trip, one cart. If any item is pricey in your area, swap freely: sweet potatoes for bell peppers, cabbage for spinach, pork shoulder for chicken thighs when it is on sale. Flexibility is the skill; the list is just a starting point. The budget recipes at Budget Bytes are an excellent source for more sub-$2-per-serving ideas when you want to rotate the menu.

    The Five Lunches

    Build around two batch-cooked bases with different daily finishes so nothing feels repetitive. Lunch 1 & 2: chicken burrito bowls — brown rice, black beans, shredded chicken, corn, diced peppers, with lime and cilantro. Lunch 3: peanut noodle bowl — rice, shredded chicken, carrots, spinach, and a peanut-soy-sriracha sauce. Lunch 4: chickpea and roasted vegetable bowl — roasted broccoli, peppers, and chickpeas over rice with a tahini-lemon or simple vinaigrette. Lunch 5: fried rice — diced chicken, eggs scrambled in, carrots, peas, soy sauce, made fresh in 10 minutes from prepped components. Every lunch hits the formula: grain base, protein, at least two vegetables, and a bold sauce. Sauces are the variety engine — the same chicken and rice tastes entirely different under peanut sauce versus salsa verde.

    The Two-Hour Sunday Session

    Efficiency comes from parallel cooking. Start the brown rice in the rice cooker and the black beans simmering (or use an Instant Pot for both). While they cook, season the chicken thighs with oil, cumin, chili powder, garlic, salt, and pepper, and roast at 425°F for 25 minutes. Chop all vegetables at once — this single prep block saves the most time. Roast the broccoli, peppers, and chickpeas on sheet pans while the chicken rests. Hard-boil 5 eggs for snacks or bowl toppings. Whisk the peanut sauce (peanut butter, soy sauce, sriracha, lime, warm water) and a simple lime vinaigrette. Then assemble: portion rice and beans into five containers, add proteins and vegetables, and pack sauces separately — sauce on the side keeps everything crisp until lunchtime. Cool everything before sealing to avoid condensation.

    Storage and Food Safety

    Use airtight containers — glass is ideal since it reheats evenly and does not stain. Refrigerate within two hours of cooking and keep the fridge at 40°F or below. These lunches stay safe and tasty for 4 days; for Friday’s lunch, freeze it on Sunday and thaw Thursday night in the fridge. Keep sauces, dressings, and delicate greens separate until serving. Reheat to steaming (165°F) and stir halfway for even heating. Do not reheat more than once. Label each container with the day — Monday’s optimism fades by Thursday, and labels prevent the mystery-container gamble. If a lunch smells off or the texture seems wrong on day four, discard it; the $6 replacement cost is not worth the risk.

    Adapting the Plan: Dietary Swaps

    The $30 framework flexes for most diets without breaking the budget. Vegetarian? Drop the chicken, double the beans and lentils, and add extra eggs — the cost actually falls. Gluten-free? Swap brown rice for certified gluten-free oats or more rice (already gluten-free) and check your soy sauce label. Dairy-free changes nothing here since the plan is naturally dairy-free. Higher protein? Add a second dozen eggs or a bag of frozen edamame. The structure — cheap grain, cheap protein, seasonal vegetables, bold sauces — stays constant; only the specific players change. That is what makes this a lasting system rather than a one-week stunt.

    Five healthy lunches for under $30 means $6 per lunch: batch-cook chicken thighs, brown rice, and black beans on Sunday, prep a week’s vegetables at once, and build grain bowls with different sauces each day. Shop store brands and frozen vegetables, pack sauces separately, refrigerate within two hours, and freeze Friday’s portion on Sunday for peak freshness.

    Conclusion

    Meal prepping five healthy lunches for under $30 is a system, not a talent: one smart shopping trip, two hours of parallel batch cooking, and the sauce variety that keeps it interesting. You eat better, spend less, and reclaim your lunch hour. Ready to plan next week? Browse our food guides, meet our team, or send us your meal prep questions.

    Frequently Asked Questions

    How long does meal-prepped lunch stay good?

    Four days refrigerated at 40°F or below. Cook Sunday, eat through Thursday, and freeze Friday’s portion on prep day, thawing it Thursday night. When in doubt about day-four food, throw it out.

    Can I meal prep without eating the same thing every day?

    Yes — that is what sauces and finishes are for. Batch-cook neutral bases (rice, chicken, beans, roasted vegetables) and vary the daily sauce: salsa, peanut sauce, vinaigrette, teriyaki. Same prep, five different flavor profiles.

    What containers are best for meal prep?

    Airtight glass containers with locking lids: they reheat evenly, do not absorb odors or stains, and last for years. Get a uniform size so they stack neatly. Keep small leak-proof containers for sauces.

    How do I keep meal prep vegetables from getting soggy?

    Pack sauces and dressings separately, cool all components before sealing, and put delicate greens on top rather than under hot ingredients. Roasted vegetables hold up far better than steamed ones over several days.

    Is $30 realistic in expensive cities?

    It is tighter but doable: lean harder on dried beans, lentils, eggs, cabbage, carrots, and frozen vegetables, and watch for markdown produce. The $6-per-lunch target flexes with local prices — even at $40, you are far below takeout costs.

  • Why Does My Rice Cooker Make Mushy Rice Every Time?

    Why Does My Rice Cooker Make Mushy Rice Every Time?

    Fluffy, distinct grains of rice should be the easiest thing a rice cooker makes — it is literally the machine’s only job. Yet yours produces mushy, gummy rice every single time, the kind that clumps into a starchy mass. The culprit is almost never a broken cooker; it is almost always too much water, unrinsed rice, or skipped resting. Rice cookers work by boiling until the water is absorbed and then sensing the temperature spike — they execute whatever ratio you give them faithfully, including a bad one. Here is how to diagnose and fix mushy rice cooker rice for good.

    Cause #1: Too Much Water (The Usual Suspect)

    Nine times out of ten, mushy rice means too much water. The classic ratio for long-grain white rice is 1 cup rice to 1.25 cups water — not the 1:2 ratio printed on many rice bags, which was written for stovetop cooking where more water evaporates. Rice cookers are sealed environments with minimal evaporation, so they need less water than the stovetop. Brown rice needs more (about 1:1.5 to 1:1.75), jasmine slightly less than standard long-grain, and basmati does best around 1:1.25. If your rice is consistently mushy, cut the water by a quarter cup per cup of rice and test — you can always add a splash next time, but you cannot un-mush a batch. Use the cooker’s included measuring cup if it came with one; it is often smaller than a standard US cup, and mixing cup systems throws ratios off. The rice cooking guides at Just One Cookbook, from a Japanese home-cooking authority, emphasize that ratio precision matters more than any other variable.

    Cause #2: Skipping the Rinse

    Unrinsed rice carries a coating of loose surface starch that turns into glue in the cooker. Rinse the rice in a bowl with several changes of cold water, swishing gently, until the water runs mostly clear — usually 3 to 4 rinses. Then drain it thoroughly; rice sitting in rinse water absorbs extra moisture that throws off your carefully measured ratio. This step takes two minutes and makes the single biggest texture difference after the water ratio. Enriched white rice loses some surface nutrients in rinsing, but the texture payoff is worth it — and you are not eating rice for its trace vitamins anyway. Brown rice benefits from rinsing too, though the effect is less dramatic since the bran layer holds less loose starch.

    Cause #3: Lifting the Lid and Skipping the Rest

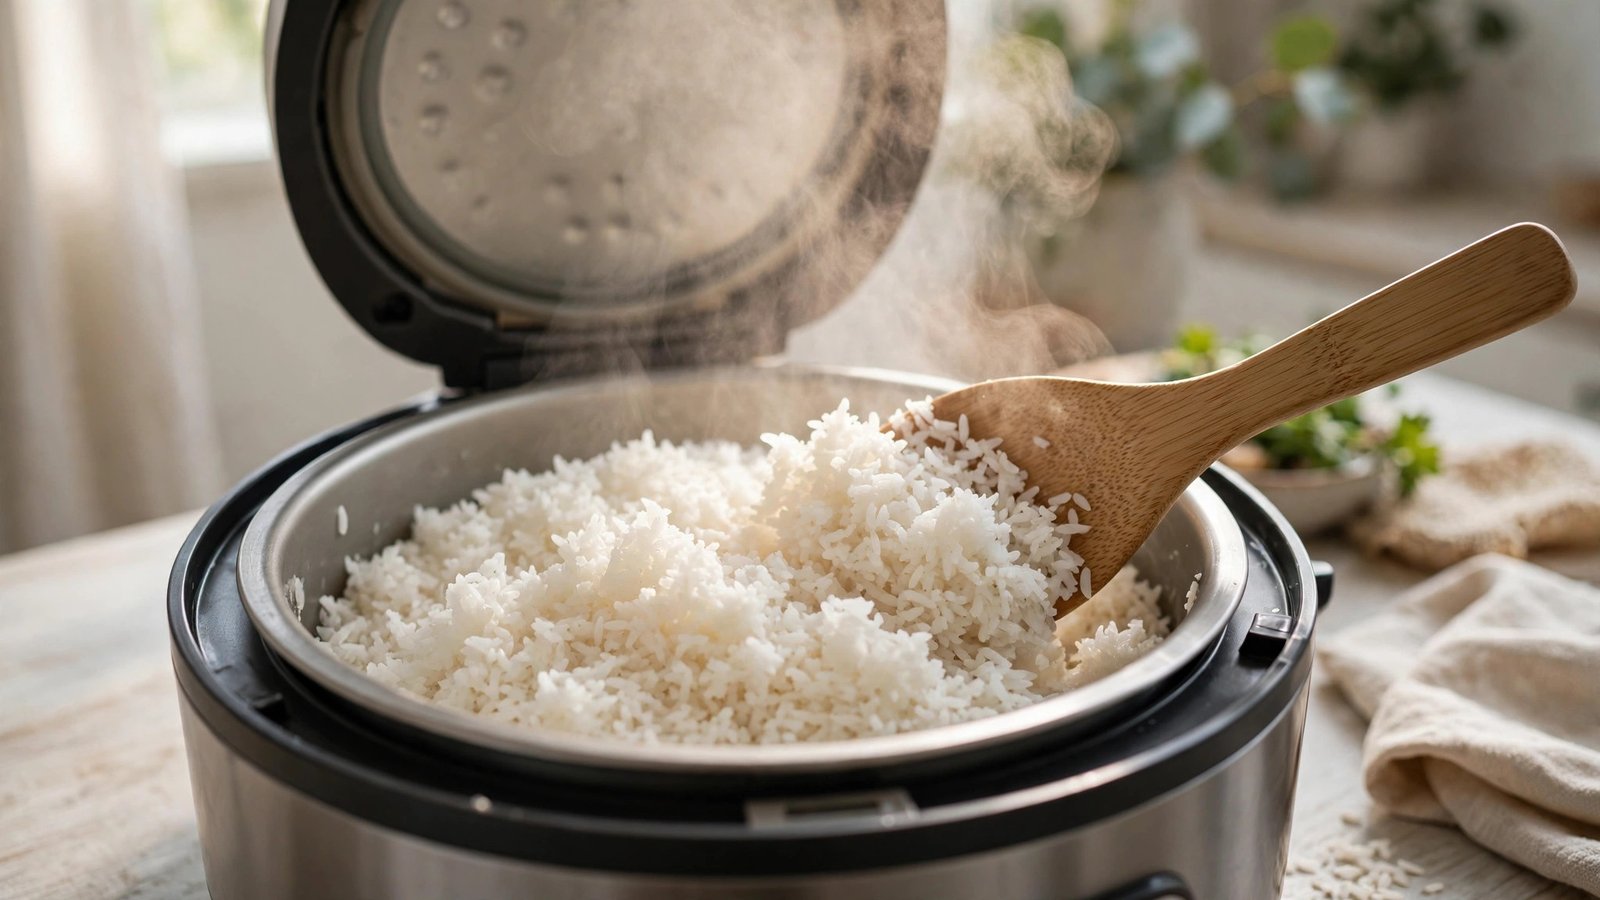
    Two related sins: peeking during cooking and serving immediately when it clicks to warm. Lifting the lid releases steam and drops the temperature, disrupting the cooker’s carefully calibrated cycle — the machine then misjudges doneness. Worse, skipping the rest: when the cooker switches to warm, the rice needs 10 to 15 minutes of undisturbed resting with the lid closed. During this rest, residual steam redistributes, the grains firm up, and excess surface moisture absorbs evenly. Rice served the instant the cooker clicks is always wetter and softer than the same batch rested properly. Fluff gently with a rice paddle after resting, using a cutting motion rather than stirring, which mashes the grains. This rest is not optional — it is the final stage of cooking.

    Other Culprits: Rice Type, Age, and Overfilling

    Different rices need different handling. Old, dried-out rice (sitting in your pantry for a year) absorbs water unevenly and cooks up mushy on the outside while staying firm inside — buy fresher rice and store it airtight. Overfilling the cooker crowds the grains and traps excess steam; respect the maximum fill line, usually about two-thirds full. Using the wrong setting matters too: many modern cookers have separate white, brown, and porridge modes with different time-temperature curves — brown rice on the white setting comes out underdone in the center and mushy outside. And keep the cooker clean: a crusty heating plate or a warped inner pot creates hot spots that cook unevenly. The rice cooker testing at Serious Eats found that even budget cookers produce excellent rice when the ratio and technique are right — the machine is rarely the problem.

    The Rescue and the Perfect Batch Checklist

    For a batch that is already mushy, spread it on a sheet pan and refrigerate uncovered for an hour — the cold firms the grains — then repurpose it as fried rice, where day-old firmed rice is actually ideal. For the next batch, run the checklist: rinse until clear and drain well, measure precisely (1:1.25 for long-grain white), do not exceed the fill line, select the right mode, do not lift the lid, rest 10 to 15 minutes on warm, then fluff with a paddle. Follow that sequence carefully and mushy rice becomes a distant memory. One more habit: do not leave rice sitting on the keep-warm setting for hours. Extended warming dries the bottom layer into a crust while the top turns gummy from trapped steam — serve within an hour of the rest period for the best texture. For more kitchen fundamentals, browse our food guides.

    Mushy rice cooker rice is almost always too much water, unrinsed rice, or no resting — not a broken machine. Use a 1:1.25 rice-to-water ratio for long-grain white (rice cookers need less water than stovetop), rinse until the water runs clear, never lift the lid mid-cycle, and rest 10-15 minutes on warm before fluffing. Rescue a mushy batch by chilling it and making fried rice.

    Conclusion

    Your rice cooker is faithfully executing the instructions you give it — so give it better ones: less water, rinsed rice, the right mode, and a proper rest. Get the ratio right once for your rice and your machine, write it on the bag with a marker, and perfect rice becomes automatic. More kitchen troubleshooting questions? Meet our team or send us your questions.

    Frequently Asked Questions

    What is the correct water ratio for a rice cooker?

    For long-grain white rice, 1 cup rice to 1.25 cups water. Jasmine: about 1:1.2. Basmati: 1:1.25. Brown rice: 1:1.5 to 1:1.75. Rice cookers lose less water to evaporation than stovetop cooking, so they need less water than bag instructions suggest.

    Should I rinse rice before using a rice cooker?

    Yes — rinse 3 to 4 times until the water runs mostly clear, then drain thoroughly. Rinsing removes the loose surface starch that causes gumminess. It is the second most impactful fix after correcting the water ratio.

    Why is my brown rice mushy outside but hard inside?

    Brown rice needs more water and a longer cycle than white — use the brown rice setting and a 1:1.5+ ratio. Cooking brown rice on the white setting is the classic cause of this exact texture problem.

    Can I fix rice that is already mushy?

    You cannot un-mush it, but you can repurpose it: chill it uncovered in the fridge to firm the grains, then make fried rice — which actually requires day-old, firmed rice for the best texture.

    Does the age of the rice matter?

    Yes. Very old rice absorbs water unevenly and cooks inconsistently. Buy rice in quantities you will use within a few months and store it airtight in a cool, dark place.

  • How to Stop Chocolate Chip Cookies From Spreading Flat

    How to Stop Chocolate Chip Cookies From Spreading Flat

    You followed the recipe exactly, but your chocolate chip cookies spread into thin, greasy lace instead of thick, chewy mounds. Flat cookies are a physics problem, not a character flaw: the dough’s fat melted before its structure set, and gravity did the rest. Every cause of spreading traces back to that race between melting and setting — and every fix either slows the melt or speeds the set. Here is why your cookies go flat and the nine fixes that actually work, ranked by impact.

    Why Cookies Spread: The Melt-vs-Set Race

    A cookie is a small chemistry experiment. In the oven’s heat, butter melts and sugars liquefy, causing the dough to spread outward — while simultaneously, the flour’s starches gelatinize and the egg proteins set, building the structure that stops the spread. If melting wins the race, you get flat crisps; if setting keeps pace, you get thick, chewy cookies with crisp edges. Everything below manipulates this race. Warm dough, melted butter, too little flour, too much sugar, or a cool oven all hand the advantage to melting. Cold dough, proper flour measurement, the right leavening, and a hot oven hand it to setting. The cookie science from King Arthur Baking confirms that temperature control is the dominant variable most home bakers overlook.

    Fix #1: Chill the Dough (Biggest Impact)

    Chilling is the single most effective anti-spread fix. Cold dough hits the oven with its butter still solid, so melting starts later and structure sets before the cookie can spread far. Chill scooped dough balls for at least 30 minutes; an hour is better, and overnight develops deeper flavor too as the flour hydrates (a bonus discovered by pastry chefs). Bake straight from the fridge — do not let the tray sit on the counter warming up while the oven preheats. If your kitchen is warm, chill the baking sheet itself between batches; a hot pan starts melting the next batch before it reaches the oven. This one change fixes the majority of flat-cookie cases on its own. For drop cookies baked from frozen, add 1 to 2 minutes to the bake time — frozen dough is the ultimate anti-spread insurance for make-ahead bakers.

    Fix #2: Check Your Butter

    Butter temperature at mixing matters enormously. Melted or even very soft butter incorporates too easily and creates a dough that spreads fast — many “chewy cookie” recipes calling for melted butter compensate with extra flour and chilling, which home bakers skip. For thick cookies, use butter that is cool and pliable: it should dent when pressed but not feel greasy or slump. Cream it with sugar just until combined, not whipped fluffy — over-creamed butter traps air that collapses in the oven, causing spread. And measure accurately: an extra tablespoon of butter (easy when eyeballing) noticeably increases spread. If you prefer the flavor of browned butter, brown it, then chill it back to solid before creaming.

    Fix #3: Measure Flour Correctly

    Too little flour is a top-three cause of flat cookies, and the usual culprit is scooping directly from the bag with the measuring cup, which compacts the flour — except most people actually under-measure this way inconsistently. The reliable methods: spoon flour into the cup and level it, or weigh it (120 grams per cup of all-purpose). Even two tablespoons short per batch increases spread visibly. If your cookies consistently go flat, try adding two extra tablespoons of flour to the recipe before changing anything else — it is the fastest diagnostic test. Bread flour (higher protein) also reduces spread and adds chewiness; swapping half the all-purpose for bread flour is a beloved trick for thick, chewy cookies. The cookie testing at Serious Eats quantified exactly how flour ratios change spread.

    Fixes #4-6: Leavening, Sugar, and Oven Heat

    Leavening affects spread more than rise here: baking soda encourages spread (it raises pH, weakening gluten and promoting browning), while baking powder gives lift with less spread. If your recipe uses only soda and your cookies go flat, try replacing half the soda with powder. Sugar type matters too — more white sugar means more spread and crispness; more brown sugar means less spread, more moisture, and chewiness. And check your oven temperature with a thermometer: an oven running 25°F cool gives the dough extra minutes to spread before setting. Bake at a true 350°F to 375°F on the middle rack, and give the oven a full 20-minute preheat so the walls, not just the air, are hot.

    Fixes #7-9: The Pan, the Scoop, and the Finish

    Use light-colored aluminum baking sheets, not dark nonstick — dark pans over-brown bottoms before the structure sets, and the cookies spread further on the hotter surface. Line with parchment, never grease the pan (grease is just more fat encouraging spread). Scoop tall, not wide: a tall mound of dough has further to spread before going flat, and it bakes into a thicker cookie. Finally, the bakery trick: immediately after pulling the tray from the oven, slam it once flat on the counter (the “pan bang”) to deflate any puffiness and create those rippled edges — then let the cookies set on the hot pan for 5 minutes before moving them. For more baking science, browse our food guides.

    Chocolate chip cookies spread flat when melting outruns structure-setting in the oven. Stop it by chilling the dough at least 30 minutes, using cool (not melted) butter, measuring flour by weight or spoon-and-level, checking that your oven truly hits 350-375°F, and baking tall scoops on light parchment-lined pans. Chill is the fix that matters most.

    Conclusion

    Flat cookies are a temperature and measurement problem with straightforward fixes: chill the dough, control your butter, measure flour right, verify oven heat, and scoop tall. Change one variable at a time and you will find your culprit fast — then thick, chewy cookies become your default. More baking troubleshooting? Meet our team or send us your questions.

    Frequently Asked Questions

    Should I use baking soda or baking powder for thick cookies?

    For less spread, favor baking powder — it provides lift without the spread-promoting effects of soda. Many thick-cookie recipes use both. If your recipe is all soda and spreads too much, swap half the soda for powder.

    Does chilling really make that much difference?

    Yes — it is the highest-impact single change. Cold butter melts later in the oven, giving the flour and egg structure time to set before the cookie spreads. Thirty minutes minimum; overnight also improves flavor.

    Why do my cookies spread more in summer?

    Warm kitchens soften butter faster at every stage — during mixing, while scooped dough waits, and on the tray. In summer, chill the dough longer, work quickly, and consider refrigerating the mixing bowl.

    Can I fix cookie dough that is already too soft?

    Yes — chill the portioned dough balls for at least 30 minutes before baking, and add a tablespoon or two of flour if the dough still feels slack. Do not bake soft, warm dough hoping for the best.

    Do silicone mats cause more spreading than parchment?

    Slightly, yes — silicone insulates the bottom, slowing the set, and its slick surface lets dough slide outward. Parchment on a light aluminum pan gives the best combination of browning and spread control.

  • When Is the Best Time to Buy a Whole Turkey for Thanksgiving Dinner?

    When Is the Best Time to Buy a Whole Turkey for Thanksgiving Dinner?

    Thanksgiving turkey shopping has its own calendar, and mistiming it means either paying full price or, worse, a still-frozen bird on Wednesday night. The best time to buy a whole turkey for Thanksgiving dinner depends on one decision — fresh or frozen — and each has its own timeline, price curve, and trade-offs. Buy frozen too late and you cannot thaw it safely; buy fresh too early and it spoils. Here is the complete timing guide, including when the sales hit, how thawing math works, and what size to buy.

    Fresh vs. Frozen: The Decision That Sets Your Timeline

    Frozen turkeys are the practical choice for most households: they are cheaper (often half the price of fresh per pound), available for weeks ahead, and — contrary to myth — taste essentially identical to fresh when thawed properly and cooked well. Blind tastings consistently fail to distinguish them. Fresh turkeys cost more ($2 to $4 per pound versus $0.50 to $1.50 for frozen on sale), must be bought 1 to 2 days before Thanksgiving, and offer a slight edge in texture for the most discerning palates. There is also a middle path: “fresh frozen” or air-chilled birds from specialty producers, ordered weeks ahead. For most families, the smart play is a frozen turkey bought on sale, thawed with care — the savings fund the rest of the feast. The turkey experts at Butterball note that proper thawing matters far more than fresh-versus-frozen for the final result.

    The Frozen Timeline: Buy Early, Thaw on Schedule

    For a frozen turkey, the buying window opens 3 to 4 weeks before Thanksgiving — and the best sales typically hit 1 to 2 weeks before the holiday, when supermarkets use turkeys as loss leaders (sometimes under $0.50 per pound, occasionally free with a minimum purchase). Buying during the sale week is the sweet spot: maximum discount with plenty of thaw time. The critical math is thawing: allow 24 hours of refrigerator thawing for every 4 to 5 pounds of turkey. A 16-pound bird needs 4 full days; a 20-pounder needs 5. Count backward from Thanksgiving morning and start thawing on that day — for a typical 16-pound turkey served Thursday, the bird goes from freezer to fridge on Sunday. Never thaw at room temperature; the exterior enters the bacterial danger zone while the center stays frozen. The USDA’s turkey thawing and food safety guidance is the authority on safe timelines.

    The Fresh Timeline: 1 to 2 Days Before

    Fresh turkeys have a short clock: buy 1 to 2 days before Thanksgiving, no earlier. Grocery stores stock fresh birds the weekend before the holiday, and popular sizes sell out — if you want fresh, shop Saturday or Sunday, not Wednesday. Store it in the coldest part of the fridge (below 40°F) on a rimmed tray to catch drips. Do not buy fresh a week ahead hoping it keeps; fresh poultry is safe for only 1 to 2 days refrigerated. If your plans are uncertain, buy frozen instead — a frozen bird waits patiently while a fresh one does not. Pre-ordered fresh turkeys from butchers or farms usually have a designated pickup day; confirm it and have fridge space cleared before you go.

    What Size to Buy (and the Leftover Question)

    The standard guidance is 1 to 1.5 pounds of turkey per person — 1 pound if you want modest leftovers, 1.5 if leftovers are the point (and for many families, they are). A 12-pound turkey serves 8 to 12; a 16-pounder serves 10 to 16; a 20-pounder serves 13 to 20. When in doubt, go bigger: extra turkey becomes sandwiches, soup, and tetrazzini, while a too-small bird is a Thanksgiving emergency. For very large gatherings, two medium turkeys beat one giant one — they cook faster, more evenly, and give you twice the coveted breast meat and drippings. Check your oven and roasting pan fit before buying; a 24-pound bird does not fit every oven. Measure your roaster and oven interior first — discovering the mismatch on Thanksgiving morning is a crisis no sale price justifies.

    Sales, Storage, and Smart Shopping

    Turkey economics reward planners. Beyond the loss-leader sales, warehouse clubs sell quality frozen birds at steady low prices all November. If freezer space allows, buying two sale turkeys — one for Thanksgiving, one for Christmas — locks in the year’s lowest price. Keep the receipt and check the store’s price policy; some adjust if the price drops further. Sign up for supermarket loyalty programs and apps in early November — digital coupons frequently stack an extra discount on top of the sale price, and some stores email turkey-specific offers to members first. Once home, a frozen turkey keeps perfectly for up to a year (though quality is best within 3 to 4 months), so there is no penalty for buying the moment you see a great price. A fresh turkey, again, gives you no such flexibility. For more holiday cooking strategy, browse our food guides.

    The best time to buy a Thanksgiving turkey: purchase frozen 1 to 3 weeks ahead to catch the loss-leader sales, then thaw in the fridge allowing 24 hours per 4-5 pounds (a 16-lb bird needs 4 days — start Sunday for Thursday dinner). Buy fresh only 1-2 days before. Plan 1 to 1.5 pounds per person, and never thaw at room temperature.

    Conclusion

    Turkey timing is simple once you know the rules: frozen bought on sale weeks ahead and thawed on a strict refrigerator schedule, or fresh bought 1 to 2 days before and no earlier. Size up generously for leftovers, respect the thawing math without shortcuts, and the bird takes care of itself. Planning the full holiday feast? Meet our team or send us your holiday cooking questions.

    Frequently Asked Questions

    Can I cook a turkey from frozen?

    Yes — the USDA says it is safe, though it takes about 50% longer and you cannot brine or stuff it easily. It is a legitimate emergency option, but a properly thawed bird cooks more evenly and browns better.

    What if my turkey is still frozen on Wednesday night?

    Use the cold-water thaw method: submerge the wrapped turkey in cold water, changing the water every 30 minutes. It thaws at about 30 minutes per pound — a 16-pound bird takes roughly 8 hours. Cook immediately after thawing.

    How far in advance do turkeys go on sale?

    The deepest discounts typically appear 1 to 2 weeks before Thanksgiving, when supermarkets use turkeys as loss leaders. Prices sometimes drop below $0.50 per pound. Warehouse clubs offer steady low prices throughout November.

    Is a fresh turkey worth the extra cost?

    For most cooks, no — properly thawed frozen turkey is indistinguishable in blind tastings. Fresh makes sense if you are brining (no thaw time needed) or if you simply prefer it and the budget allows. The cooking technique matters far more than fresh versus frozen.

    How long can a thawed turkey stay in the fridge before cooking?

    One to 2 days after fully thawing. Plan your thaw so the bird finishes defrosting the day before or the morning of cooking — a turkey thawed Sunday and cooked Thursday has been sitting too long.

  • How to Make Authentic Tacos al Pastor Without a Vertical Rotisserie

    How to Make Authentic Tacos al Pastor Without a Vertical Rotisserie

    Tacos al pastor — chile-marinated pork shaved off a spinning vertical spit, kissed with charred pineapple — is one of Mexico’s greatest street foods, born from Lebanese immigrants’ shawarma technique meeting Mexican flavors. The trompo, that glorious vertical rotisserie, is the one piece of equipment no home kitchen has. But the soul of al pastor is not the spit; it is the adobo marinade, the thin-sliced pork, the high-heat char, and the pineapple. With the right technique, you can get remarkably close at home using your oven or grill. Here is how to make authentic-tasting tacos al pastor without a vertical rotisserie.

    What Makes Al Pastor Al Pastor

    Strip away the theater of the trompo and al pastor is defined by four elements. First, the adobo: dried chiles (guajillo for sweetness and color, plus árbol or chipotle for heat) blended with achiote paste, garlic, oregano, cumin, cloves, vinegar, and pineapple juice. Achiote — ground annatto seed — gives the signature brick-red color and earthy flavor; find it in Latin markets or online. Second, thin-sliced pork shoulder (Boston butt), marinated for hours so the chile mixture penetrates. Third, high-heat cooking that chars the edges while keeping the interior juicy. Fourth, pineapple — traditionally a whole pineapple speared atop the trompo, its juices basting the meat. Nail these four and the absence of the spit becomes a footnote. The authentic Mexican cooking resources from Rick Bayless break down the traditional adobo beautifully.

    The Marinade: Where the Magic Lives

    Toast 4 to 5 dried guajillo chiles (stemmed and seeded) in a dry skillet until fragrant, then soak in hot water for 20 minutes. Blend with 3 ounces of achiote paste, 4 garlic cloves, a quarter cup of white vinegar, half a cup of pineapple juice, a teaspoon each of dried oregano and cumin, a pinch of ground cloves, and salt. The result should be a thick, brick-red paste that smells incredible. Slice 3 to 4 pounds of pork shoulder as thin as you can — partially freezing it for an hour firms it up for cleaner slicing — and coat every slice thoroughly in the adobo. Marinate at least 4 hours, ideally overnight; the acid and salt need time to work into the meat. Reserve a little marinade (made separately, never the meat-contact batch) for basting if you like. This marinade also freezes well, so double it for next time.

    The Trompo Problem: Three Home Solutions

    Here is where home cooks improvise the vertical spit. Method one, the oven stack: thread the marinated pork slices onto two or three vertical metal skewers stuck into a halved onion base on a sheet pan, building a compact tower. Roast at 450°F, and the tower’s exterior chars while the interior stays juicy — then shave off the crispy outer slices with a knife, exactly like a taquero. Method two, the grill: pile the slices on skewers over direct high heat, turning for char on all sides. Method three, the sheet-pan blast: spread slices in a single layer on a screaming-hot sheet pan under the broiler for intense char, fastest but least trompo-like. The oven-stack method gives the closest texture to real trompo because the meat self-bastes as it roasts. Whichever you choose, the tacos al pastor testing at Serious Eats confirms that thin slices plus ripping heat matter more than the equipment.

    Pineapple, Tortillas, and Assembly

    Do not skip the pineapple — its sweetness and acidity cut the rich pork and it is non-negotiable in authentic al pastor. Char thick pineapple rings or spears on the grill or in a screaming-hot skillet until caramelized at the edges, then chop. Warm corn tortillas directly over a gas flame or in a dry skillet until pliable with a few charred spots; double them up, taqueria-style, since they are thin. Assemble: a generous pile of chopped pork, diced white onion, chopped cilantro, a few chunks of charred pineapple, a squeeze of lime, and your salsa of choice — salsa roja or a smoky salsa de árbol. Eat immediately, standing up, preferably with the confidence of someone who just made trompo-less al pastor. Leftover pork reheats beautifully in a hot skillet and makes exceptional quesadillas, tortas, and breakfast tacos the next day. For more Mexican-inspired cooking, browse our food guides.

    Sourcing Ingredients and Easy Swaps

    Most al pastor ingredients are one Latin-market trip away, but workable swaps exist. No achiote paste? Use two tablespoons of paprika plus a teaspoon of cumin and a splash of vinegar for color and earthiness — not identical, but respectable. No guajillos? Ancho chiles give sweetness with less heat; pasillas work in a pinch. Canned pineapple juice replaces fresh in the marinade without complaint, though fresh pineapple for serving chars far better than canned rings. Corn tortillas beat flour here — their nutty flavor is part of the authentic profile — and white onion plus cilantro is the classic topping duo for a reason. Buy extra chiles and achiote when you find them; both keep for months and this marinade is worth repeating.

    Authentic tacos al pastor without a trompo come down to the adobo (guajillo chiles, achiote, garlic, vinegar, pineapple juice), thin-sliced marinated pork shoulder, and ripping heat. Stack the slices on vertical skewers over an onion base and roast at 450°F, shaving the charred exterior like a taquero. Serve on doubled warm corn tortillas with charred pineapple, onion, cilantro, lime, and salsa.

    Conclusion

    You do not need a vertical rotisserie to capture al pastor’s soul — you need the right adobo, thin pork, high heat, and pineapple. The oven-stack method gets you remarkably close to the taqueria experience, and the marinade alone elevates any pork you cook. Fire up the oven and taste Mexico City at home. More taco ambitions? Meet our team or send us your cooking questions.

    Frequently Asked Questions

    Can I use pork loin instead of pork shoulder?

    You can, but shoulder is better — its fat and connective tissue keep the meat juicy through high-heat cooking, while lean loin dries out. If you must use loin, marinate longer and watch the cooking time carefully.

    What is achiote and where do I buy it?

    Achiote is ground annatto seed, often sold as a paste (often labeled “achiote” or “recado rojo”) in Latin markets, the international aisle of large supermarkets, or online. It gives al pastor its signature red color and earthy flavor — there is no great substitute.

    How long should I marinate the pork?

    Minimum 4 hours, ideally overnight (8 to 12 hours). The acid needs time to penetrate the thin slices. Do not marinate beyond 24 hours — the acid will start to break down the meat’s texture and make it mushy.

    Can I make al pastor ahead for a party?

    Yes. Marinate the pork up to a day ahead, and the adobo itself keeps a week refrigerated or months frozen. Cook just before serving — al pastor is at its peak in the 15 minutes after the pork comes off the heat.

    What toppings go on tacos al pastor?

    The classics: diced white onion, chopped cilantro, charred pineapple chunks, lime wedges, and salsa. Radishes and a sprinkle of salt are common taqueria additions. Keep it simple — the pork is the star.