Breaking

Category: Technology

  • How to Change Your DNS Settings on Windows 11 for Faster Browsing

    How to Change Your DNS Settings on Windows 11 for Faster Browsing

    Every time you type a website address, your computer asks a DNS server — the internet’s phone book — to translate that name into a number. By default, you use your internet provider’s DNS, which is often slow, sometimes logs your browsing, and occasionally hijacks mistyped addresses to show you ads. Switching to a faster public DNS on Windows 11 takes two minutes, costs nothing, and can shave noticeable milliseconds off every page load while improving privacy. Here is how to do it, which servers to choose, and how to verify it actually helped.

    What DNS Does and Why Changing It Helps

    DNS resolution happens before anything else when you load a site — your browser cannot even start downloading the page until the name resolves. A slow DNS server adds 50–200 milliseconds to every new domain you visit; across a day of browsing dozens of sites, that adds up to real perceived sluggishness. Your ISP’s DNS is rarely optimized for speed, and some ISPs use DNS to redirect mistyped domains to ad pages or to log browsing for marketing.

    Readers can also follow related coverage through London Big News’ capital coverage.

    Public DNS providers — Cloudflare (1.1.1.1), Google (8.8.8.8), and Quad9 (9.9.9.9) — run massive anycast networks designed to answer queries in single-digit milliseconds from nearly anywhere. Many also promise no logging (Cloudflare) or add malware-domain blocking (Quad9). Switching is not magic — it will not fix a slow internet plan — but it removes a common hidden bottleneck and a privacy leak in one move.

    Step 1: Open Windows 11 Network Settings

    Right-click the network icon in the taskbar (bottom-right corner) and select “Network and Internet settings.” Click “Advanced network settings,” then “More network adapter options” — this opens the classic Control Panel network window that Microsoft keeps burying deeper with each Windows release. Right-click your active connection (WiFi or Ethernet — change the one you actually use, or both) and select Properties.

    In the list, select “Internet Protocol Version 4 (TCP/IPv4)” and click Properties. This is where the DNS settings live. Note the current setting first — if it is “Obtain DNS server address automatically,” you are on your ISP’s DNS, and you can always revert by reselecting that option.

    Step 2: Enter Your New DNS Servers

    Select “Use the following DNS server addresses” and enter your chosen servers. The most popular choices: Cloudflare — Preferred 1.1.1.1, Alternate 1.0.0.1 (fastest for most US users, audited no-logging privacy); Google — Preferred 8.8.8.8, Alternate 8.8.4.4 (extremely reliable, but Google’s privacy policy applies); Quad9 — Preferred 9.9.9.9, Alternate 149.112.112.112 (blocks known malicious domains, nonprofit-operated).

    Click OK, then Close. The change takes effect immediately for new connections — no restart needed, though you may want to close and reopen your browser to flush its internal DNS cache. If a site suddenly fails to load, you mistyped an address; recheck the numbers. And remember what you changed: if anything ever behaves oddly, switching back to automatic takes ten seconds.

    Step 3: Also Set IPv6 DNS (If You Use IPv6)

    Many connections now use IPv6 alongside IPv4, and Windows will happily use your ISP’s IPv6 DNS even after you change IPv4 — leaking queries you thought you moved. In the same Properties window, select “Internet Protocol Version 6 (TCP/IPv6),” click Properties, and set its DNS too: Cloudflare 2606:4700:4700::1111 and 2606:4700:4700::1001; Google 2001:4860:4860::8888 and 2001:4860:4860::8844; Quad9 2620:fe::fe and 2620:fe::9.

    If your network does not use IPv6 at all, these settings sit idle and harmless. But setting them closes the leak for networks that do — and most US broadband and mobile connections now do. It takes thirty extra seconds and completes the job properly.

    Step 4: Verify the Change Worked

    Open Command Prompt and type nslookup google.com — the “Server” line should show your new DNS address (1.1.1.1, 8.8.8.8, or 9.9.9.9), not your router or ISP address. For a deeper check, visit a DNS leak test site, which shows which servers handle your queries — after the change, you should see only your chosen provider.

    To measure the speed difference, use a free benchmarking tool like GRC’s DNS Benchmark or namebench: they test dozens of DNS servers from your actual location and rank them by response time. Run one before and after the change if you want proof rather than placebo. Most US users see Cloudflare or their ISP’s own servers win on raw speed — the privacy and reliability benefits of switching apply regardless.

    Going Further: DNS Over HTTPS

    Standard DNS queries are unencrypted — anyone on your network path can see which sites you look up. Windows 11 supports DNS over HTTPS (DoH), which encrypts those queries. To enable it: Settings, Network and internet, WiFi or Ethernet, click your connection, and under “DNS server assignment” click Edit — if your chosen provider supports DoH (Cloudflare, Google, and Quad9 all do), Windows 11 will offer “Encrypted only (DNS over HTTPS)” as an option.

    DoH is the privacy completion of this project: not only are you using a no-logging provider, your ISP cannot even see the queries in transit. The Cloudflare documentation on DNS privacy explains the threat model well. Note that DoH does not hide which sites you visit from your ISP entirely — the subsequent connections still reveal IP addresses — but it closes the easiest snooping channel.

    Troubleshooting: When New DNS Breaks Things

    Two common issues. First, some corporate VPNs and parental-control software depend on specific DNS — if your work VPN stops resolving internal sites after the change, switch back to automatic while the VPN is connected. Second, a few ISPs intercept all DNS traffic regardless of your settings (DNS hijacking); if nslookup still shows your ISP’s server after the change, your ISP is intercepting, and DNS over HTTPS is the workaround since encrypted queries cannot be intercepted.

    Also flush stale caches after changing: in Command Prompt, run ipconfig /flushdns, and in Chrome visit chrome://net-internals/#dns and click “Clear host cache.” Microsoft’s Windows networking support pages document these steps for persistent resolution problems.

    Switching DNS on Windows 11 means entering 1.1.1.1/1.0.0.1 (Cloudflare), 8.8.8.8/8.8.4.4 (Google), or 9.9.9.9 (Quad9) in your adapter’s IPv4 and IPv6 properties — two minutes, no restart, verified with nslookup. Add DNS over HTTPS for encrypted queries.

    Conclusion

    Changing your DNS settings on Windows 11 is one of the highest-value two-minute tweaks in computing: faster name resolution on every page load, no ISP snooping or ad-injection on mistyped domains, and — with DNS over HTTPS — encrypted queries. Pick Cloudflare for speed and privacy, Quad9 for malware blocking, or Google for raw reliability; set both IPv4 and IPv6; verify with nslookup. For more Windows optimization guides, browse our technology section, meet the team, or ask us your networking questions.

    Frequently Asked Questions

    Will changing DNS make my internet faster?

    It makes page loads snappier by speeding up name resolution (often 50–200ms saved per new domain), but it cannot increase your plan’s bandwidth — downloads and streaming speeds stay the same. Think of it as removing a delay, not adding speed.

    Which DNS is best: Cloudflare, Google, or Quad9?

    Cloudflare (1.1.1.1) is fastest for most US users with strong privacy; Quad9 (9.9.9.9) adds malicious-domain blocking; Google (8.8.8.8) is the most battle-tested for reliability. Run a benchmark from your location — the winner varies by city and ISP.

    Is it safe to change my DNS settings?

    Yes — it is fully reversible in ten seconds by reselecting “Obtain DNS server address automatically.” The providers listed are operated by major, reputable organizations. Just double-check you typed the addresses correctly.

    Should I change DNS on my router instead?

    Changing it on the router covers every device in the house at once — phones, TVs, consoles — which is more thorough. But per-device changes let you use different providers per device and avoid touching router settings. Do the router if you are comfortable there; per-device otherwise.

    What is DNS over HTTPS and do I need it?

    DoH encrypts your DNS queries so networks cannot snoop on which sites you look up. It is a genuine privacy upgrade available in Windows 11 settings. You do not strictly need it for the speed benefits, but enabling it completes the privacy picture.
  • What to Do If Your Phone Screen Cracks but the Touch Still Works

    What to Do If Your Phone Screen Cracks but the Touch Still Works

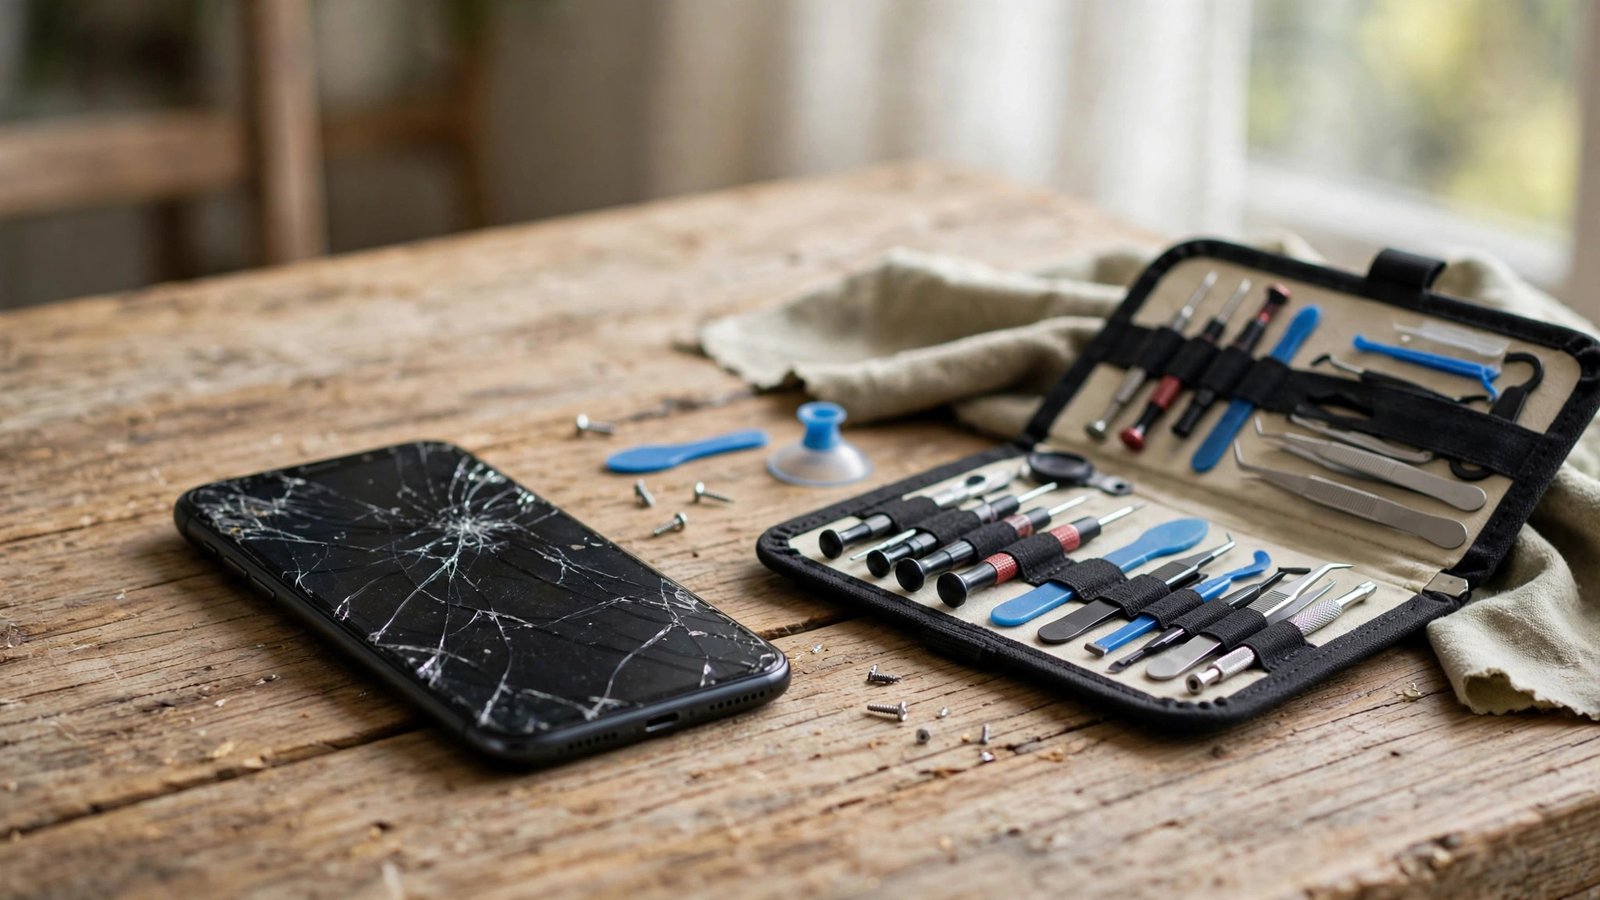
    The sickening crack spiderwebs across your screen — but when you swipe, everything still works. Touch responds, colors look right, the phone functions perfectly behind its shattered glass. So do you actually need to fix it? The honest answer: not today, but soon — because a cracked screen is a structural injury that gets worse, and the risks go beyond cosmetics. Here is what to do right now, what happens if you wait, and your repair options ranked by cost.

    Immediate First Aid: Stop It Getting Worse

    Do three things today. First, apply a tempered-glass screen protector over the crack — it holds the shards in place, prevents glass splinters in your fingertip (a real hazard with cracked screens), and stops the crack from spreading as quickly. A $8 protector is the best money you will spend this week. Second, back up everything now: photos, messages, the lot. A cracked screen means the phone has suffered impact, and impact damage can progress — the display could fail suddenly next week.

    Third, assess the damage honestly. A single hairline crack in the corner with perfect touch and display? Low urgency. Spiderweb across the whole screen, even with working touch? Higher urgency — the structural integrity is gone, and the next minor bump can kill the digitizer. Cracks over the front camera or earpiece can degrade calls and selfies gradually as glass dust migrates.

    What Happens If You Just Live With It

    Many people do, for months. The risks of waiting: the crack spreads (temperature changes and normal flexing propagate cracks — what is a corner chip today is a full spiderweb by summer), glass splinters work loose and can cut fingers or fall into the earpiece, moisture and dust enter through the cracks and corrode internals (that “mystery” malfunction six months later), and touch sensitivity degrades as the digitizer layer beneath takes micro-damage.

    There is also the resale/trade-in math: a cracked screen typically cuts trade-in value by $100–200+, while a repair costs $30–150 depending on route. Waiting rarely saves money — it usually costs it. And if the phone is a work device or your only phone, the risk of sudden total failure should weigh heavily.

    Option 1: Manufacturer Repair (Best Quality)

    Apple and Samsung’s official repairs use genuine parts, preserve water resistance (they reseal the device), and keep your warranty intact. iPhone screen repair runs $129–379 depending on model (cheaper with AppleCare+, which makes accidental damage a flat fee); Samsung similar. The downside is cost and logistics — mail-in takes days, though many cities have same-day stores.

    Choose this for: phones under warranty, phones you will keep 2+ years, and anyone who values water resistance (third-party repairs almost never restore the factory seal properly). Check your AppleCare+/Samsung Care+ status first — it transforms the economics completely. Apple’s repair pricing pages list exact costs per model.

    Option 2: Third-Party Repair Shop (Best Value)

    Local repair shops typically charge $50–150 for a screen replacement, often done in under an hour while you wait. Quality varies enormously: good shops use high-grade aftermarket screens nearly indistinguishable from original; bad shops use dim, fragile panels with washed-out colors. Vet the shop — check reviews specifically mentioning screen repairs, ask what grade of parts they use, and confirm the warranty (reputable shops offer 90 days to a year).

    Ask specifically: does the replacement include the full display assembly (recommended — glass, digitizer, and LCD/OLED as one unit) or just the glass (cheaper but riskier, and True Tone/calibration features may not transfer)? For iPhones, note that non-genuine screens trigger a “non-genuine display” warning in Settings — cosmetic, but it affects resale. The iFixit repair guides show what the repair involves if you want to judge a shop’s competence.

    Option 3: DIY Repair (Cheapest, Riskiest)

    Screen replacement kits cost $25–60 on Amazon and eBay, and iFixit sells quality kits with tools and guides. For older iPhones (8 through 11 especially), it is a genuinely approachable 30–60 minute repair with good guides. For newer phones with waterproof sealing, Face ID sensors fused to the display, and delicate OLED panels, DIY risk rises sharply — one slip damages the $300 display you just bought or kills Face ID permanently.

    DIY makes sense when: the phone is old/low-value (repair quotes exceed its worth), you are technically comfortable, and you accept the risks (no water resistance afterward, possible feature loss). It does not make sense for a $1,000 phone under warranty — the savings do not justify the risk. Watch a full video guide for your exact model before ordering parts; if it looks intimidating, it is.

    Option 4: When Repair Is Not Worth It

    Do the math: if professional repair costs more than 40–50% of the phone’s current used value, put the money toward a replacement instead. A $150 repair on a phone worth $180 is bad economics — especially since the impact that cracked the screen may have damaged other components waiting to fail. Also consider upgrading if the battery is degraded too; a cracked screen plus an 80%-health battery is a phone telling you it is done.

    In the meantime, the screen protector + backup strategy from the first-aid section keeps a cracked phone safely usable for weeks or months while you decide. And when you do replace it, sell the cracked phone for parts — even shattered phones fetch $30–80 for their working internals. The Consumer Reports phone buying guidance helps you shop the replacement wisely.

    A cracked-but-working screen needs a tempered-glass protector today (holds shards, stops spreading) and a full backup now. Then choose: manufacturer repair for quality and warranty, third-party shop for value, DIY for old phones — but do not wait indefinitely, because cracks spread and moisture enters.

    Conclusion

    A cracked screen with working touch is not an emergency, but it is a countdown: protect it with a tempered-glass cover today, back up your data, and choose your repair path based on the phone’s value and your risk tolerance. Manufacturer repair for quality, local shops for value, DIY for the brave with old phones. Waiting is the only wrong answer — cracks grow, and the repair gets more expensive, not less. For more phone survival guides, see our technology section, meet the team, or ask us your repair questions.

    Frequently Asked Questions

    Can I just put a screen protector over the crack and ignore it?

    As a temporary measure, yes — a tempered-glass protector holds everything together and prevents cuts. But it does not stop the underlying crack from slowly spreading or moisture from entering. Think of it as a bandage buying you weeks, not a cure.

    Will Apple void my warranty if I use a third-party repair?

    Third-party screen repair does not void the entire warranty under US law (Magnuson-Moss), but Apple can deny warranty service for issues related to the non-genuine part. In practice, iPhones with third-party screens get flagged, and subsequent Apple repairs may be refused. Factor this into the decision.

    Does a cracked screen affect trade-in value?

    Significantly — typically $100–200+ less than an intact phone. Interestingly, repairing first then trading in often nets more than trading in cracked: a $100 repair that recovers $150 in trade value pays for itself.

    Is the glass dangerous to touch?

    It can be — loose shards and splinters from cracked screens cause small cuts, and glass dust can irritate. A tempered-glass protector over the crack eliminates the hazard. Avoid pressing hard on cracked areas and keep it away from children’s hands.

    Why does touch still work with a cracked screen?

    The touch digitizer is a separate layer beneath the glass. Cracks in the outer glass do not immediately break the digitizer — but impacts and crack propagation eventually reach it, which is why touch often fails weeks after the initial crack.

  • How to Tell If Your Computer Has a Virus or Just Needs More RAM

    How to Tell If Your Computer Has a Virus or Just Needs More RAM

    Your computer crawls: programs take forever to open, the browser stutters, everything feels like wading through mud. Two very different problems cause this — malware secretly burning your resources, or simply not enough RAM for what you are asking the machine to do. They feel identical from the chair, but the fixes are opposites: one needs a security cleanup, the other needs a hardware upgrade (or lighter habits). Spending money on RAM will not fix a virus, and antivirus will not fix 4 GB of RAM in 2026. Here is how to tell which you have.

    Test 1: Check RAM Usage (the Decisive Number)

    Open Task Manager on Windows (Ctrl + Shift + Esc, Performance tab, Memory) or Activity Monitor on Mac (Memory tab, look at “Memory Pressure”). The key figure: what percentage of RAM is in use during your normal slow moments? If memory sits at 85–95%+ while you are just browsing with a few apps open, you are RAM-starved — the system is constantly swapping data to the much-slower disk, which feels exactly like “my computer is dying.”

    If RAM usage is modest (50–70%) but the machine still crawls, RAM is not your problem — something is eating CPU or disk instead, which points toward malware, a runaway process, or a failing drive. This single number splits the diagnosis cleanly: high RAM usage means upgrade-or-lighten; normal RAM with slowness means investigate processes.

    Test 2: Look for Malware’s Fingerprints

    With Task Manager open, sort processes by CPU. Malware’s signature: a process with a nonsense name or a familiar name in the wrong place (a “svchost.exe” running from your Downloads folder, for instance) consuming steady CPU. Also check the Startup tab for unknown entries, and your browser for changed homepages, new toolbars, or search engines you did not choose — classic hijacker signs.

    Run the scans: Windows Security full scan (built in, free) plus a second-opinion scan with the free version of Malwarebytes. If scans find cryptominers, adware, or trojans, you have your answer — clean the infection first, then reassess speed. The FTC’s malware guide details the warning signs. Note: legitimate processes (antivirus scans, Windows Update, cloud sync) also spike CPU temporarily — check whether the hog persists across reboots before panicking.

    How Much RAM Do You Actually Need?

    The honest 2026 baseline: 8 GB is the minimum for comfortable general use (browser, office apps, video calls); 16 GB is the sweet spot for multitaskers and anyone who keeps 20+ browser tabs open; 4 GB — still sold in budget laptops — is simply insufficient for modern Windows or macOS and will feel slow no matter what you do. If your machine has 4 GB and Test 1 shows it pegged, no software tweak fixes that; it is a hardware capacity problem.

    Check whether your RAM is upgradeable: many thin laptops solder RAM permanently (check your model’s specs), while most desktops and chunkier laptops have accessible slots. A RAM upgrade ($30–60 for 8–16 GB DDR4) is the best-value speed upgrade in computing — but only when RAM is actually the bottleneck. Upgrading RAM on a malware-infected machine just gives the malware more room.

    The Third Suspect: A Dying Hard Drive

    There is a third cause people miss: a failing mechanical hard drive. Symptoms overlap both — extreme slowness, freezing, programs not responding — but with telltale extras: clicking or grinding noises, frequent “not responding” hangs, and disk usage pinned at 100% in Task Manager with little actual throughput. Check the drive’s health with CrystalDiskInfo (free, Windows) — it reads the drive’s self-diagnostics.

    If the drive is failing, neither antivirus nor RAM helps — and you should back up immediately, because a dying drive can take your data with it. The real fix is replacing the HDD with an SSD ($30–50 for 500 GB), which is the single most transformative upgrade for any computer still on spinning rust — often a bigger speedup than doubling the RAM.

    Quick Wins Before Spending Money

    Regardless of diagnosis, do the free maintenance first: audit startup programs and disable the non-essential (Task Manager, Startup tab); uninstall programs you do not use; clear browser extensions and keep tabs under control; ensure 15–20% of your drive is free; and update everything. These steps resolve a large share of “slow computer” complaints without diagnosing anything.

    Then lighten the load to match your RAM: if you have 8 GB, close the 40-tab browser habit (use bookmarks), quit apps instead of minimizing them, and restart every few days — memory leaks accumulate. Browsers have memory-saver modes that sleep idle tabs automatically; turn them on. Many “need more RAM” cases are actually “need fewer tabs” cases.

    The Decision: Clean, Upgrade, or Replace

    Put it together. Malware found? Clean it, reassess — do not buy RAM for an infected machine. RAM pegged at 90%+ with 8 GB or less and no malware? Upgrade RAM if possible ($30–60), or adapt habits if soldered. Drive failing? SSD replacement, urgently, with backup first. Machine over 7–8 years old with multiple issues? Put the upgrade money toward a replacement — a $400 modern laptop outperforms a fully upgraded 2016 machine.

    And be honest about expectations: no fix makes a 2015 laptop with 4 GB of soldered RAM feel new. The goal is identifying the actual bottleneck and spending (or not spending) accordingly — the most expensive mistake is upgrading the wrong component.

    Check Task Manager’s memory percentage during slowdowns: pegged at 85%+ means you need more RAM (or fewer tabs); normal RAM with high CPU from suspicious processes means malware — scan with Windows Security plus Malwarebytes. Also rule out a dying hard drive, which mimics both.

    Conclusion

    Virus versus RAM is a diagnosable question, not a guessing game: check memory usage, scan for malware’s fingerprints, assess drive health, and do the free maintenance first. Each cause has its own fix — cleanup, RAM upgrade, or SSD replacement — and knowing which saves you from buying RAM for a virus or scanning for a hardware limit. For more computer triage guides, browse our technology section, meet the team, or describe your slow machine and we will help diagnose it.

    Frequently Asked Questions

    How do I know if I need more RAM?

    Open Task Manager (Performance, Memory) during normal use. If memory usage consistently sits above 85%, you are RAM-starved — the system is swapping to disk, which causes the slowness. Below 70% with slowness points elsewhere (CPU hogs, malware, or drive issues).

    Can a virus survive a RAM upgrade?

    Obviously yes — upgrading hardware does nothing to malware. Always scan and clean infections before spending money on hardware. A RAM upgrade on an infected machine just gives the malware more memory to work with.

    Is 8 GB of RAM enough in 2026?

    For general use — browsing, office work, video calls — yes, comfortably. For heavy multitasking, creative work, or 30+ browser tabs, 16 GB is the sweet spot. 4 GB is insufficient for modern operating systems regardless of what else you do.

    Will more RAM fix a slow old hard drive?

    No — these are independent bottlenecks. If CrystalDiskInfo shows a failing drive or Task Manager shows disk pinned at 100%, the fix is an SSD replacement, not RAM. In fact, an SSD upgrade usually delivers a bigger perceived speedup than a RAM upgrade on old machines.

    How can I tell a virus from a legitimate process using CPU?

    Legitimate spikes are temporary and explainable (Windows Update, antivirus scan, cloud sync finishing). Malware persists across reboots, hides with nonsense or mimicked names, and resists being closed. When in doubt, scan with Malwarebytes and research the process name online.

  • Why Your Microwave Interferes With Your WiFi Signal

    Why Your Microwave Interferes With Your WiFi Signal

    You are on a video call from the kitchen table, someone microwaves lunch, and your WiFi dies — every single time. It feels like a prank, but it is physics: your microwave oven and your WiFi router are shouting on the same radio frequency, and the microwave shouts a million times louder. This is one of the most common and most misunderstood sources of home WiFi problems. Here is why it happens, how to confirm it, and the practical fixes that end the lunchtime disconnects.

    Why a Microwave Kills WiFi: Shared Airwaves

    Microwave ovens heat food by blasting it with 2.4 GHz radio waves — the exact frequency your router’s 2.4 GHz WiFi band uses. It is not a coincidence: 2.4 GHz is an unlicensed ISM band, free for anyone to use, which is why both devices ended up there. A microwave emits around 1,000 watts of 2.4 GHz energy; your router transmits at about 0.1 watts. When the microwave runs, it floods the band with noise millions of times stronger than your WiFi signal.

    Microwave shielding is good but imperfect — the door mesh blocks most radiation, but enough leaks to devastate nearby WiFi. The interference is worst within 10–15 feet of the microwave and affects the 2.4 GHz band almost exclusively; the 5 GHz band uses a completely different frequency the microwave does not touch. That single fact drives every fix below.

    How to Confirm the Microwave Is the Culprit

    The test is simple: run a continuous ping or a speed test on a device connected to 2.4 GHz WiFi, then run the microwave empty for 30 seconds (with a cup of water inside — never run it truly empty). If latency spikes, speeds collapse, or the connection drops during those 30 seconds and recovers immediately after, you have your answer. Repeat once to be sure.

    Also note the pattern: interference that strikes at mealtimes, lasts 2–5 minutes, and affects only devices near the kitchen is the classic microwave signature. If the whole house drops regardless of distance, or it happens when the microwave is off, look elsewhere — likely a router or ISP issue. The FCC’s interference guidance lists microwave ovens among the most common household WiFi disruptors.

    Fix 1: Move Devices to the 5 GHz Band

    This is the fix that solves it for most people permanently. The 5 GHz band is immune to microwave interference — different frequency, no overlap. Move your laptop, phone, and streaming devices to the 5 GHz network (the one with “5G” in its name). In most homes, 5 GHz reaches the kitchen fine, and you get faster speeds as a bonus.

    The devices stuck on 2.4 GHz — older smart-home gadgets, some printers — do not need real-time performance, so their brief microwave-induced hiccups rarely matter. Prioritize the devices where drops hurt: work laptops, video-call setups, streaming TVs. If your router combines both bands under one name (band steering), consider splitting them so you can deliberately park important devices on 5 GHz.

    Fix 2: Move the Router (or the Microwave’s Victims) Away

    Interference strength drops rapidly with distance. If your router sits on the kitchen counter next to the microwave — a depressingly common setup — moving it to another room can eliminate the problem even on 2.4 GHz. Every wall and every ten feet of distance dramatically reduces the microwave’s noise at the router.

    Equally, move yourself: if you work from the kitchen table, the laptop’s WiFi radio is in the blast zone regardless of where the router is. Relocating your workspace just one room away, or switching that laptop to 5 GHz, breaks the pattern. Central, elevated router placement — the standard advice — also happens to maximize distance from kitchen appliances.

    Fix 3: Change the 2.4 GHz Channel

    Microwave interference is strongest at the center of the 2.4 GHz band and weaker at the edges. WiFi channels 1 and 11 sit at the band’s edges; the middle channels overlap the microwave’s peak noise most. If you must use 2.4 GHz near a kitchen, log into your router and set the 2.4 GHz channel manually to 1 or 11 instead of Auto.

    This is a mitigation, not a cure — a close microwave overwhelms even edge channels — but combined with distance it can make 2.4 GHz usable. Use a WiFi analyzer app to check which channels your neighbors use too; in an apartment, channel congestion compounds the microwave problem, and picking a clear edge channel helps both.

    Other Kitchen Interference Worth Knowing

    Microwaves are the worst offender, but kitchens host others: baby monitors and older cordless phones also use 2.4 GHz; Bluetooth devices (speakers, headphones) share the band; even some LED power supplies emit radio noise. If problems persist after addressing the microwave, audit what else is transmitting nearby.

    And check the microwave itself: a very old or damaged microwave with a degraded door seal leaks more radiation than a modern one. If the interference seems unusually severe — killing WiFi two rooms away — the oven’s shielding may be failing, which is also a safety concern worth addressing. When in doubt, the 5 GHz migration in Fix 1 sidesteps all of it regardless of source. Our technology guides cover more WiFi interference detective work.

    Microwave ovens blast 2.4 GHz radio energy a million times stronger than your router’s signal, which is why WiFi dies at lunchtime. Move important devices to the 5 GHz band (immune to microwaves), increase distance from the kitchen, or switch the 2.4 GHz channel to 1 or 11.

    Conclusion

    Microwave WiFi interference is pure physics — 1,000 watts of 2.4 GHz noise versus your router’s whisper — but the fixes are easy: migrate devices to 5 GHz, put distance between the router and the kitchen, and tune the 2.4 GHz channel as a fallback. Confirm with the 30-second microwave test, apply the fixes, and lunchtime disconnects become a story you tell, not a problem you have. For more home-networking fixes, browse our technology section, meet the team, or ask us your WiFi mysteries.

    Frequently Asked Questions

    Can a microwave damage my router or devices?

    No — the interference disrupts the radio signal but causes no hardware damage. Your devices are simply deafened by noise while the microwave runs; they recover fully the moment it stops. It is annoying, not harmful.

    Why does only my laptop disconnect but not my phone?

    Different devices handle interference differently: antenna design, WiFi chip quality, and which band each is connected to all matter. If the phone is on 5 GHz and the laptop on 2.4 GHz, only the laptop suffers — which also confirms the diagnosis.

    Is microwave radiation from the oven dangerous?

    Modern microwaves in good condition leak only tiny amounts well within safety standards — the door mesh is specifically designed to block the waves. The WiFi disruption comes from minuscule leakage that is still enormous relative to WiFi signal strength. If you are concerned about the seal, have it checked.

    Do air fryers or other appliances interfere too?

    Not meaningfully — the interference is specific to microwave ovens because they intentionally generate 2.4 GHz radio waves. Other appliances do not transmit on WiFi frequencies (though faulty electronics of any kind can emit incidental radio noise).

    Will a WiFi 6 router fix microwave interference?

    Partially — WiFi 6 handles interference more gracefully, but a microwave next to the router still overwhelms the 2.4 GHz band regardless of standard. The band migration to 5 GHz matters far more than the WiFi generation.

  • How to Block Spam Text Messages From Unknown Numbers on iPhone

    How to Block Spam Text Messages From Unknown Numbers on iPhone

    “Hi, this is USPS, your package is held” — from a number you have never seen. Then the crypto pitch, the fake bank alert, the “you won” scam. Spam texts on iPhone have exploded, and blocking numbers one by one is whack-a-mole: spammers rotate numbers constantly. Apple has built genuinely effective tools to stem the flood — most iPhone owners just never turn them on. Here is the layered setup that reduces spam texts from a daily deluge to a rare nuisance.

    Layer 1: Filter Unknown Senders (the Foundation)

    Start here: Settings, Messages, turn on “Filter Unknown Senders.” This splits your Messages app into two tabs — Contacts and Unknown Senders — so spam stops interrupting your real conversations. Unknown-sender messages land silently in their own list without notifications. You still receive them (so you can check for legitimate texts from new numbers), but they no longer buzz your pocket.

    On newer iOS versions, also enable “Filter Junk” if offered in the same menu — it auto-sorts suspected spam into a Junk folder within Unknown Senders. These two toggles take thirty seconds and immediately transform the experience: your main message list becomes humans only. One important note: messages from unknown senders will not show link previews or notification banners, which is intentional — it prevents spammers from confirming your number is active through preview loads and read receipts.

    Layer 2: Report Every Spam Text (It Trains the System)

    Under each message from an unknown sender, iOS shows a “Report Junk” link — tap it, then Delete and Report Junk. This sends the message to Apple and your carrier, feeding the spam-detection systems that protect everyone. It takes two seconds and has genuine collective effect: reported numbers get flagged across the network.

    Also forward spam texts to 7726 (SPAM) — this works on all major US carriers and feeds their blocking databases directly. The one-two of Apple’s report plus 7726 covers both the device-level and network-level defenses. The FTC’s guidance on unwanted texts recommends reporting as the single most useful individual action.

    Layer 3: Silence Unknown Callers (Stops the Text-to-Call Pipeline)

    Many spam operations probe with texts then follow up with calls. Enable Settings, Phone, “Silence Unknown Callers” — unknown numbers go straight to voicemail without ringing. Legitimate callers leave voicemail; spammers rarely do. This does not block texts directly, but it collapses the spammers’ multi-channel campaigns against you.

    The tradeoff: delivery drivers, doctor’s offices, and new contacts call from unknown numbers. Mitigate by checking voicemail daily and telling important new contacts to text first (texts from unknown senders still arrive, just filtered). Most people find the silence worth the minor inconvenience within a week.

    Layer 4: Carrier-Level Blocking (the Network Shield)

    Your carrier blocks spam before it reaches your phone — if you enable it. Verizon: Call Filter app (free spam blocking); T-Mobile: Scam Shield (free Scam ID and Scam Block); AT&T: ActiveArmor (free fraud-call blocking and spam filtering). These work at network level, catching patterns invisible to your phone alone, and they cover texts as well as calls.

    Enable yours in the carrier’s app or account portal — it is free and takes minutes. The FCC’s spam-text consumer resources list carrier tools as a primary defense alongside device settings. Carrier blocking plus iPhone filtering is the combination that actually moves the needle; either alone leaves gaps. Note that carrier spam filters occasionally misfire on legitimate automated texts (two-factor codes, appointment reminders), so if an expected code never arrives, check with your carrier whether it was filtered.

    Layer 5: Starve the Spammers (Stop Feeding Them Data)

    Every defense above is reactive; this one is preventive. Spammers get your number from data brokers, breach dumps, and forms you filled out. Reduce the supply: never reply STOP to obvious scam texts (any reply confirms the number is live — legitimate marketing texts honor STOP; scams use your reply to validate you), never click links in spam texts (they can confirm receipt and install malware), and use a Google Voice or similar secondary number for online forms, signups, and selling items.

    Check whether your number is in breach dumps (see our guide on checking email breaches — phone numbers leak the same way) and consider removing yourself from major data brokers. It will not stop spam overnight — your number is already out there — but it slows the fresh supply.

    The Nuclear Option: Third-Party Filters

    Apps like Nomorobo, RoboKiller, and Truecaller offer SMS filtering via iOS’s SMS-filtering extension framework: Settings, Messages, Unknown and Spam, enable the app under “SMS Filtering.” They maintain large spam databases and can auto-sort with more aggression than Apple’s built-in filter. RoboKiller even deploys “answer bots” that waste spammers’ time — entertaining, if theatrical.

    The honest assessment: for most people, Apple’s built-in filtering plus carrier blocking is sufficient, and third-party apps add privacy tradeoffs (they process your messages) for marginal gains. Try the free layers first; add a third-party filter only if spam remains unbearable after a month of the full stack. If you do install one, review its privacy policy — you are granting an app access to every text you receive, so choose an established developer with a clear data-retention policy, and disable message access the moment you stop using it.

    Turn on Filter Unknown Senders (and Filter Junk), report every spam text via Report Junk and 7726, silence unknown callers, enable your carrier’s free blocking, and never reply to or click links in spam texts. Layered defenses beat number-blocking every time.

    Conclusion

    Blocking iPhone spam texts is a system, not a button: filter unknown senders into silence, report everything to train the databases, let your carrier block at the network level, and stop feeding spammers fresh data. No layer is perfect; together they turn a daily flood into background noise. For more iPhone defense guides, see our technology section, learn about us, or share your worst spam texts — we collect the most creative ones.

    Frequently Asked Questions

    Should I reply STOP to spam texts?

    Only to legitimate businesses you recognize. For obvious scams, never reply — any response confirms your number reaches a human, increasing its value to spammers. Delete, report via Report Junk, and move on.

    Will Filter Unknown Senders hide important texts?

    It sorts them, not deletes them — unknown-sender texts wait in a separate tab without notifications. Check the Unknown Senders tab periodically (especially when expecting deliveries or appointments) so nothing legitimate slips by.

    Can spammers see if I read their text?

    Read receipts only go to contacts, and unknown senders cannot see them. But clicking links in spam texts can confirm receipt to the spammer’s server — another reason never to tap.

    Why am I suddenly getting more spam texts?

    Common triggers: your number appeared in a recent breach dump, you entered it on a form that sold it, or you replied to/clicked a previous spam (confirming liveness). A sudden surge after years of quiet usually means a fresh leak — check breach databases.

    Are spam-filtering apps worth paying for?

    Usually not as a first step. Apple’s built-in filtering plus free carrier blocking handles most spam. Consider a paid app only if the free stack leaves you with significant daily spam after a month — and weigh the privacy tradeoff of granting message access.

  • The Easiest Way to Scan Old Family Photos Without a Scanner

    The Easiest Way to Scan Old Family Photos Without a Scanner

    Boxes of old family photos sit in closets across America — fading, curling, one basement flood away from gone forever. You know they should be digitized, but buying a flatbed scanner feels like a project, and scanner apps seem… sketchy? Here is the truth: your phone is now a better scanner than the $80 flatbed gathering dust would be. Modern scanning apps with auto-crop, glare removal, and perspective correction produce genuinely archival-quality results. Here is the method that gets the best scans with gear you already own.

    Why Your Phone Beats a Cheap Scanner

    Phone cameras now resolve 12–48 megapixels with excellent lenses — far beyond what a 4×6 print contains. Dedicated scanning apps add what raw camera apps lack: automatic edge detection (finds the photo’s borders), perspective correction (fixes the trapezoid when you shoot at a slight angle), glare detection and removal (the killer feature — it takes multiple exposures and composites out reflections), and batch capture modes.

    The two best free options: Google PhotoScan (free, iOS and Android — its glare-removal is unmatched: you capture the photo plus four angled shots, and it composites a reflection-free result) and Photomyne (free tier, excellent batch scanning of multiple photos at once, smart cropping). Your phone’s built-in document scanner (iPhone Notes, Google Drive) works in a pinch but lacks photo-specific glare handling.

    The Setup: Light and Surface Matter More Than the App

    Great scans are 80% setup. Work in bright, indirect daylight — near a window but out of direct sun, which creates harsh reflections on glossy prints. Lay photos on a flat, dark, non-reflective surface (a dark tablecloth or black poster board); the contrast helps the app detect edges. Turn off overhead lights directly above — they reflect in glossy prints as bright spots.

    Handle photos by the edges — fingerprints show in scans. If photos are curled, place them under a heavy book for a day first; the app’s perspective correction handles slight curl, but flat is always better. Remove photos from sticky albums if you safely can (dental floss slid gently under the photo separates most album adhesives); if they resist, scan them in the album rather than risk tearing.

    The Scanning Process: Slow Down for Quality

    In PhotoScan: position the phone directly over the photo, tap capture, then move the phone to align with each of the four corner dots — the app guides you. This multi-capture is what kills glare; rushing it produces worse results than a single careful shot. In Photomyne’s batch mode: lay out 3–4 photos with small gaps, capture once, and the app crops each separately — dramatically faster for large boxes.

    Check each scan immediately at full zoom: look for blur (retake — you moved), missed edges (reposition), and remaining glare spots (adjust lighting angle). It is far faster to retake now than to discover problems after boxing the originals back up. Aim for a steady rhythm: setup once, then scan in batches of 20–30 with review breaks.

    Resolution, Format, and Organization

    Scan at the highest quality the app offers — storage is cheap, and you cannot re-add detail later. Save as JPEG at maximum quality for sharing and viewing; if the app offers TIFF or PNG, use those for your archival masters of the most precious photos (larger files, zero compression loss). Name files meaningfully as you go: “1987-christmas-grandma-house-001.jpg” beats “scan042.jpg” when your grandchildren search.

    Organize into folders by decade, event, or family branch — whatever matches how your family remembers. Add dates and names to metadata or filenames now, while the relatives who remember are available to ask. This is the unglamorous step everyone skips and everyone later regrets: a thousand perfectly scanned but unlabeled photos is barely better than the shoebox.

    Backing Up: The 3-2-1 Rule for Memories

    Scanned photos are now your most irreplaceable digital files — protect them accordingly. Keep three copies: the originals on your computer or external drive, a second copy on a different drive or NAS, and a third in the cloud (Google Photos, iCloud, or Amazon Photos — the latter offers unlimited full-resolution photo storage for Prime members). The Library of Congress digital preservation guidance recommends exactly this redundancy for personal archives.

    Share with family: a shared Google Photos album or a USB drive mailed to siblings distributes both the joy and the backup. Many families discover that digitizing prompts the best outcome of all — relatives identifying faces, telling stories, and adding the context that turns scans into history. The National Archives’ guidance on preserving family photos covers long-term storage formats and practices.

    When to Use a Real Scanner (or a Service)

    Phone scanning handles prints beautifully, but three cases deserve better: fragile or damaged photos (a flatbed’s gentle, even process is safer than handling), negatives and slides (phone apps cannot do these well — you need a backlit scanner or a dedicated slide converter), and very large collections (500+ photos — at that scale, a $200 auto-feed photo scanner or a bulk scanning service at ~$0.30–0.50 per photo saves weekends of labor).

    For negatives especially, do not improvise — the detail in film far exceeds prints, and proper scanning preserves it. But for the standard shoebox of prints, the phone in your pocket right now is genuinely the right tool.

    Scan old photos with Google PhotoScan (best glare removal) or Photomyne (fastest batch mode) in bright indirect daylight on a dark flat surface. Scan at maximum quality, name files meaningfully while relatives can still identify faces, and keep three copies including one in the cloud.

    Conclusion

    Digitizing family photos without a scanner is not a compromise — with the right app, good lighting, and a systematic approach, phone scans rival dedicated hardware for prints. Work through the boxes methodically, label as you go, back up three ways, and share with family. The photos are fading; the phone in your pocket is ready today. For more preservation guides, browse our technology section, meet the team, or ask us your archiving questions.

    Frequently Asked Questions

    Which free app scans photos best?

    Google PhotoScan for the best glare removal (its multi-capture compositing is unmatched) and maximum quality per photo; Photomyne for the fastest batch scanning of large collections. Both are free with optional paid tiers.

    What resolution should I scan at?

    The highest the app offers. A 4×6 print contains limited detail, so maximum phone resolution captures all of it with headroom. You can always downsize later; you can never add detail back.

    How do I avoid glare on glossy photos?

    Bright indirect daylight (no direct sun or overhead lights), a dark non-reflective surface, and PhotoScan’s multi-angle capture, which composites glare away. If a stubborn reflection persists, slightly change the light angle — even a few degrees helps.

    Can I scan photos still stuck in albums?

    Yes — scan them in place rather than risk tearing. Try dental floss gently slid under the photo for sticky albums, but if it resists, leave it. An in-album scan beats a torn photo every time.

    Should I throw away the originals after scanning?

    No. Keep the originals as the ultimate backup — stored flat, cool, dry, and dark. Digital files can corrupt; cloud services can close; the print remains. Scanning preserves access; the original preserves the artifact.

  • How to Set Up Parental Controls on a Chromebook for Your Kids

    How to Set Up Parental Controls on a Chromebook for Your Kids

    Your kid’s Chromebook is a gateway to homework — and to everything else on the internet. Chromebooks are popular in schools precisely because Google built strong management tools into them, and parents can use the same system at home. With Google’s Family Link, you set up content filters, screen-time limits, app approvals, and location tracking from your own phone, free. Here is the complete setup, what each control actually does, and the honest limitations no parental-control system can fix.

    Step 1: Set Up Family Link (the Foundation)

    Everything runs through Google Family Link. On your phone (iPhone or Android), install the Family Link app and sign in with your Google account. Create a Google Account for your child if they do not have one — children under 13 must use a Family Link-managed account; you cannot just hand them your account and filter it.

    On the Chromebook, sign in with the child’s account (not yours). During first sign-in with a managed account, ChromeOS walks you through linking it to Family Link — accept the supervision prompts. If the Chromebook is already set up with your account, add the child’s account via Settings, People, and sign them in; supervision activates on their profile automatically. The whole process takes about 15 minutes.

    Step 2: Content Filters That Actually Work

    In the Family Link app, open your child’s profile and go to Controls, Content restrictions. Here you control three layers. Google Chrome filters: choose “Try to block mature sites” (Google’s SafeSearch-based filtering — good but not perfect) or “Only allow certain sites” (whitelist mode — maximum safety for young kids, where you approve every site). Google Search: lock SafeSearch on. Google Play: set maturity filters for apps, games, movies, and books.

    Be realistic: “try to block mature sites” uses automated filtering that occasionally misses — determined kids find workarounds, and no filter understands context. For young children, whitelist mode is genuinely effective. For teens, filters are speed bumps, not walls — which is why the time limits and activity reports below matter as much as blocking.

    Step 3: Screen Time Limits and Bedtimes

    Family Link’s screen-time controls are its best feature. Set a daily limit (Controls, Screen time) — when time expires, the Chromebook locks except for calls. Set a bedtime schedule so the device locks automatically at night (and stays locked until morning). You can also set per-app limits: two hours of YouTube, unlimited Khan Academy, for example. School-issued Chromebooks managed by the school district may have their own policies that interact with Family Link — if limits seem to conflict, the school’s admin settings usually take precedence during school hours, which is worth knowing before you troubleshoot.

    The nuance: schoolwork needs exceptions. You can grant bonus time remotely from your phone with two taps — useful for the “I need 30 more minutes for homework” negotiation. And consider the Chromebook’s purpose: a homework device with tight limits teaches better habits than a locked-down brick they resent. Google’s Family Link help pages document every control in detail.

    Step 4: App Approvals and Purchases

    By default, your child cannot install apps without your approval — each request pings your phone for an allow/deny decision. Review these thoughtfully rather than auto-approving: check what the app does, its age rating, and its reviews. In Controls, Google Play, you can also require approval for all purchases and downloads, blocking both paid apps and in-app purchase traps.

    Also manage existing apps: Family Link shows everything installed, and you can block or time-limit individual apps remotely. Pay special attention to browsers-within-apps and messaging apps — kids route around filters through the least supervised app, so the app list deserves the same scrutiny as the web filter.

    Step 5: Location, Activity Reports, and Account Controls

    Family Link shows the Chromebook’s location (when it is on and connected) — useful for the “did you actually go to the library” check. Weekly activity reports summarize screen time per app and website, giving you conversation material beyond “get off that thing.” You can remotely lock the device instantly (“it is dinner time”) and ring it when lost in the house.

    Lock down the account itself: prevent your child from adding unsupervised profiles (in Family Link, device settings — supervised accounts cannot add new users without permission, but verify), and know that a factory reset (Powerwash) removes supervision — physically securing the device matters for determined teens. The FTC’s guidance on kids and internet safety emphasizes that technical controls work best paired with ongoing conversations.

    The Honest Limitations

    No parental control is complete. Tech-savvy teens can boot alternative operating systems from USB (disable this in chrome://settings if you are concerned — managed accounts restrict it by default), use a friend’s unrestricted device, or access anything through school computers. Filters over-block (homework research caught by keyword filters) and under-block (new sites appear faster than filters update).

    Treat Family Link as one layer: combine it with the Chromebook living in shared spaces (not bedrooms overnight — the bedtime lock helps, but physical presence helps more), regular conversations about online safety, and gradually loosening controls as kids demonstrate responsibility. Review the activity reports together occasionally rather than using them as surveillance gotchas — transparency about the monitoring builds trust and teaches self-regulation. The goal is raising a competent digital citizen, not maintaining a perfect filter — controls should shrink as judgment grows.

    Set up Google Family Link with a supervised child account on the Chromebook, then configure content filters, daily screen-time limits with bedtimes, app-approval requirements, and activity reports — all managed free from your phone. Pair technical controls with conversations; no filter replaces those.

    Conclusion

    Parental controls on a Chromebook via Family Link give you real power: filtered browsing, screen-time limits, bedtime locks, app approvals, location, and activity reports — free, managed from your phone. Set them up thoughtfully, calibrate strictness to the child’s age, and remember the controls are training wheels, not permanent restraints. For more family-tech guides, explore our technology section, learn about us, or ask your parenting-tech questions.

    Frequently Asked Questions

    Is Google Family Link free?

    Yes, completely free. It works with any Google account and manages Chromebooks, Android devices, and (with limitations) web activity. There is no premium tier — every control described here costs nothing.

    Can my child bypass Family Link?

    Determined teens can find ways — factory-resetting the device, using friends’ devices, or booting from USB (blocked by default on managed accounts). Family Link is highly effective for younger kids and a useful speed bump for teens, but it is not unbypassable. Conversations matter more than code at that age.

    What age needs the strictest settings?

    Under 10: whitelist mode for websites, tight screen-time limits, all app approvals required. Ages 10–13: filtered browsing, moderate limits, purchase approvals. Teens: lighter filters focused on the worst content, generous but bounded screen time, and activity reports for accountability conversations.

    Does Family Link work if the Chromebook is offline?

    Yes — screen-time limits, bedtimes, and content filters enforce locally on the device without internet. Remote actions (bonus time, instant lock, location) need the Chromebook online to receive them.

    Can I manage multiple children’s Chromebooks?

    Yes — Family Link supports multiple children, each with independent settings, from one parent app. Each child signs into their own supervised account on their own (or a shared) Chromebook.

  • Why Your Phone Overheats When Charging and Whether It Is Dangerous

    Why Your Phone Overheats When Charging and Whether It Is Dangerous

    Your phone feels hot while charging — not warm, hot. Hot enough to notice through the case, hot enough to make you wonder if it is going to catch fire. Phone overheating during charging is common, usually harmless, and occasionally a genuine warning sign. The difference matters: normal charging warmth is physics, but excessive heat signals a problem with the charger, the battery, or what the phone is doing while it charges. Here is how to tell which you have and what to do about it.

    Why Charging Generates Heat (the Normal Part)

    Charging is an energy transfer, and no transfer is perfectly efficient — the lost energy becomes heat. Fast charging makes this worse by design: pushing 25, 45, or 65 watts into a small battery generates significant warmth, especially in the first 50% of the charge when current is highest. Your phone may also run warm because it is doing things while charging: installing updates, backing up photos, syncing — all while current flows in.

    Normal charging warmth feels like a warm mug — noticeable but comfortable to hold indefinitely. It peaks early in the charge cycle and tapers as the battery fills (charging slows dramatically past 80%, and heat drops with it). If your phone is warm for the first half hour on a fast charger and then cools, that is textbook normal behavior, not a defect.

    When Heat Means Something Is Wrong

    Cross these lines and pay attention. Too hot to hold comfortably, heat concentrated in one spot (especially a bulging area near the battery), the phone displaying a temperature warning and pausing charging, or heat accompanied by a swollen case or screen lifting at the edges — these are warning signs. A swelling battery is the serious one: stop using the phone, do not charge it further, and take it for service. Punctured or damaged lithium batteries can enter thermal runaway, and while phone fires are rare, they are real.

    Also suspect: heat that appears with a new charger or cable, heat during slow overnight charging (which should barely warm the phone), or a phone that gets hot while charging and also drains abnormally fast off the charger. These patterns point to specific causes below — most of them fixable.

    Cause 1: The Wrong Charger or Cable

    Cheap, uncertified chargers are the top cause of abnormal charging heat. They deliver dirty, unstable power — voltage spikes that the phone’s charging circuitry fights as heat. Counterfeit “fast chargers” are the worst offenders: they claim wattages they cannot cleanly deliver. The fix is simple: use the manufacturer’s charger or a certified third-party one (look for USB-IF certification or Apple’s MFi badge for Lightning cables).

    Cables matter too: a damaged cable with frayed shielding or a loose connector creates resistance, and resistance becomes heat at the connector. If the heat concentrates at the charging port end of the cable, replace the cable. And skip the no-name gas-station charger permanently — saving $15 is not worth cooking a $1,000 phone’s battery.

    Cause 2: Charging While Running Hot Tasks

    Charging heat plus workload heat stacks. Gaming, video calls, GPS navigation, or 4K video recording while plugged in means the processor generates heat at the same time the battery does — the combined load can push temperatures into throttling territory. The phone may dim the screen, slow charging, or warn you; these are protective measures working as designed.

    The fix is behavioral: let demanding tasks and charging take turns. If you must navigate while charging on a road trip, vent-mount the phone in the air-conditioning stream — it sounds silly, but active cooling completely solves the problem. Remove thick cases while fast-charging; many cases are thermal blankets that trap exactly the heat you want to escape.

    Cause 3: Environment and Battery Age

    Charging in a hot car, in direct sunlight, or under a pillow traps heat the phone cannot shed — lithium batteries charge safely up to about 35°C/95°F ambient, and beyond that the phone throttles or stops charging to protect itself. Always charge on a hard, ventilated surface in the shade. Wireless charging adds 10–20% more heat than wired (induction is less efficient), so a phone that runs hot on a wireless pad may be perfectly cool on a cable.

    An aging battery also runs hotter: as capacity degrades past ~80%, internal resistance rises, and more charging energy becomes heat. If your two-year-old phone suddenly runs hotter charging than it used to, check battery health — the heat may be the battery telling you it is near end of life. Apple’s battery service guidance and the Consumer Product Safety Commission’s battery safety resources both cover when heat crosses from normal to service-worthy.

    Best Practices for Cool, Safe Charging

    Charge on hard, flat, ventilated surfaces — never under pillows or in enclosed spaces. Use certified chargers and cables. Remove heavy cases during fast charging. Avoid demanding tasks while charging when possible. Charge to 80–90% for daily use rather than 100% (less heat, less battery wear — use your phone’s optimized-charging feature). And unplug if the phone ever feels too hot to hold or shows a temperature warning; let it cool before resuming.

    For overnight charging, slow is your friend: a basic 5W charger generates a fraction of the heat of a 45W fast charger, and eight hours is plenty of time. Your battery will thank you with a longer lifespan.

    Mild warmth while fast-charging is normal physics; heat too intense to hold, localized hot spots, swelling, or temperature warnings are not. Use certified chargers, charge on ventilated surfaces, avoid heavy tasks while charging, and treat any swelling battery as an immediate stop-use situation.

    Conclusion

    A phone that gets warm while charging is usually fine — fast charging generates heat by nature, and it tapers as the battery fills. Worry when heat is excessive, localized, or paired with swelling or warnings; then check your charger, your habits, and your battery’s age. Charge smart — certified gear, ventilated surfaces, no pillow-charging — and heat stays in the safe zone. For more phone-care guides, browse our technology section, meet the team, or ask us your battery questions.

    Frequently Asked Questions

    Is it dangerous if my phone gets hot while charging?

    Mild warmth is normal and safe. It becomes concerning when the phone is too hot to hold comfortably, shows a temperature warning, or the battery/case is swelling. Swelling is the serious warning sign — stop using and charging the phone and get it serviced.

    Why does my phone get hotter on a wireless charger?

    Wireless (induction) charging is less efficient than wired — more energy becomes heat. A 10–20% heat increase over wired charging is normal. If it gets uncomfortably hot, switch to wired charging or remove the case.

    Can a cheap charger damage my phone?

    Yes. Uncertified chargers can deliver unstable voltage that stresses the charging circuitry, generates excess heat, and degrades the battery faster. In rare cases they have caused fires. Use manufacturer or certified third-party chargers only.

    Should I take my case off while charging?

    For fast charging, yes — thick cases trap heat significantly. For slow overnight charging it matters less. If your phone consistently runs warm while charging, removing the case is the easiest test of whether heat dissipation is the issue.

    Does fast charging ruin the battery?

    Modern phones manage fast charging intelligently (slowing past 80%, monitoring temperature), so occasional fast charging is fine. But chronic fast charging to 100% in heat does accelerate wear versus slower, cooler, partial charging. Use fast charging when you need speed, slow charging overnight.

  • How to Reduce Buffering When Streaming on a Slow Internet Connection

    How to Reduce Buffering When Streaming on a Slow Internet Connection

    You are on a 10 Mbps connection — or a congested hotel network, or rural DSL — and every streaming service stutters, buffers, and drops to potato quality. Upgrading your plan is not always an option, and “just get faster internet” is not advice. The good news: streaming services are designed to adapt, and a handful of settings changes plus some network hygiene can turn an unwatchable connection into a perfectly serviceable one. Here is how to squeeze smooth playback out of slow internet.

    Step 1: Lower the Streaming Quality Deliberately

    This is the highest-impact change and the one people resist. A 4K stream needs 15–25 Mbps; 1080p needs 5–8; 720p needs 2–4; 480p needs under 1.5. On a 10 Mbps connection shared with anything else, forcing 720p or even 480p eliminates buffering entirely — and on a phone or small laptop screen, the visual difference between 720p and 1080p is genuinely hard to see.

    Set it per service: Netflix — Account, Profile, Playback settings, choose Medium or Low (or App Settings, Cellular Data Usage on mobile); YouTube — Settings, Video quality preferences, set “Data saver” or a fixed 720p/480p; Prime Video — Settings, Stream and Download, set to “Good”; Disney+/Max — similar quality toggles in app settings. Auto quality sounds smart but causes the quality-yo-yo that feels worse than stable lower quality — pick a fixed level your connection sustains.

    Step 2: Clear the Network of Competitors

    Your stream is not the only thing using your connection. Pause cloud backups and syncs (OneDrive, Dropbox, Google Drive, iCloud Photos) during viewing — an uploading photo backup silently eats the bandwidth your stream needs. Pause automatic updates on all devices: phones, laptops, game consoles (a console downloading a 50 GB update in the background murders streaming).

    Kick freeloaders off strategically: if someone is on a video call in the next room, your stream will suffer — schedule around it or ask them to drop to audio. And check for bandwidth vampires you forgot: security cameras uploading to the cloud, a torrent client left running, a smart TV updating apps. The FCC’s guide to household bandwidth helps you estimate what your connection can actually support simultaneously.

    Step 3: Wire It or Move Closer

    WiFi is a shared, interference-prone medium — on a slow connection, WiFi overhead and retransmissions waste a meaningful share of your already-scarce bandwidth. An Ethernet cable to your streaming device (TV, laptop, console) eliminates WiFi variables entirely and is the single best physical upgrade. Powerline adapters ($30–50) carry network over your home’s electrical wiring when running cable is impractical.

    If you must use WiFi: move closer to the router, switch to the 5 GHz band (less congested, though shorter range), and restart the router — a stale router connection degrades over weeks. Also check what your connection actually delivers at the device: run a speed test on the TV or streaming stick itself, not just your phone. TVs often have weaker WiFi chips and get half the speed your phone does in the same room.

    Step 4: Use Download-First Viewing

    The ultimate buffering fix is not streaming at all: download first, watch later. Netflix, Prime Video, Disney+, Max, and YouTube Premium all let you download shows and movies to phones, tablets, and laptops over WiFi for offline viewing. Start downloads before bed or before leaving for good WiFi; watch buffer-free whenever you want.

    This completely sidesteps connection quality — a download that takes an hour overnight plays flawlessly at full quality. For commuters, travelers, and anyone with unreliable internet, download-first is not a workaround; it is the superior strategy. Get in the habit of queueing downloads whenever you are on fast WiFi.

    Step 5: Tune the Router and the Stream

    A few router tweaks help marginal connections. Enable QoS (Quality of Service) in your router settings and prioritize your streaming device — this tells the router to favor video packets when bandwidth gets tight. Update router firmware; manufacturers fix throughput bugs regularly. And if your router is ancient, its WiFi implementation may be the bottleneck rather than your plan — a modern budget router can deliver more of your plan’s speed to your devices.

    On the software side: close other browser tabs and apps during streaming (each consumes bandwidth and CPU), disable VPNs during streaming (they add overhead and often throttle video), and restart the streaming app itself — apps develop memory leaks over long sessions that manifest as buffering. If one service buffers while others play fine, the problem is that service’s CDN route to you, not your connection — try a different service or wait it out.

    Know Your Floor: When Slow Is Too Slow

    Be realistic about minimums. Below ~3 Mbps, even 480p struggles if anything else uses the connection; below ~1.5 Mbps, streaming video is genuinely impractical and download-first becomes mandatory. If your plan promises 25 Mbps but delivers 4, that is an ISP problem — document speed tests at different times of day and call support; you may be paying for speed you are not receiving, or your line may need repair.

    Also check for data caps: some “slowdowns” are actually throttling after cap exhaustion. And explore alternatives: fixed wireless, Starlink, and T-Mobile/Verizon home internet have brought real competition to areas where DSL was the only option. The Consumer Reports ISP ratings can show what your neighbors actually get from each provider.

    On slow internet, force a fixed lower streaming quality (720p or 480p), pause all background syncs and updates, wire the streaming device with Ethernet, and download shows overnight for buffer-free viewing. Stable lower quality always beats stuttering HD.

    Conclusion

    Reducing buffering on a slow connection is about matching demand to reality: set fixed lower quality, eliminate bandwidth competitors, improve the physical connection, and embrace download-first viewing. None of this requires a faster plan — just fifteen minutes of settings and habits. And if your connection consistently underdelivers what you pay for, that is a support call, not a settings problem. For more streaming and networking guides, browse our technology section, meet the team, or tell us your buffering woes.

    Frequently Asked Questions

    What internet speed do I need for Netflix?

    Netflix recommends 15 Mbps for 4K, 5 Mbps for HD (1080p), and 3 Mbps for SD. In practice, stable 720p works on 4–5 Mbps and 480p on ~1.5 Mbps. These are per-stream — add 3–5 Mbps headroom for anything else using the connection.

    Why does my stream buffer even though my speed test is fast?

    Speed tests measure to a nearby server; streaming services use CDNs that may route poorly to you, especially at peak evening hours. Also, WiFi to your specific device may be far slower than the wired speed the test measured. Test on the streaming device itself.

    Does a VPN slow down streaming?

    Usually yes — VPNs add encryption overhead, extra routing distance, and many VPN servers throttle video. Streaming services also actively block many VPN IPs, causing errors beyond slowness. Disable the VPN for streaming unless you need it.

    Is buffering worse at certain times of day?

    Yes — evening peak hours (7–11 p.m.) congest both your ISP’s local network and streaming CDNs. If daytime streaming is smooth but evenings buffer, it is congestion, not your setup. Download-first viewing sidesteps peak hours entirely.

    Will a new router fix buffering?

    Only if the router is the bottleneck. Test wired directly to the modem: if wired is fast but WiFi buffers, a modern router helps. If wired also buffers, the problem is your plan speed or ISP congestion — a new router changes nothing.

  • What to Do If Your External Hard Drive Is Not Recognized by Windows

    What to Do If Your External Hard Drive Is Not Recognized by Windows

    You plug in your external hard drive — the one with the photo archive, the work backup, the only copy of the project — and Windows does nothing. No autoplay, no new drive letter, no comforting whir of recognition. Before panic sets in: an unrecognized external drive is one of the most commonly fixable Windows problems, and the cause is usually the cable, the USB port, or a drive-letter assignment — not a dead drive. Work through these steps in order before assuming your data is gone.

    Step 1: Rule Out the Physical Basics

    Half of “dead” external drives are cable or power problems. Swap the USB cable — cables fail internally while looking fine, and many external drives are picky about cable quality. Try a different USB port, preferably one directly on the computer rather than a hub; then try a USB port on the opposite side (different internal controllers). If the drive has its own power adapter (common on desktop-size drives), confirm it is plugged in and the outlet works — USB power alone cannot spin up larger drives.

    Listen and feel: a healthy spinning drive vibrates gently and may click softly once on spin-up. Repeated loud clicking (the “click of death”), beeping, or total silence with no vibration points to hardware failure — skip to the data-recovery section. But if the drive spins and lights up while Windows ignores it, the problem is software, and the steps below will likely fix it.

    Step 2: Check Disk Management (the Diagnostic Hub)

    Right-click the Start button and open Disk Management. This is the single most informative step: it shows every storage device Windows detects, even ones without drive letters. Look for your drive — it may appear as “Disk 1” or “Disk 2” with labels like “Unallocated,” “RAW,” “Offline,” or simply without a drive letter.

    Each status means something specific. Drive present but no letter: right-click it, “Change Drive Letter and Paths,” and assign one — this alone fixes a huge share of cases (Windows sometimes fails to assign letters to previously Mac- or Linux-formatted drives). Drive shows “Offline”: right-click and select “Online.” Drive shows “Unallocated”: the partition table is damaged or missing — do not format yet; see Step 4. Drive absent entirely: the problem is hardware or drivers — continue to Step 3.

    Step 3: Update Drivers and Check Device Manager

    Open Device Manager (right-click Start, Device Manager) and expand “Disk drives” and “Universal Serial Bus controllers.” Look for your drive with a yellow warning icon, or an “Unknown USB Device” entry. Right-click and update the driver; if that fails, uninstall the device, unplug the drive, reboot, and plug it back in — Windows will reinstall fresh drivers.

    Also try the USB controller reset: in Device Manager, under USB controllers, uninstall each “USB Root Hub,” then reboot — Windows rebuilds the entire USB stack. This fixes corruption that no single-device reinstall touches. If the drive appears in Device Manager but not Disk Management, the partition structure is likely damaged (Step 4). If it appears in neither, try the drive on a different computer — if it is invisible everywhere, you are looking at hardware failure.

    Step 4: Repair the Partition Without Losing Data

    If Disk Management sees the drive but shows RAW or unallocated space, the file system is damaged — but the data is usually still there. Do not format: formatting writes a new empty file system over your data’s bookkeeping. Instead, try chkdsk: open Command Prompt as administrator and run chkdsk X: /f (replace X with the drive letter if it has one). For drives without letters, third-party tools like TestDisk (free, open-source) can rebuild partition tables non-destructively — it is the go-to tool data-recovery professionals use for exactly this.

    If chkdsk reports unfixable errors or TestDisk cannot find the partition, the next level is file-carving recovery (PhotoRec, from the same makers as TestDisk, or DMDE) — these scan the raw disk and extract files without needing the file system. Slow but remarkably effective. Microsoft’s external drive troubleshooting guide covers the built-in Windows steps.

    Step 5: When the Drive Is Physically Failing

    Recognize the point of no return: repetitive loud clicking, beeping, grinding, the drive appearing and disappearing rapidly, or an acrid smell. Stop using it immediately — every minute of a failing drive’s operation risks more damage. Do not run chkdsk on a physically failing drive; the intensive scanning can finish what the failure started.

    Your options: if the data is worth less than ~$300, try a single careful clone with ddrescue (free, Linux-based) to a healthy drive, then recover from the clone — never work on the failing original. If the data is worth more, professional recovery labs ($300–1,500) with clean rooms are the answer; stop touching the drive and ship it. The drive itself is disposable; only the data has value — spend accordingly.

    Prevention: Never Be Here Again

    Every external drive fails eventually — the only variable is whether you have another copy. Follow the 3-2-1 rule: three copies of important data, on two different media types, one offsite (cloud counts). Always use “Safely Remove Hardware” before unplugging — yanked drives mid-write are a top cause of the corruption in Step 4. And replace external drives on a schedule: after 4–5 years of regular use, retire them to non-critical duty before they retire themselves. The Backblaze annual drive-failure reports show real-world failure rates climbing steeply after year four.

    Check Disk Management first — most “unrecognized” drives appear there missing only a drive letter, which takes ten seconds to assign. Swap cables and ports, reinstall USB drivers, repair partitions with chkdsk or TestDisk before ever formatting, and stop immediately if the drive clicks or beeps.

    Conclusion

    An external hard drive Windows does not recognize is usually a ten-minute fix: new cable, different port, a drive letter in Disk Management, or a driver reinstall. Partition damage is repairable with chkdsk or TestDisk without formatting. Only physical symptoms — clicking, beeping, vanishing — mean the drive itself is dying, and then the playbook switches from repair to data rescue. Back up the 3-2-1 way afterward so you never feel this panic again. For more storage rescue guides, see our technology section, meet the team, or ask us your drive questions.

    Frequently Asked Questions

    Why did my drive work yesterday and not today?

    Common triggers: a Windows update changed USB drivers, the drive was unplugged mid-write corrupting the partition, the cable developed an internal break, or the drive letter got claimed by another device. The Disk Management check identifies which within a minute.

    Should I format the drive if Windows suggests it?

    No — not until you have exhausted repair options. The “you need to format” prompt appears for any unreadable file system, including ones with fully recoverable data. Run chkdsk or TestDisk first; format only when you have accepted the data is gone or already recovered it.

    Can a USB hub cause recognition problems?

    Yes, frequently. Unpowered hubs cannot deliver enough current for spinning drives, and even powered hubs add a failure point. Always test the drive plugged directly into the computer before deeper troubleshooting.

    My drive shows in BIOS but not Windows. What does that mean?

    The hardware is fine — Windows’ storage stack is the problem. Focus on drivers (reinstall USB controllers), Disk Management (assign letter/online the disk), and partition repair. BIOS visibility rules out cable, port, and drive-electronics failure.

    How do I know if the data is recoverable?

    If the drive spins without alarming noises and appears in Disk Management or BIOS, recovery odds are excellent — it is a software problem. Clicking, beeping, or total invisibility on multiple computers means hardware failure, where professional labs are the realistic option.