Breaking

Category: Sports

  • When to Upgrade From Rental Skis to Your Own Pair

    When to Upgrade From Rental Skis to Your Own Pair

    You have rented skis for three seasons now, you know your DIN setting by heart, and you just spent twenty minutes in a rental line while your friends were already on the lift. The question nagging you on every chairlift ride: is it finally time to buy? The honest answer is that owning skis is not automatically smarter — rentals make perfect sense for a lot of skiers. But there is a clear tipping point where rentals start costing you money, performance, and mornings. Here is how to find your tipping point: the math, the skill threshold, the boot question (which matters more than the skis), and what to actually buy when you are ready.

    Do the Math: The Break-Even Point

    Start with hard numbers. A standard rental package (skis, boots, poles) at a major US resort runs $50 to $75 per day; demo-grade rentals run $75 to $100. A solid pair of new skis with bindings costs $600 to $1,000; last season’s models or quality used skis run $250 to $500. At $60 a day in rentals, a $700 ski setup breaks even at about 12 days on snow — and most skiers keep skis for 100+ days, making the per-day cost trivial after year two. The math shifts further if you rent demos (break-even in under 10 days) or buy used (sometimes under 5 days). Count your days honestly across the last two seasons, project next season, and include the hidden rental costs: the time in line, the inability to catch first chair, and the fact that rental skis are tuned for durability, not performance — you are paying premium prices for the dullest skis in the building.

    The Skill Threshold: When Rentals Hold You Back

    Money aside, there is a skill moment when rentals actively slow your progress. Rental fleets are built to survive beginners: soft, forgiving, detuned edges, and sized conservatively. That is perfect until you are linking confident parallel turns on blue runs and starting to explore blacks — at that point, the rental’s softness becomes a ceiling. You will notice it as vagueness: the ski washes out when you pressure it, chatters at speed instead of holding, and feels dead on ice. If an instructor has told you that you are “overpowering” your rentals, or you demo a real ski for a day and feel like a different skier, you have crossed the threshold. Buying skis matched to your actual ability — not your ability three years ago — typically produces the single biggest performance jump an intermediate skier will ever feel.

    Buy Boots First — Seriously

    Ask any bootfitter and you will hear the same sermon: boots matter more than skis, and rental boots are the worst part of renting. A rental boot is a packed-out, one-size-fits-many compromise that has conformed to a hundred other feet; it delivers sloppy energy transfer, shin bang, and cold toes. Your own boots — properly fitted, ideally with custom footbeds — transform every ski you click into, rentals included. Budget $300 to $500 for boots plus a professional fitting, and get the fitting from a real bootfitter, not a big-box shelf. The Professional Ski Instructors of America’s gear guidance likewise puts boots before skis for progressing skiers. The fitting process takes about an hour: shell sizing, stance alignment, and often heat-molding the liner. Boots last 150 to 200 ski days, far longer than skis, so the per-day cost is tiny. Many skiers buy boots a full season before skis and never regret the order. If you buy one thing this year, make it boots.

    What to Buy: New, Used, or Last Season’s Models

    You have three good options. New current-season skis ($600-$1,000 with bindings) give you the latest shapes and full warranty — worth it if you ski 20+ days a year and know exactly what you want. Last season’s new skis (30 to 50 percent off in spring sales) are the value sweet spot: identical performance to this year’s graphics for hundreds less. Quality used skis ($150-$350) from reputable shops or ski swaps are excellent for skiers still progressing — just check the bases for deep gouges, ensure edges are not cracked, and have a shop test and reset the bindings to your boots (binding indemnification matters: shops will not service bindings too old to be on the manufacturer’s approved list, typically 10+ years). For ski type, most upgrading intermediates want an all-mountain ski, 85 to 100 millimeters underfoot, in a length reaching roughly between chin and nose. And demo before you buy whenever possible — many shops apply demo fees toward purchase. REI’s expert ski-buying guides are a solid free resource for comparing models side by side.

    The Case for Keeping Rentals (It’s Valid)

    Honesty requires the other side. Keep renting if you ski fewer than five days a year — the math simply does not work, and rentals spare you storage, transport, and maintenance. Keep renting if you fly to ski and dread the airline ski bag fees and logistics. Keep renting if you are still progressing rapidly through sizes or ability levels — a ski that is perfect in December may be wrong by March for a fast-improving skier. And consider the hybrid path many experienced skiers use: own boots (always), rent or demo skis per trip. You get 80 percent of the ownership benefit — fit, comfort, warmth — with zero commitment to a ski choice and no gear to haul. There is no prize for owning; there is only the skiing.

    Buy boots first, then buy skis when you ski enough days to break even (usually 10-15) or when rentals start limiting your skiing — whichever comes first. Until then, renting is the smart play, not a compromise.

    Timing Your Purchase and Maintaining the Investment

    If you are buying, buy in spring. March and April bring the year’s deepest discounts as shops clear inventory — 30 to 50 percent off is routine, and selection is still good if you shop early in the sale season. Fall “early bird” sales are the second-best window. Once you own skis, protect the investment with basic care: wax every 4 to 6 days on snow (a $25 wax kit pays for itself immediately), dry skis before storage, store them in a cool dry place (not a hot garage), and get a professional tune — edges sharpened, bases repaired — at least once a season. Well-maintained skis ski better and last 100 to 150 days. And keep your bindings checked annually; release settings drift, and a shop safety check is cheap insurance.

    Conclusion

    Upgrade from rental skis when the math works (around 10 to 15 days a season), when your ability has outgrown soft rental fleets, or when you are simply tired of the rental line eating your mornings — and buy the boots first no matter what. Shop spring sales, demo before committing, and maintain what you buy. The goal was never ownership for its own sake; it is more days on snow, on gear that fits, with less hassle between you and first chair. For more winter sports guidance, explore our sports section, learn about who writes these guides, or send us your gear question anytime.

    Frequently Asked Questions

    How many days a year do I need to ski to justify buying skis?

    Roughly 10 to 15 days per season at typical resort rental prices ($50-$75/day) against a $600-$1,000 ski setup. Below about 8 days a year, renting usually wins on pure math — though buying boots alone is still worthwhile for comfort at any frequency.

    Should I buy skis or boots first?

    Boots, without question. Properly fitted boots transform every ski you use, rentals included, while new skis in sloppy rental boots still ski poorly. Budget $300-$500 for boots plus a professional fitting, and buy skis the following season if the math works.

    Is it safe to buy used skis?

    Yes, from reputable sources, with one critical check: bindings. Have a certified shop inspect and set the bindings to your boots — shops cannot legally service bindings older than the manufacturer’s indemnification list (usually 10+ years). Check bases and edges for damage, and you can get excellent skis for $150-$350.

    What length and width ski should an intermediate buy?

    Most progressing intermediates do well on an all-mountain ski 85-100mm underfoot, in a length between chin and nose height. Wider suits powder and off-piste; narrower suits groomed runs and ice. When in doubt, demo two widths back-to-back — the difference is immediately obvious.

    When is the cheapest time to buy skis?

    March and April, when shops clear inventory at 30-50 percent off. Fall preseason sales are the runner-up. Avoid buying at full price in December or January unless you need skis immediately — the same skis will be hundreds cheaper in spring.

  • How to Keep Score at a Bowling Alley for a Birthday Party

    How to Keep Score at a Bowling Alley for a Birthday Party

    You volunteered to keep score at your kid’s bowling birthday party, the automatic scorer glitched on lane six, and now eight nine-year-olds are chanting your name while you stare at a scoresheet like it is written in Sanskrit. Take a breath — bowling scoring looks intimidating, but it runs on a handful of simple rules, and for a kids’ birthday party you need exactly two skills: recording what happened on each ball, and knowing when a frame is over. This guide gives you the 90-second version that handles any birthday party, plus the full rules for strikes and spares so you can look like you have done this a hundred times.

    The Birthday Party Shortcut: What You Actually Need

    Here is the truth for kids’ parties: most bowling alleys have automatic scoring, and your job is backup and crowd control, not professional scorekeeping. But when the computer hiccups — wrong pins, a ball thrown out of turn, a kid who bowls twice — someone has to fix it, and that someone is you. What you need: each bowler’s name in order, and for each of the ten frames, the number of pins knocked down on each ball. Write the first ball’s pins in the small upper-left box of the frame, the second ball’s in the upper-right. If a kid misses everything, mark a dash. That is genuinely 90 percent of the job. The alley staff can fix the computer from your paper record, and the kids care about whose turn it is and who won, not about scoring nuance. Keep the line moving, keep it fun, and you have succeeded.

    The Basics: Frames, Balls, and Pins

    A game has ten frames. In frames one through nine, each bowler gets up to two balls: if they knock down all ten pins on the first ball, that is a strike, the frame is over, and you move on. If pins remain, they bowl a second ball at what is left; knocking down the rest is a spare. Knocking down some but not all across two balls is an open frame — you just add the pins. The tenth frame is special: a bowler who strikes or spares earns bonus balls, up to three total in the tenth. That is the entire structure. For a kids’ party, bumpers are usually up, which means gutter balls are rare and scores run higher — expect excitement, not precision. Write clearly, because you will be reading your own handwriting three frames later with a slice of pizza in your other hand. For party-friendly formats, USBC’s youth bowling resources are worth a look.

    Strikes, Spares, and the Bonus Points (The Part That Confuses Everyone)

    Here is the full scoring logic, explained the simple way. A strike is worth 10 pins plus your next two balls — mark it with an X. A spare is worth 10 pins plus your next one ball — mark it with a slash (/). An open frame is just the pins you knocked down. So if you strike in frame one, you cannot finish scoring frame one until you have thrown two more balls — the score “waits.” Example: strike in frame 1, then 7 pins and 2 pins in frame 2. Frame 1 scores 10 + 7 + 2 = 19. Frame 2 scores 9. Running total after two frames: 28. For a spare: 7 pins then 3 pins (spare), then 5 pins on the next ball. The spare frame scores 10 + 5 = 15. At a kids’ party, you rarely need to compute this live — the computer does it — but understanding it lets you spot when the computer is wrong, which is exactly when everyone looks at you. The United States Bowling Congress publishes the official playing rules covering every scoring scenario.

    Running the Party: Order, Pace, and Kid Chaos

    Scorekeeping is the easy part; managing eight kids on two lanes is the real job. Set the bowling order before anyone throws and write it on the sheet — then enforce it gently, because kids will absolutely try to bowl out of turn. Keep pace brisk: with bumpers and light balls, each kid’s turn takes about a minute, so a full game for eight kids runs roughly an hour including shoe chaos and snack breaks. That is perfect birthday timing. Assign one older kid or parent per lane as the “pin resetter watcher” — kids love pressing the reset button, and unauthorized resets are the number one cause of scoring disputes. When disputes happen (“I knocked down nine!”), the rule is simple: the scorekeeper’s call stands, delivered with a smile, and the game moves on. Nobody remembers the score; everybody remembers whether it was fun.

    Fixing the Computer When It Glitches

    Automatic scorers miscount most often in three situations: a pin wobbles but stays up (computer may count it down), a ball is thrown before the sweep clears the pins, and a kid bowls on the wrong lane’s turn. Every system has an edit or correction mode — ask the counter staff to show you before the party starts; it takes thirty seconds and saves ten minutes of panic later. To fix a frame, you will typically select the bowler, select the frame, and re-enter the pins ball by ball — which is exactly why your paper backup matters. If the whole system freezes, keep bowling and keep your paper scores; staff can reconstruct the game afterward. Pro tip: photograph your scoresheet every few frames — paper gets pizza on it.

    For a kids’ bowling party, scorekeeping is 90% recording pins per ball and 10% understanding strikes and spares. Keep the order, keep the pace, back everything up on paper, and let the computer do the math — your real job is keeping eight kids happy, not being a scoring referee.

    Fun Twists That Make You the Hero Parent

    Once scoring is handled, a few extras elevate the party. Bowl a “parent vs. kids” frame where the adults bowl with their non-dominant hand — instant comedy and the kids will talk about it for weeks. Run a mini-competition for highest single frame rather than highest game, so every kid stays in contention. Most alleys offer cosmic bowling (black lights and music) for parties — book it if available, because it turns even gutter balls into an event. And take the team photo with the final scores visible on the monitor behind the group; it is the birthday picture that actually captures the day. None of this requires scoring expertise — just the confidence that the numbers are handled, which, after this guide, they are.

    Conclusion

    Keeping score at a bowling birthday party is simpler than it looks: record pins per ball, understand that strikes and spares earn bonus balls, keep the bowling order moving, and back everything up on paper for when the computer hiccups. The kids will not remember whether frame seven was scored perfectly — they will remember that the party ran smoothly and you kept it fun. That is the whole job, and you have got it. For more family activity guides, check our sports section, meet the team behind them, or ask us your party-planning question anytime.

    Frequently Asked Questions

    What does the slash (/) mean in bowling scoring?

    A slash marks a spare — knocking down all ten pins across two balls in one frame. A spare scores 10 pins plus the pins from your next one ball as a bonus. So a spare followed by a 5 on the next ball scores 15 for the spare frame.

    How does the 10th frame work in bowling?

    The 10th frame gives bonus balls: strike on the first ball and you get two more balls; spare across two balls and you get one more. That is why the 10th frame can have up to three balls and scores up to 30 points. Every pin counts with no further bonuses after the 10th.

    What is a perfect score in bowling?

    300 — twelve consecutive strikes (one per frame plus two bonus balls in the 10th). Each strike earns 10 plus the next two balls, so twelve strikes cascade into 30 points per frame across ten frames.

    Do I need to know scoring if the alley has automatic scorers?

    Mostly as backup. Automatic scorers handle the math, but they glitch — wrong pin counts, out-of-turn throws, frozen screens. Keep a paper record of pins per ball per bowler, and you can fix or reconstruct any game. Ask staff to show you the correction mode before the party.

    How long does a bowling game take with kids?

    About an hour for 6-8 kids on two lanes with bumpers, including shoe rental chaos and a snack break. That is ideal birthday-party length — one full game, then cake, then home before anyone melts down.

  • What to Know Before Signing Your Kid Up for Travel Baseball

    What to Know Before Signing Your Kid Up for Travel Baseball

    Your kid’s coach just mentioned travel baseball, the other parents are already talking about tryouts, and you are staring at a decision that could cost $3,000, swallow your weekends for six months, and shape your child’s relationship with the sport for years. Travel baseball can be the best thing that ever happened to a young player — better coaching, stronger competition, lifelong friendships. It can also be an expensive burnout machine that ends with a 12-year-old who never wants to touch a glove again. The difference is rarely the kid’s talent. It is whether the family walked in with eyes open. Here is what nobody puts in the tryout flyer: the real costs, the real time, the questions to ask the organization, and how to know whether your child is actually ready.

    The Real Cost: Budget for Double the Sticker Price

    Ask a travel organization for the fee and you will hear something like $1,200 to $2,500 per season — and that is only the beginning. Uniforms and gear packages, tournament entry fees (often passed through per event), hotels and food for out-of-town weekends, private lessons the coach “strongly recommends,” and the new bat your kid suddenly needs because everyone has one — families routinely spend $3,000 to $8,000 a year, with elite programs climbing past $10,000. Before committing, build a real budget: registration, travel, gear, lessons, and a 20 percent buffer. Then ask the hard family question: does this spending crowd out savings, vacations, or siblings’ activities? There is no shame in deciding the money does not work — rec ball plus a good private instructor twice a month often develops a player just as well for a fraction of the cost.

    The Time Commitment Is Bigger Than You Think

    Travel baseball is not “baseball twice a week.” A typical season runs March through July (fall ball often follows), with two to three practices a week plus weekend tournaments that consume entire Saturdays and Sundays — arrive at 8 a.m., play three games across ten hours, drive home. Families routinely log 15 to 20 hours a week on baseball during tournament season. Before tryouts, audit your family’s actual bandwidth honestly, including work schedules and other kids’ needs. Also check the organization’s tournament schedule in advance — how many out-of-town events, how far, how many weekends? A program with eight travel weekends is a fundamentally different commitment from one with two, and nobody tells you this until you are already rostered.

    Is Your Kid Ready? The Honest Checklist

    Talent is the least important readiness factor. The kids who thrive in travel ball share traits you can observe right now: they love practice, not just games — the kid who begs to hit off the tee in the backyard is ready; the kid who groans at practice is not. They handle failure without falling apart, because travel ball means better pitching and more strikeouts, guaranteed. They want it themselves — not because dad played, not because friends are doing it, but because they asked. Age matters too: before age 9 or 10, most child development experts say multi-sport play and unstructured time beat specialization. The sweet spot for starting travel is usually 10 to 12, when kids can genuinely choose it for themselves.

    Vet the Organization Like You Are Hiring Them — Because You Are

    Travel programs range from superb developmental academies to thinly disguised cash machines, and the tryout flyer will not tell you which. Ask these questions before committing: Who are the coaches, and what are their qualifications — former players, certified training, or just dads with loud voices? What is the coaching philosophy — development of all players, or winning with the best nine while everyone else watches? How is playing time handled — is there a written policy, or does it depend on the coach’s mood? What is the full cost, in writing, including every fee and expected travel expense? How many players are rostered — 12 kids means everyone plays; 15 means three kids paid thousands to sit. Can you talk to two families from last season? Their answers will tell you more than any brochure. And watch one practice before tryouts: a good program’s practice is organized, energetic, and instructional; a bad one’s is chaotic, punitive, or dominated by scrimmaging.

    The Burnout and Injury Risks Are Real

    This is the section travel organizations never present. Kids who specialize in baseball before their teens show measurably higher rates of overuse injuries — Little League elbow, shoulder strains, stress fractures — because throwing is an unnatural motion that growing bodies tolerate only in moderation. The research-backed guidance is clear: kids should not play one sport more than eight months a year, weekly hours should not exceed their age, and pitchers need strict rest. Both Little League International and USA Baseball publish pitch-count and rest guidelines every family should follow. Burnout is the quieter killer: the 13-year-old who quits because baseball consumed his childhood is a cliché because it happens constantly. Protect your kid with hard boundaries: at least one full season off per year, no pitching on consecutive days, encouragement to play other sports, and a standing rule that they can quit at season’s end without guilt. The families who set these rules upfront have kids who still love baseball at 16.

    Travel baseball is worth it when your kid genuinely wants it, the program develops all its players, and the family can afford the money and time without resentment. It’s a trap when it’s driven by parent ambition, vague promises, or fear of falling behind. Vet the organization, protect the arm, and let the kid’s love of the game lead.

    Alternatives Worth Considering

    Travel ball is not the only path to better baseball. Many towns have competitive rec or “select” leagues that offer stronger competition without the travel circus. A skilled private instructor twice a month ($50 to $100 per session) plus rec ball often develops mechanics better than a travel team’s group practices. Summer camps run by college programs give intensive instruction and a taste of high-level play for a few hundred dollars. And for kids under 10, the best “development program” is unstructured play — pickup games, backyard home run derby, playing multiple sports. Choose the path that fits your kid’s age, love of the game, and your family’s life — not the one the loudest parents chose.

    Conclusion

    Signing your kid up for travel baseball is a five-figure, hundred-weekend decision disguised as a simple tryout — so treat it like the major commitment it is. Budget the true cost, audit the true time, verify your kid actually wants it, vet the organization ruthlessly, and set injury and burnout guardrails before the first practice. Done right, travel ball gives a young player coaching, competition, and memories that last a lifetime. Done blindly, it is the most expensive way to make a kid quit baseball. For more youth sports guidance, explore our sports section, learn about who writes these guides, or ask us your youth sports question directly.

    Frequently Asked Questions

    What is the average cost of travel baseball per year?

    Most families spend $3,000 to $8,000 per year all-in: $1,200-$2,500 in team fees plus uniforms, tournament travel, hotels, gear, and lessons. Elite programs can exceed $10,000. Always budget from the total cost, not the advertised registration fee, which is typically less than half the real spend.

    What age should kids start travel baseball?

    Most experts point to ages 10 to 12 as the sweet spot — old enough to genuinely choose it, young enough to benefit from the development. Before age 9 or 10, multi-sport play and unstructured time generally serve kids better than specialization, and college coaches actively prefer multi-sport athletes.

    How do I know if a travel baseball organization is good?

    Look for qualified coaches with a stated development philosophy, a written playing-time policy, reasonable roster sizes (12 or fewer), transparent full pricing, and willing references from current families. Watch a practice: organized, instructional, and positive beats chaotic or punitive every time.

    Will travel baseball help my kid get a college scholarship?

    Honest answer: very rarely the way parents imagine. Fewer than 7 percent of high school players play in college, and baseball scholarships are partial (11.7 full scholarships split across ~35 roster spots in D1). Travel ball helps development, but it is not a scholarship pipeline — play it for love of the game, not ROI.

    How do I prevent burnout if my kid plays travel baseball?

    Set boundaries before the season: at least one full season off per year from baseball, weekly hours not exceeding the child’s age, no year-round pitching, encouragement to play other sports, and a guilt-free exit at season’s end. Kids who feel ownership over the decision burn out far less than kids fulfilling parent ambition.

  • How to Practice Baseball Pitching Alone in Your Backyard

    How to Practice Baseball Pitching Alone in Your Backyard

    You want to get your pitching reps in, but there is no catcher, no coach, and nobody willing to stand 46 feet away while you work on your curveball. The good news: some of the best pitching development in baseball history happened alone in backyards, against fences, tarps, and strike zones drawn in chalk. You do not need a catcher to build velocity, command, and a repeatable delivery — you need a target, a plan, and enough space to throw safely. Here is how to turn a backyard into a legitimate pitching lab, what equipment actually matters, and the drills that develop real skills without a single person catching for you.

    Set Up a Safe, Legal Backyard Range First

    Before throwing a single pitch, solve the safety equation. You need roughly 60 feet of clear throwing lane (46 feet for Little League distance, 60 feet 6 inches for regulation) plus buffer space behind your target for misses — because there will be misses. The number one rule: never throw toward houses, cars, streets, or neighbors’ yards. A pitching net or a heavy tarp hung from a frame is non-negotiable; it stops wild pitches and gives you a defined target. Check local ordinances and HOA rules too — some neighborhoods restrict net structures or have noise expectations, and a quick check beats a complaint. Position your “mound” on flat ground (a portable pitching rubber or even a taped line works), make sure the landing area is not concrete, and keep siblings, pets, and spectators behind or to the side of you, never downrange. Twenty minutes of setup prevents 100 percent of the accidents that give backyard pitching a bad name.

    The Essential Gear: Less Than You Think

    You need four things: balls, a target, a net, and something to mark distance. For balls, buy a bucket of a dozen baseballs (or soft-core safety balls for younger kids) so you can throw in sets without walking to retrieve each pitch — the rhythm of throwing 10 to 12 pitches, then collecting, mimics real innings. Your target should be a strike zone, not just a net: hang a strike zone target on the net, paint one on a tarp, or build a simple PVC frame with a fabric zone. The visual of a defined zone is what trains command; throwing “at the net” trains nothing. A pitching net with a built-in strike zone pocket is the best single purchase, typically $80 to $150, and it doubles as your backstop. Add a roll of athletic tape or chalk for marking your rubber distance and you are fully equipped. Total realistic cost: $100 to $200, most of it the net.

    Build Your Delivery With Mirror and Video Work

    Here is the secret advantage of practicing alone: without a catcher rushing you, you can obsess over mechanics. Set up your phone on a tripod (a $15 phone tripod is plenty) and film every session from the side and from behind. Compare your delivery to slow-motion clips of major league pitchers on MLB’s video library — not to copy them exactly, but to check fundamentals: balanced leg lift, closed front shoulder, hips leading the arm, full follow-through with your chest over your front knee. The towel drill is the classic solo mechanics drill: hold a small towel in your throwing hand and snap it at the target through your full delivery — it trains arm path and extension without any throwing stress. Do 15 to 20 towel reps as a warm-up before touching a ball, and you will build a cleaner delivery than most kids who only throw to catchers.

    Command Drills That Actually Work Without a Catcher

    Command — hitting spots — is the skill that separates pitchers, and it is entirely trainable solo. The 20-pitch zone drill: throw 20 pitches at your strike zone target, calling your spot before each pitch (low-away, high-inside), and track hits versus misses on paper. Pros live by this kind of charting. The “corners” game: aim only at the four corners of the zone, 5 pitches each, and score yourself — it gamifies the boring middle of practice. For off-speed pitches, the backyard is actually ideal: without a batter, you can throw 30 changeups in a row focusing purely on arm speed matching your fastball, which is exactly how feel develops. One caution: limit breaking balls by age. Pitchers under 14 should focus on fastball command and changeups; curveballs and sliders before physical maturity are strongly linked to arm injuries in youth pitching research. The backyard builds arms up — do not let it break yours down.

    Velocity and Arm Care: The Solo Program

    Velocity comes from the legs, core, and efficient mechanics more than from the arm, which means much of it is built without throwing at all. A simple twice-weekly routine — bodyweight squats, lunges, planks, and band work for the shoulder — does more for a young pitcher’s radar gun reading than an extra hundred max-effort throws. For throwing itself, long toss is the best solo velocity tool if you have the space: gradually extend distance over 10 to 15 minutes, throwing on a line, then pull back in. Follow pitch-count guidelines even alone: they exist to protect growing arms, and the backyard counts. Finish every session with arm circles, cross-body stretches, and icing only if something is sore, not as routine.

    You don’t need a catcher to become a better pitcher — you need a net, a defined strike zone, a phone camera, and a plan. Film your mechanics, chart your command, respect pitch counts, and protect your arm: the backyard has produced more pitchers than any camp ever has.

    Make Practice Stick: Structure Beats Volume

    The difference between kids who improve alone and kids who just throw is structure. Use a simple 45-minute template: 10 minutes warm-up and towel drills, 10 minutes mechanical focus (one cue only, like “stay closed” or “finish out front”), 15 minutes command games with charting, 5 minutes of one off-speed pitch, and 5 minutes cool-down and stretch. Three sessions a week beats seven unfocused ones — arms need recovery days. Keep a small notebook: date, pitch counts, what you worked on, what felt good. Within a month you will have data showing real progress, which is rocket fuel for motivation. And every few weeks, throw to a real catcher if you can — a teammate, a parent with a glove, anyone — to calibrate your backyard command against a live target. The backyard builds the pitcher; live reps prove it.

    Conclusion

    Practicing baseball pitching without a catcher is not a compromise — done right, it is an advantage. A net and a strike zone target give you unlimited reps, a phone camera gives you better mechanical feedback than most coaches provide in real time, and structured command drills build the skill that actually gets outs. Set up safely, invest in the net, film everything, chart your spots, and take arm care as seriously as velocity. For more baseball development guidance, visit our sports section, meet the team behind these guides, or send us your training question — we read them all.

    Frequently Asked Questions

    How much space do I need to practice pitching in my backyard?

    You need the pitching distance (46 feet for Little League, 60 feet 6 inches for teens and adults) plus 10 to 15 feet behind your target for misses. A 75-foot clear lane works for most ages. If your yard is shorter, practice from reduced distance focusing on mechanics and command — both transfer fully to the mound.

    What is the best target for solo pitching practice?

    A pitching net with a built-in strike zone or strike zone pocket is the best single purchase ($80-$150). It stops wild pitches safely and gives you a defined zone to aim at, which is what actually trains command. A painted strike zone on a heavy tarp is a solid budget alternative.

    Can I learn a curveball practicing alone?

    You can, but age matters more than setting. Pitchers under 14 should master fastball command and a changeup first — youth sports medicine research links early breaking-ball use to higher arm injury rates. Teens and adults can develop a curveball solo with video feedback, but keep volumes moderate and stop at any elbow or shoulder pain.

    How many pitches should I throw in a backyard session?

    Follow the same pitch-count guidelines as games: roughly 50-75 pitches per session for ages 11-12, 75-95 for teens, with at least two rest days after heavier sessions. Count warm-up throws separately from intent throws, and never throw through sharp pain.

    Is long toss safe to do alone?

    Yes, with proper warm-up and gradual distance extension. Throw on a line rather than moonshotting the ball, build distance over 10-15 minutes, and stay within a distance where your mechanics stay clean. Long toss is one of the best solo velocity builders available.

  • Why Your Heart Rate Spikes So High During Spin Class

    Why Your Heart Rate Spikes So High During Spin Class

    Twenty minutes into spin class, you glance at the monitor and your heart rate reads 178 — a number that would alarm you on a run, and it stays there while the instructor cheerfully yells about the next hill. Are you in danger, out of shape, or just built differently? The short answer: indoor cycling creates a perfect storm of conditions that drive heart rates higher than most other workouts, and for most healthy people it is normal. But “normal” has limits, and knowing why the number spikes — heat, dehydration, bike fit, caffeine, and plain old effort — is what separates a hard workout from a warning sign you should not ignore.

    The Heat Trap: Why Indoor Cycling Runs Hot

    The biggest factor is one you cannot see: heat. Outdoors, moving air constantly strips heat from your body — even a slow ride generates a 10 to 15 mph breeze. In a spin studio, you are stationary in a warm room, often shoulder-to-shoulder with forty other heat-generating humans, with nothing but a weak ceiling fan. Your core temperature climbs faster, and your heart compensates by pumping more blood to the skin for cooling — a phenomenon called cardiovascular drift. Research on indoor cycling consistently shows heart rates running 5 to 15 beats per minute higher than the same effort outdoors, with the gap widening as the class goes on. This is also why the spike feels worse in minute 35 than minute 10: dehydration compounds the heat effect as blood volume drops. A fan pointed at your bike is not a luxury — it is the single most effective heart-rate-lowering tool in the studio.

    Effort, Music, and the Psychology of the Room

    Spin classes are engineered to push you harder than you would push yourself. The dark room, the pounding music at 130+ beats per minute, the instructor’s cues, and the leaderboard all exploit well-documented psychology: people work measurably harder in groups and in time with music than they do alone. If your heart rate monitor has zones, check whether you are spending the whole class in zone 4 and 5 (roughly 80 to 100 percent of max). Occasional zone 5 intervals are the point of the workout; living there for 45 minutes is not training — it is just suffering, and it is why you feel wrecked instead of energized afterward.

    Your Max Heart Rate Is Personal — Formulas Lie

    Part of the panic comes from bad math. The old “220 minus age” formula can be off by 15 to 20 beats in either direction for an individual, and studio bike consoles often use it to flash alarming red zones. A 40-year-old whose true max is 195 will see 176 and think they are at 98 percent when they are really at 90 — still hard, but a completely different story. True max heart rate is largely genetic — which is why your neighbor sits at 142 while you sit at 172 on the same effort. Consider a field test to find your real max, or use the more accurate Tanaka formula (208 minus 0.7 × age). The American College of Sports Medicine notes that fitness doesn’t lower your max — fit people just recover faster between efforts.

    When a Spike Is Actually a Warning Sign

    High is not the same as dangerous, but certain patterns deserve medical attention. See a doctor before your next class if your heart rate spikes disproportionately to effort — for example, jumping to 170 during the warm-up — or stays elevated long after you stop, with a slow recovery. Chest pain, pressure, or tightness is a stop-immediately-and-get-checked symptom at any heart rate. So are dizziness, near-fainting, or unusual shortness of breath. Heart palpitations — a fluttering, pounding, or irregular sensation — especially if they occur outside workouts too, warrant evaluation for arrhythmias. These cautions apply doubly with risk factors like high blood pressure, diabetes, or family history of early heart disease. The American Heart Association’s target heart rate guidance is a solid reference for understanding your zones, but persistent symptoms beat any chart — get checked.

    How to Keep Your Heart Rate Under Control in Class

    You do not need to quit spin; you need to ride smarter. First, hydrate aggressively: drink 16 to 20 ounces in the two hours before class and keep sipping throughout — even two percent dehydration measurably raises heart rate. Second, claim a bike near a fan or bring a small clip-on fan; evaporative cooling directly lowers cardiovascular drift. Third, learn the resistance knob: on climbs, add enough resistance to feel the hill but keep your cadence above 60 RPM — grinding below 50 RPM at high resistance is what sends heart rates into the stratosphere. Fourth, skip the pre-workout stimulants and go easy on coffee before class; caffeine can add 5 to 10 beats per minute on its own. Fifth, warm up properly instead of sprinting from a cold start — the first ten minutes should build gradually. And finally, give yourself permission to back off: the instructor cannot see your heart rate, and a class where you finish strong beats one where you blow up at minute 25.

    Spin spikes heart rates because you’re exercising in a hot, still room with no wind cooling, dehydrating as you sweat, and riding harder than you would solo thanks to music and group energy. For most healthy people it’s normal — but chest pain, dizziness, palpitations, or a heart rate that won’t come down are reasons to see a doctor, not push through.

    Bike Fit: The Overlooked Heart-Rate Factor

    A badly set-up bike makes your heart work harder for the same output. A saddle set too low forces your quads to do all the work through a cramped range of motion, spiking heart rate and cooking your knees; a saddle too high rocks your hips and wastes energy. The quick check: with your heel on the pedal at its lowest point, your leg should be nearly straight — then when you clip in with the ball of your foot, you will have the proper slight bend. Handlebar height matters too: slammed low looks fast but compresses your chest and restricts breathing for most riders.

    Conclusion

    A sky-high heart rate in spin class is usually the predictable result of heat, dehydration, group psychology, and honest hard effort — not a sign that something is wrong with you. Control what you can: hydrate, get airflow, set up the bike properly, learn your real max heart rate, and ride your own ride instead of the instructor’s. And respect the genuine warning signs — chest pain, dizziness, palpitations, or a heart rate disconnected from effort — by getting checked promptly rather than toughing it out. Spin is one of the best cardio workouts available; it just demands a little more self-awareness than the dark room suggests. Find more training-smart advice in our sports section, learn about who we are, or send us your fitness question anytime.

    Frequently Asked Questions

    What heart rate is too high during spin class?

    There is no universal danger number — it depends on your personal max. Sustained time above 90 to 95 percent of your true max with symptoms like dizziness or chest pain is a stop signal. Without symptoms, very high numbers usually reflect heat, dehydration, or effort rather than danger, but get a checkup if the pattern is new or persistent.

    Why is my heart rate higher in spin than running at the same effort?

    Mostly heat and cooling: running moves you through air, which carries heat away efficiently, while a spin studio traps it. Studies show indoor cycling heart rates run 5 to 15 bpm higher than equivalent outdoor efforts. Dehydration during the class widens the gap further as the session continues.

    Should I wear a heart rate monitor to spin class?

    Yes — it is the best tool for learning the difference between hard and too hard. A chest strap is more accurate than a wrist optical sensor during intense, sweaty, gripping-handlebar exercise. Use it to pace intervals and to notice trends, like a heart rate that runs higher than usual on a given day signaling fatigue or dehydration.

    Does caffeine before spin class raise heart rate dangerously?

    Caffeine typically adds 5 to 10 bpm and is not dangerous for healthy people, but combined with heat, dehydration, and max efforts, it can push you into an uncomfortably high zone and worsen the post-class crash. If your numbers run hot, try skipping the pre-workout or coffee and compare.

    How quickly should my heart rate recover after spin class?

    A good rule of thumb: your heart rate should drop at least 12 to 20 beats in the first minute after stopping. Slower recovery can indicate overtraining, dehydration, or being under the weather — and persistently poor recovery is worth mentioning to your doctor.

  • Road Bike vs Hybrid for Commuting: How to Choose the Right One

    Road Bike vs Hybrid for Commuting: How to Choose the Right One

    You want to bike to work, and the internet has opinions: the roadies say a hybrid is a slow compromise, the commuters say a road bike is a fragile diva that will strand you in the rain. Both are exaggerating. Road bikes and hybrids are genuinely different tools, and the right one for commuting depends on your route, your body, and how much fuss you are willing to tolerate before coffee. This guide cuts through the tribalism with the practical differences that actually matter on a Tuesday morning in traffic — geometry, tires, gears, carrying capacity, and durability — so you can buy once and ride happy for years.

    Start With Your Route, Not the Bike

    The single most important variable is the commute itself. Map it honestly: how many miles each way, how much is protected bike lane versus open road, how rough is the pavement, and how many hills stand between you and your desk? A five-mile ride on smooth pavement with bike lanes is a completely different problem from a twelve-mile mixed route with potholes, gravel shortcuts, and a 400-foot climb. Short, smooth, and flat favors the road bike’s speed; long, rough, or hill-heavy with cargo favors the hybrid’s comfort and toughness. Also consider the non-riding parts of commuting: do you have secure indoor parking, or will the bike live on a rack in the rain? Will you carry a laptop, lunch, and a change of clothes? A bike that cannot comfortably carry your stuff — or that you are afraid to lock outside — is the wrong commuter no matter how fast it is.

    Geometry: The Comfort Gap Is Real

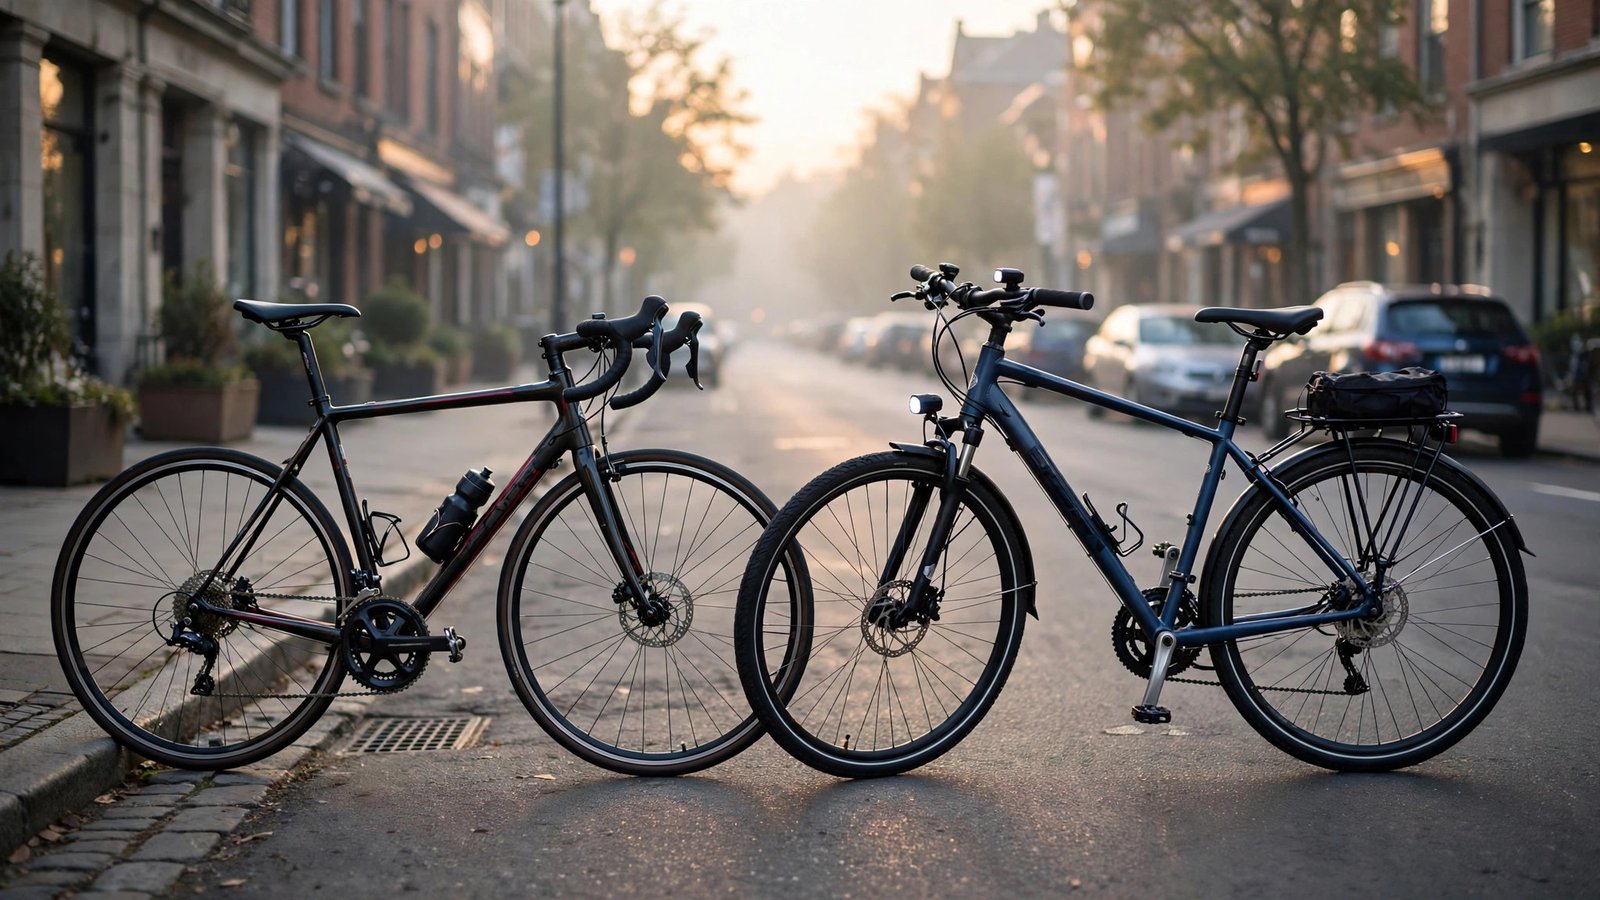
    The core difference between the two is riding position. A road bike puts you in an aggressive, leaned-forward posture with drop handlebars: aerodynamic and efficient, but demanding on your back, neck, and wrists until your body adapts. A hybrid gives you a flat handlebar and a far more upright position — you see traffic better, your weight sits on the saddle rather than your hands, and you arrive less folded-up. For rides under 30 minutes, most commuters adapt to either. Beyond that, or if you have any back or neck issues, the hybrid’s upright geometry is meaningfully kinder. There is a middle ground worth knowing about: endurance road bikes and gravel bikes have relaxed geometry that splits the difference, and flat-bar road bikes exist too. But as categories go, hybrids win comfort for the average commuter, and that comfort is what determines whether you still ride in month six.

    Tires and Durability: Where Hybrids Earn Their Keep

    Commutes are not races; they are obstacle courses of potholes, debris, wet leaves, and the occasional curb. Hybrids typically roll on wider tires — 35 to 45 millimeters — that absorb rough pavement, resist pinch flats, and grip confidently in the rain. Road bikes traditionally run 23 to 28 millimeter tires at high pressure: faster on smooth asphalt, harsher and more puncture-prone everywhere else. Modern road bikes have moved toward wider rubber, which narrows the gap, but the hybrid’s sturdier wheels and more relaxed frame still shrug off abuse better. If your route includes any gravel, broken pavement, or winter riding, the hybrid’s toughness is not a luxury — it is the difference between a reliable daily tool and a bike that spends Fridays in the shop. Fenders and racks, the unsung heroes of commuting, also mount more easily and cheaply on most hybrids — see the League of American Bicyclists’ commuter resources for route-planning and gear checklists.

    Speed: How Much Faster Is a Road Bike, Really?

    Let us quantify the road bike’s advantage honestly. On flat, smooth pavement, a reasonably fit rider on a road bike cruises 2 to 4 mph faster than the same rider on a hybrid — the aerodynamics, lighter weight, and narrower tires all compound. Over a 30-minute commute, that is roughly five to eight minutes saved each way. That is real, but in stop-and-go city traffic the gap shrinks dramatically — aerodynamics barely matter at 12 mph between red lights. Hills are where the road bike’s lighter weight and more efficient gearing shine brightest. So ask yourself what your time is worth and what your route rewards. If you are chasing a sub-30-minute ten-miler on open roads, the road bike earns its keep. If your commute is a six-mile urban crawl, you will arrive within minutes of each other, and the hybrid rider will arrive more comfortable.

    Gearing, Maintenance, and Cost of Ownership

    Both bike types now come with wide-range gearing that handles real hills, so do not overthink the drivetrain — but do think about maintenance. Road bikes, especially performance-oriented ones, tend toward lighter components and tighter tolerances that demand more frequent tuning. Hybrids are generally built to be neglected a little: sturdier wheels, simpler components, and frames that tolerate a lock-up outside. Cost follows the same pattern: a solid commuter hybrid starts around $500 to $800, while a decent entry road bike starts around $900 to $1,200, and the road bike will tempt you into upgrades (clipless pedals, better wheels) that the hybrid never will. Budget for the accessories either way — a good lock, lights, fenders, and a rack or panniers will add $150 to $300 to either bike, and they matter more to commuting happiness than the frame does. PeopleForBikes’ city ratings show how bike-friendly your route actually is before you buy.

    Match the bike to the route: smooth, longer, hillier commutes reward a road bike’s speed; rough, stop-and-go, cargo-carrying commutes reward a hybrid’s comfort and toughness. The best commuter bike is the one you’ll still happily ride in month six — comfort and practicality beat speed for almost everyone.

    The Verdict: A Decision Framework

    Choose the road bike if your commute is over eight miles each way on decent pavement, you are reasonably fit or want to get fit fast, you have secure indoor parking, and you might also ride for fun on weekends — a road bike that doubles as a weekend bike is excellent value. Choose the hybrid if your route has rough pavement or mixed surfaces, you carry cargo, you lock up outside, you have back or neck concerns, or you simply want the lowest-maintenance, most forgiving daily tool. Either way, test-ride both on a route that resembles your commute, not just around the parking lot — twenty minutes in the saddle tells you more than twenty reviews. And whatever you buy, get a professional basic fit; a $75 fit session prevents the knee pain and numb hands that kill more commuting habits than any bike choice.

    Conclusion

    Road bike versus hybrid is not a contest with a winner — it is a matching problem. Audit your route honestly, weigh speed against comfort and durability, budget for the accessories that make commuting actually work, and test-ride before you commit. Thousands of Americans have replaced car commutes with bikes that fit their real lives, and the right choice here is simply the one that gets ridden. For more practical gear and fitness guidance, check our sports section, read about the people behind these guides, or ask us your cycling question — we answer every one.

    Frequently Asked Questions

    Can I put drop handlebars on a hybrid later?

    Technically possible but rarely worth it — the frame geometry, brake levers, and shifters are all designed around flat bars, so the conversion costs nearly as much as the bike. If you think you want drops eventually, buy the road bike (or a gravel bike) from the start.

    Are e-bikes a better commuter option than either?

    For hilly or long commutes, often yes — an e-hybrid flattens hills and kills sweat, which removes the two biggest barriers to daily riding. They cost more upfront ($1,500+) and weigh more, but for commutes over ten miles or with serious elevation, they are worth a serious look.

    How much should I spend on my first commuter bike?

    The sweet spot is $600 to $1,000 for a hybrid and $900 to $1,400 for a road bike, plus $150 to $300 for lock, lights, fenders, and cargo carrying. Below that range you get components that wear out fast; far above it you get performance you cannot use in traffic.

    Do I need special clothes to commute by bike?

    For rides under 20 minutes, no — regular clothes work fine, especially on an upright hybrid. Longer or hillier commutes merit padded shorts and a change of clothes at the office. The real essentials are visibility (lights and bright colors) and rain protection, not lycra.

    What about a gravel bike instead of choosing between the two?

    A gravel bike is genuinely the best of both for many commuters: drop-bar efficiency with wide, tough tires and relaxed geometry, plus rack and fender mounts. If your budget stretches to $1,000+, test-ride one — it may make this entire debate moot.

  • When to See a Doctor for a Twisted Ankle From Soccer

    When to See a Doctor for a Twisted Ankle From Soccer

    You rolled your ankle in the 70th minute, heard a pop, and finished the game on adrenaline — and now it is the size of a tennis ball and you are wondering whether you actually need a doctor or just ice and a good attitude. Twisted ankles are the most common soccer injury by a wide margin, and the vast majority are simple sprains that heal with home care. But a meaningful minority are fractures, high ankle sprains, or torn ligaments that get worse when ignored, and the difference between “walk it off” and “get an X-ray” is not always obvious in the first hour. Here is how to read your own ankle like a sports medicine clinician would, so you neither waste a Saturday in urgent care nor limp around on a fracture for three weeks.

    First, Understand What Actually Happened in There

    Most soccer ankle twists are inversion sprains: your foot rolls inward, stretching or tearing the ligaments on the outside of the ankle, especially the anterior talofibular ligament. These are graded 1 through 3 — a mild stretch, a partial tear, or a complete rupture. Far less common but more serious are high ankle sprains (damage to the ligaments connecting the tibia and fibula, usually from the foot being forced outward) and fractures, particularly of the fibula or the talus. High ankle sprains heal much more slowly than lateral sprains and are the ones most often misdiagnosed as “just a sprain.” Knowing this anatomy matters because each injury has its own red flags, and the care for a fracture is nothing like the care for a Grade 1 sprain.

    Use the Ottawa Ankle Rules at Home

    Emergency departments use a validated checklist called the Ottawa Ankle Rules to decide who needs an X-ray, and you can apply the core logic yourself. Get imaging if any of these are true: you cannot bear weight — meaning you cannot take four steps, even limping — both immediately after the injury and when you check again; there is bone tenderness at the back edge or tip of either ankle bone (the malleoli); or there is tenderness along the midfoot or an inability to bear weight pointing to a foot fracture. These rules catch nearly all fractures while sparing most sprains an unnecessary X-ray. They are not a diagnosis, but they are the best home triage tool sports medicine has.

    Red Flags That Mean “Go Today, Not Tomorrow”

    Beyond the Ottawa criteria, certain signs should send you to urgent care or your doctor the same day. Visible deformity — the ankle looks crooked, displaced, or angulated — is an obvious one. So is numbness, tingling, or a foot that turns pale or feels cold, which can signal circulation or nerve compromise. Rapid, severe swelling within minutes, a loud pop followed by immediate inability to stand, or pain directly over the bony prominences rather than the soft tissue all raise the fracture odds. Pain above the ankle joint itself, especially when you squeeze the calf, hints at a high ankle sprain, which needs professional evaluation even though it is not a fracture. And if the ankle gives way repeatedly over the following days — the joint feels unstable, like it might buckle — the ligaments may be significantly torn and need a clinician’s assessment, possibly an MRI.

    What Proper Home Care Looks Like for a Simple Sprain

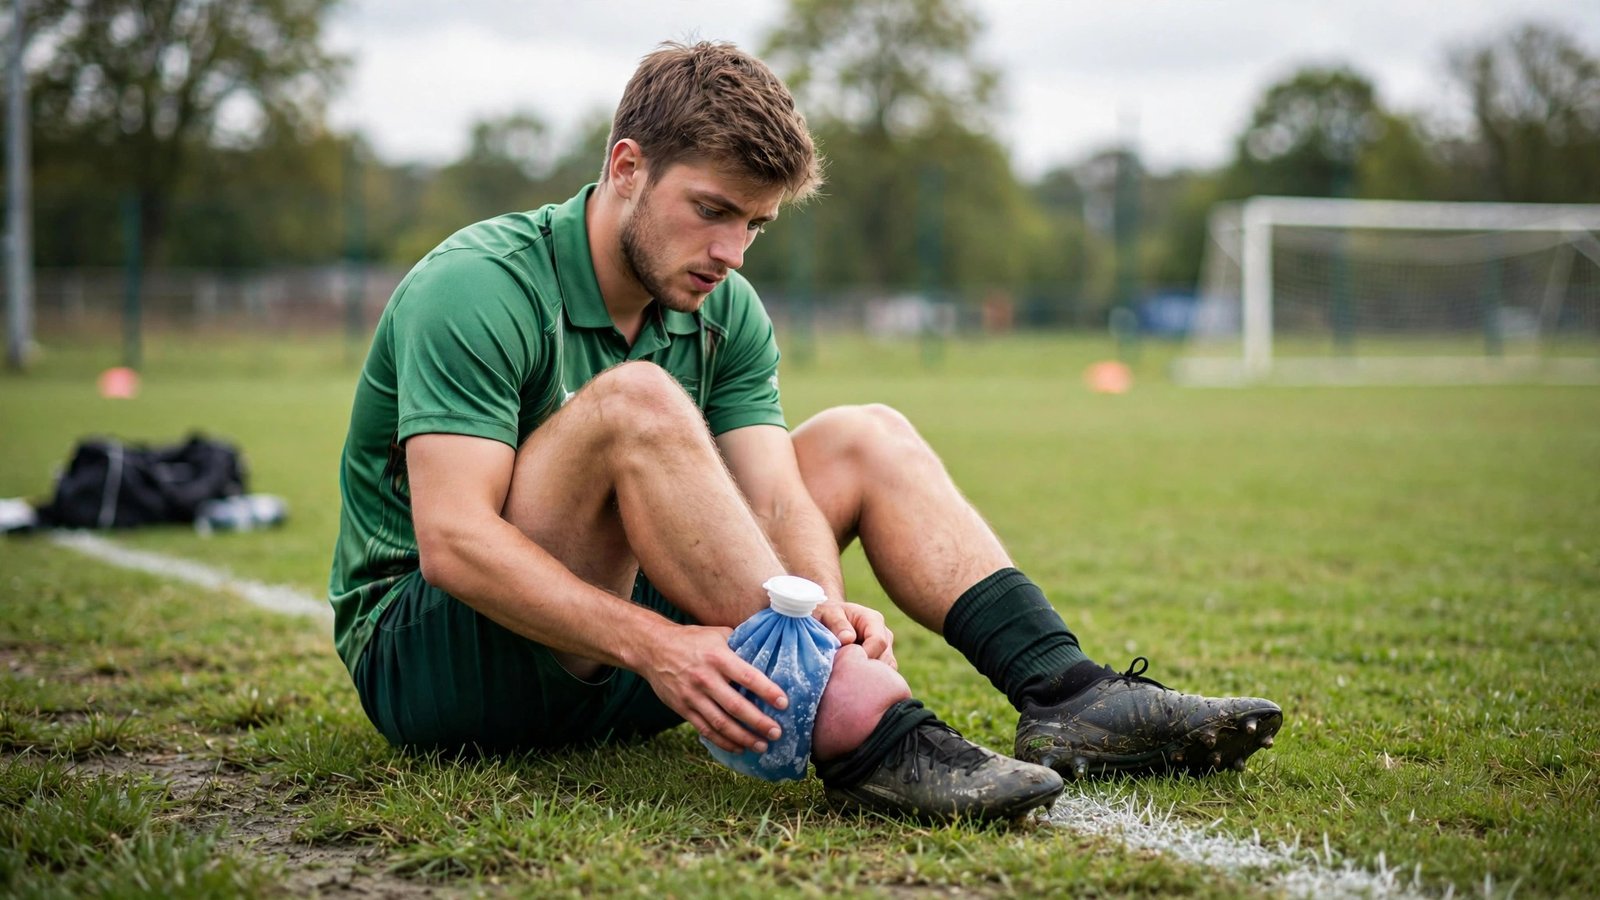
    If you can bear weight, the pain is over soft tissue rather than bone, and there is no deformity, you are likely dealing with a Grade 1 or 2 sprain that home care handles well. The modern protocol has moved past old-school total rest: protect the ankle for a day or two, but start gentle movement early, because controlled motion reduces stiffness and speeds ligament healing. Ice for 15 to 20 minutes a few times a day during the first 48 hours, compress with an elastic bandage (snug, not numb-making), and elevate above heart level as often as you can. Over-the-counter anti-inflammatories help pain, though some sports medicine research suggests not overdoing them in the first day since inflammation is part of healing. Begin gentle range-of-motion work within a couple of days, then progress to single-leg balance exercises — the best defense against re-spraining. The American Orthopaedic Foot & Ankle Society’s patient resources detail how proprioception retraining prevents chronic instability.

    When “Wait and See” Stops Being Reasonable

    Here is the timeline that should trigger a visit even if the first day seemed fine. If you cannot walk normally within three to four days, get evaluated — a simple sprain should be improving by then. If swelling has not meaningfully decreased after a week, something beyond a mild sprain is likely. If the same ankle has been sprained before and this episode feels worse or the joint feels loose, chronic instability may be developing, and a physical therapist can fix what rest cannot. And if pain persists beyond two to three weeks despite proper care, ask about imaging beyond an X-ray: stress fractures and cartilage injuries of the talus hide from X-rays and explain the classic “sprain that never got better.” Trust the trend more than any single day — steady improvement means you are on track; a plateau or regression means you need eyes on it.

    Can you take four steps on it? Is the pain over soft tissue rather than bone? Then it’s probably a routine sprain that home care will handle. Can’t bear weight, see deformity, feel numbness, or still can’t walk normally after a few days — that’s your signal to get professional evaluation without delay.

    What the Doctor Will Actually Do

    Knowing the process removes the fear of going. The clinician will take a history (how the foot twisted, what you heard and felt), palpate the specific ligaments and bones, and test stability by gently stressing the joint. If the Ottawa criteria or exam suggest it, you will get weight-bearing X-rays. For suspected high ankle sprains or persistent pain with clean X-rays, an MRI may follow. Treatment for confirmed simple sprains is usually a brace or walking boot for a week or two, a referral to physical therapy for balance and strengthening work, and a graded return-to-play plan — typically two to six weeks depending on severity. Fractures may mean a boot and crutches for six weeks or, for displaced fractures, surgery. The key point: early, accurate diagnosis shortens total recovery time. The players who miss a whole season are usually the ones who tried to tough out a serious injury, not the ones who got checked promptly.

    Conclusion

    Most twisted soccer ankles are routine sprains that respond beautifully to smart home care: protect briefly, ice and elevate, move early, and rebuild balance. But your ankle gives you clear signals when the injury is more than that — inability to bear weight, bone tenderness, deformity, numbness, or pain that refuses the normal healing timeline. Respect those signals and get evaluated; sports medicine exists precisely for this call. For more injury-smart guidance, explore our sports coverage, meet the team behind it, or send us your sports health question directly.

    Frequently Asked Questions

    Can I play through a twisted ankle if the pain isn’t that bad?

    Finishing a game on adrenaline is common, but playing on a freshly sprained ankle in the following days risks turning a Grade 1 sprain into a Grade 2 or 3, and a small fracture into a displaced one. Sit out until you can walk, jog, and cut without pain or limping — usually days for mild sprains, weeks for worse ones.

    Should I get an X-ray for every twisted ankle?

    No. The Ottawa Ankle Rules exist precisely to avoid unnecessary X-rays: if you can bear weight and there is no bone tenderness, an X-ray is very unlikely to change anything. Get imaging when you cannot take four steps, have tenderness over the ankle bones, or show any red-flag signs.

    How long does a typical soccer ankle sprain take to heal?

    Grade 1 sprains often resolve in one to two weeks, Grade 2 in three to six weeks, and Grade 3 or high ankle sprains in eight to twelve weeks or more. Returning before the ankle is stable is the main reason sprains become chronic — rehab, especially balance training, matters as much as rest.

    Is a walking boot overkill for a sprain?

    For mild sprains, yes — a lace-up brace and early movement are better. Boots are appropriate for Grade 3 sprains, suspected fractures, or high ankle sprains where immobilization protects healing ligaments. A clinician can tell you which category you are in.

    Why does my ankle keep rolling after the first sprain?

    Repeated rolling usually means the ligaments healed in a lengthened position or your proprioception — the ankle’s position sense — never recovered. This chronic instability responds well to physical therapy focused on balance and peroneal strengthening. An ankle brace during play is a smart bridge while you rehab.

  • How to Get Your Teenager Interested in Sports Beyond Video Games

    How to Get Your Teenager Interested in Sports Beyond Video Games

    If your teenager’s idea of a workout is a marathon gaming session, you are not alone — and you are not a bad parent for worrying about it. The average American teen now spends close to three hours a day on video games, according to industry surveys, and many parents watch that number with a mix of frustration and guilt. Getting your teen interested in a sport rarely fails because the kid is lazy — it usually fails because the approach clashes with how teenagers think: they crave autonomy, they fear looking foolish, and they will reject anything that smells like parental homework. The trick is to stop selling exercise and start offering something games cannot give them: real-world stakes, real friends, and a genuine sense of getting better at something hard.

    Understand Why Video Games Win (and Use That Knowledge)

    Before you compete with the console, study why it wins. Video games hand teens four things instantly: autonomy (they choose the mission), mastery (visible progress bars and ranks), social connection (squads and voice chat), and low-stakes failure (respawn in ten seconds). Traditional sports, as most parents pitch them, offer the opposite: an assigned role, a coach yelling corrections, teammates who already know the game, and public failure in front of everyone. No wonder the controller wins. Instead of fighting these preferences, channel them. Look for sports that offer fast feedback and a visible skill curve, like rock climbing, skateboarding, martial arts, or even recreational disc golf — activities where a beginner can feel noticeably better within two weeks. The Aspen Institute’s Project Play initiative has documented how multi-sport, low-pressure sampling keeps kids engaged far longer than early specialization. Teens who feel progress stay; teens who feel judged quit.

    Let Them Choose — Never Assign the Sport

    This is the single highest-leverage move you have. A teen who picks their own sport will tolerate bad weather, early mornings, and sore muscles; a teen who was signed up for travel soccer “because your sister loved it” will find every excuse to quit. Give them a real menu, not a single option. Take them to watch a local high school rugby match, a skate park session, a bouldering gym, or an adult rec volleyball league, and watch what actually lights them up. Frame it as an experiment with a defined trial period: “Pick something, we’ll try it for six weeks, and if you hate it, you pick something else.” That escape hatch paradoxically makes them more willing to commit, because the risk of being trapped is gone.

    Lower the Stakes: Casual and Non-Traditional Sports

    For a teen who has never played organized sports, joining a competitive team feels like showing up to a raid without any gear. Reduce the intimidation. Rec leagues, intramurals, and pickup games at the park cost little, practice once or twice a week, and attract mixed skill levels. Non-traditional sports are even better for gaming kids: ultimate frisbee, climbing, mountain biking, rowing, fencing, and parkour all feel adventurous rather than like “gym class.” Many YMCAs and community centers run beginner-friendly teen programs specifically designed for kids with zero background. The CDC’s youth physical activity guidelines recommend 60 minutes of daily activity for teens — and stress that it should be enjoyable, not forced. One more underrated option: sports with individual rather than team pressure, like swimming, track events, or tennis, where a teen competes mostly against their own last performance. When nobody can blame you for a loss, the fear of embarrassment drops fast.

    Use Gaming Itself as the Bridge

    Instead of positioning sports as the enemy of gaming, recruit the gamer’s instincts. Teens who play sports games like FIFA, NBA 2K, or MLB The Show already understand formations, strategy, and player roles — invite them to see how it feels in real life. Fitness games, VR boxing, and dance games can be a literal stepping stone: studies have found that active gaming does raise heart rates into moderate exercise zones, and for a sedentary teen, that first taste of physical exertion is valuable. The goal is not to replace gaming overnight but to prove that real-world movement delivers the same dopamine hits they already chase.

    Make It Social Before You Make It Serious

    Ask any teen why they keep playing a sport and the answer is almost never “for fitness.” It is the friends. A sport your teen’s friend group already plays has a tenfold higher chance of sticking than one they do alone. Recruit one friend to try something with them — offer to cover the friend’s registration fee if money is tight, because that investment pays for itself in retention. Coaches matter enormously too: one coach who praises effort publicly and corrects privately can keep a teen in a sport for years, while a screamer can end it in a month. If your teen tries a team and the vibe is toxic, switching teams is smarter than quitting the sport. And remember your own role: be the parent who drives to practice without commentary, cheers effort rather than results, and never critiques the game on the ride home. Research on youth sports consistently shows that the car ride home is where most kids decide whether they want to keep playing.

    The formula that works: let your teen pick the sport, start with something low-pressure and social, give it a defined trial window, and praise effort instead of talent. Teens don’t need to be convinced that exercise is healthy — they need an experience that feels like theirs, not an assignment.

    What Not to Do: Avoid the Pressure Traps

    A few well-meaning moves reliably backfire. Do not ban gaming as leverage — it frames sports as a punishment and makes you the villain in a story where the sport never had a chance. Do not sign them up for the most competitive league available, hoping intensity will “toughen them up”; for a reluctant beginner, intensity just confirms that sports are miserable. And do not hover: watching every practice from the sideline with a running commentary turns a fun activity into a performance review. The parents whose teens stick with sports long-term share one trait — they made it easy to start, easy to quit one thing and try another, and genuinely fun to keep showing up.

    Conclusion

    Getting a teenager off the couch is not a battle you win with lectures about screen time; it is a recruitment campaign you win by understanding what motivates them. Give them real choice, point them toward low-stakes and non-traditional sports, recruit a friend, find a coach who builds kids up, and use the gaming instincts they already have as fuel rather than fighting them. Most teens are not anti-exercise — they are anti-embarrassment and anti-boredom. Remove those two barriers and movement starts to sell itself. Browse more practical parenting and fitness guidance in our sports section, learn more about who writes these guides, or ask us your own family fitness question — we read every message.

    Frequently Asked Questions

    Should I limit video games to force my teen into sports?

    Hard bans usually backfire — they turn sports into punishment and gaming into forbidden fruit. A healthier approach is structuring the day: gaming happens after the chosen physical activity is done, not instead of it. Teens accept “practice first, games after” far better than “no more games.”

    What if my teenager tries a sport and quits after two weeks?

    That is normal and useful information, not a character flaw. Thank them for trying, ask what specifically they disliked (the sport, the coach, the schedule, the teammates), and let them pick the next experiment. Most teens find their fit on the second or third try, not the first.

    Are expensive travel teams worth it for a beginner teen?

    No. A beginner needs reps, fun, and a good coach — all available in rec leagues and school programs at a fraction of the cost. Travel teams make sense only after a teen has played for a season or two, genuinely loves the sport, and wants stronger competition. Starting at the travel level is the fastest route to burnout.

    How do I handle a teen who says they “hate all sports”?

    Take the claim seriously but literally — they hate what they have been exposed to, which is usually school PE and televised team sports. Ask them to define the hate: is it sweating, being watched, competition, or boredom? Then suggest activities that dodge that specific trigger, like climbing, cycling, martial arts, or dance, which many teens do not even file under “sports.”

    Can gaming and sports coexist in a healthy routine?

    Absolutely — the goal is balance, not elimination. Many teen athletes are avid gamers. A routine where a teen trains or plays a few days a week and games the rest is completely healthy, and the physical activity often improves their focus and mood during gaming too.

  • The Proper Way to Stretch Before Pickup Basketball

    The Proper Way to Stretch Before Pickup Basketball

    You show up for pickup basketball, do a couple of toe-touches, and start playing — then wonder why your hamstring barked on the first fast break and your jumper feels stiff for the first ten minutes. Most pickup players warm up wrong: either not at all, or with the static stretching (holding stretches for 30 seconds) that research now shows can temporarily reduce power and doesn’t prevent injuries. The proper pre-pickup routine is dynamic — movement-based, basketball-specific, and done in about 10 minutes. Here’s exactly what to do before you check the ball.

    Why Static Stretching Before Basketball Backfires

    For decades, athletes were taught to hold static stretches before playing. Sports science has largely reversed this: prolonged static stretching (holds over 30–60 seconds) before explosive activity temporarily decreases muscle power, sprint speed, and jump height — the exact qualities basketball demands. It also doesn’t warm the muscles the way movement does; a stretched-but-cold muscle is still a cold muscle.

    Static stretching isn’t villainous — it has real value for flexibility, just after activity, not before. The pre-game job is raising muscle temperature, activating the nervous system, lubricating joints, and rehearsing basketball movement patterns. Dynamic stretching — controlled movements through full range of motion — does all four simultaneously. Save the long holds for after the run, when muscles are warm and the flexibility gains actually stick. The American College of Sports Medicine’s flexibility guidelines reflect this dynamic-before, static-after consensus.

    The 10-Minute Pickup Warmup Routine

    Do this sequence courtside before every run — no equipment needed, about 10 minutes:

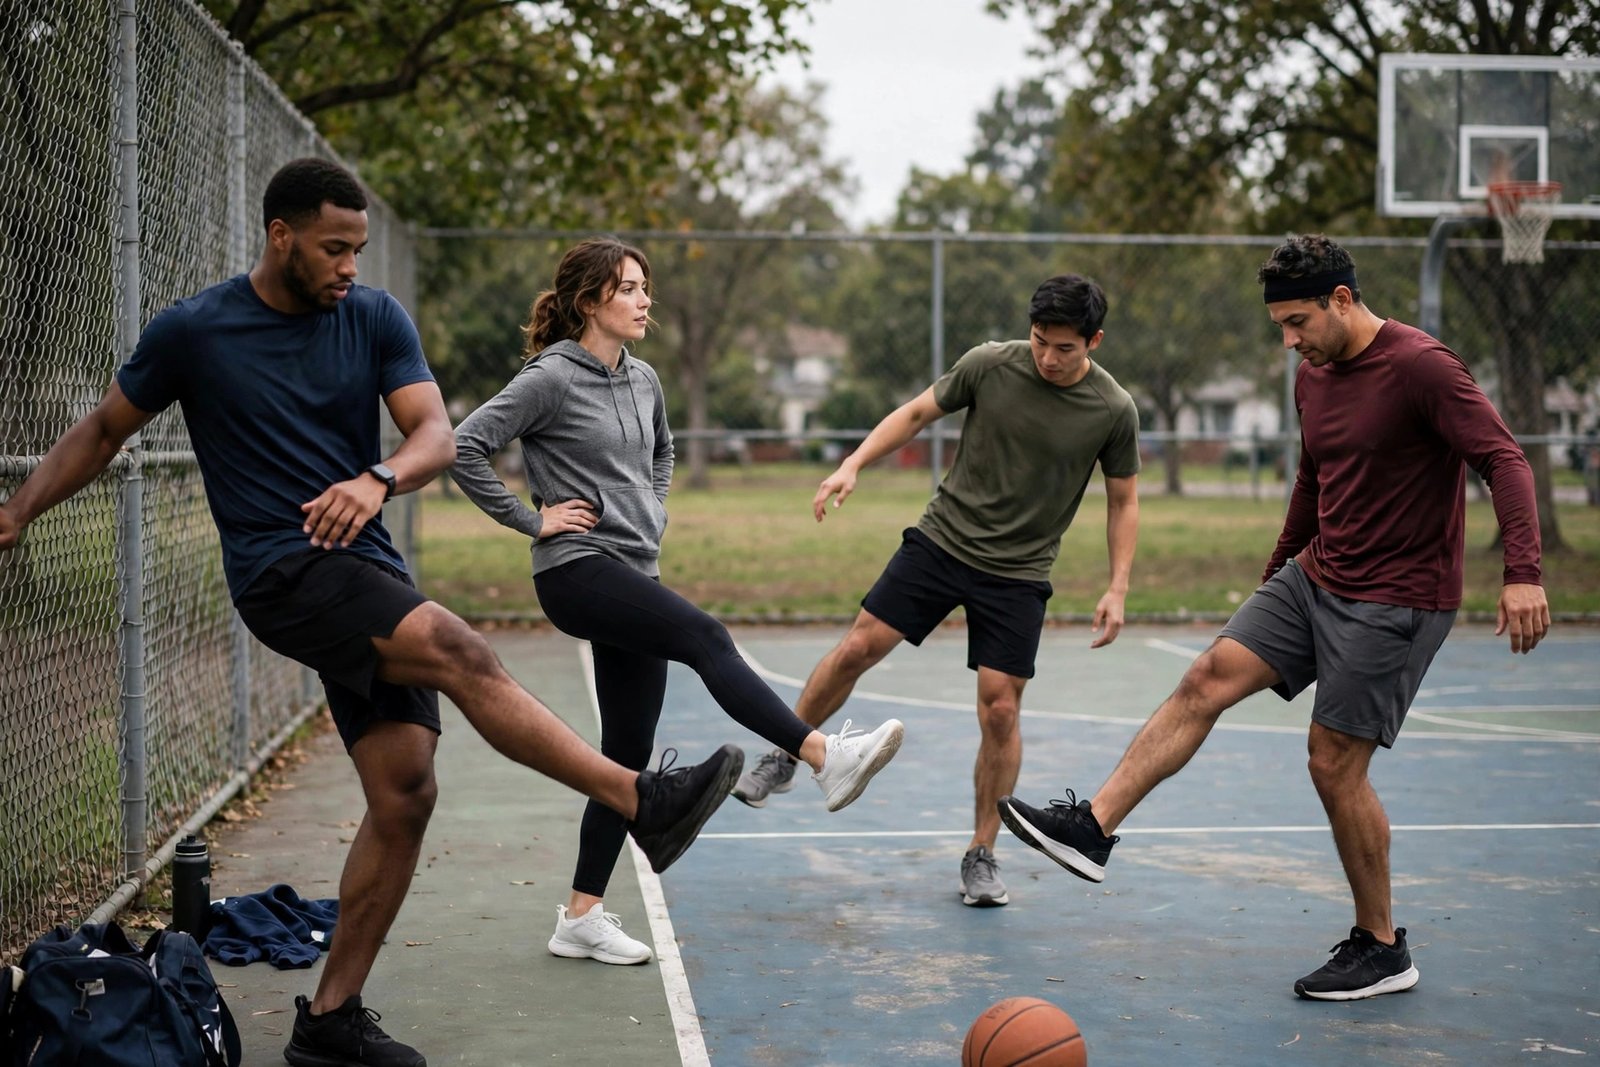
    Minutes 0–2: Raise the temperature. Easy jogging around the court, then progressive: jog a lap, run the second lap a bit harder, finish with 3–4 short accelerations (not sprints — build-ups to 80 percent). You should feel warm and slightly breathy. Minutes 2–5: Dynamic leg work (down the court and back for each): walking lunges with a twist, leg swings front-to-back (10 each leg, holding the wall), lateral leg swings (10 each), high knees (down and back), butt kicks (down and back). These open the hips and activate the exact muscles basketball uses.

    Minutes 5–8: Basketball-specific movement. Defensive slides down and back (low stance, active hands), backpedals, carioca/grapevine steps (hip mobility for change of direction), and 5–6 progressive vertical jumps (start small, build to near-max — priming the nervous system for rebounding). Minutes 8–10: Shooting warmup. Start close — form shooting from 5 feet, 10 makes — then move out progressively: free throws, mid-range, threes. This isn’t just feel; it’s neuromuscular rehearsal that makes your first-game jumper fall instead of clank.

    The Key Areas Pickup Players Neglect

    Ankles: Basketball’s most-sprained joint gets zero warmup from most players. Add ankle circles (10 each direction per foot) and calf raises (15 reps) to your routine — warmed-up ankles with activated calves resist the roll that ends pickup seasons. Consider this non-negotiable if you’ve sprained an ankle before; previously sprained ankles re-sprain at high rates without proper warmup and strengthening.

    Hips: Tight hips from desk sitting are the hidden epidemic in adult pickup games — they limit defensive stance depth, reduce first-step explosiveness, and shift load to the knees and back. The walking lunges, leg swings, and carioca in the routine specifically target this, but chronically tight players should add 90/90 hip stretches and deep squat holds to their daily life, not just pre-game. Shoulders and wrists: arm circles (forward and backward, 10 each) and wrist rotations take 30 seconds and prepare the shooting mechanism. The Hospital for Special Surgery’s basketball injury prevention guide details warmup protocols targeting these vulnerable areas.

    Game-Day Adjustments and Common Mistakes

    Adjust for conditions. Cold outdoor courts: extend the warmup to 12–15 minutes — cold muscles need more time, and asphalt is unforgiving. Wear layers you can shed. Back-to-back games: between games, keep moving lightly (walk, easy shots) rather than sitting and stiffening — the second game’s first five minutes injure more players than the first game’s. Tight schedule: if you only have 5 minutes, prioritize the jog, leg swings, lunges, and progressive jumps — the highest-value movements.

    Common mistakes to avoid: static stretching marathons before tip (save for after), going from zero to full sprint in the first possession (the classic hamstring pull), skipping the warmup because “it’s just pickup” (pickup intensity is real — nobody jogs a fast break), and warming up then sitting for 20 minutes waiting for a court (warmup expires — redo a quick 3-minute version before playing). Treat the warmup as part of the game, not an optional prelude.

    After the Run: The Cool-Down That Matters

    What you do after pickup affects tomorrow more than the warmup does. Spend 5 minutes: easy walking or shooting around (don’t stop abruptly — gradual cool-down aids recovery), then static stretching while muscles are warm — now’s the time for those 30-second holds: hamstrings, quads, hip flexors, calves, each 2×30 seconds. This is when flexibility gains actually occur.

    Hydrate, eat some protein within a couple of hours, and note any tweaks — the ankle that felt “a little funny” deserves attention (ice, assessment) before next week’s run, not after it becomes a real sprain. The players who last for decades in pickup basketball aren’t the most athletic — they’re the ones with the boring habits: warm up dynamically, cool down properly, and respect the small warning signs.

    The proper way to stretch before pickup basketball is dynamic, not static: 10 minutes of jogging, leg swings, walking lunges, defensive slides, carioca, progressive jumps, and close-range shooting warmup. Save static holds for after the game. Warm the ankles and hips specifically, extend the routine on cold days, and never go from zero to full sprint in the first possession.

    Conclusion

    Pickup basketball deserves a real warmup — 10 minutes of dynamic movement that raises your temperature, opens your hips, primes your jumper, and protects your ankles. Ditch the pre-game static stretching (save it for after), adjust for cold courts and back-to-back games, and cool down properly. The best ability in pickup basketball is availability, and availability starts before tip-off. For more basketball training guidance, browse our sports section, meet our team, or ask your training questions.

    Frequently Asked Questions

    Should I stretch before playing basketball?

    Yes — but dynamically, not statically. Do movement-based warmups (leg swings, lunges, slides, progressive jumps) before playing. Save static stretching (holding positions 30+ seconds) for after the game, when it improves flexibility without reducing power.

    How long should a basketball warmup take?

    About 10 minutes: 2 minutes of jogging/build-ups, 3 minutes of dynamic leg work, 3 minutes of basketball-specific movement (slides, backpedals, jumps), and 2 minutes of progressive shooting. Extend to 12–15 minutes on cold outdoor courts.

    Why do my legs feel heavy at the start of pickup games?

    Skipped or insufficient warmup — your cardiovascular system and muscles need several minutes of progressive activity to reach game readiness. The jogging and build-up portion of the warmup specifically eliminates the heavy-legs first five minutes.

    What’s the best stretch for basketball ankle injury prevention?

    Ankle circles and calf raises as warmup, plus the dynamic routine overall. Previously sprained ankles benefit most — they re-sprain at high rates without proper warmup. Consider balance-board work and strengthening if you have a sprain history.

    Can I warm up after sitting out between pickup games?

    Yes — and you should. Do a quick 3-minute version (jog, leg swings, a few jumps, some shots) before re-entering. Muscles stiffen quickly when you sit; the second game’s opening minutes injure more players than the first game’s.

  • How to Join an Adult Recreational Softball League in Your City

    How to Join an Adult Recreational Softball League in Your City

    You miss playing ball — the crack of the bat, the dugout banter, an excuse to be outside on summer evenings. Adult recreational softball leagues are one of America’s best-kept social secrets: low-cost, genuinely fun, welcoming to rusty players, and an instant community of teammates. Every city has them, sign-up is straightforward, and you absolutely don’t need to be good. Here’s how to find your league, pick the right division, and show up ready.

    Where to Find Leagues in Your City

    Start with your city’s Parks and Recreation department — most run affordable adult softball leagues ($50–$100 per player per season) with spring, summer, and fall sessions. Search “[your city] parks and rec adult softball” and you’ll typically find registration pages with divisions, schedules, and fees. These municipal leagues are the most beginner-friendly entry point: organized, officiated, reasonably priced, and explicitly recreational.

    Beyond parks and rec: Meetup.com and Facebook groups — search “adult softball [your city]” for pickup games and casual teams always seeking players; this is the fastest way to play this week. Corporate/company leagues — ask coworkers; many companies field teams and welcome ringers. Bar and social sports organizations — companies running social sports leagues in major metros combine softball with post-game socializing (great for newcomers to a city). Church and community leagues — often the most relaxed competition level. And USSSA and USA Softball local associations list sanctioned leagues from recreational to competitive. Cast a wide net initially — you can always switch leagues next season.

    Choosing the Right Division and Format

    Softball comes in flavors — pick the one matching your goals. Slow-pitch vs. fast-pitch: adult recreational leagues are overwhelmingly slow-pitch (the ball arcs in gently), which is far more beginner-friendly — if you played baseball growing up, slow-pitch feels easy; fast-pitch is the competitive variant. Coed vs. single-gender: coed leagues (typically requiring minimum female players on the field) tend to be more social and less intense; men’s and women’s leagues skew more competitive.

    Division levels: most leagues offer recreational (beginners welcome, fun-first), intermediate, and competitive tiers — be honest about your level and start one tier lower than your ego suggests. Nothing ruins the experience like a beginner in a competitive division (or a ringer dominating rec league). Joining as a free agent vs. a team: most leagues accept individual “free agent” signups and place you on a team needing players — perfect if you don’t know anyone. It’s the most common way adults join, and teams expect it. You’ll know teammates’ names by week two and have inside jokes by week four.

    What to Bring and What It Costs

    The gear barrier is refreshingly low. Required: a glove (any baseball/softball glove works — borrow one your first season if needed), athletic shoes or molded cleats (no metal spikes in most rec leagues), and comfortable athletic clothes. Provided by the league/team: balls, bases, and usually bats (though many players eventually buy their own bat — $50–$150 for a decent slow-pitch bat). Nice to have: batting gloves (prevent blisters), a water bottle, sunscreen, and a folding chair for the dugout sidelines.

    Total first-season cost: typically $75–$150 including league fees, or under $50 if you borrow a glove. Compare that to golf, skiing, or gym memberships — softball is among the cheapest adult sports per hour of fun. Some leagues include a team shirt; others collect $10–$20 for custom jerseys (worth it for the team identity). Post-game food and drinks are the real budget item — and the best part.

    What to Actually Expect (It’s Better Than You Think)

    Game format: usually 7 innings or a time limit (55–75 minutes), once weekly on weeknights, 8–12 game seasons plus playoffs. Skill range in rec divisions is gloriously wide — former college players alongside people who haven’t touched a glove in 20 years — and that’s the charm. The unwritten rules: hustle (run out ground balls), know the basic rules (force outs, tagging up — you’ll pick them up in two games), cheer for everyone, and never take it too seriously. The player who screams at teammates in rec softball is the villain of every league story.

    The social dimension is the real product. Teams go for food and drinks after games; seasons end with parties; friendships form fast around shared dugout time. For adults who moved to a new city, joined leagues report it as their fastest path to a friend group — better than apps, better than work. Show up consistently, bring a good attitude and maybe a cooler of drinks once, and you’ll be “one of the team” within weeks. The USA Softball resources can connect you with local associations and playing opportunities.

    Getting Game-Ready (Minimal Prep, Maximum Fun)

    You don’t need training camp, but two weeks of light prep prevents the classic first-game injuries. Throwing: play catch 2–3 times before the season — your arm needs gradual reintroduction to throwing or it’ll ache for a week. Start at short distances and build up. General movement: a few jogs and some dynamic stretching wake up the legs; softball’s signature injury is the pulled hamstring from sprinting cold to first base. Batting practice: if you can access a cage or even soft-toss with a friend, do it once — timing returns faster than you expect.

    Game day: arrive 20–30 minutes early for warmups, bring water, and warm up your arm progressively (never max-effort throws cold). Know your league’s specific rules (some have unique slow-pitch arc limits, run rules, or roster batting). And embrace the rust — everyone drops a ball or whiffs in week one. By week three, muscle memory returns, and by playoffs you’re wondering why you waited years to do this. The USSSA’s league finder lists sanctioned slow-pitch leagues by region.

    Join an adult recreational softball league by checking your city’s Parks and Rec department ($50–$100/season), Facebook groups, or Meetup for free-agent spots — no team needed. Choose slow-pitch coed recreational divisions as a beginner, bring just a glove and athletic shoes, play catch for two weeks beforehand, and show up ready for the cheapest, most social sport in adult life.

    Conclusion

    Adult softball is waiting for you — affordable, welcoming, social, and fun from the first game regardless of skill. Find your city’s parks and rec league or a free-agent spot online, pick the recreational division honestly, prep your arm with two weeks of catch, and show up. The hardest part is signing up; everything after is dugout laughs and summer evenings. Your glove is gathering dust for no reason. For more adult sports guidance, browse our sports section, meet our team, or ask your questions.

    Frequently Asked Questions

    Do I need experience to join an adult softball league?

    No — recreational divisions explicitly welcome beginners, and free-agent signups are designed for individuals without teams. Basic athleticism and a good attitude are the only prerequisites. Start in the lowest division and move up if it’s too easy.

    How much does adult softball cost?

    Typically $50–$100 per player per season through parks and rec leagues, plus a glove if you don’t own one ($30–$80, or borrow). Bats and balls are usually provided. It’s among the cheapest organized adult sports available.

    What’s the difference between slow-pitch and fast-pitch softball?

    Slow-pitch (the recreational standard) features a high-arcing gentle pitch that’s easy to hit — beginner-friendly and social. Fast-pitch uses high-speed windmill pitching and is the competitive variant. Adult rec leagues are almost always slow-pitch.

    Can I join without knowing anyone on a team?

    Yes — most leagues accept individual “free agent” registrations and assign you to a team needing players. It’s the most common way adults join. You’ll know the team within a couple of weeks; softball dugouts build friendships fast.

    When do softball seasons run?

    Most cities offer spring, summer, and fall sessions through parks and rec, with registration opening 4–8 weeks before each season. Summer is peak season; fall ball is often the most relaxed. Check your city’s parks department for exact dates.