Breaking

Category: Gardening

  • Why Does My Compost Pile Smell Like Rotten Eggs

    Why Does My Compost Pile Smell Like Rotten Eggs

    A healthy compost pile smells like a forest floor — earthy, rich, slightly sweet. So when you lift the lid and get hit with the unmistakable stench of rotten eggs, something has gone wrong in the microbial city inside your bin. That sulfur smell is hydrogen sulfide gas, and it is a distress signal: the beneficial aerobic microbes that should be running your compost have been replaced by anaerobic bacteria, the kind that thrive without oxygen and produce foul gases as they work. The good news is that a smelly pile is not a dead pile — it is a fixable pile. The rotten-egg smell points to specific, correctable conditions, and most piles stop stinking within days of the right intervention.

    What That Rotten-Egg Smell Actually Means

    Composting is digestion, and like any digestion, the byproducts depend on who is doing the digesting. In a healthy pile, aerobic bacteria and fungi break down organic matter using oxygen, producing mainly carbon dioxide, water, and heat — no foul odors. But when oxygen cannot reach parts of the pile, anaerobic bacteria take over, and their metabolism produces hydrogen sulfide (the rotten-egg smell), ammonia, and various organic acids. These anaerobes are not dangerous to you in an open backyard pile, but they work slowly, produce acids that stall decomposition, and — most noticeably — they stink. The smell is therefore diagnostic: wherever you smell sulfur, oxygen is not reaching. Your job is not to mask the odor but to restore airflow to the suffocated zones. A pile that smells like rotten eggs is essentially holding its breath, and you need to help it breathe again.

    The Three Usual Causes

    Nearly every stinky pile comes down to one of three problems, often in combination. First: too much water. A soggy pile — from heavy rain, a lid that traps condensation, or enthusiastic watering — fills the air spaces between particles with water, and oxygen cannot move through waterlogged material. Squeeze a handful of compost: it should feel like a wrung-out sponge, releasing a drop or two at most. If water streams out, the pile is too wet. Second: too many greens. A pile loaded with fresh grass clippings, kitchen scraps, and coffee grounds — all nitrogen-rich “greens” — mats together into a dense, airless mass, especially grass clippings, which compress into slimy layers. Third: compaction and neglect. A pile that has never been turned develops dead zones in the center where oxygen ran out months ago. Any one of these creates anaerobic pockets; together they create a pile-wide stink. The EPA’s home composting guide explains the balance of moisture, air, and materials that keeps decomposition aerobic and odor-free.

    The Fix: Turn It, Brown It, Drain It

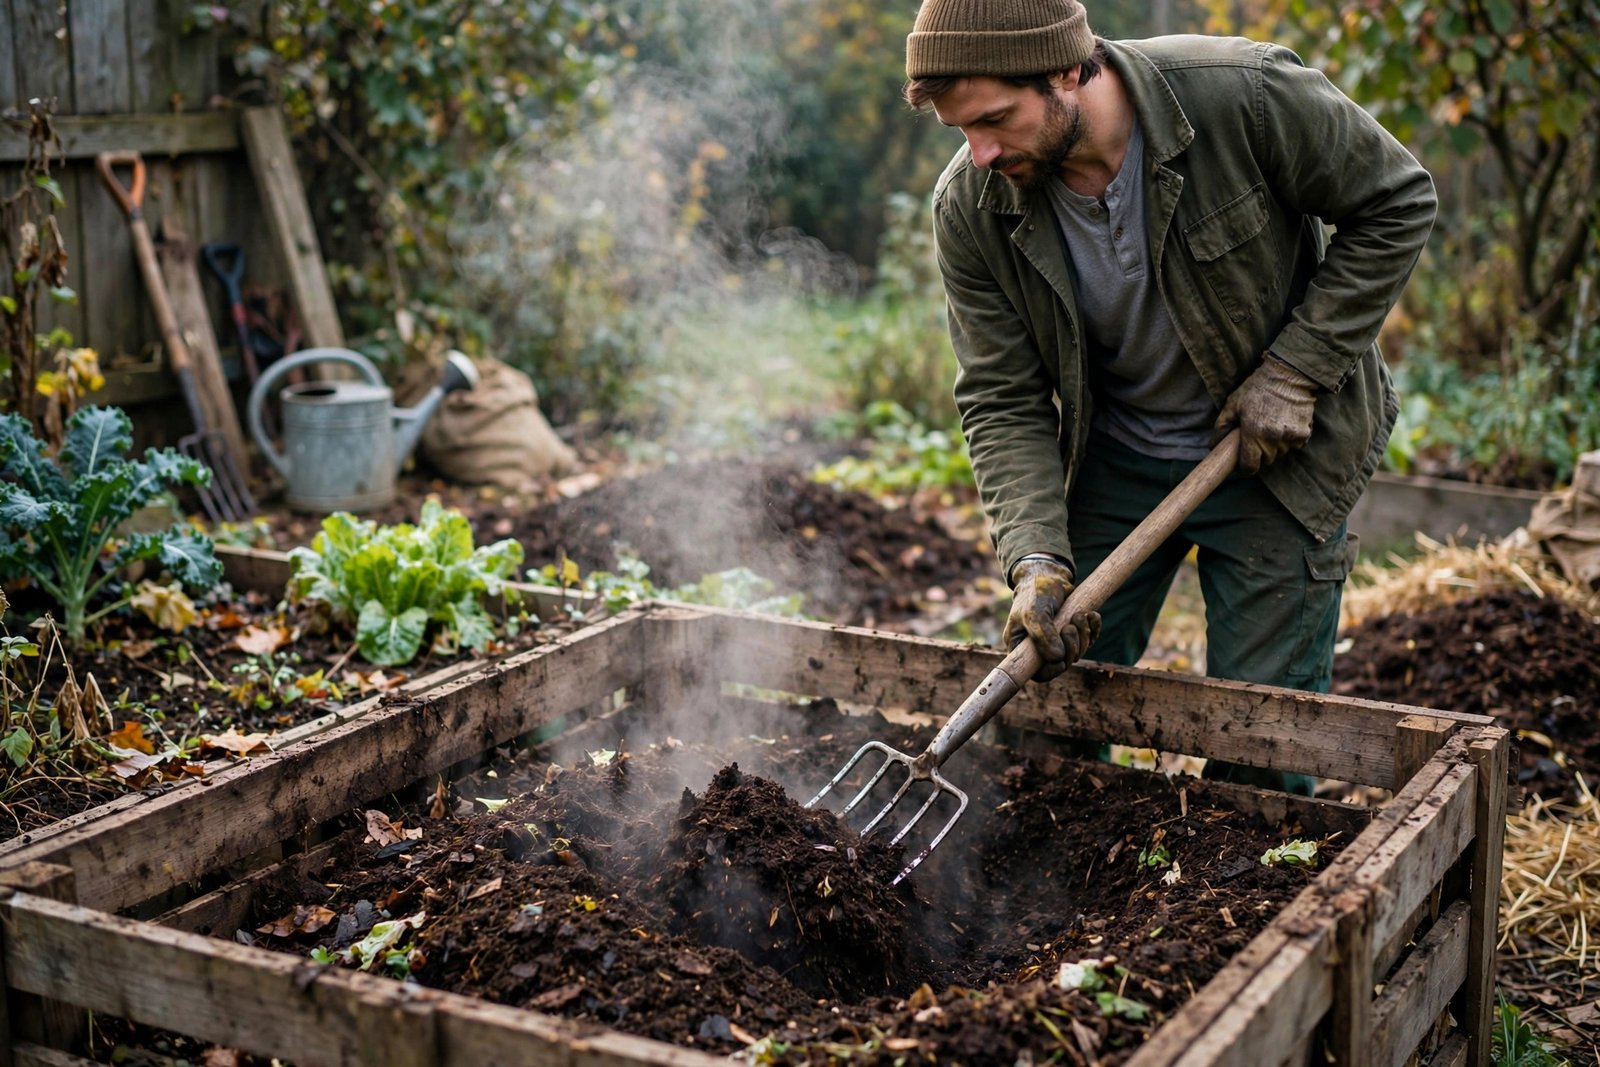
    Start with the fastest intervention: turn the pile. Use a pitchfork to flip and fluff the entire heap, breaking up matted layers and moving the anaerobic center material to the oxygen-rich outside. You will often see steam rise as trapped gases release — that is a good sign. Next, add browns: every forkful of smelly, wet material needs a generous addition of dry, carbon-rich “browns” — shredded cardboard, dry leaves, straw, wood chips, or shredded newspaper. Browns do double duty: they absorb excess moisture and their irregular shapes create air channels through the pile. Aim to restore roughly a 3:1 ratio of browns to greens by volume. Then address drainage: if the bin sits in a low spot that collects water, move it or raise it on pallets; if the lid traps rain, drill a few drainage holes in the bin’s base and consider a cover that sheds rain while allowing airflow. In most cases, one thorough turning plus a big addition of browns eliminates the rotten-egg smell within 48 hours as aerobic microbes reclaim the pile.

    What NOT to Put in the Pile

    Some smell problems come from the inputs themselves. Meat, fish, dairy products, and greasy foods do not just smell bad — they putrefy anaerobically, attract rats and flies, and overwhelm a backyard pile’s ability to process them. Leave them out (a sealed bokashi system handles them better if you are determined). Also skip pet waste from dogs and cats, which can harbor pathogens, and glossy or heavily printed paper, which adds little but chemicals. Large woody branches decompose so slowly they are better chipped first or used as the base layer for airflow. And go easy on any single material in bulk: an entire bag of grass clippings dumped at once is the classic recipe for a slimy, stinking mat — always mix greens with browns as you add them. Eggshells are fine but rinse them first; otherwise the membrane residue adds its own sulfurous note. Good inputs, layered sensibly, rarely stink.

    Keeping It Sweet Long-Term

    Once the smell is gone, a few habits keep it from returning. Turn the pile every one to two weeks — it takes ten minutes and is the single best thing you can do. Add browns every time you add greens: keep a bin of shredded leaves or cardboard next to the compost so the habit is easy. Maintain that wrung-out-sponge moisture level; in rainy climates, a simple roof or tarp over the bin (raised for airflow, not sealed) prevents waterlogging. Chop or shred materials before adding them — smaller pieces compost faster and pack less densely. If you use a closed tumbler, remember that tumblers are notorious for going anaerobic: tumble frequently, do not overfill, and add browns aggressively. A well-managed pile runs hot (130 to 150°F in the center), breaks materials down in weeks rather than months, and smells like good earth. That earthy smell is your report card — when the pile smells sweet, the microbes are happy. Cornell’s compost chemistry resources offer deeper detail on the microbial processes for the scientifically curious.

    A compost pile that smells like rotten eggs is starved of oxygen — anaerobic bacteria are producing hydrogen sulfide in waterlogged, compacted, or green-heavy zones. Turn the pile thoroughly, mix in generous dry browns, fix drainage, and the sulfur stink usually disappears within two days.

    Conclusion

    The rotten-egg smell from your compost pile is not a mystery and not a disaster — it is hydrogen sulfide from anaerobic bacteria, telling you exactly where oxygen is not reaching. Turn the pile to break up dead zones, add plenty of dry browns to absorb moisture and open air channels, fix any drainage problems, and keep meat and dairy out. Most piles go from sulfurous to sweet-smelling within days. Then maintain the rhythm — regular turning, balanced greens and browns, sensible moisture — and your compost will smell like the forest floor it is becoming. For more composting and soil-building guides, visit our gardening section, learn about our team, or send us your composting questions.

    Frequently Asked Questions

    Is the rotten-egg smell from compost dangerous?

    In an open backyard pile, no — hydrogen sulfide dissipates quickly outdoors and the concentrations are low. Never stick your head into an enclosed compost container to sniff it, though; confined spaces can accumulate gases. Turn the pile outdoors with normal ventilation and you will be fine.

    How quickly will the smell go away after turning?

    Usually within 24 to 48 hours. Turning reintroduces oxygen immediately, and aerobic microbes rebound fast once they can breathe. If the smell persists after a thorough turning plus added browns, the pile is likely still too wet — check drainage and add more dry material.

    Can I just add lime to fix a smelly compost pile?

    Lime raises pH and can temporarily reduce odors, but it treats the symptom, not the cause — the anaerobic conditions remain. Worse, it can interfere with the microbial balance. Fix the airflow, moisture, and carbon-nitrogen balance instead; that solves the actual problem.

    Why does my compost tumbler smell worse than an open pile?

    Tumblers are prone to anaerobic conditions because people overfill them, rarely add enough browns, and the sealed design limits airflow. Tumble every few days, keep it no more than two-thirds full, add browns aggressively with every green addition, and leave the air vents open.

    Should a compost pile be in sun or shade?

    Either works, but shade or partial shade is more forgiving — it prevents the pile from drying out in summer. Sun helps in cold climates. Location matters less than management: moisture, browns-to-greens ratio, and turning determine whether a pile smells sweet or sulfurous.
  • How Do I Keep My Succulents Alive Through a Humid Summer

    How Do I Keep My Succulents Alive Through a Humid Summer

    Succulents evolved for deserts — blazing sun, bone-dry air, and rain that arrives months apart. So when summer brings weeks of 90 percent humidity, still air, and afternoon thunderstorms, these desert plants face conditions they were never designed to handle. The result is predictable: soft, translucent leaves, blackening stems, and plants that seem to melt overnight. But humidity does not have to be a death sentence. Succulent lovers in Florida, the Gulf Coast, and the humid Midwest keep thriving collections every summer by changing three things: the soil, the airflow, and the watering discipline. Here is how to make your succulents humidity-proof.

    Why Humidity Kills Succulents (It Is Not the Moisture in the Air)

    Here is the counterintuitive truth: humid air alone rarely kills succulents. The killer is what humidity does to the soil and the plant’s ability to dry out. In arid conditions, water evaporates from soil and leaf surfaces quickly, and the plant’s roots get the wet-dry cycle they need. In humid, still air, evaporation slows to a crawl — soil stays damp for days after watering, water sits in leaf crevices, and the roots sit in prolonged wetness. That is when rot organisms (fungi like Phytophthora and Pythium) thrive. The plant’s fleshy leaves, designed to store water for droughts, become liabilities: excess internal moisture plus warm temperatures equals cellular breakdown. You will see the classic signs — leaves turning yellow, translucent, and jelly-like, often starting with the lower leaves, and stems going soft and black from the base up. Understanding this mechanism points straight at the fixes: everything is about helping water leave the plant’s environment faster.

    The Soil Fix: Go Grittier Than You Think

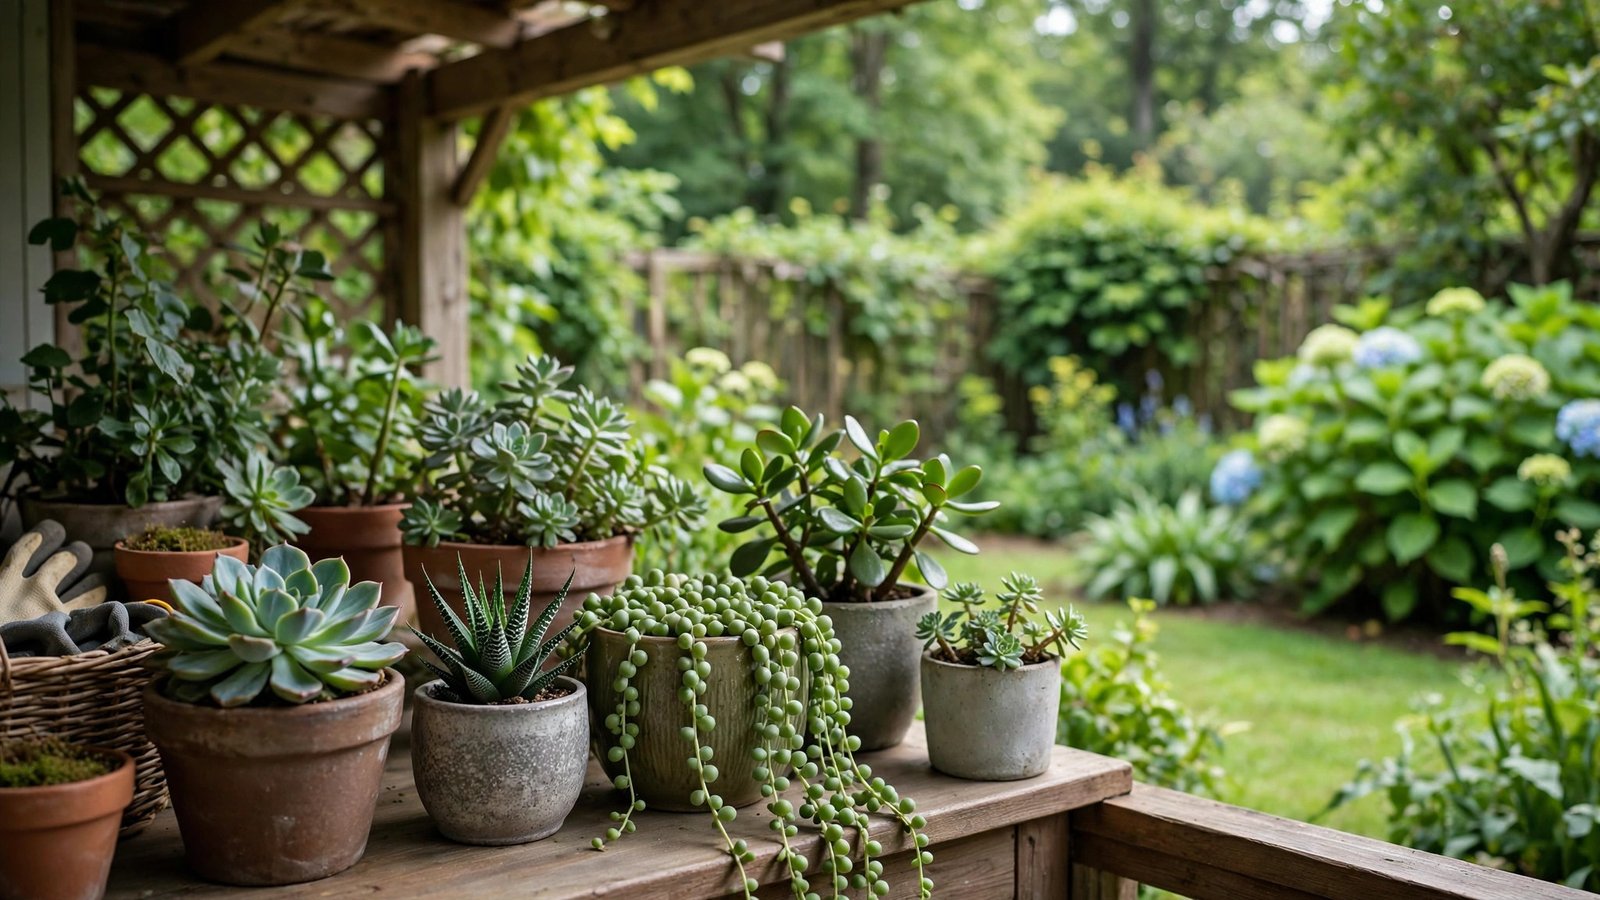
    Standard potting soil is a humidity death trap for succulents — it holds water for days. In humid climates, your mix should be at least 50 percent inorganic grit, and many successful humid-climate growers go to 70 percent or more. A proven recipe: equal parts quality cactus/succulent mix, perlite or pumice, and coarse grit like chicken grit, turface, or crushed granite. The mix should feel crunchy and drain almost instantly when you water — if water pools on top for more than a few seconds, add more grit. Top-dress with a layer of gravel or coarse sand, which keeps the base of the plant dry and prevents soil from splashing onto leaves. Use terracotta pots, never glazed ceramic or plastic: terracotta breathes, wicking moisture out through its walls, which measurably speeds drying. Make sure every pot has drainage holes — no exceptions — and never let pots sit in saucers of water. Repotting an existing collection into grittier mix before summer arrives is the single highest-impact change you can make. Clemson Cooperative Extension’s guide to indoor cacti and succulents covers soil and container fundamentals, and the RHS cacti and succulent growing guide has more on gritty mixes for humid climates.

    Airflow Is Non-Negotiable

    In the desert, constant wind dries everything. On a humid patio, still air lets moisture linger on leaves and soil for hours — exactly what rot needs. Manufacture the breeze. Outdoors, space pots well apart rather than clustering them, elevate them on shelves or stands so air circulates underneath, and position them where they catch natural breezes. A small outdoor-rated fan running during the most humid stretches works remarkably well; even gentle air movement dramatically speeds surface drying. Indoors, crack windows, run a ceiling fan, or place a small fan near (not directly blasting) the plants. Prune dead lower leaves promptly — they trap moisture against the stem and harbor fungus. If you grow succulents crowded on a windowsill, thin them out for summer; the Instagram-worthy dense arrangement is a rot incubator in July. Good airflow also discourages mealybugs and fungus gnats, the pests that love humid succulent collections.

    Watering Rules for Humid Climates

    Forget every watering schedule you have read — in humid summers, water only when the plant tells you to. Wait until the soil is completely dry all the way through the pot (use a wooden skewer pushed to the bottom; it should come out clean and dry) AND the plant shows mild thirst signs: slightly soft or wrinkled lower leaves. Then water deeply until it drains freely, and empty the saucer immediately. In peak humidity, many succulents need water only every two to three weeks, and some not at all during the muggiest stretches — they are built to wait. Water in the morning so any splashed moisture evaporates during the day, and water the soil, never the rosette — water sitting in leaf axils is a rot invitation. When in doubt, skip it: a slightly wrinkled succulent recovers in hours after watering, while a rotted one is gone. Reduce or stop fertilizing in the most humid months; soft, fast growth from fertilizer is far more rot-prone than slow, firm growth.

    Placement and Rain Protection

    Summer rain is the wildcard. A week of daily thunderstorms can undo perfect soil and watering discipline, saturating pots faster than they can drain. Give succulents a covered spot — under a porch overhang, a clear patio cover, or a simple shelf with a roof — where they get bright light but you control the water. Morning sun with afternoon shade is ideal in hot, humid regions: it provides the light they need without the brutal midday heat that cooks wet roots. If plants must stay in the open, tilt pots slightly so rain runs off rather than pooling, and after heavy rain, tip out any saucers and consider moving the most rot-prone varieties (echeverias, lithops) under cover until things dry out. Watch the forecast during tropical systems and move the collection under cover preemptively — one hurricane weekend has ended many collections. Bring the lessons of summer into fall: as humidity drops, you can relax the regime, but keep the gritty soil year-round.

    Humid summers kill succulents through prolonged soil wetness, not moist air. Fight back with extra-gritty fast-draining soil, terracotta pots, strong airflow, and strict bottom-up watering discipline — water only when the soil is fully dry and leaves wrinkle slightly, and shelter pots from repeated summer downpours.

    Conclusion

    Keeping succulents alive through a humid summer is entirely doable once you stop fighting humidity and start managing moisture. Repot into gritty, fast-draining mix in breathable terracotta, maximize airflow around and under every pot, water only on the plant’s schedule (not yours), and give the collection shelter from relentless rain. The plants will look a little less plump than their desert-climate cousins, and that is fine — firm and slightly lean beats lush and rotted every time. For more container-growing advice, browse our gardening guides, meet the team, or ask us your succulent questions.

    Frequently Asked Questions

    Can succulents survive 90 percent humidity?

    Yes, with the right setup. The humidity itself is not the problem — it is slow soil drying. Gritty fast-draining soil, terracotta pots, strong airflow, and infrequent deep watering let succulents thrive even in Gulf Coast summers. Thousands of collectors in Florida and Louisiana prove it is possible.

    Why are my succulent leaves turning translucent and mushy?

    That is classic overwatering/rot: cells bursting from excess internal moisture, usually with roots sitting too wet. Stop watering immediately, unpot to check the roots, cut away anything black and mushy, and repot in dry gritty mix. If the stem is still firm, the plant can often recover.

    Should I mist my succulents in summer?

    No — misting is one of the worst things you can do in humidity. It wets leaf surfaces that then cannot dry, inviting rot and fungal spots. Succulents take water through their roots; always water the soil directly and keep the leaves dry.

    How often should I water succulents in a humid summer?

    There is no fixed schedule — water only when the soil is completely dry through the pot and the plant shows mild thirst (slightly soft lower leaves). In peak humidity this often means every two to three weeks or less. A wooden skewer to the bottom of the pot is the most reliable dryness check.

    Is perlite or pumice better for succulent soil?

    Both work well. Pumice is heavier (pots do not tip as easily), does not float to the surface when watering, and lasts indefinitely; perlite is cheaper and widely available. Many growers use either at 50 percent or more of the mix in humid climates with excellent results.

  • When Should I Start Seeds Indoors for a May Planting in Ohio

    When Should I Start Seeds Indoors for a May Planting in Ohio

    Every February, Ohio gardeners stare out at the snow and ask the same question: is it time to start seeds yet? Start too early and you get leggy, root-bound seedlings gasping on a windowsill weeks before they can go outside. Start too late and your peppers are still flowering when the first fall frost arrives. The answer is not a single date — it is a simple countdown from your last frost, adjusted crop by crop. Ohio spans USDA zones 5b to 6b, with last frost dates ranging from late April in Cincinnati to mid-May in Cleveland and Columbus, and that range changes everything. Here is how to nail the timing for a May planting.

    Start With Your Actual Last Frost Date

    Everything flows from one number: your average last spring frost date. For southern Ohio (Cincinnati, Dayton), it falls around April 20 to late April. Central Ohio (Columbus) averages early May, roughly May 5 to 10. Northern Ohio (Cleveland, Toledo) runs mid-May, around May 15 to 20. But “average” means half of all years see frost after that date, so experienced gardeners add a cushion — plan your transplant date one to two weeks after the average last frost, not on it. Warm-season crops like tomatoes, peppers, and basil go out after that cushioned date; cool-season crops like broccoli, cabbage, and lettuce can go out two to four weeks before it, tolerating light frosts. Look up your zip code’s date rather than trusting a statewide average, since microclimates near Lake Erie or in river valleys shift things by a week or more. Ohio State University Extension publishes planting date charts for Ohio vegetables that are worth bookmarking.

    The Countdown Method: How Indoor Timing Works

    Seed packets say things like “start indoors 6–8 weeks before last frost,” and that instruction is the whole system. Pick your target transplant date (your cushioned date after last frost), count backward by the weeks the packet specifies, and that is your sowing date. Add about a week as a germination buffer for slow starters. The reason timing matters is seedling quality: a tomato started eight weeks before transplant is stocky and vigorous, while one started twelve weeks early is tall, pale, and stressed from months in a small pot — and the younger transplant will outgrow it within weeks of planting out. Bigger is not better with seedlings; the ideal transplant is compact, dark green, and just beginning to outgrow its container. If you are unsure between two dates, choose the later one. You can always buy a few transplants to fill a gap, but you cannot undo six weeks of leggy windowsill suffering.

    Crop-by-Crop Timing for a May Planting

    For a mid-May transplant target in central and northern Ohio, the calendar looks roughly like this. Peppers and eggplant — the slowest — start indoors in late February to early March, needing 8 to 10 weeks plus their sluggish germination. Tomatoes follow in mid to late March, 6 to 8 weeks before transplant; they germinate fast and grow quickly, so resist starting them with the peppers. Onions from seed start early too, late February into March, though many gardeners use sets instead. Brassicas (broccoli, cauliflower, cabbage) and lettuce start in late March to early April for transplanting out in late April to early May, since they tolerate cool weather. Herbs split by type: basil waits until April (it hates cold and grows fast), while parsley, slow to germinate, can start in March. Cucumbers, squash, melons, and beans grow so fast that starting them indoors more than 3 to 4 weeks early backfires — sow them in late April to early May, or simply direct-sow after the soil warms. Southern Ohio gardeners shift everything about two weeks earlier; the method is identical, just anchored to an earlier frost date.

    What NOT to Start Indoors

    Some crops actively resent transplanting, and starting them indoors wastes effort. Root vegetables — carrots, beets, radishes, parsnips — should always be direct-sown; their roots fork and deform when transplanted. Corn, beans, and peas germinate so quickly in warm soil that indoor starting gains nothing. Cucumbers and squash can be started indoors but only 3 to 4 weeks before transplant, in biodegradable pots that go straight into the ground, since they hate root disturbance. Lettuce and other fast greens can go either way, but direct sowing successions every two weeks from April onward gives a steadier harvest than a single indoor batch. Garlic and potatoes are planted as cloves and seed potatoes, not started from seed at all. When in doubt, check the packet: if it says “direct sow after last frost,” believe it. Your windowsill space is precious — reserve it for the long-season crops like peppers and tomatoes that genuinely need the head start.

    The Gear That Actually Matters

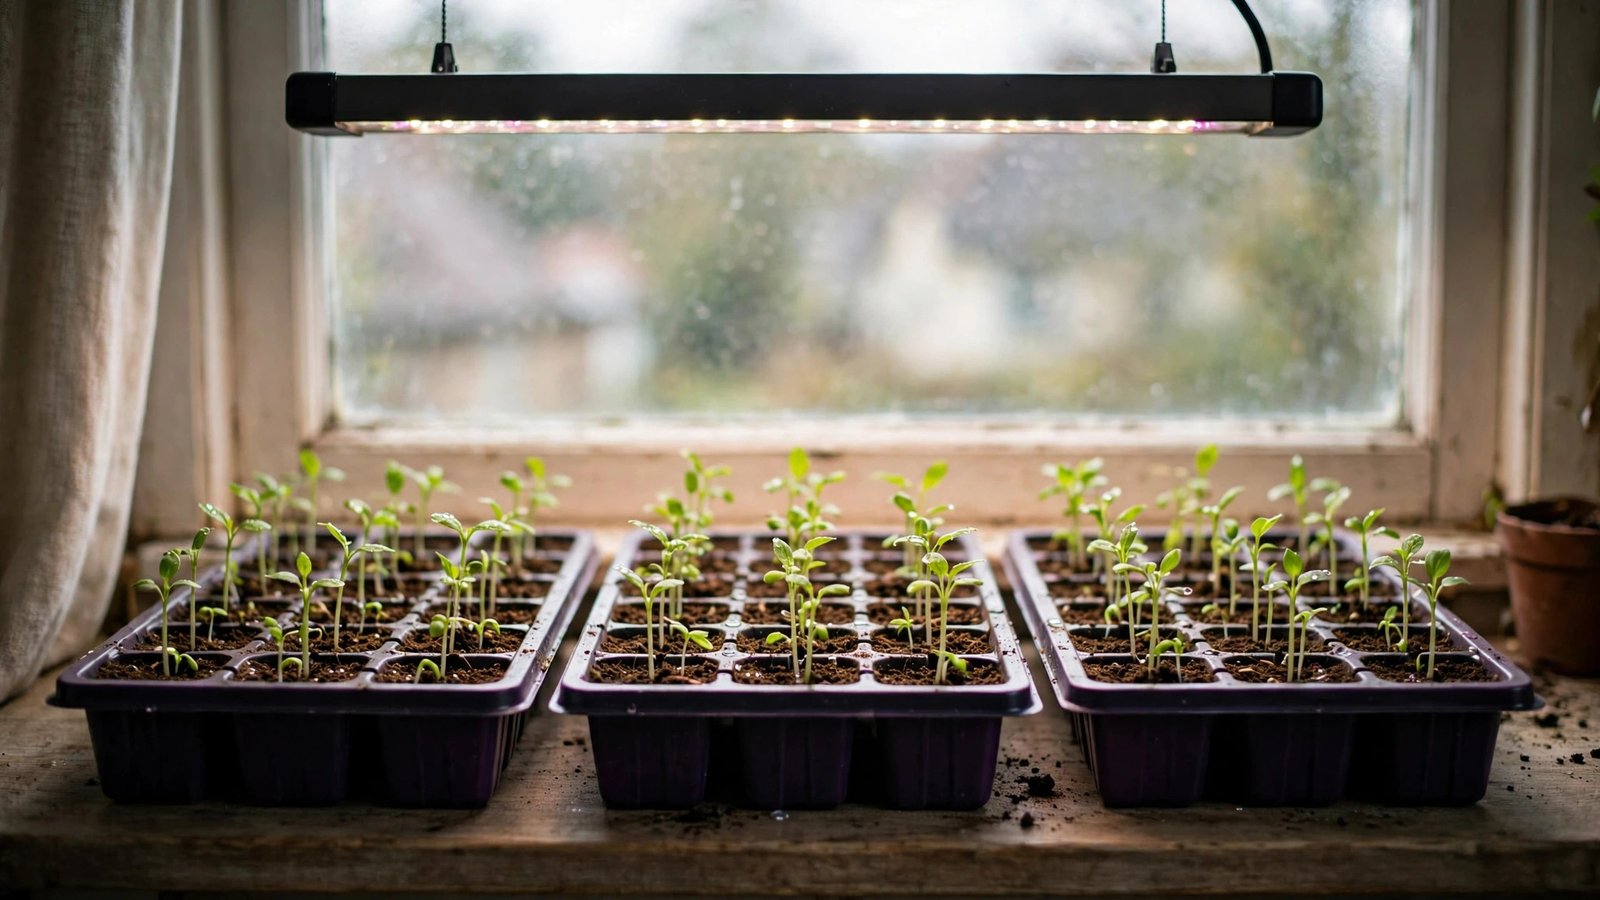
    You do not need an expensive setup, but two items separate success from frustration. First, light: a sunny windowsill is almost never enough in February and March, and seedlings stretch toward weak light becoming leggy. A basic LED or fluorescent shop light hung two to three inches above the seedlings, raised as they grow, on for 14 to 16 hours a day, produces stocky plants. Second, warmth for germination: peppers and tomatoes germinate dramatically faster on a heat mat (around 75 to 85°F soil temperature) than at cool room temperature — days instead of weeks for peppers. Beyond that, the essentials are simple: clean containers with drainage, a bag of seed-starting mix (not garden soil, which compacts and harbors disease), a spray bottle or gentle watering can, and a small fan providing gentle air movement once seedlings emerge — the breeze builds sturdier stems. Harden seedlings off over 7 to 10 days before transplanting, introducing them to outdoor sun and wind gradually, or all that indoor perfection wilts on day one. The Old Farmer’s Almanac planting calendar lets you enter your zip code for customized indoor-start and transplant dates.

    For a May planting in Ohio, anchor everything to your local last frost date — late April in the south, mid-May in the north. Count backward: peppers and eggplant 8–10 weeks, tomatoes 6–8 weeks, brassicas 4–6 weeks, and cucumbers just 3–4. When unsure, start later rather than earlier.

    Conclusion

    Starting seeds indoors for an Ohio May planting is a countdown, not a guess. Find your zip code’s last frost date, add a one- to two-week safety cushion for warm-season transplants, and count backward using each crop’s recommended weeks — late February for peppers, late March for tomatoes, April for the fast growers. Give seedlings strong light, bottom warmth for germination, and a proper hardening-off, and direct-sow everything that prefers it. A little calendar math in February buys you the healthiest transplants of your gardening life. For more regional growing guidance, browse our gardening guides, meet the team, or ask us your seed-starting questions.

    Frequently Asked Questions

    What is Ohio’s last frost date?

    It varies by region: southern Ohio (Cincinnati) averages late April, central Ohio (Columbus) early May around May 5–10, and northern Ohio (Cleveland, Toledo) mid-May around May 15–20. Look up your specific zip code, since lake effects and valleys shift dates, and plan warm-season transplants one to two weeks after the average date for safety.

    Can I start tomato seeds in February in Ohio?

    You can, but you should not. Tomatoes started in February become leggy and root-bound long before a mid-May transplant date. Late March is the sweet spot for most of Ohio — 6 to 8 weeks before transplanting produces stocky, vigorous seedlings that outperform older, stressed plants once in the ground.

    Do I really need grow lights for seedlings?

    In February and March in Ohio, yes, effectively. Window light is too weak and too one-directional, producing tall, pale, floppy seedlings. A basic shop light hung inches above the plants for 14–16 hours daily is the single biggest upgrade a home seed-starter can make, and it costs very little.

    When should I direct-sow versus transplant in Ohio?

    Direct-sow root crops (carrots, beets, radishes), beans, peas, and corn — they germinate fast or resent transplanting. Start indoors only the long-season crops that need a head start: peppers, eggplant, tomatoes, onions, and brassicas. Cucumbers and squash go either way but need just 3–4 weeks indoors max.

    What does hardening off mean and how long does it take?

    Hardening off is gradually acclimating indoor seedlings to outdoor sun, wind, and temperature swings over 7 to 10 days. Start with a few hours of sheltered shade, increasing exposure daily. Skipping it shocks tender seedlings — even a single afternoon of harsh sun can scorch unhardened leaves.

  • How Can I Attract Hummingbirds to My Small Patio Garden

    How Can I Attract Hummingbirds to My Small Patio Garden

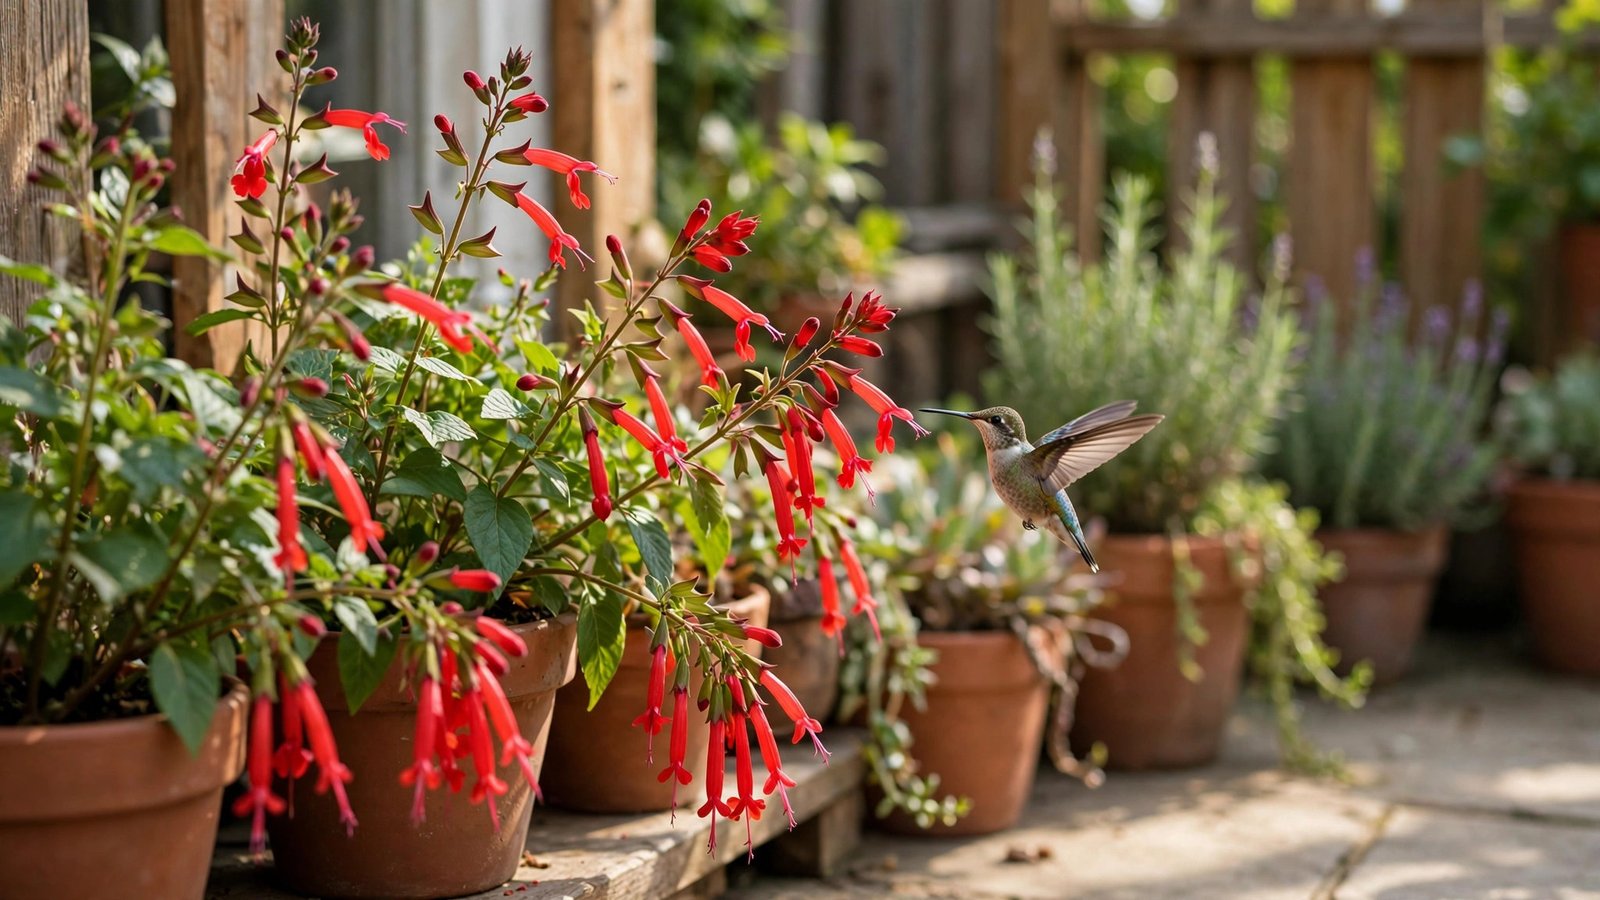
    You do not need a sprawling backyard meadow to attract hummingbirds. These tiny birds are fearless explorers that routinely investigate balconies, fire escapes, and postage-stamp patios — if the right signals are there. A single well-placed feeder or a few pots of the right flowers can turn the smallest urban patio into a regular hummingbird stop, sometimes within days of setup. The trick is understanding what hummingbirds actually look for: high-energy nectar, the color red, safe perches, and reliability. Get those four things right, and you will be watching iridescent visitors hover inches from your chair all summer.

    Think Like a Hummingbird: What They Actually Want

    A hummingbird lives life at a metabolic extreme — its heart can beat over a thousand times per minute in flight, and it must consume roughly half its body weight in sugar daily just to survive. That means every foraging decision is about energy economics: maximum calories for minimum effort, from sources it can trust to be there tomorrow. Your patio wins when it offers dense, easy calories in a predictable spot. Red and orange tubular flowers are the visual billboard; hummingbirds see red exceptionally well and associate it with nectar-rich blooms. But color alone is not enough — the birds also need to feel safe. A patio with nearby shrubs or small trees for perching and quick escape routes beats an exposed concrete slab every time. And consistency matters enormously: a feeder that is full and fresh every day trains birds to include your patio in their daily route, while one that sits empty for days teaches them to skip you.

    The Best Patio Plants for Hummingbirds

    On a small patio, every pot must earn its place, so choose plants that bloom heavily and continuously. Top-tier container choices include salvia (especially Salvia guaranitica and scarlet sage), fuchsia for shadier patios, lantana, vermillionaire (cuphea), petunias bred for tubular throats, and mandevilla on a small trellis. Prioritize varieties in red, coral, and hot pink, and favor single blooms over doubles — doubles often hide or eliminate the nectar the birds want. Plant for succession: combine early, mid, and late bloomers so something is always flowering from spring through fall. Even three to five well-chosen pots clustered together create a target hummingbirds can spot from a surprising distance. Native plants like trumpet vine (in a large container with support), bee balm, and cardinal flower are magnets if you have room for bigger pots. Deadhead spent blooms regularly to keep the nectar coming, and skip pesticides entirely — a sprayed flower is a poisoned bird feeder. The National Audubon Society’s hummingbird gardening tips offer excellent plant lists organized by region.

    Feeders Done Right: The Details That Matter

    A feeder is the fastest way to get hummingbirds’ attention, but only if it is done properly. Make your own nectar — it is cheaper, safer, and takes two minutes: one part plain white table sugar dissolved in four parts water. That is it. Never add red dye, honey, brown sugar, or artificial sweeteners; dye is unnecessary (the feeder’s red parts provide the attraction) and the rest can harm or kill the birds. Boiling the water first helps the sugar dissolve and slows spoilage, then cool it completely before filling. In summer heat, change the nectar every two to three days — fermented, cloudy nectar grows mold that causes a fatal tongue infection in hummingbirds. Scrub the feeder with hot water and a bottle brush at every refill; a quick vinegar rinse handles stubborn mold. Hang the feeder in partial shade to slow spoilage, near your flowers but with open flight space around it. Start with one feeder; add a second out of sight of the first if a dominant male starts guarding it aggressively, which gives shyer birds a chance to feed.

    Water, Perches, and Shelter Seal the Deal

    Flowers and feeders bring hummingbirds in; the supporting habitat makes them stay. Hummingbirds rarely drink from deep birdbaths, but they love moving water — a small solar fountain, a mister attachment on a hose, or even a dripper over a shallow dish gives them drinking and bathing opportunities. They bathe by flying through fine mist, which is delightful to watch. Provide perches: a thin dead branch staked in a pot, a small trellis, or even a wire gives them a place to rest and preen between feeding bouts, and perched birds are far easier to observe and photograph. Some shelter from wind matters too — a patio umbrella, a trellis with vines, or positioning pots against a wall creates calmer air where tiny birds can hover efficiently. If your patio is on an upper floor, do not worry: hummingbirds happily visit high-rise balconies, sometimes preferring the safety from ground predators. Keep cats indoors, since even well-fed cats are lethal to hummingbirds.

    Timing, Migration, and Patience

    Set up early. In most of the United States, ruby-throated hummingbirds arrive between April and May, and having feeders and early blooms ready when scouts arrive dramatically increases your chances of becoming a regular stop. Keep everything going through fall — a persistent myth says feeders prevent migration, but migration is triggered by daylight length, not food availability, and late migrants desperately need the calories. Take feeders down only after you have seen no hummingbirds for two full weeks, typically late October or November depending on your region. Do not be discouraged if nothing appears the first week; it can take time for birds to discover a new food source, especially early in the season. Once one bird finds you and the setup stays reliable, word spreads fast in hummingbird terms — regular visitors often return to the same patios year after year, sometimes within days of the same date. The Smithsonian’s hummingbird spotlight has fascinating detail on migration timing and behavior by species.

    Hummingbirds find small patios fast when you offer red tubular flowers, fresh homemade nectar in a clean feeder, moving water, and safe perches. Set up before spring migration, keep nectar fresh every two to three days, and stay consistent — reliable patios become permanent stops on their daily routes.

    Conclusion

    Attracting hummingbirds to a small patio is less about square footage and more about signal quality. Cluster red, tubular, nectar-rich flowers in containers, hang one clean feeder with fresh homemade sugar water, add a mister or small fountain plus a perch, and keep the whole setup relentlessly consistent through the season. Skip the red dye, skip the pesticides, and be patient those first weeks. Do this, and your morning coffee will come with aerial acrobats. For more wildlife-friendly gardening ideas, explore our gardening guides, learn who we are, or tell us about your patio visitors.

    Frequently Asked Questions

    How long does it take for hummingbirds to find a new feeder?

    Anywhere from a few days to a few weeks. Early in the season, when scouts are actively searching, discovery can be fast. Placing the feeder near red flowers, keeping it visible from above, and hanging something red nearby all speed things up. Once one bird finds it and the nectar stays fresh, visits become regular quickly.

    Is homemade sugar water really safe for hummingbirds?

    Yes — a 1:4 ratio of plain white table sugar to water closely mimics natural flower nectar and is the recipe ornithologists recommend. Avoid honey (which grows dangerous fungus), brown or raw sugars, and any red dye. Change it every two to three days in heat and scrub the feeder at each refill.

    Will a feeder stop hummingbirds from migrating?

    No. Migration is triggered by changing daylight, not food supply. Keeping feeders up through fall actually helps late migrants fuel up for their journey. Take feeders down after two full weeks with no sightings rather than on an arbitrary date.

    Why is one hummingbird chasing all the others away?

    Males aggressively defend rich food sources — it is natural territorial behavior, not a problem you caused. The fix is adding a second feeder out of sight of the first (around a corner or on the other side of the patio) so subordinate birds can feed unguarded.

    Can hummingbirds visit a high-rise balcony?

    Absolutely. Hummingbirds routinely visit feeders and flowers on balconies many stories up, and the height can actually make them feel safer from predators. The same rules apply: red tubular flowers, fresh nectar, water, and consistency.

  • What Should I Do About Grubs Destroying My Lawn in August

    What Should I Do About Grubs Destroying My Lawn in August

    August is when grub damage explodes across American lawns. One week the grass looks fine; the next, irregular brown patches appear, the turf feels spongy underfoot, and — the classic horror-movie moment — you can peel back sections of lawn like a loose carpet because the roots are gone. Those are white grubs, the larvae of Japanese beetles, June bugs, and European chafers, feeding ravenously on grass roots just below the surface. The good news: August is actually a workable time to fight back, because the young grubs are small, near the surface, and vulnerable. But the window is specific, the product choice matters, and the lawn needs repair afterward. Here is exactly what to do, in order.

    Confirm It Is Actually Grubs: The Tug Test

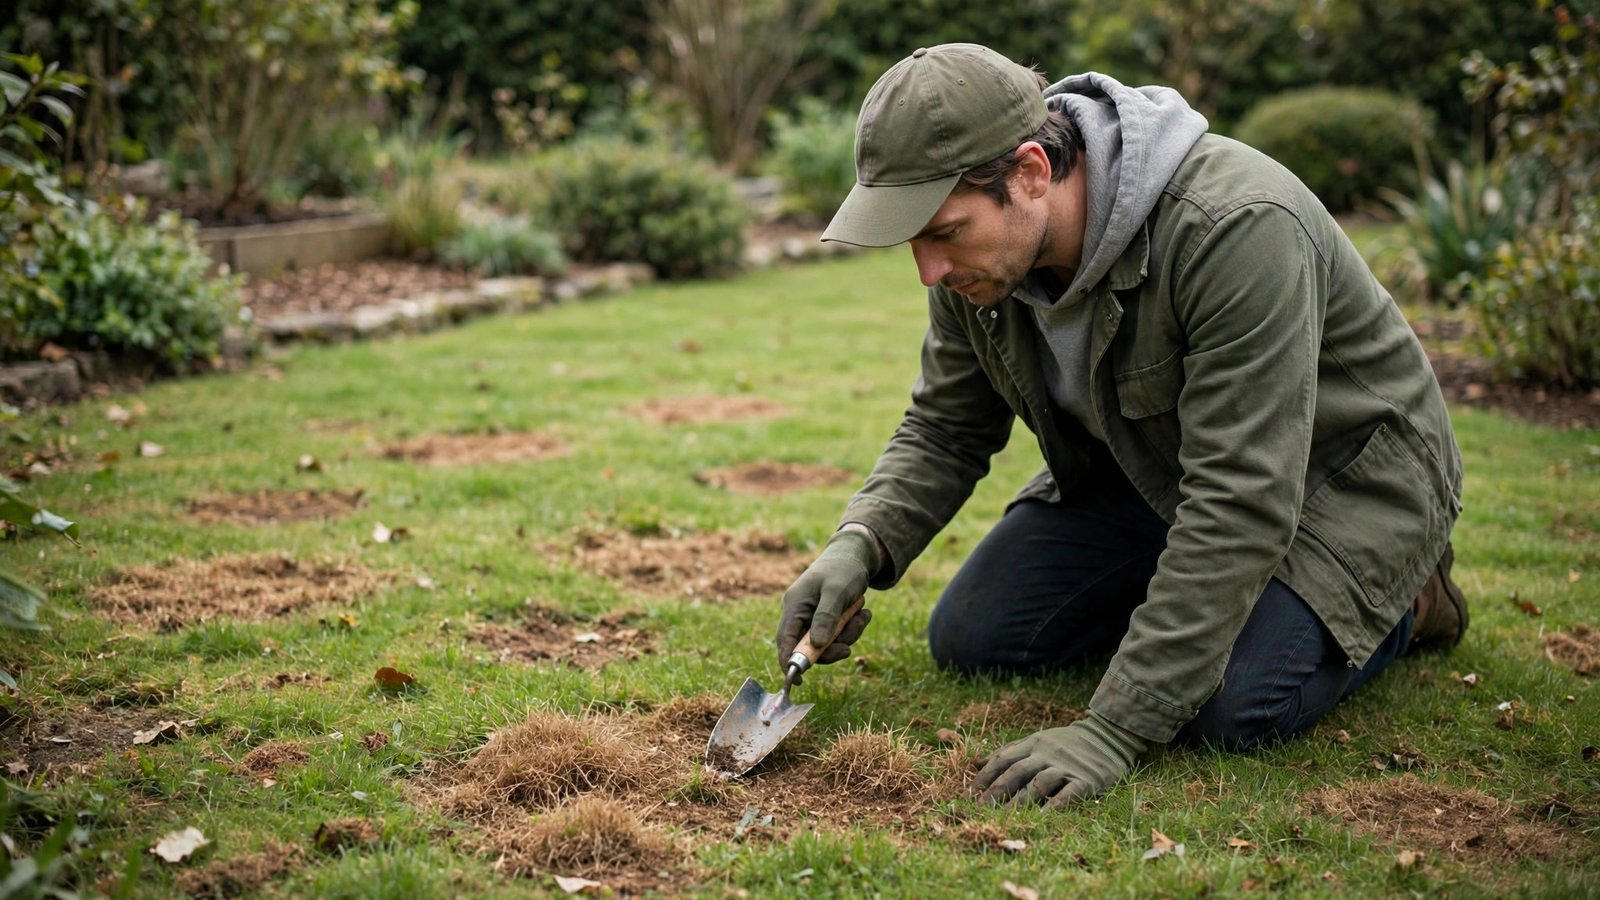
    Before spending a dollar on grub control, verify the diagnosis — brown patches in August can also be drought, fungal disease, or heat dormancy, and treating the wrong problem wastes money. Walk to the edge of a brown patch, grab a handful of grass, and tug firmly. If the turf pulls up easily with no roots attached, and you see white, C-shaped grubs about the size of a thumbnail in the top two inches of soil, you have grubs. Count them in a one-square-foot area: more than about six to ten grubs per square foot in a healthy lawn (or three to five in a stressed one) justifies treatment. Also look for secondary evidence — skunks, raccoons, or birds tearing up the lawn at night are hunting grubs, and their digging is often the first sign homeowners notice. If the grass does not pull up and no grubs are visible, you are likely looking at drought stress or disease instead, which need entirely different fixes. The University of Minnesota Extension’s white grub guide details identification and threshold counts for treatment decisions.

    Why August Means Curative — Not Preventive — Products

    This distinction is where most homeowners go wrong. Preventive grub products (containing chlorantraniliprole, the active ingredient in GrubEx) must be applied in spring or early summer, well before eggs hatch, because they work by sitting in the soil waiting for young larvae. Applied in August, they do almost nothing against the grubs already feeding. What you need now is a curative insecticide — one that kills grubs on contact — with active ingredients like trichlorfon (sold as Dylox) or carbaryl. These work fast, often within days, but they have a shorter residual effect, which is fine because the current generation is the target. Read the label carefully and apply exactly as directed; more is not better and can harm beneficial insects and pollinators. Water the product in with about half an inch of irrigation immediately after application unless the label says otherwise — the insecticide must reach the root zone where grubs feed, not sit on the leaf blades.

    Consider Nematodes for a Biological Option

    If you prefer to avoid synthetic insecticides, beneficial nematodes — microscopic roundworms that parasitize grubs — are a legitimate August option when conditions are right. The effective species against white grubs is Heterorhabditis bacteriophora. Nematodes are living organisms, so success depends on handling: buy fresh stock from a reputable supplier, apply in the evening or on a cloudy day since UV light kills them, and water the lawn thoroughly before and after application because nematodes need moist soil to move and hunt. Soil temperatures should be above about 60°F, which August easily provides. Nematodes will not give the overnight knockdown of a curative chemical — expect results over one to three weeks — but they keep working, reproduce in dead grubs, and pose no risk to kids, pets, or pollinators. Milky spore, by contrast, is not a good August rescue: it targets Japanese beetle grubs specifically and takes years to build up in soil. For broader biological context, the EPA’s integrated pest management principles explain how to combine biological and targeted chemical controls responsibly.

    Water, Then Repair the Damage

    Killing the grubs stops the damage, but the lawn still needs rebuilding. Grub-damaged turf cannot absorb water properly with its root system chewed away, so start with deep, consistent watering — about an inch per week — to support whatever roots remain and encourage recovery. For areas where the turf peeled away entirely, you will need to reseed or patch. Rake out the dead material, loosen the top inch of soil, spread a quality grass seed matched to your region and sun conditions, press it into the soil, and keep it consistently moist until germination — usually two to three weeks of light daily watering. Early fall is prime seeding season in most of the country, so August damage repaired in late August or September establishes beautifully. A light application of starter fertilizer helps seedlings, but skip heavy nitrogen on damaged turf until it recovers. Top-dressing thin areas with a quarter inch of compost improves the soil biology that keeps future grub populations in check.

    Set Up Next Year So This Does Not Repeat

    August curative treatment solves this year’s crisis; smart timing prevents next year’s. Mark your calendar: preventive grub control goes down between late May and mid-July, targeting the next generation of eggs and hatchlings before they can feed. A thick, healthy lawn is itself grub-resistant — grubs prefer stressed, thin turf — so the best long-term defense is good cultural care: mow high (3 to 4 inches), water deeply but infrequently, overseed thin spots each fall, and feed appropriately. If Japanese beetles were the source, reducing their numbers helps too: hand-pick beetles from garden plants in summer, and avoid beetle traps near your lawn, since traps often attract more beetles to the area than they catch. Consider that a lawn with a small grub population and no visible damage needs no treatment at all — grubs are a normal part of soil ecology, and the goal is management, not extermination.

    Brown, spongy patches that peel up like carpet in August mean white grubs are feeding on roots. Confirm with the tug test, apply a curative insecticide like trichlorfon now (preventive products will not work this late), water it in, then reseed damaged areas in early fall — and schedule preventive treatment for next June.

    Conclusion

    Grubs destroying your lawn in August feel like a disaster, but the situation is very fixable. Confirm the diagnosis with the tug test and a grub count, hit the feeding grubs with a curative treatment or beneficial nematodes while they are young and near the surface, water deeply to support recovery, and reseed the destroyed patches as fall seeding season arrives. Then put next year’s prevention on the calendar for early summer, and build a thicker lawn through proper mowing and watering — the best grub control is grass too vigorous to notice a few larvae. For more lawn rescue walkthroughs, visit our gardening guides, read about our team, or send us your lawn questions.

    Frequently Asked Questions

    Is it too late to treat grubs in August?

    No — August is actually prime time for curative treatment. The grubs are young, small, and feeding near the soil surface, which makes them vulnerable to curative insecticides and nematodes. What is too late is using preventive products in August; those must go down in spring or early summer before eggs hatch.

    How many grubs per square foot mean I should treat?

    The common threshold is six to ten grubs per square foot in a healthy, vigorous lawn, or as few as three to five in a stressed or newly seeded lawn. Below those numbers, a healthy lawn usually tolerates the feeding without visible damage, and treatment is unnecessary.

    Will the brown patches recover on their own?

    Lightly damaged areas with intact crowns can recover with watering once grubs are controlled. Areas where turf peels up with no roots will not recover — the plants are dead — and need reseeding or sodding. Reseed in late August through September for the best establishment.

    Are grub treatments safe for pets and kids?

    Follow the label: most curative products require keeping people and pets off the treated lawn until the granules are watered in and the grass dries, typically 24 hours. Beneficial nematodes are non-toxic to mammals and can be used with no waiting period. Always store products out of reach of children and pets.

    Do I need to treat my whole lawn or just the damaged spots?

    Sample several areas first — grubs cluster, and damage often extends beyond the visible brown patches. Spot-treating only the obvious damage misses grubs in adjacent areas that will expand the dead zones. Treating the full lawn, or at least a generous buffer around damage, gives far better results.

  • How Do I Overwinter My Geraniums in a Cold Garage

    How Do I Overwinter My Geraniums in a Cold Garage

    Geraniums are the workhorses of summer containers, blooming relentlessly from May until frost — and then, heartbreakingly, most gardeners toss them on the compost pile in October and buy new ones in spring. That is an expensive habit, because those same plants can live for years. Geraniums (technically pelargoniums) are tender perennials that simply cannot survive a freezing winter outdoors, but a cold garage is actually close to ideal for overwintering them. With one of three proven methods — keeping them potted, storing them bare-root dormant, or rooting cuttings — you can carry your favorite plants through winter and have big, blooming specimens months ahead of anything you could buy in spring.

    First, Know Your Garage’s Real Temperature

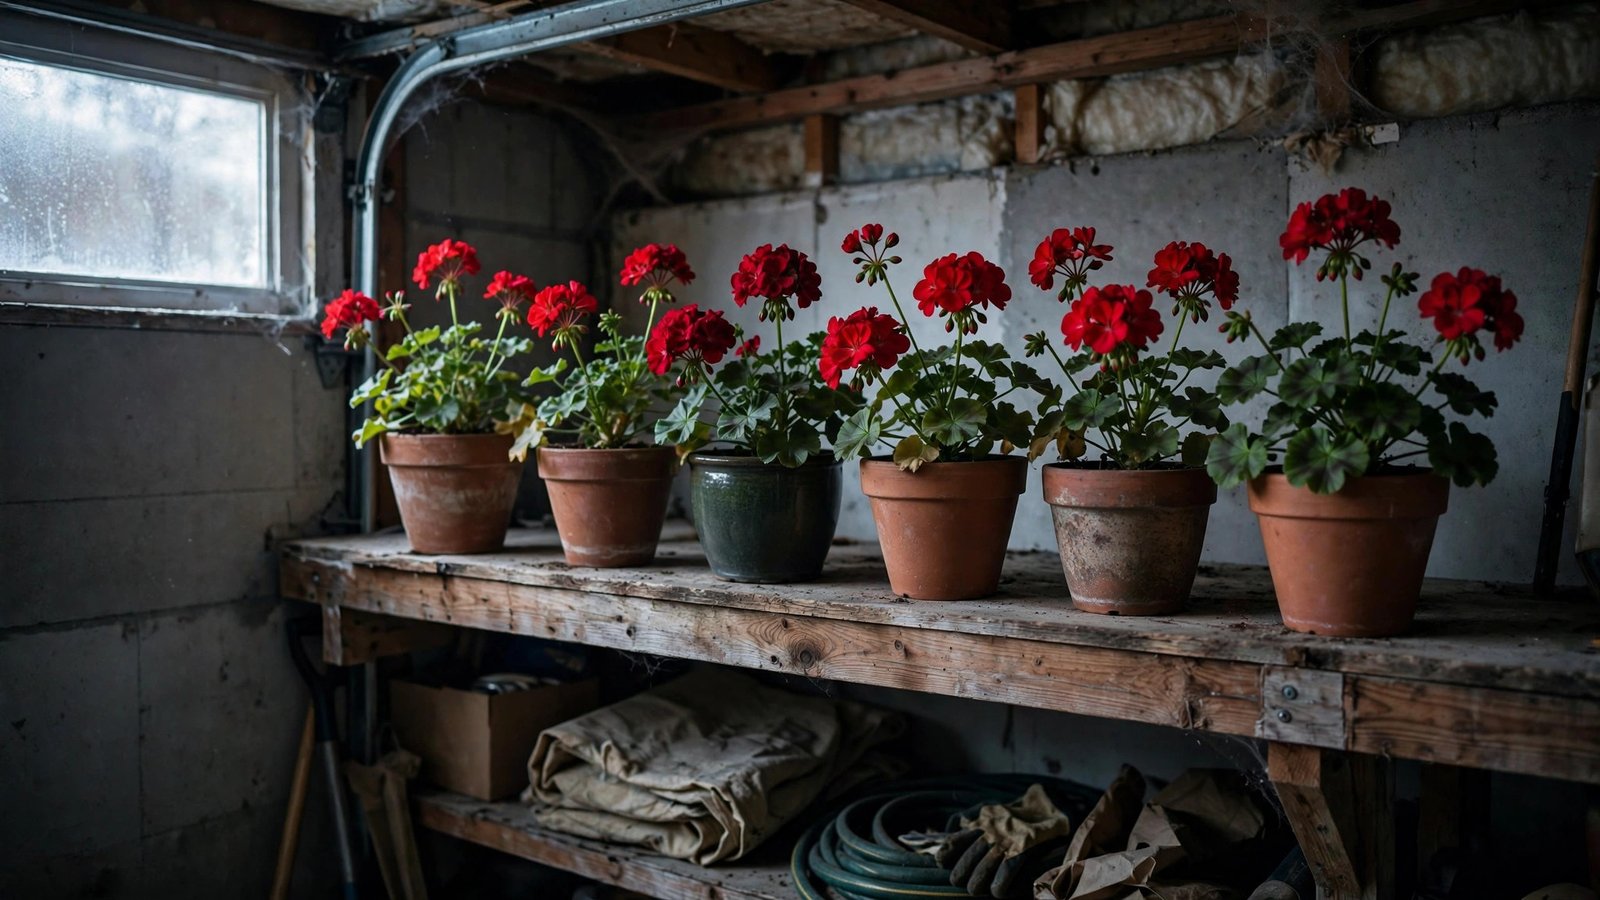
    Everything depends on how cold your garage actually gets. Geraniums survive winter storage best between about 45 and 55°F — cool enough to stay semi-dormant, warm enough to avoid freeze damage. An attached garage that shares a wall with the house often stays in this sweet spot all winter. A detached, uninsulated garage in Minnesota might plunge well below freezing, which will kill stored geraniums outright. Before you commit, put a simple min-max thermometer in the garage for a week in late fall and check the overnight lows. If temperatures regularly dip below freezing, you will need to insulate the storage spot — a cardboard box lined with old blankets around the plants, placed against the warmest wall, can buy several degrees of protection. If the garage stays above 60°F all winter, the plants will try to keep growing weakly, which leads to leggy, pale growth; in that case the potted method with supplemental light works better than dormant storage. Knowing your numbers takes the guesswork out of the whole project.

    Method 1: Keep Them Potted and Growing Slowly

    The simplest approach is to bring the pots indoors before the first hard frost and keep the plants alive, just barely, through winter. Cut each plant back by about one-third to one-half — be brave, since leggy summer growth will only get leggier indoors. Check carefully for insects and spray with insecticidal soap before bringing them in; whiteflies and aphids love to hitchhike. Place the pots in your brightest spot: a south-facing window or under a simple shop light or LED grow light for 12 to 14 hours a day. Water sparingly — only when the top inch or two of soil is dry — because cool, dim conditions plus wet soil equals rot. Do not fertilize at all until late winter. Expect some yellowing leaves and a tired look by February; that is normal. The payoff comes in March, when you resume normal watering and feeding and the plants explode into growth weeks ahead of store-bought seedlings. This method suits gardeners with good window space or a basic grow light, and it preserves the exact plant, flowers and all.

    Method 2: Bare-Root Dormant Storage

    If you are short on window space, the old-fashioned bare-root method lets you store dozens of geraniums in a cardboard box. Before the first frost, dig up the plants or pull them from containers and shake off all the soil. Trim the plants back hard, leaving a few inches of stem, and let them dry for a day or two in a shaded spot so any nicks callus over. Then pack them loosely in a ventilated cardboard box or paper bag — some gardeners layer them with shredded newspaper — and stash the box in your cool garage. The key detail most guides gloss over: check them monthly. If stems look shriveled, soak the roots in lukewarm water for an hour or two, let them dry, and repack. If you see mold, improve air circulation and remove affected material. Come late winter, pot up the survivors in fresh mix, water well, and place in bright light. Not every plant makes it — expect 70 to 80 percent survival — but the method costs nothing and takes almost no space. University of Wisconsin Extension’s overwintering geraniums guide walks through this traditional storage technique in detail.

    Method 3: Take Cuttings in Late Summer

    For many gardeners, cuttings are the sweet spot: small, clean, and space-efficient. In late August or September, while plants are still vigorous, snip 4- to 6-inch healthy stem tips, strip the lower leaves, and let the cut ends dry for a few hours. Stick them in moist perlite, vermiculite, or a light seed-starting mix — skip the rooting hormone, since geraniums root eagerly without it. Cover loosely with a clear plastic dome or bag to hold humidity, keep them in bright indirect light, and roots typically form in two to three weeks. Once rooted, pot each cutting into a 4-inch pot and grow them on a sunny windowsill all winter. By spring you have compact, bushy young plants — arguably better than overwintered old ones, since geraniums bloom most freely on younger wood. Take twice as many cuttings as you need to allow for losses, and label varieties if you grow several. This method also gives you extras to share with gardening friends in spring, which never fails to make you popular.

    Waking Them Up in Spring

    Timing the wake-up is as important as the winter storage. About six to eight weeks before your last frost date, move stored plants into warmth and bright light and resume regular watering. Prune away any dead or weak stems, cutting back to firm green growth. Repot bare-root survivors and potted plants into fresh potting mix — last year’s mix is exhausted and may harbor pests. Begin feeding with a balanced liquid fertilizer at half strength once new growth is a few inches long, moving to full strength as spring progresses. Harden plants off gradually over one to two weeks before moving them outside permanently: a few hours of sheltered outdoor time at first, increasing daily. Do not rush them into cold spring nights — one late frost undoes months of careful storage. By the time garden centers are selling tiny geranium seedlings, your overwintered plants will already be large, bushy, and budding. The Royal Horticultural Society’s pelargonium growing guide offers excellent advice on spring care and ongoing cultivation.

    A cold garage between 45 and 55°F is ideal for overwintering geraniums. Keep them potted in bright light with minimal water, store them bare-root and dormant in a ventilated box, or root cuttings in fall — then wake them six to eight weeks before your last frost for big, early-blooming plants.

    Conclusion

    Overwintering geraniums in a cold garage is one of gardening’s best-kept money savers. Check your garage temperature first, then pick the method that fits your space: potted plants for the brightest windows, bare-root dormant storage for the space-constrained, or fall cuttings for the most vigorous spring plants. All three beat buying replacements every May, and overwintered plants bloom weeks earlier than new seedlings. Whichever method you choose, the monthly check-in during winter is the habit that separates success from a box of dead stems. For more season-stretching techniques, browse our gardening guides, meet the people behind them, or ask us your overwintering questions.

    Frequently Asked Questions

    What is the lowest temperature geraniums can survive in a garage?

    Dormant stored geraniums tolerate brief dips to around 40°F, but sustained freezing kills them. The ideal storage range is 45 to 55°F. If your garage drops below freezing regularly, insulate the storage area with blankets or move plants to a basement. A min-max thermometer tells you exactly what you are dealing with.

    Should I water geraniums stored bare-root in a box?

    Not on a schedule. Check monthly: if stems look shriveled and dry, soak the roots in lukewarm water for an hour or two, let them air-dry, and repack. Most garages have enough ambient humidity that many plants need no water at all until late winter. Over-wetting stored plants causes mold and rot.

    Why are my overwintered geraniums leggy and pale?

    Insufficient light combined with too-warm temperatures causes weak, stretched growth. Move potted plants to your brightest window or add a grow light for 12 to 14 hours daily, keep them cool (55 to 65°F is fine for growing plants), and prune leggy stems back hard in late winter — they will branch out bushier.

    When should I take geranium cuttings for overwintering?

    Late August through September, while the parent plants are still vigorous and before cool nights slow growth. Cuttings taken too late root slowly in declining light. Take 4- to 6-inch stem tips, root them in perlite or light mix, and you will have sturdy young plants by spring.

    Can I overwinter geraniums in a dark basement instead?

    Yes, if it stays in the 45 to 55°F range — the bare-root dormant method works in any cool, dark, frost-free spot. Potted growing plants need light, so a dark basement only suits dormant storage. Check stored plants monthly for shriveling or mold regardless of location.

  • Why Do My Pepper Plants Drop Their Flowers Before Fruiting

    Why Do My Pepper Plants Drop Their Flowers Before Fruiting

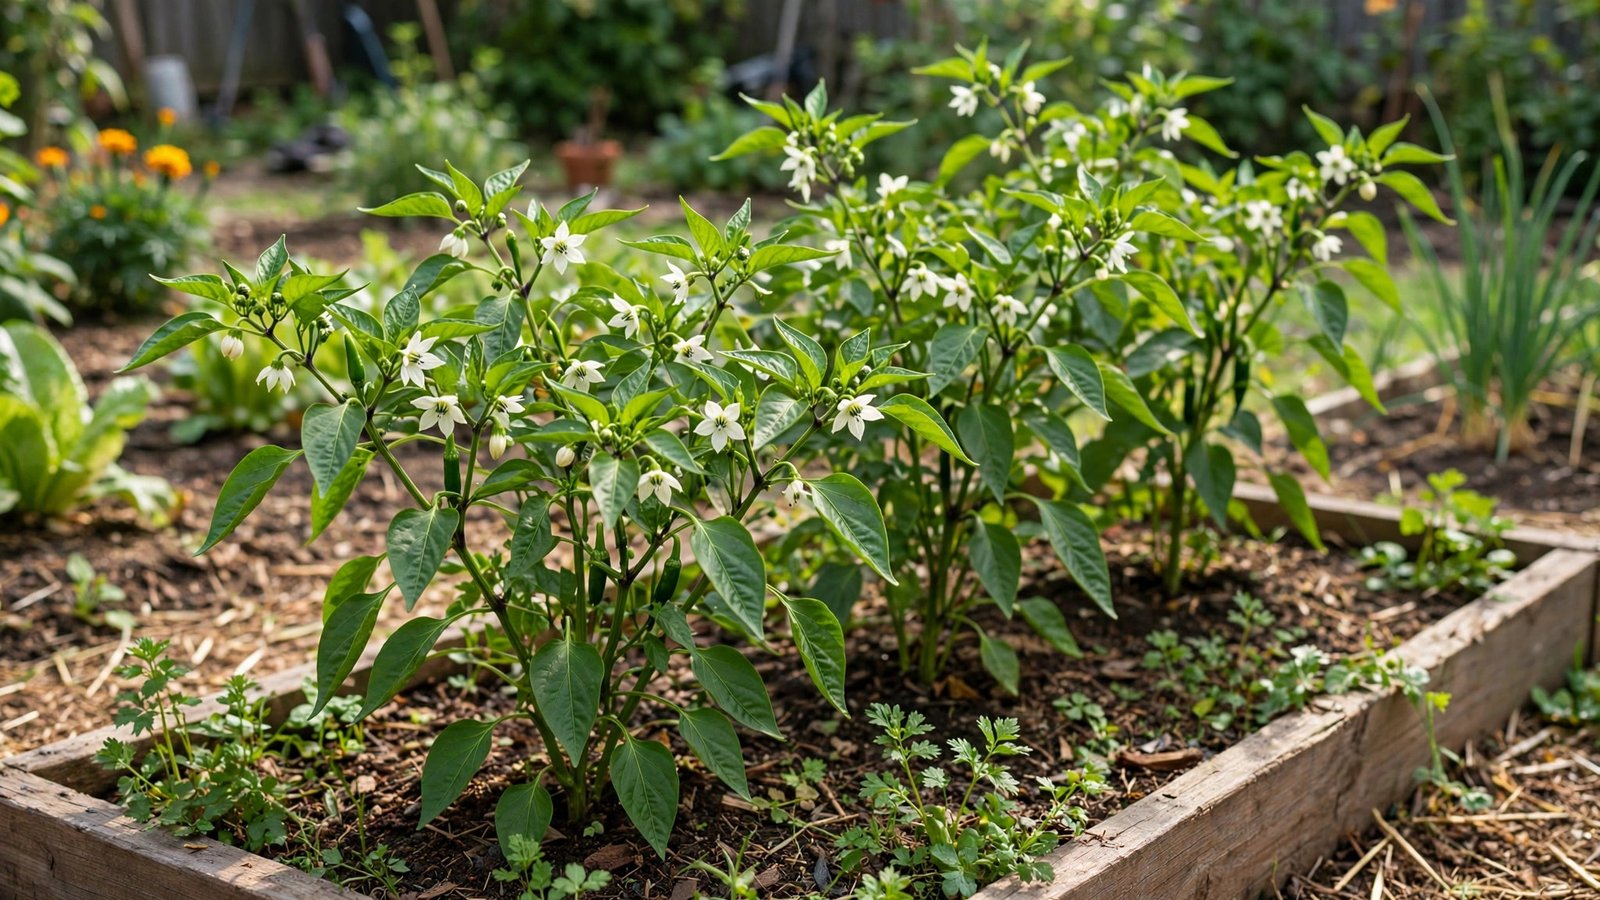
    Nothing is more frustrating than watching your pepper plants burst into bloom, counting the future harvest in your head, and then finding a carpet of fallen blossoms under the plants a few days later. Flower drop — sometimes called blossom drop — is one of the most common complaints among home pepper growers, and it happens to beginners and veterans alike. The good news is that the plant is not sick and you probably did not do anything terribly wrong. Pepper flowers fall for a handful of specific, fixable reasons, and once you identify which one is at work in your garden, you can usually stop the drop within a week or two and get those plants setting fruit the way they should.

    Heat Is the Number-One Culprit

    By far the most common cause of pepper flower drop is temperature stress, especially heat. Peppers are warm-season plants, but their blossoms are surprisingly picky: daytime temperatures consistently above about 90°F, or nighttime temperatures staying above roughly 75°F, cause flowers to abort before pollination can finish. The plant is essentially protecting itself — setting fruit in extreme heat produces weak, misshapen peppers, so the plant cuts its losses. This is why flower drop peaks during heat waves in July and August across much of the United States. You cannot air-condition a garden, but you can help: shade cloth rated at 30 to 40 percent draped over plants during the hottest afternoons can drop leaf temperatures dramatically. Water deeply in the morning so plants head into the heat fully hydrated, and mulch heavily to keep roots cool. The RHS pepper growing guide has variety-specific tips for hot climates. Often the drop stops when the heat breaks, and plants produce heavily in the milder weather of late summer and fall.

    Readers can also follow related coverage through London Big News’ capital coverage.

    Cold Snaps Cause It Too

    The flip side of heat stress is cold. Nighttime temperatures dipping below about 55 to 60°F can also trigger blossom drop, which is why gardeners who transplant too early in spring often see their first flush of flowers fall. Peppers planted out while nights are still chilly sit there shivering instead of setting fruit. The fix is timing and protection: wait until nighttime temperatures are reliably above 60°F before transplanting — usually a week or two after your last frost date, not on it. If a late cold snap threatens, cover plants with row cover fabric or even old bedsheets overnight, removing the covers in the morning. Plants that dropped flowers due to cold almost always rebound and bloom again once warm nights return, so a cold-induced drop early in the season rarely affects your total harvest.

    Pollination Problems and What to Do About Them

    Pepper flowers are self-pollinating, but pollination can still fail. In still, humid air — greenhouses, indoor setups, or long rainy stretches — pollen does not transfer properly and unpollinated blossoms drop. The fix is simple: gently shake or tap plants each morning to mimic visiting bees. Outdoors, nearby pollinator flowers help; indoors, a small fan for a few hours a day works wonders. The University of Minnesota Extension’s pepper growing guide notes that good air circulation and avoiding temperature extremes are key to reliable fruit set.

    Watering and Feeding Mistakes

    Both too much and too little water stress pepper plants into dropping flowers. Inconsistent watering — soaked one day, bone dry the next — is worse than either extreme, because the plant keeps adjusting and aborting blossoms in response. Aim for consistently moist, never soggy, soil: deep watering two to three times a week in most climates, more during heat waves, with several inches of mulch to even out moisture swings. On the feeding side, the classic mistake is too much nitrogen. Heavy nitrogen fertilizer produces gorgeous, lush, dark-green plants with almost no fruit — the plant puts all its energy into leaves. If your plants look fantastic but drop every flower, cut back on nitrogen and switch to a fertilizer higher in phosphorus and potassium once flowering begins, or side-dress with compost. A soil test every couple of years takes the guesswork out of feeding entirely.

    Pests, Disease, and Simple Overcrowding

    Sometimes flowers drop because the plant is under attack. Aphids and thrips feeding on buds can cause blossoms to abort, and stressed, pest-ridden plants prioritize survival over reproduction. Inspect flower clusters and growing tips regularly — a strong blast of water dislodges aphids, and insecticidal soap handles heavier infestations. Fungal issues from overhead watering and poor air circulation add stress too, so water at the base of plants. Overcrowding is another quiet cause: peppers planted too close together compete for light, water, and nutrients, and shaded interior flowers drop. Give plants 18 to 24 inches of space, prune lightly for airflow if they become a jungle, and remove suckers judiciously rather than letting the plant sprawl. A stressed plant drops flowers; a comfortable plant sets them.

    When Flower Drop Is Actually Normal

    Here is the reassurance part: some flower drop is completely normal and not worth fixing. Young pepper plants often produce a first flush of blossoms before they are big enough to support fruit, and dropping those early flowers is the plant pacing itself — many experienced growers pinch off the very first flowers deliberately to encourage stronger root and leaf growth first. A plant adjusting after transplant also commonly drops its first blossoms while it settles in. And no pepper plant sets every flower; even healthy plants abort a portion of their blossoms naturally. Judge by the trend, not individual fallen flowers. If the plant is growing vigorously, producing new buds, and only dropping some blossoms during a heat wave, leave it alone — it knows what it is doing. Worry only when nearly all flowers fall over an extended period, which signals one of the correctable stresses above.

    Pepper flowers drop mainly from heat above 90°F, cold nights below 60°F, poor pollination in still air, inconsistent watering, or excess nitrogen. Fix the stress — shade cloth, steady watering, gentle daily shaking, balanced feeding — and healthy plants resume setting fruit, often producing their best harvest after the stressful weather passes.

    Conclusion

    Flower drop feels like failure, but it is really your pepper plant communicating. Check the thermometer first, because temperature stress causes most cases — shade cloth and patience handle heat waves, and proper transplant timing handles cold. Then look at pollination, watering consistency, and feeding, shaking plants gently each morning and easing off nitrogen once blooms appear. Remember that some early blossom loss is the plant pacing itself, not a crisis. Work through the causes methodically instead of changing everything at once, and you will find the trigger. For more vegetable-growing troubleshooting, explore our gardening guides, learn who writes them, or ask us about your garden problems.

    Frequently Asked Questions

    Will my pepper plant grow new flowers after dropping them?

    Almost always. Flower drop is a temporary stress response, not damage. Once temperatures moderate, healthy plants produce new buds within one to two weeks — many gardeners get their heaviest harvests from the post-heat-wave bloom.

    Should I pinch off the first flowers on young pepper plants?

    Many experienced growers do. Removing the first flush of blossoms on small transplants directs energy into roots and foliage, producing a sturdier plant that supports a heavier harvest later. It is optional, but if your young plants are dropping those first flowers anyway, the plant is essentially making the same decision itself.

    How much shade cloth do pepper plants need in extreme heat?

    A 30 to 40 percent shade cloth is the sweet spot — enough to cool plants significantly without starving them of light. Drape it over supports so it does not rest directly on foliage, and use it during the hottest afternoon hours or leave it up through heat waves. Remove it once temperatures drop back below the mid-90s.

    Can over-fertilizing cause flower drop?

    Yes, particularly with nitrogen-heavy fertilizers. Excess nitrogen pushes leafy growth at the expense of flowers and fruit, and the blossoms that do form often abort. Once plants start flowering, switch to a balanced or bloom-focused fertilizer, and always follow label rates — more is not better with peppers.

    Do I need bees to pollinate my peppers?

    Not strictly — pepper flowers are self-pollinating and do not require bees. But bee visits improve pollination rates and fruit quality, and in still or humid conditions where pollen does not move well on its own, any vibration help matters. Gently shaking plants daily achieves much of the same effect indoors or on calm days.

  • How Can I Tell If My Houseplant Needs Water or Has Root Rot

    How Can I Tell If My Houseplant Needs Water or Has Root Rot

    That sad, drooping houseplant is sending an ambiguous message: wilting leaves and yellowing edges can mean it is parched and begging for water, or that its roots are drowning and rotting underground. The cruel part is that the fix for one kills the plant suffering from the other. Telling them apart takes five minutes with your finger, your nose, and a little patience — and getting it right is the single most important skill in indoor gardening, because watering mistakes kill more houseplants than pests, disease, and low light combined — most plant parents water on a schedule instead of checking the soil first.

    The Finger Test Beats Every Watering Schedule

    Watering on a calendar schedule is how most houseplant trouble begins — plants drink according to light, temperature, humidity, and season, not timetables. Push your index finger two inches into the soil: cool and moist means no water needed, no matter what the calendar says; dry and crumbly means water now. For large pots, check three to four inches deep, since surfaces dry faster than root zones. A University of Minnesota Extension guide to watering indoor plants explains why checking moisture directly beats guessing from the surface — and why this one habit prevents the vast majority of watering-related plant deaths.

    Readers can also follow related coverage through London Big News.

    What a Thirsty Plant Actually Looks Like

    A thirsty plant shows specific symptoms: soil pulling away from the pot edges, a noticeably lighter pot when lifted, and leaves that go limp, thin, and papery with crispy edges. The oldest lower leaves yellow first, then turn brown and crunchy. In severe cases the whole plant flops dramatically — terrifying to see, but encouraging, because a plant that perks up within hours of watering was simply dry. If the finger test says dry, water thoroughly until it drains from the bottom and watch it recover.

    What Root Rot Looks Like Above the Soil

    Root rot tells a different story: yellowing leaves feel soft and mushy rather than crispy, leaves drop while still yellow or green, and stems feel soft near the soil line. The soil stays wet for days after watering, and you may see mold, algae, or fungus gnats. In advanced cases the plant wobbles because rotted roots no longer anchor it. The definitive check: slide the plant out and look at the roots — healthy roots are white and firm, rotted ones brown or black, slimy, and foul-smelling. If you see that, watering more is the worst thing you can do.

    The Smell Test and the Drainage Check

    Your nose is a good diagnostic tool: healthy soil smells earthy and fresh, while rotting roots smell sour or musty. Also check drainage, the root cause of most rot. Does the pot have drainage holes? Many decorative pots do not, and pooled water creates a root-killing swamp. Is the pot far too large for the root ball? Oversized pots keep huge volumes of soil wet for weeks — a classic beginner trap. The Missouri Botanical Garden’s indoor plant care guide covers how proper containers and soil mixes prevent the soggy conditions rot needs.

    How to Rescue a Plant in Each Situation

    For a thirsty plant, water slowly and deeply until it drains freely, then empty the saucer after fifteen minutes. If shrunken soil lets water run down the gap, set the pot in room-temperature water for twenty to thirty minutes so the root ball absorbs from below. Remove fully crispy leaves, and expect perk-up within hours.

    For root rot, unpot and rinse roots under lukewarm water. With sterilized scissors, cut away every brown, black, or mushy root — be ruthless, since rot spreads. Repot into fresh, dry, well-draining mix in a clean pot with drainage holes, sized to the remaining healthy roots. Then do not water for several days so trimmed roots can callus. Keep the plant in bright indirect light and skip fertilizer until new growth appears.

    Set Yourself Up So You Never Have to Guess Again

    Prevention is about pot and soil: always use drainage holes, match pot size to the root ball, and choose fast-draining mix with added perlite. Empty saucers after watering so roots never sit in water. Learn the lift test — the weight difference between wet and dry pots becomes second nature. And cut back watering in fall and winter when growth slows; a summer watering habit is the number-one winter killer. Browse our gardening guides for more plant-by-plant care walkthroughs.

    A drooping plant with dry, crumbly soil and crispy leaf edges is thirsty — water it deeply. A drooping plant with soggy soil, mushy yellow leaves, and a sour smell has root rot — stop watering, trim the rotted roots, and repot in fresh dry mix. When in doubt, check the roots: white and firm means alive, brown and slimy means rot.

    Conclusion

    Telling thirst apart from root rot comes down to three checks: the finger test for soil moisture, the look and feel of the leaves, and the smell of the soil. Dry soil plus crispy leaves means water; wet soil plus mushy leaves and a sour smell means rot, and more water will only make it worse. Match the rescue to the diagnosis — a deep soak for the thirsty plant, root surgery and fresh dry soil for the rotted one — and then fix the underlying setup with drainage holes, right-sized pots, and fast-draining mix so the question rarely comes up again. Most houseplants are tougher than they look, and a correctly diagnosed plant usually recovers. If you are still unsure after checking, send us a photo and your plant questions — and meet the team behind these guides.

    Frequently Asked Questions

    Can a plant recover from root rot?

    Yes, if caught early with the stem base still firm. Trim mushy roots with sterilized scissors, repot in fresh dry mix, and wait a few days before watering. If the stem itself is mushy at the soil line, recovery is unlikely.

    How deep should I check soil moisture with my finger?

    About two inches deep for small to medium pots — push your finger to the second knuckle. For pots larger than ten inches, check three to four inches down, since the surface dries faster than the root zone. The surface can look bone-dry while the roots still have plenty of moisture.

    Why do the leaves turn yellow in both cases?

    Yellowing is a general stress response, which is exactly why it confuses people. The texture tells the story: underwatered yellow leaves feel dry, thin, and crispy, usually starting with the oldest lower leaves. Root-rot yellow leaves feel soft, limp, or mushy and may drop while still yellow or green.

    Should I water a plant with root rot at all?

    No — not until treated and repotted, since water feeds the rot organisms. After repotting in fresh dry mix, wait several days before the first light watering.

    Do moisture meters actually work?

    Simple probe-style moisture meters work well enough for most houseplants and are great training wheels while you learn the finger and weight tests. Push the probe into the root zone, not just the surface, and water when it reads in the dry zone for most plants. They are inexpensive and available at any garden center.

  • When Is the Best Time to Plant Tomatoes in Texas?

    When Is the Best Time to Plant Tomatoes in Texas?

    The best time to plant tomatoes in Texas is 1–2 weeks after your area’s last expected spring frost, when nighttime temperatures stay above 50°F and soil temperatures reach at least 60°F. In practice, that means mid-February to early March in South Texas (the Rio Grande Valley), mid-to-late March in Central Texas (Austin, San Antonio), late March to mid-April in North Texas (Dallas–Fort Worth), and late April into May in the Panhandle. Plant too early and a late cold snap kills them; plant too late and brutal summer heat shuts down fruit production before you get a real harvest. Here’s exactly how to time it for your part of Texas — plus the fall planting window most gardeners don’t know about.

    Texas Is Not One Planting Zone

    The single biggest mistake Texas gardeners make is following generic “plant tomatoes in spring” advice written for the Midwest. Texas spans USDA hardiness zones 6b (the northern Panhandle) through 10a (the southern tip) — a wider spread than the distance from Ohio to Florida. Check your exact zone on the USDA Plant Hardiness Zone Map, but for tomatoes, what matters more than the zone number is your local last-frost date:

    • South Texas (Brownsville, McAllen, Corpus Christi): last frost typically late January to mid-February. Tomatoes go in the ground mid-February to early March.
    • Central Texas (Austin, San Antonio, Waco): last frost mid-to-late March. Plant mid-March through early April.
    • North Texas (Dallas–Fort Worth, Tyler): last frost late March to early April. Plant late March through mid-April.
    • West Texas & Panhandle (El Paso, Amarillo, Lubbock): last frost mid-April to early May. Plant late April through May.

    These are averages, not guarantees — Texas weather loves exceptions. Texas A&M AgriLife Extension publishes county-level guidance that beats any statewide chart, and your county extension office will know the local frost quirks better than any website.

    The Two Dates That Actually Matter

    Forget the calendar month. Professional growers time tomato planting by two measurements, and you should too.

    1. The last expected frost date

    Tomatoes are tropical plants wearing a garden disguise — a single night below 32°F kills an unprotected transplant outright, and even nights in the 40s stunt growth for weeks. The standard rule is to transplant 1–2 weeks after the average last frost. Keep frost cloth or old bedsheets handy regardless; Texas is famous for a surprise freeze two weeks after everyone relaxed. The Old Farmer’s Almanac maintains a frost-date lookup by ZIP code that’s accurate enough for planning.

    2. Soil temperature above 60°F

    This is the one beginners ignore. Tomato roots shut down in cold soil even when the air feels warm — transplants set into 50°F soil just sit there, sulking, while disease moves in. A $10 soil thermometer from any garden center ends the guessing: push it 3–4 inches deep in the morning, and plant when it reads 60°F or higher for several days running. Black plastic mulch laid two weeks before planting can warm the soil 5–10 degrees and buy you an earlier start.

    Key takeaway: Air temperature tells you when it’s pleasant to garden; soil temperature tells you when tomatoes will actually grow. Plant by the thermometer, not by the calendar.

    Texas Spring Planting Calendar at a Glance

    Working backward from transplant dates — start seeds indoors 6–8 weeks before your target transplant date:

    • South Texas: start seeds indoors early January → transplant mid-February to early March
    • Central Texas: start seeds indoors late January → transplant mid-to-late March
    • North Texas: start seeds indoors early-to-mid February → transplant late March to mid-April
    • Panhandle/West Texas: start seeds indoors mid-March → transplant late April to mid-May

    Buying transplants instead of starting seeds? Texas nurseries time their stock to local planting windows remarkably well — if the garden center has healthy tomato starts on the shelf, your window is open. Just harden them off (a week of gradually increasing outdoor time) before planting, or that first windy Texas afternoon will shred them.

    The Secret Second Season: Fall Tomatoes

    Here’s what separates Texas tomato growing from the rest of the country: you get two seasons. Spring-planted tomatoes typically collapse by July — when nights stay above 75°F, pollen becomes sterile and fruit stops setting, no matter how much you water. Most beginners assume the year is over. It’s not.

    For a fall crop, start seeds indoors in late June and transplant in late July to mid-August (about 100 days before your first expected fall frost). The transplants establish through the worst heat under shade cloth and mulch, then explode into production as September nights cool — often producing until the first freeze in November or December. In South Texas, fall tomatoes can produce into January. Texas A&M’s Aggie Horticulture program specifically recommends these heat-set varieties for the fall window, since they keep setting fruit in temperatures that shut down standard varieties.

    Planting for Texas Heat: Techniques That Actually Work

    Timing gets them in the ground; technique gets you a harvest before summer wins.

    • Plant deep. Bury transplants up to their first true leaves — tomatoes root along the buried stem, building a massive root system that handles heat stress far better than a shallow-planted start.
    • Mulch heavily. 3–4 inches of straw, shredded leaves, or wood chips keeps soil 10–15 degrees cooler and cuts watering needs dramatically. This is non-negotiable in Texas.
    • Choose heat-set and disease-resistant varieties. Look for varieties bred for Southern heat: ‘Celebrity,’ ‘Bella Rosa,’ ‘Solar Fire,’ ‘Phoenix,’ and cherry types like ‘Sweet Million’ and ‘Juliet,’ which keep producing when big slicers quit. The letters after variety names (VFNTA) indicate resistance to verticillium, fusarium, nematodes, tobacco mosaic, and alternaria — in Texas soils, these matter.
    • Water deeply and consistently. Inconsistent watering causes blossom-end rot (the black sunken spots on fruit bottoms) — the most common Texas tomato complaint. Drip irrigation or soaker hoses on a timer beat overhead watering, which also spreads foliar disease.
    • Give afternoon shade in the hottest zones. In South and West Texas, 30–40% shade cloth over the plants from June onward can extend the spring season by weeks.

    Conclusion

    The best time to plant tomatoes in Texas isn’t a date — it’s a set of conditions: two weeks past your last frost, nights above 50°F, and soil at 60°F or warmer. That lands anywhere from mid-February in the Valley to May in the Panhandle, which is exactly why statewide advice fails and local timing wins. Nail the window, plant deep, mulch hard, pick heat-tough varieties — and remember the fall season, Texas’s quiet superpower, when spring plants give out in July. Do that and you’ll be picking tomatoes while gardeners in Ohio are still watching snow melt. For more regional growing guides, visit our gardening section — and if you’re troubleshooting a specific problem, ask our newsroom. You can also read about the team behind these guides.

    Frequently Asked Questions

    Can I plant tomatoes in Texas in February?

    In South Texas (Rio Grande Valley, Corpus Christi), yes — mid-to-late February is the normal window there. In Central, North, or West Texas, February planting risks a killing frost; wait until mid-March at the earliest and check soil temperature first.

    What happens if I plant tomatoes too late in Texas?

    Late-planted tomatoes run straight into summer: once nighttime temperatures stay above 75°F, pollen sterilizes and fruit stops setting. You’ll get lush plants with no tomatoes until fall — if the plants survive the heat at all. In that case, pivot to the fall planting window instead.

    Is it too late to plant tomatoes in Texas in June?

    For a spring crop, yes. But June is exactly when to start seeds indoors for the fall crop — transplant late July to mid-August for harvest from September until first frost. Many experienced Texas gardeners consider fall their better season.

    What soil temperature do tomatoes need?

    At least 60°F at 3–4 inches deep, measured in the morning, for several consecutive days. Below that, roots stall and disease pressure rises. Black plastic mulch laid two weeks early can warm soil 5–10 degrees.

    Which tomato varieties grow best in Texas heat?

    Heat-set varieties like ‘Celebrity,’ ‘Bella Rosa,’ ‘Solar Fire,’ and ‘Phoenix,’ plus cherry types such as ‘Sweet Million’ and ‘Juliet’ that keep producing through heat. Choose varieties with disease-resistance codes (V, F, N) suited to Texas soils.

  • When Is the Best Time to Plant Tomatoes in Texas?

    When Is the Best Time to Plant Tomatoes in Texas?

    The best time to plant tomatoes in Texas is 1–2 weeks after your area’s last expected spring frost, when nighttime temperatures stay above 50°F and soil temperatures reach at least 60°F. In practice, that means mid-February to early March in South Texas (the Rio Grande Valley), mid-to-late March in Central Texas (Austin, San Antonio), late March to mid-April in North Texas (Dallas–Fort Worth), and late April into May in the Panhandle. Plant too early and a late cold snap kills them; plant too late and brutal summer heat shuts down fruit production before you get a real harvest. Here’s exactly how to time it for your part of Texas — plus the fall planting window most gardeners don’t know about.

    Texas Is Not One Planting Zone

    The single biggest mistake Texas gardeners make is following generic “plant tomatoes in spring” advice written for the Midwest. Texas spans USDA hardiness zones 6b (the northern Panhandle) through 10a (the southern tip) — a wider spread than the distance from Ohio to Florida. Check your exact zone on the USDA Plant Hardiness Zone Map, but for tomatoes, what matters more than the zone number is your local last-frost date:

    • South Texas (Brownsville, McAllen, Corpus Christi): last frost typically late January to mid-February. Tomatoes go in the ground mid-February to early March.
    • Central Texas (Austin, San Antonio, Waco): last frost mid-to-late March. Plant mid-March through early April.
    • North Texas (Dallas–Fort Worth, Tyler): last frost late March to early April. Plant late March through mid-April.
    • West Texas & Panhandle (El Paso, Amarillo, Lubbock): last frost mid-April to early May. Plant late April through May.

    These are averages, not guarantees — Texas weather loves exceptions. Texas A&M AgriLife Extension publishes county-level guidance that beats any statewide chart, and your county extension office will know the local frost quirks better than any website.

    The Two Dates That Actually Matter

    Forget the calendar month. Professional growers time tomato planting by two measurements, and you should too.

    1. The last expected frost date

    Tomatoes are tropical plants wearing a garden disguise — a single night below 32°F kills an unprotected transplant outright, and even nights in the 40s stunt growth for weeks. The standard rule is to transplant 1–2 weeks after the average last frost. Keep frost cloth or old bedsheets handy regardless; Texas is famous for a surprise freeze two weeks after everyone relaxed. The Old Farmer’s Almanac maintains a frost-date lookup by ZIP code that’s accurate enough for planning.

    2. Soil temperature above 60°F

    This is the one beginners ignore. Tomato roots shut down in cold soil even when the air feels warm — transplants set into 50°F soil just sit there, sulking, while disease moves in. A $10 soil thermometer from any garden center ends the guessing: push it 3–4 inches deep in the morning, and plant when it reads 60°F or higher for several days running. Black plastic mulch laid two weeks before planting can warm the soil 5–10 degrees and buy you an earlier start.

    Key takeaway: Air temperature tells you when it’s pleasant to garden; soil temperature tells you when tomatoes will actually grow. Plant by the thermometer, not by the calendar.

    Texas Spring Planting Calendar at a Glance

    Working backward from transplant dates — start seeds indoors 6–8 weeks before your target transplant date:

    • South Texas: start seeds indoors early January → transplant mid-February to early March
    • Central Texas: start seeds indoors late January → transplant mid-to-late March
    • North Texas: start seeds indoors early-to-mid February → transplant late March to mid-April
    • Panhandle/West Texas: start seeds indoors mid-March → transplant late April to mid-May

    Buying transplants instead of starting seeds? Texas nurseries time their stock to local planting windows remarkably well — if the garden center has healthy tomato starts on the shelf, your window is open. Just harden them off (a week of gradually increasing outdoor time) before planting, or that first windy Texas afternoon will shred them.

    The Secret Second Season: Fall Tomatoes

    Here’s what separates Texas tomato growing from the rest of the country: you get two seasons. Spring-planted tomatoes typically collapse by July — when nights stay above 75°F, pollen becomes sterile and fruit stops setting, no matter how much you water. Most beginners assume the year is over. It’s not.

    For a fall crop, start seeds indoors in late June and transplant in late July to mid-August (about 100 days before your first expected fall frost). The transplants establish through the worst heat under shade cloth and mulch, then explode into production as September nights cool — often producing until the first freeze in November or December. In South Texas, fall tomatoes can produce into January. Texas A&M’s Aggie Horticulture program specifically recommends these heat-set varieties for the fall window, since they keep setting fruit in temperatures that shut down standard varieties.

    Planting for Texas Heat: Techniques That Actually Work

    Timing gets them in the ground; technique gets you a harvest before summer wins.

    • Plant deep. Bury transplants up to their first true leaves — tomatoes root along the buried stem, building a massive root system that handles heat stress far better than a shallow-planted start.
    • Mulch heavily. 3–4 inches of straw, shredded leaves, or wood chips keeps soil 10–15 degrees cooler and cuts watering needs dramatically. This is non-negotiable in Texas.
    • Choose heat-set and disease-resistant varieties. Look for varieties bred for Southern heat: ‘Celebrity,’ ‘Bella Rosa,’ ‘Solar Fire,’ ‘Phoenix,’ and cherry types like ‘Sweet Million’ and ‘Juliet,’ which keep producing when big slicers quit. The letters after variety names (VFNTA) indicate resistance to verticillium, fusarium, nematodes, tobacco mosaic, and alternaria — in Texas soils, these matter.
    • Water deeply and consistently. Inconsistent watering causes blossom-end rot (the black sunken spots on fruit bottoms) — the most common Texas tomato complaint. Drip irrigation or soaker hoses on a timer beat overhead watering, which also spreads foliar disease.
    • Give afternoon shade in the hottest zones. In South and West Texas, 30–40% shade cloth over the plants from June onward can extend the spring season by weeks.

    Conclusion

    The best time to plant tomatoes in Texas isn’t a date — it’s a set of conditions: two weeks past your last frost, nights above 50°F, and soil at 60°F or warmer. That lands anywhere from mid-February in the Valley to May in the Panhandle, which is exactly why statewide advice fails and local timing wins. Nail the window, plant deep, mulch hard, pick heat-tough varieties — and remember the fall season, Texas’s quiet superpower, when spring plants give out in July. Do that and you’ll be picking tomatoes while gardeners in Ohio are still watching snow melt. For more regional growing guides, visit our gardening section — and if you’re troubleshooting a specific problem, ask our newsroom. You can also read about the team behind these guides.

    Frequently Asked Questions

    Can I plant tomatoes in Texas in February?

    In South Texas (Rio Grande Valley, Corpus Christi), yes — mid-to-late February is the normal window there. In Central, North, or West Texas, February planting risks a killing frost; wait until mid-March at the earliest and check soil temperature first.

    What happens if I plant tomatoes too late in Texas?

    Late-planted tomatoes run straight into summer: once nighttime temperatures stay above 75°F, pollen sterilizes and fruit stops setting. You’ll get lush plants with no tomatoes until fall — if the plants survive the heat at all. In that case, pivot to the fall planting window instead.

    Is it too late to plant tomatoes in Texas in June?

    For a spring crop, yes. But June is exactly when to start seeds indoors for the fall crop — transplant late July to mid-August for harvest from September until first frost. Many experienced Texas gardeners consider fall their better season.

    What soil temperature do tomatoes need?

    At least 60°F at 3–4 inches deep, measured in the morning, for several consecutive days. Below that, roots stall and disease pressure rises. Black plastic mulch laid two weeks early can warm soil 5–10 degrees.

    Which tomato varieties grow best in Texas heat?

    Heat-set varieties like ‘Celebrity,’ ‘Bella Rosa,’ ‘Solar Fire,’ and ‘Phoenix,’ plus cherry types such as ‘Sweet Million’ and ‘Juliet’ that keep producing through heat. Choose varieties with disease-resistance codes (V, F, N) suited to Texas soils.