
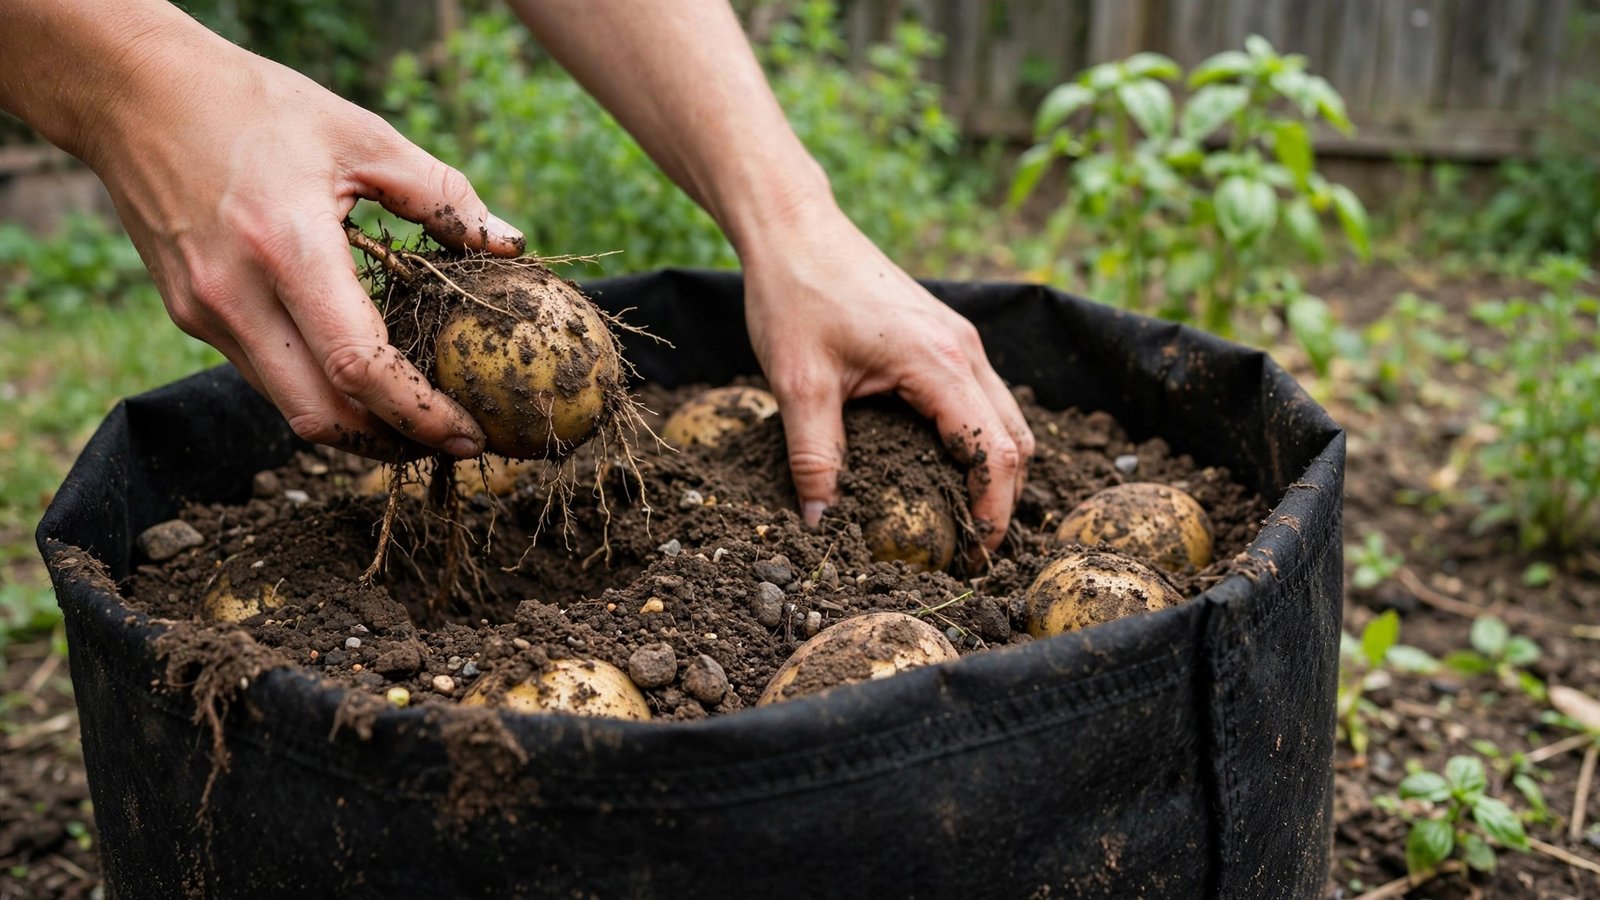
Potatoes growing in grow bags are wonderfully low-drama — no digging trenches, no hilling endless rows — but they create one specific anxiety: you cannot see what is happening underground. In a garden bed you might sneak a peek; in a grow bag, the harvest is a mystery until you commit. Harvest too early and you get a handful of marble-sized tubers. Harvest too late and you risk rot, wireworm damage, or a bag of potatoes sprouting in fall rains. Fortunately, the plants telegraph exactly what is happening below through their flowers, foliage, and stems. Learn to read those signals, and you will pull perfect harvests from your grow bags every time — including the bonus early crop most gardeners miss.
The Two Harvests: New Potatoes vs. Mature Storage Potatoes
Every potato planting offers two distinct harvests, and grow bags make the first one easy. “New” potatoes are the small, thin-skinned, creamy tubers you steal early in the season — they are a delicacy, not an underripe mistake. The mature harvest comes later: full-sized potatoes with toughened skins built for months of storage. Most gardeners only think about the final harvest and miss weeks of new potatoes, which is a shame, because grow bags are ideal for gentle early raiding — you can feel around in the soil without disturbing the whole plant. Decide your goal upfront: if you want maximum total yield for storage, leave plants alone until full maturity; if you want the longest eating season, start stealing new potatoes early and let the rest mature. Many gardeners do both — early raids from one bag, full maturity in another. There is no wrong answer, only mistimed digging.
Reading the Signs: Flowers, Vines, and the Skin Test
The plants tell you everything. Flowering — typically 60 to 70 days after planting — signals that new potatoes are forming and large enough to steal; reach in gently and harvest a few of the largest, leaving the rest to keep growing. For the main harvest, watch the vines: when they yellow, wither, and die back naturally, the tubers below have finished bulking up. This usually happens 90 to 120 days after planting, depending on variety — early varieties like Yukon Gold finish sooner, late varieties like Russets take longer. Do not rush: after vine death, wait another one to two weeks before harvesting. This waiting period lets the skins “set” — thicken and toughen — which dramatically improves storage life. Test readiness with the skin-set check: rub a tuber firmly with your thumb; if the skin slips off easily, wait longer; if it stays put, they are ready. Potatoes harvested before skin set must be eaten within weeks, while properly set skins store for months. Your seed supplier’s potato growing guidance typically lists days-to-maturity per variety — use it to calibrate your expectations.
How to Harvest From Grow Bags (The Fun Part)
This is where grow bags shine over in-ground beds: harvesting is clean, fast, and fork-free. For the main harvest, simply tip the entire bag on its side onto a tarp and sift through the soil with your hands — no stabbed tubers, no missed potatoes rotting underground. It is genuinely satisfying, like emptying a treasure chest. For early new-potato raids during the season, carefully push soil aside near the edge of the bag, feel for the largest tubers, twist them off, and tuck the soil back — the plant continues growing undisturbed. Harvest on a dry day if possible; wet soil clings to tubers and complicates curing. Handle potatoes gently at every stage — bruises become rot in storage. Let harvested tubers sit on the soil surface or a tarp for an hour or two to dry (but not in direct hot sun, which greens them), then brush off loose soil. Do not wash potatoes destined for storage; wash only what you will eat within days.
Curing and Storing Your Harvest
Curing is the step that separates potatoes that last until spring from potatoes that rot by Thanksgiving. After harvest, cure tubers for one to two weeks in a dark, humid, well-ventilated spot at 50 to 60°F — a garage or basement corner works. Curing thickens skins further and heals minor nicks, sealing out the decay organisms that cause storage rot. After curing, move potatoes to long-term storage: dark, 35 to 40°F, humid, with good air circulation. Light turns potatoes green and produces solanine (the bitter, mildly toxic compound) — darkness is essential. Never store potatoes in sealed plastic bags, which trap moisture; use paper bags, burlap, or ventilated boxes. Check stored potatoes monthly and remove any that soften or sprout before they affect neighbors. One critical rule: do not store potatoes near onions or fruit — onions’ moisture and fruits’ ethylene gas both accelerate potato sprouting and spoilage. Properly cured and stored, many varieties keep 4 to 6 months.
Grow Bag Tips for Your Best Harvest Yet
A few bag-specific practices maximize results. Use bags of at least 10 gallons — 15 is better — since cramped bags produce cramped potatoes. Start with just 4 to 6 inches of soil, place 3 to 4 seed potatoes per bag, and “hill” by adding soil as vines grow, keeping tubers covered; any tuber exposed to light turns green and inedible. Fabric bags air-prune roots and drain exceptionally well, which potatoes love, but they also dry out faster than plastic — check moisture regularly, aiming for consistently moist (not soggy) soil, especially during flowering and tuber bulking. Stop watering once vines begin dying back; continuing to water mature tubers invites rot. Fold down the bag’s sides early in the season for easier hilling access, then roll them up as you add soil. At season’s end, dump the soil into a compost pile or garden bed — do not reuse it for potatoes or tomatoes next year, since soil-borne diseases like blight persist. Fresh mix each spring keeps the system clean. Penn State Extension’s potato production resources cover variety selection and disease management for home growers.
Flowering potato plants mean new potatoes are ready to steal; yellowed, dead vines plus firm skins that pass the thumb-rub test mean the mature harvest is ready. Wait one to two weeks after vine death for skins to set, tip the grow bag onto a tarp to harvest, then cure tubers before storage.
Conclusion
Harvesting potatoes from grow bags is simple once you read the plant’s signals: flowers for early new potatoes, dead vines and set skins for the storage harvest. Tip the bag, gather your treasure, cure the tubers in a cool dark spot, and store them properly for months of eating. The grow bag method trades backbreaking digging for a few minutes of tipping and sifting — and honestly, it is more fun. For more container vegetable guides, explore our gardening section, meet the team, or ask us your growing questions.
Frequently Asked Questions
Can I harvest potatoes while the plant is still green?
Yes — those are “new” potatoes, and they are delicious. Once plants flower (around 60–70 days after planting), gently feel around in the bag for the largest tubers and harvest a few, leaving the rest to mature. Just be gentle so the plant keeps growing.
What happens if I leave potatoes in the grow bag too long?
Over-mature tubers risk rot in wet fall weather, wireworm and slug damage, and sprouting if temperatures stay warm. Once vines are fully dead and skins have set (1–2 weeks after vine death), harvest promptly — there is no benefit to waiting longer.
Why did my potatoes turn green?
Exposure to light produces chlorophyll (green color) and solanine, a bitter compound that is mildly toxic in large amounts. This happens when tubers grow exposed at the soil surface. Hill soil up around plants during the season, and cut away green portions generously before eating — or discard heavily greened potatoes.
How many potatoes can I expect from one grow bag?
A 10- to 15-gallon bag planted with 3 to 4 seed potatoes typically yields 5 to 10 pounds, depending on variety, soil fertility, and watering. Early varieties yield less than late-season types. Consistent moisture during tuber bulking is the biggest yield factor you control.
Can I reuse grow bag soil for potatoes next year?
Not for potatoes, tomatoes, peppers, or eggplant — soil-borne diseases like early blight and verticillium wilt persist in the mix. Dump it on ornamental beds or the compost pile and start with fresh mix each spring. The old soil is perfectly fine for flowers, herbs, or unrelated vegetables.
Leave a Reply