Breaking

Category: Fashion

  • Why New Clothes Smell Like Chemicals and How to Remove the Odor

    Why New Clothes Smell Like Chemicals and How to Remove the Odor

    You open the package and the smell hits you: sharp, chemical, vaguely like a swimming pool crossed with a hardware store. New clothes — especially fast fashion, imports, and wrinkle-resistant garments — often arrive reeking of the chemicals used in manufacturing, shipping, and finishing. The smell is unpleasant, it can irritate skin and trigger headaches, and it raises the obvious question of what exactly you are wearing. The good news: the odor is removable, usually in one or two washes done correctly. Here is what causes it and how to get rid of it.

    What That Smell Actually Is

    The “new clothes smell” is a cocktail of manufacturing chemicals. Formaldehyde and formaldehyde-releasing resins are the most notorious — used in “wrinkle-free,” “easy care,” and “permanent press” finishes to keep garments crisp through shipping. They off-gas the sharp chemical odor and are known skin and respiratory irritants; some people develop contact dermatitis from unwashed treated garments. Sizing agents, dyes (especially dark and bright colors), softeners, anti-mold treatments applied for container shipping, and volatile organic compounds from packaging all contribute.

    This is why the smell is strongest in: wrinkle-resistant dress shirts and chinos (formaldehyde finishes), dark jeans and brightly dyed fast fashion (excess dye and fixing agents), vacuum-sealed imports (chemicals concentrated in sealed packaging), and synthetic fabrics (which hold manufacturing odors more than natural fibers). The smell is a legitimate signal — it means chemical residues are present on the fabric surface — and washing before first wear is not just about odor but about removing irritants from contact with your skin.

    The Removal Protocol: Wash Before You Wear

    Always wash new clothes before wearing them — this single habit eliminates most of the problem and most of the skin-irritation risk. For the standard chemical smell: wash in the warmest water the care label allows with your regular detergent plus one cup of distilled white vinegar in the rinse cycle. The vinegar neutralizes alkaline chemical residues and dissolves finishing agents without damaging fabric. For strong odors, pre-soak the garments for 1–2 hours in cool water with a cup of baking soda before washing — baking soda absorbs odors rather than masking them.

    For stubborn cases (the shirt that still smells after one wash): run a second wash with a half-cup of baking soda added directly to the wash cycle, or try an oxygen-based bleach soak (OxiClean) for whites and colorfast items. Add an extra rinse cycle to ensure all residues wash out — chemical smells often persist because residues were not fully rinsed, not because they are permanent. Dry in fresh air and sunlight when possible; UV and airflow break down volatile compounds far faster than dryer heat, which can actually bake some chemical odors deeper into synthetic fibers.

    Special Cases: Wrinkle-Free Finishes and Dark Dyes

    Formaldehyde-finished garments (labeled wrinkle-free, easy care, permanent press, or durable press) deserve extra attention because the finish is designed to persist through washes — that is its selling point. Multiple washes gradually reduce it; the vinegar rinse helps each cycle. If you are chemically sensitive, consider avoiding “wrinkle-free” labeled garments entirely and choosing untreated fabrics plus a steamer instead. The EPA’s information on formaldehyde in textiles confirms these finishes as a real (if generally low-level) exposure source worth washing out.

    Dark and brightly dyed clothes often smell of excess dye and fixing agents. Wash them separately the first few times (they will bleed), inside out, in cold water with a cup of vinegar — which also helps set the dye and reduce future fading. If the dye smell is extreme and the garment bleeds heavily after multiple washes, the dye job is poor quality; consider returning it, since excessive unfixed dye can also transfer to skin. For “dry clean only” items with chemical smell, air them outdoors for 24–48 hours before wearing — fresh air off-gassing handles what you cannot wash.

    When the Smell Signals a Real Problem

    Most new-clothes smell is benign manufacturing residue that washes out. But watch for warning signs: a strong musty or moldy smell (suggests the garments were stored damp — wash hot with vinegar and dry thoroughly; persistent mold smell means return it), skin reactions after wearing washed clothes (redness, itching, rash — possible formaldehyde sensitivity or dye allergy; see a dermatologist and avoid the garment), and an overwhelming chemical smell that survives three proper washes (poor manufacturing; return it — no garment is worth persistent chemical exposure).

    Reduce future exposure at the source: buy from brands with OEKO-TEX or similar chemical-safety certifications, prefer natural fibers over heavily treated synthetics, avoid “wrinkle-free” finishes if you are sensitive, and air out all new clothes (even “no wash needed” items) for a day before wearing. Secondhand clothes, paradoxically, are often the lowest-chemical option — years of washing have removed all manufacturing residues. The American Academy of Dermatology’s textile dermatitis resources describe the skin reactions some people develop from unwashed new clothing chemicals.

    New clothes smell like chemicals because of formaldehyde finishes, excess dyes, sizing agents, and shipping treatments — remove it by always washing before first wear, adding a cup of white vinegar to the rinse, pre-soaking strong odors in baking soda water, and drying in fresh air and sunlight. Multiple washes defeat even stubborn finishes; persistent smell after three washes means return the garment.

    Conclusion

    That chemical new-clothes smell is manufacturing residue, not a permanent feature — and it comes off with the right washing. Make “wash before wearing” non-negotiable, deploy vinegar and baking soda for the stubborn cases, air-dry in sunlight when you can, and shop with chemical awareness (certifications, fewer “wrinkle-free” finishes, more natural fibers) to reduce the problem at the source. Your nose was right to complain; now your laundry routine can answer. For more wardrobe care guides, explore our fashion section, read about our practical philosophy, or share your de-stinking methods.

    Frequently Asked Questions

    Why do new clothes smell like chemicals?

    Manufacturing residues: formaldehyde-based wrinkle-resistant finishes, excess dyes and fixing agents, sizing chemicals, anti-mold shipping treatments, and VOCs concentrated in packaging. The smell signals surface chemical residues — which is why washing before first wear matters for skin health, not just odor.

    How do I remove the chemical smell from new clothes?

    Wash in the warmest safe water with regular detergent plus one cup of white vinegar in the rinse. For strong odors, pre-soak 1–2 hours in baking soda water first. Dry in fresh air and sunlight, which breaks down volatile compounds faster than dryer heat.

    Is the chemical smell on new clothes harmful?

    Usually it is low-level manufacturing residue that washes out — but formaldehyde finishes can irritate skin and airways, and some people develop contact dermatitis from unwashed treated garments. Always wash before wearing; see a dermatologist for persistent skin reactions.

    What if the smell does not come out after washing?

    Try a second wash with baking soda in the cycle plus an extra rinse, or an oxygen-bleach soak for colorfast items. If a strong chemical smell survives three proper washes, return the garment — the manufacturing is poor quality and not worth persistent exposure.

    Are wrinkle-free clothes safe to wear?

    Generally yes after washing, which reduces the formaldehyde finish significantly over the first few washes. If you are chemically sensitive, avoid “wrinkle-free/easy care/permanent press” labels entirely and choose untreated fabrics with a steamer for wrinkle control.

    How can I buy clothes with fewer chemicals?

    Look for OEKO-TEX or similar chemical-safety certifications, prefer natural fibers over heavily treated synthetics, skip wrinkle-free finishes, and air out all new purchases for a day. Secondhand clothes are often the lowest-chemical option since years of washing removed all residues.

  • How to Dress for a Beach Wedding When You Burn Easily

    How to Dress for a Beach Wedding When You Burn Easily

    A beach wedding invitation when you burn easily presents a genuine dilemma: you want to celebrate, look great in photos, and not spend the ceremony turning the color of the bridesmaids’ coral bouquets. Sand reflects UV, there is no shade, the event lasts hours, and “just wear sunscreen” — while true — is not a complete strategy when your skin reddens in 15 minutes. Dressing for a beach wedding as someone who burns is about sun protection engineered into every choice: fabric, coverage, timing, and products working together.

    The Sun Reality of Beach Weddings

    Beach venues amplify sun exposure beyond what most people expect. Sand reflects up to 15–25 percent of UV radiation back at you — so you are getting hit from above and below simultaneously. Water nearby adds more reflection. There is typically zero shade during the ceremony, which often happens in late afternoon when UV is still strong. And the timeline works against you: arrive early, ceremony, photos, cocktail hour — easily two to three hours of exposure before you ever reach the shaded reception.

    For burn-prone skin, this means planning like sun protection is part of the outfit, not an afterthought. Check the UV index for the wedding day and location — a UV index of 8+ (common at beach destinations) burns unprotected fair skin in under 15 minutes. Knowing the number calibrates your strategy: moderate UV needs good habits, extreme UV needs full armor. The EPA’s UV index guidance explains exposure categories and the protection each level demands.

    What to Wear: Coverage That Looks Like Style, Not Hiding

    The winning move is choosing coverage that reads as elegant rather than defensive. For women: a maxi dress with sleeves (three-quarter or long) in a breathable fabric — you get full leg and arm coverage in a silhouette that is quintessentially beach-wedding. Wide-leg jumpsuits with sleeves offer the same coverage with modern polish. High necklines protect the chest and shoulders, the areas that burn fastest and show it most in photos. Flowy fabrics (chiffon, linen blends) keep covered skin cool through airflow.

    For men: a long-sleeve linen shirt (sleeves down, not rolled — the rolled sleeve sacrifices the forearm protection you need) with lightweight trousers, in light colors that reflect heat. An unlined, unconstructed blazer adds shoulder and upper-arm protection for the ceremony and can come off later. Hats are the single most effective accessory: a wide-brim hat protects face, ears, and neck — the highest-burn zones — and at a beach wedding it reads as stylish, not odd. Choose one that suits the dress code (straw fedora or Panama-style for men, wide-brim sun hat for women).

    The Sunscreen Strategy (Beyond “Just Apply It”)

    For burn-prone skin at a beach wedding, sunscreen needs a protocol. Use SPF 50+ broad-spectrum, water-resistant formula — applied 15–20 minutes before sun exposure (it needs time to bind to skin), in the full recommended quantity (a shot-glass amount for the body; most people apply a quarter of what they need). Cover every exposed area including ears, back of neck, tops of feet, and the part in your hair. Reapply every two hours and after sweating — set a phone alarm; you will forget in the celebration.

    Layer your protection: a sunscreen stick for the face (easier to reapply over makeup without ruining it — dab, do not rub), spray for hard-to-reach areas (sprays are convenient but apply less evenly, so rub them in), and consider UPF-rated clothing for the worst zones — a UPF 50 cover-up or shirt provides guaranteed protection that does not sweat off or need reapplication. Take an oral sun-protection supplement? The evidence is thin — treat them as a possible minor supplement to, never a replacement for, topical sunscreen and coverage. The American Academy of Dermatology’s sunscreen guidance covers proper application, which most people get wrong.

    Timing, Positioning, and the Day-Of Playbook

    Work the logistics, not just the wardrobe. Arrive with sunscreen already applied and set (remember the 15–20 minute activation). Position yourself at the ceremony’s edge or back where you can shift slightly for any available shade — near the dunes, a palm, the venue structure. Bring a parasol if the dress code allows; at beach weddings they are charming rather than odd, and they provide mobile shade through the entire event.

    Manage the timeline: the highest-risk window is the pre-ceremony gathering and ceremony itself, when you are stationary in direct sun. Once cocktail hour starts, gravitate to shaded areas, tents, and indoor spaces. Keep a small kit in your bag: sunscreen stick for reapplication, blotting papers (sweat plus sunscreen gets shiny in photos), water (hydrated skin handles sun stress better, and you will be drinking less water than you think), and aloe gel for the evening just in case. If you feel burning despite everything, retreat to shade immediately — a beach wedding is not worth a second-degree sunburn.

    Dress for a beach wedding when you burn easily with coverage-as-style: maxi dresses or jumpsuits with sleeves, long-sleeve linen shirts, wide-brim hats, and UPF layers. Apply SPF 50+ generously 20 minutes before exposure and reapply every two hours, position for shade at the ceremony, bring a parasol if appropriate, and retreat to shade at the first sign of burning.

    Conclusion

    Burning easily does not disqualify you from beach weddings — it just means your preparation is part of getting ready, like choosing the outfit itself. Engineer sun protection into every layer: covered-but-breathable clothing, a real hat, serious sunscreen applied correctly and reapplied on schedule, and smart positioning through the day’s timeline. Do that, and you will be the guest who looks radiant in the photos for the right reasons. For more event dressing guides, explore our fashion section, read about our practical philosophy, or share your sun-survival tips.

    Frequently Asked Questions

    How do I avoid sunburn at a beach wedding?

    Layer protection: SPF 50+ applied generously 20 minutes before exposure and reapplied every two hours, coverage clothing (sleeves, maxi lengths), a wide-brim hat, and strategic positioning for shade. Sand reflects 15–25% of UV, so you need more protection than the same time inland.

    What should I wear to a beach wedding if I burn easily?

    Maxi dresses or jumpsuits with sleeves for women; long-sleeve linen shirts (sleeves down) with lightweight trousers for men. Wide-brim hats for everyone. Choose breathable flowy fabrics so coverage stays cool, and consider UPF-rated layers for guaranteed protection.

    How much sunscreen do I actually need?

    Far more than most people apply — about a shot-glass amount for the body, applied 15–20 minutes before exposure. Cover ears, back of neck, tops of feet, and hair part. Reapply every two hours and after sweating; set a phone alarm since celebrations make you forget.

    Can I reapply sunscreen over makeup?

    Yes — use a sunscreen stick and dab (do not rub) over makeup, or a mineral powder sunscreen for touch-ups. Blotting papers first remove sweat and oil so the reapplication adheres. Plan the first full application before makeup for the base layer.

    Is a parasol appropriate at a beach wedding?

    At most beach weddings, yes — parasols read as charming and intentional rather than odd, and they provide mobile shade through the ceremony and photos. Check with the couple or wedding party if you are unsure; otherwise, it is a stylish sun solution.

    What should I do if I start burning during the ceremony?

    Move to shade immediately — discreetly reposition to the edge or back. No wedding is worth a serious sunburn. Afterward, cool the skin, apply aloe, hydrate, and avoid further sun. Prevention (shade positioning from the start) beats treatment.

  • Best Way to Organize a Closet With No Dresser

    Best Way to Organize a Closet With No Dresser

    No dresser, no problem — or so you tell yourself while digging through a laundry basket for matching socks. A closet without a dresser forces every category of clothing to live on hangers or in piles, and piles inevitably become chaos. But some of the best-organized closets have no dresser at all; they just use the vertical space, the floor, and the closet door with more intention. Here is how to build a complete clothing storage system in a closet with zero drawers.

    Zone the Closet: Every Category Gets a Home

    The foundation of dresser-free organization is zoning — assigning every clothing category a specific, consistent location so nothing floats. Divide the closet into zones: hanging clothes on the rod (shirts, blouses, dresses, jackets, trousers on hangers), folded clothes on shelves (jeans, sweaters, tees, shorts), small items in containers (underwear, socks, accessories), and shoes on the floor or a rack. When every category has a home, putting laundry away takes minutes and finding things takes seconds.

    If your closet has a single rod and no shelves, you are working with the most common dresser-free constraint. The fix is adding shelf space without renovation: a freestanding shelf unit that fits under the hanging rod (wire or fabric cube shelves, $25–$40), hanging shelf organizers that suspend from the rod (fabric cubbies perfect for folded tees and jeans), and stackable bins on the closet floor. Measure before buying — closet dimensions vary, and a shelf unit an inch too wide is useless. The goal is converting dead air below the hanging clothes into folded storage.

    The Dresser Replacements: What Holds Folded Clothes

    Several products replace dresser drawers effectively. Hanging closet organizers (the fabric kind with 6–10 cubbies) are the fastest win — they install in seconds, hold folded shirts, jeans, and sweaters, and cost under $20. Cube storage units (IKEA KALLAX-style or simple wire cubes) on the closet floor create genuine drawer-like compartments; add fabric bins to the cubes for the full dresser effect with categories per bin. Stackable clear bins let you see contents without opening — critical for maintaining the system, since opaque bins become mystery boxes within weeks.

    For underwear, socks, and small items — the categories that suffer most without drawers — use small divided organizers: drawer-style dividers inside a bin, a hanging shoe organizer repurposed for rolled socks and underwear (the clear-pocket kind on the closet door is perfect), or small fabric boxes on a shelf. Roll rather than fold small items; rolled socks and underwear in divided compartments are visible, accessible, and stay neat far longer than piles. Vacuum bags handle off-season overflow on the top shelf.

    Folding and Hanging Techniques That Maximize Space

    Without a dresser, your folding technique matters more. The file-folding method (folding clothes into upright “files” that stand in rows, Marie Kondo style) lets you see every item in a bin at a glance — no digging, no toppling stacks. It works brilliantly in cube compartments and shallow bins. For hanging, use slim velvet hangers: they grip clothes (no slipping), take up half the space of plastic hangers, and a closet full of matching slim hangers instantly looks organized while fitting 30–50 percent more.

    Hang strategically: group by category then color within category (all shirts together, arranged light to dark) — it looks tidy and makes outfit selection visual. Use the vertical extremes: the top shelf for off-season and occasion wear in labeled bins, the floor for shoes on a low rack or in clear boxes. Cascading hangers (vertical multi-hangers) multiply rod space for trousers and skirts. And ruthlessly edit: a dresser-free closet has no room for “maybe” clothes — if you have not worn it in a year, it is consuming space your daily clothes need.

    Maintaining the System (Where Most People Fail)

    The system fails not from bad design but from entropy — clean laundry draped over the rod, the “chairdrobe” migrating into the closet, bins becoming junk drawers. The maintenance rules are simple: put laundry away the day it is done (a 10-minute task that prevents the avalanche), follow the one-in-one-out rule for new purchases, and do a 15-minute reset weekly — refold anything that has slumped, return strays to their zones, and pull anything that no longer fits or you no longer wear.

    Label everything that is not visible — bins, boxes, and shelf sections get labels (a label maker or masking tape and marker both work). Labels feel excessive until you realize they are what keep other household members from destroying your zones. Do a seasonal swap twice a year: off-season clothes go to the top shelf in vacuum bags, current season takes the prime real estate. The whole swap takes an hour and keeps the closet feeling spacious year-round. The Container Store closet guides offer good visual inspiration for small-closet configurations, and Good Housekeeping’s small closet ideas feature more no-dresser layouts.

    Organize a dresser-free closet by zoning every category to a specific home, replacing drawers with hanging shelf organizers, cube units with fabric bins, and clear stackable containers — file-fold clothes so everything is visible, switch to slim velvet hangers, label all bins, and maintain with same-day laundry put-away and a weekly 15-minute reset.

    Conclusion

    A closet with no dresser is not a handicap — it is a design constraint that forces better systems. Zone everything, add shelf space under the rod, file-fold for visibility, use slim hangers for density, and maintain with small consistent habits. The result is a closet where everything is findable, which is the entire point of organization anyway. Drawers were never the magic; the system was. For more small-space living guides, explore our fashion section, read about our practical philosophy, or share your closet transformations.

    Frequently Asked Questions

    How do I store folded clothes without a dresser?

    Use hanging closet organizers (fabric cubbies on the rod), cube storage units with fabric bins on the closet floor, or stackable clear bins. File-fold clothes upright so every item is visible. A freestanding shelf unit under the hanging rod converts dead air into folded storage.

    Where do I put underwear and socks without drawers?

    Small divided organizers inside bins, a clear-pocket hanging shoe organizer on the closet door repurposed for rolled socks and underwear, or small fabric boxes on a shelf. Roll small items rather than folding — they stay neat and visible longer.

    What hangers save the most closet space?

    Slim velvet hangers — they grip clothes without slipping and take up roughly half the space of plastic hangers, fitting 30–50% more clothes on the same rod. Matching hangers also make the closet look instantly more organized.

    How do I keep a dresser-free closet from becoming messy?

    Put laundry away the same day (10 minutes prevents avalanches), label every bin and zone, do a 15-minute weekly reset, follow one-in-one-out for purchases, and edit ruthlessly — dresser-free closets have no room for “maybe” clothes.

    What is file folding and why does it help?

    Folding clothes into upright “files” that stand in rows (Marie Kondo style) so every item is visible at a glance — no digging through stacks. It works best in cube compartments and shallow bins and dramatically reduces the mess of finding things.

    How often should I reorganize my closet?

    Do a seasonal swap twice a year (off-season to top-shelf vacuum bags, current season to prime space — about an hour), plus the weekly 15-minute reset. A full reorganization is only needed when the system stops working, not on a schedule.

  • How to Clean Suede Shoes After Walking Through Mud

    How to Clean Suede Shoes After Walking Through Mud

    You took a shortcut across the park, the ground was softer than it looked, and now your suede shoes are wearing a coat of mud. Suede’s velvety nap — the whole reason it looks so good — is also why mud is its nemesis: the fine fibers trap dirt deep, water stains darken it, and the wrong cleaning move (looking at you, wet rag scrubbing) mats the nap permanently. But muddy suede is recoverable in almost all cases. The secret is counterintuitive: do less, wait longer, and brush more.

    Step One: Do Nothing (Seriously, Let It Dry)

    The single most important rule of muddy suede: let the mud dry completely before you touch it. Wet mud worked into suede drives dirt deeper into the nap and spreads the stain; dry mud sits on the surface and brushes off. This is the hardest step because every instinct says to clean it immediately — resist. Stuff the shoes with newspaper or shoe trees to hold their shape, set them in a ventilated spot at room temperature (never near heat — radiators and hair dryers damage suede), and wait until the mud is fully dry and crumbly, which can take several hours or overnight.

    Once dry, the cleanup is almost anticlimactic: brush the dried mud off with a suede brush (or a clean, stiff toothbrush in a pinch), using firm strokes in one direction. Most of the mud will flake away. For mud caked in seams and welts, an old toothbrush or a dry cloth edge works it out. You will be amazed how much of the “disaster” disappears in this step alone — which is exactly why the waiting matters.

    Brushing: The Core Suede Skill

    A suede brush (the two-sided kind with stiff bristles on one side and a crepe rubber edge on the other, about $8) is the essential tool. After the dry mud is off, brush the entire shoe with the bristle side using short, firm strokes in one direction — this lifts the nap back up and evens out the texture. Then go over the muddy areas against the nap (lifting the fibers) and then with it (smoothing), which restores uniformity. The crepe rubber side erases scuffs and surface marks through friction.

    For muddy water stains — the darker rings left where wet mud sat — brush vigorously first; many water marks fade significantly with brushing alone as the nap evens out. If a faint ring remains, lightly dampen the entire shoe evenly with a fine water mist (a spray bottle on mist setting), then brush as it dries — evening out the moisture prevents the tide-line effect that spot-wetting causes. Never soak suede; the goal is uniform light dampness, not wetness. The Saphir suede care guides detail this brushing technique for those who want to master it.

    For Stubborn Stains: Erasers and Vinegar

    A suede eraser (the dry, crumbly block kind, often sold with the brush) handles stains that brushing alone cannot: rub it firmly over the mark like a pencil eraser, and it crumbles away carrying embedded dirt with it. Brush afterward to restore the nap. This handles most remaining mud staining, scuffs, and surface grime. For grease-adjacent mud stains (mud mixed with oily street grime), sprinkle cornstarch on the spot overnight to absorb the oil component, brush off, then erase.

    White vinegar is the home remedy with real chemistry behind it: dampen a clean cloth with white vinegar and dab (not rub) the stained area — the mild acid breaks down mineral and dirt deposits without harming suede. Let it air-dry completely, then brush the nap back up. Test on a hidden spot first if the suede is a light or unusual color. What to never use on suede: regular soap and water scrubbing (mats the nap and leaves water marks), bleach or harsh cleaners (destroys the finish), and heat drying (shrinks and stiffens the leather).

    Prevention and Long-Term Suede Care

    The best mud cleanup is the one you barely need. Apply suede protector spray (Crep Protect, Jason Markk Repel, Tarrago Nano — silicone or nano-based, not silicone-heavy cheap sprays that darken) to clean, dry suede before wearing, and reapply every few weeks of regular use. The spray creates an invisible barrier that makes mud and water bead instead of soaking in — the difference between a five-minute brush-off and a restoration project.

    Brush suede after every few wears as routine maintenance — it takes 60 seconds and keeps the nap healthy. Store suede shoes with shoe trees in a breathable (not plastic) bag away from direct sunlight, which fades the color. Rotate your shoes so suede gets rest days; daily wear in all conditions is what kills suede fastest. And accept the honest truth: suede is not a foul-weather shoe. On days when mud is likely, the protector spray plus a different shoe choice beats any cleaning method. The Allen Edmonds shoe care resources cover suede maintenance schedules worth adopting.

    Clean muddy suede by letting the mud dry completely first (never clean wet mud), brushing off the dried dirt, restoring the nap with firm one-direction brushing, and using a suede eraser or white vinegar dab for stubborn marks. Never scrub with soap and water or use heat. Prevent the next incident with protector spray applied to clean, dry suede before wearing.

    Conclusion

    Muddy suede looks catastrophic and cleans up beautifully — if you respect the material’s rules. Wait for dry, brush don’t scrub, erase the stubborn spots, vinegar the water marks, and protect before the next outing. The whole rescue takes 20 minutes plus drying time, and your shoes come back looking like the mud never happened. Suede rewards the patient and punishes the hasty; now you know which one to be. For more footwear care guides, explore our fashion section, read about our practical philosophy, or share your suede rescue stories.

    Frequently Asked Questions

    Should I clean mud off suede shoes immediately?

    No — let the mud dry completely first. Wet mud worked into suede drives dirt deeper and spreads the stain; dry mud sits on the surface and brushes off easily. Stuff with newspaper, air-dry at room temperature away from heat, and wait until it is fully dry and crumbly.

    What is the best brush for suede shoes?

    A two-sided suede brush (stiff bristles plus crepe rubber edge, about $8). Use firm one-direction strokes to lift the nap, brush against then with the nap on stained areas, and use the crepe side for scuffs. A clean stiff toothbrush works in a pinch.

    How do I remove water stains from suede?

    Brush vigorously first — many marks fade as the nap evens. For remaining rings, mist the entire shoe evenly with fine water spray (never spot-wet), then brush as it dries to prevent tide lines. White vinegar dabbed on works for stubborn mineral deposits.

    Can I use soap and water on suede?

    No — regular soap-and-water scrubbing mats the nap permanently and leaves water marks. Use dry methods (brushing, suede eraser, cornstarch for oil) and white vinegar for stains. Never use bleach, harsh cleaners, or heat drying on suede.

    How do I protect suede shoes from future mud?

    Apply suede protector spray (nano or silicone-based) to clean, dry suede before wearing; reapply every few weeks. It makes mud and water bead instead of soaking in. Also: brush after every few wears, store with shoe trees away from sun, and choose different shoes on likely-mud days.

    Will mud permanently stain suede?

    Rarely, if handled correctly — dried mud brushes off and remaining marks yield to erasers and vinegar. Permanent damage usually comes from wrong cleaning (wet scrubbing, heat, harsh chemicals) rather than the mud itself. Deep oil-mud mixtures are the hardest case; cornstarch overnight helps.

  • When Is It Appropriate to Wear White After Labor Day in 2026?

    When Is It Appropriate to Wear White After Labor Day in 2026?

    “No white after Labor Day” is the fashion rule everyone has heard and almost nobody follows anymore — yet it lingers in the back of the mind every September when you reach for white jeans. In 2026, the rule is effectively dead as a rule, but understanding where it came from and what replaced it helps you wear white year-round with confidence instead of second-guessing. Here is the real story and the modern answer.

    Where the Rule Came From (It Was Never Really About Fashion)

    The “no white after Labor Day” rule originated in the late 19th and early 20th centuries among America’s upper class, and it was about social signaling, not aesthetics. Wealthy families wore lightweight white clothing as summer resort wear; when they returned to the city after Labor Day, they switched to darker city clothes. The rule functioned as a class marker — knowing it (and following it) signaled that you were part of the social elite with a summer home and a seasonal wardrobe. It was, at root, a way for old money to distinguish itself from new money and the working class.

    The practical origin is simpler: white clothes showed dirt, and in an era of coal heating, dusty streets, and limited laundering, white was genuinely impractical for fall and winter city life. Labor Day marked the end of the clean summer season. Both origins are thoroughly obsolete — modern laundering, cleaner cities, and the democratization of fashion dissolved the rule’s foundations decades ago. What remains is a ghost: a rule everyone cites and almost no one obeys, kept alive by grandmothers and fashion columns that need content.

    The 2026 Reality: White Is Year-Round

    In 2026, white after Labor Day is not just acceptable — it is a deliberate style choice that fashion editors actively recommend. Winter white (cream, ivory, winter white, off-white) is a staple of cold-weather dressing: white jeans with a camel coat, cream sweaters with dark denim, ivory boots, white dresses with tights and boots. The look reads fresh, modern, and confident precisely because it defies the old seasonal logic. Runway shows and street style have featured white year-round for over a decade — Vogue’s coverage of winter white dressing and InStyle’s white-after-Labor-Day styling guides document the shift; the rule’s death is not news, it is history.

    The only context where the old rule faintly survives is ultra-traditional social settings — certain old-guard country clubs, very formal Southern events, and the occasional traditionalist wedding guest list. Even there, it is fading. For everyday life, work, social events, and everything in between, white after Labor Day in 2026 raises zero eyebrows. If someone cites the rule at you, they are revealing their age or their nostalgia, not a current standard. Wear the white jeans.

    How to Wear White After Labor Day Well

    The key to fall and winter white is fabric and tone. Stark, bright optic white reads summery; winter white, cream, ivory, and off-white read seasonal and sophisticated. Choose heavier fabrics — white denim, cream wool, ivory cashmere, winter-weight cotton — rather than lightweight summer whites like linen and eyelet. The fabric weight signals the season more than the color does.

    Pair white with fall textures and colors for intentional contrast: white jeans with a chunky camel sweater and boots, cream trousers with a navy blazer, an ivory dress with dark tights and knee-high boots. Monochrome winter white (head-to-toe cream) is an advanced move that looks stunning when the tones match — keep them in the same warm or cool family to avoid a mismatched effect. And maintain your whites: winter’s salt, slush, and grime are the real enemies, so treat stains promptly, wash whites separately, and consider that white winter boots require commitment.

    The Exceptions Worth Knowing

    Two genuine exceptions survive. First, weddings: do not wear white (or anything close — ivory, cream, champagne) to a wedding unless the dress code explicitly requests it. This is not about Labor Day; it is about not competing with the bride, and it applies 365 days a year. Second, funerals and somber formal occasions call for dark colors regardless of season — white is not mournful in Western tradition.

    Beyond those, the “rules” are just guidelines for looking intentional: head-to-toe white in muddy conditions is impractical rather than improper; white shoes at a dusty outdoor fall event will suffer (a practical concern, not a fashion one). And regional traditionalism varies — if your specific social circle still observes the old rule and you value harmony over statement, there is no prize for provoking your grandmother. Style is contextual; the goal is confidence, not rebellion for its own sake.

    The “no white after Labor Day” rule was a 19th-century class marker made obsolete by modern life — in 2026, white is fully year-round. Wear winter white, cream, and ivory in heavier fabrics paired with fall textures; avoid white only at weddings (never compete with the bride) and somber formal occasions. The rule is dead; confidence is the dress code.

    Conclusion

    White after Labor Day in 2026 is not a fashion risk — it is a fashion choice, and a good one. The old rule died of irrelevance decades ago, killed by washing machines, cleaner cities, and the simple fact that winter white looks fantastic. Choose seasonal fabrics and tones, pair with fall textures, keep the wedding and funeral exceptions in mind, and wear your white jeans in October with total confidence. The only people still enforcing the rule are the ones who have not updated their fashion software since 1962. For more myth-busting style guidance, explore our fashion section, read about our modern philosophy, or share the rules you have happily broken.

    Frequently Asked Questions

    Can you wear white after Labor Day in 2026?

    Absolutely — the rule is obsolete. Winter white, cream, and ivory are staples of fall and winter fashion. Choose heavier fabrics and seasonal tones, pair with fall textures, and wear white year-round with confidence.

    Where did the “no white after Labor Day” rule come from?

    19th-century American upper-class social signaling — white was summer resort wear, and switching to dark city clothes after Labor Day marked elite status. Practical roots (white showed dirt in the coal-heating era) reinforced it. Both foundations are long obsolete.

    What white should I wear in fall and winter?

    Winter white, cream, ivory, and off-white in heavier fabrics — white denim, cream wool and cashmere, ivory boots. Stark optic white and lightweight summer fabrics (linen, eyelet) read summery; the fabric weight and tone signal the season.

    Are there any occasions where white is still inappropriate?

    Yes: weddings (never wear white/ivory/cream as a guest — do not compete with the bride) and funerals or somber formal occasions (dark colors expected). These are about respect, not seasons, and apply year-round.

    How do I style white jeans for fall?

    Pair with fall textures and colors: chunky camel or gray sweaters, navy blazers, dark boots, leather jackets. The contrast between white denim and autumnal layers is the core of the look. Keep whites clean — winter grime is the real enemy.

    Does anyone still follow the no-white rule?

    Only in ultra-traditional pockets — some old-guard social clubs and very traditional Southern formal settings. For everyday life, work, and social events, it raises zero eyebrows. Regional and generational traditionalism varies, so read your specific room.

  • How to Make an Old Prom Dress Work for a Formal Event

    How to Make an Old Prom Dress Work for a Formal Event

    Your old prom dress is hanging in the closet — beautiful, expensive, worn exactly once — and a formal event just appeared on the calendar. Buying new feels wasteful when a perfectly good gown is sitting there, but wearing a prom dress to an adult formal event raises legitimate questions: will it look age-appropriate? Will it photograph like 2019? Can a dress designed for a high school gym work at a gala, wedding, or formal dinner? The answer is yes, with the right modifications and styling. Here is how to transform prom into polished.

    Assess the Dress Honestly: What Works and What Dates It

    Start with a brutally honest evaluation in good light and a full-length mirror. What makes a dress read “prom” rather than “formal event” is usually a short list of features: very bright or neon colors, all-over glitter or sequin explosions, corset-style exposed boning, high-low hemlines, cutouts in trendy placements, and junior sizing proportions (very short, very tight). A classic silhouette — A-line, sheath, simple mermaid, elegant empire waist — in a rich color or black transcends its origins easily. The simpler and more classic the original design, the easier the transformation.

    Check the condition with fresh eyes: try it on and look for fit changes (bodies change since prom), yellowing or storage stains, loose beading, stretched straps, and musty storage smell. Most issues are fixable — a dry cleaner handles the smell and freshening, a tailor handles fit — but factor the restoration cost into the decision. If the dress needs $150 of alterations and cleaning, compare that against affordable new formal options before committing. The Brides formalwear guides show what current adult formal looks like, which helps you judge how far your dress needs to travel, and David’s Bridal alteration services handle this exact kind of restyling.

    Alterations: The Transformation Toolkit

    A tailor is the difference between “wearing her prom dress” and “wearing a beautiful gown.” The highest-impact alterations: hemming to the right length for your shoes and the event’s formality (floor-length for black-tie, tea-length or midi for semi-formal — shortening a prom gown to a chic midi is a dramatic modernizer), taking in or letting out for a current perfect fit, and removing dated elements (detaching an overskirt, removing excessive tulle layers, or taking off glued-on embellishments a seamstress can carefully remove).

    Strategic additions modernize too: adding sleeves or straps to a strapless dress (lace or illusion sleeves read instantly adult), lining a sheer bodice for modesty, or adding a slit to a plain skirt for movement and modernity. Dyeing is the nuclear option for color problems — a professional dye job can take a dated bright color to black, navy, or burgundy, though it works best on natural fabrics and costs $50–$150. Budget $75–$200 total for alterations; even at the high end, it is usually less than a new quality gown, and the result fits you perfectly.

    Styling: How Adults Wear Formal Differently Than Prom

    Styling does half the transformation work. Prom styling was maximalist — big hair, heavy makeup, statement everything. Adult formal is edited: hair in a polished updo, sleek blowout, or elegant waves (not the prom updo with curled tendrils); makeup refined rather than dramatic; one statement element, not five. If the dress is embellished, keep jewelry minimal — small earrings, a delicate bracelet, no necklace competing with a detailed neckline. If the dress is simple, one striking accessory (bold earrings or a cuff) adds the adult polish.

    Shoes and outerwear complete the recontextualization: grown-up heels or elegant flats (not the prom platform), a proper wrap, pashmina, or tailored blazer for arrival (nothing says “adult formal” like a chic cover-up), and a clutch rather than a wristlet. The overall principle: every styling choice should say “this is my formal look” rather than “this is my prom look repeated.” Photograph the full outfit before the event and assess it with fresh eyes — the camera catches prom-ness that the mirror forgives.

    When It Works Beautifully (and When to Buy New)

    The prom-to-formal conversion works best when: the dress is a classic silhouette in a rich, non-trendy color (black, navy, burgundy, emerald, champagne); the event is semi-formal to formal but not ultra-strict black-tie; and you are willing to invest in alterations and restyling. It is also perfect for events where sustainability matters to you — rewearing is the most eco-friendly formal choice, and owning that story confidently is chic in itself.

    Buy new instead when: the dress is unmistakably trendy-dated (neon, extreme cutouts, heavy junior styling that alterations cannot fix); the event is strict black-tie with a fashion-critical crowd; the restoration costs approach new-dress prices; or you simply do not feel confident in it — confidence is the real outfit, and no amount of tailoring fixes a dress you feel self-conscious wearing. There is no shame in retiring the prom dress to memory-box status and finding an affordable new gown; the goal is feeling fantastic at the event, by whatever route gets you there.

    Make an old prom dress work for a formal event by assessing honestly (classic silhouettes in rich colors transform easiest), investing $75–$200 in tailoring (hemming, fit, removing dated elements, possibly adding sleeves), and restyling with adult polish — edited hair and makeup, minimal jewelry with embellished dresses, proper heels, and an elegant wrap. If the dress is unfixably trendy or the restoration costs rival new, buy new without guilt.

    Conclusion

    That prom dress deserves better than closet exile if the bones are good. Classic silhouette plus rich color plus skilled alterations plus adult styling equals a formal look nobody will clock as a repurposed prom gown — and you will have the satisfaction of the sustainable, economical choice. Assess honestly, tailor strategically, style with restraint, and walk in confident. The best formalwear is the kind with a story. For more event style guidance, explore our fashion section, read about our practical philosophy, or share your own restyling wins.

    Frequently Asked Questions

    Can I wear my prom dress to a formal adult event?

    Yes, if the silhouette is classic and the color is rich rather than trendy. Success depends on tailoring (fit, hemming, removing dated elements) and adult restyling (edited hair/makeup, minimal jewelry, proper accessories). Very trendy or junior-styled dresses are harder to convert.

    What alterations make a prom dress look more adult?

    Hemming to event-appropriate length (floor for black-tie, midi for semi-formal), perfecting the fit, removing dated elements like overskirts or excessive embellishments, adding sleeves or lining for modesty, and professional dyeing for color issues. Budget $75–$200.

    How should I style a repurposed prom dress differently?

    Go edited: polished hair (not prom-big), refined makeup, one statement accessory max, minimal jewelry with embellished dresses, adult heels, and an elegant wrap or blazer. Photograph the full outfit beforehand — cameras catch datedness mirrors forgive.

    Can a prom dress be dyed a different color?

    Professional dyeing can transform dated brights to black, navy, or burgundy, costing $50–$150. It works best on natural fabrics; synthetics resist dye. Factor the cost into the alter-vs-buy decision.

    When should I just buy a new formal dress instead?

    When the dress is unmistakably trendy-dated, the event is strict black-tie with a fashion-critical crowd, restoration costs approach new-dress prices, or you do not feel confident in it. Confidence is the real outfit.

    Is rewearing a prom dress environmentally better?

    Yes — rewearing is the most sustainable formalwear choice, avoiding new production entirely. Owning the story confidently is part of the chic; sustainability is increasingly valued, not hidden, in fashion culture.

  • What to Wear to a Baby Shower as the Only Male Guest

    What to Wear to a Baby Shower as the Only Male Guest

    You are the only man invited to a baby shower — maybe you are the partner, the brother, the close friend, or the coworker — and now you are facing a room full of women, a pile of pastel gifts, and the eternal question of what to wear. The anxiety is understandable but misplaced: being the only male guest is not a fashion emergency, it is just a social situation with a clear, simple dress code. Here is how to dress right, behave well, and actually enjoy yourself.

    What to Wear: The Simple Formula

    Dress to the shower’s level, which is almost always smart casual with a cheerful tilt. The reliable formula: well-fitting chinos or dark jeans (no distressing), a button-down shirt or quality polo in a pleasant color, and clean casual shoes — loafers, clean minimal sneakers, or desert boots. You want to look like you made an effort without looking like you are headed to a board meeting or a barbecue. Match the venue: backyard shower means slightly more casual; restaurant or venue shower means a half-step dressier.

    Color and pattern are your friends here — baby showers are celebratory, so a light blue Oxford, a subtle floral or patterned shirt, or cheerful pastels fit the mood far better than funeral-dark tones. Avoid anything that reads as trying too hard (full suit), trying too little (gym clothes, cargo shorts, flip-flops), or attention-seeking (loud graphics, novelty items). Grooming matters: neat hair, trimmed nails, clean shoes. You will likely be in photos, and “the only guy” is memorable — make it memorable for the right reasons. When in doubt, ask the host or the mom-to-be what the dress code is; it is a normal question that shows consideration.

    The Gift: What the Only Guy Brings

    Bring a gift — the male-guest status does not exempt you, and showing up empty-handed to a gift-giving occasion is the fastest way to feel awkward. Check the registry first; buying from it is always correct and eliminates guessing. If you are close to the parents, practical group gifts work well: a bundle of diapers in various sizes (newborns outgrow size 1 fast), a DoorDash or grocery gift card for the first weeks, or contributions toward a big-ticket registry item.

    Budget honestly — $30–$75 is the typical friend range, more for family or very close friends. Wrap it or use a gift bag (a gift bag is perfectly acceptable and far easier), include a card with a genuine message, and do not stress about picking the “perfect” baby item. Experienced parents consistently say the most appreciated gifts are the unglamorous practical ones: diapers, wipes, gift cards, and freezer meals. Your presence plus a thoughtful practical gift is the complete package.

    How to Behave: The Social Playbook

    The games are coming — the melted-candy-bar-in-the-diaper game, the baby-food tasting, the “guess the belly size” with toilet paper. Participate cheerfully. The only male guest who sits out every game with his arms crossed becomes the story; the one who dives in becomes beloved. You do not have to win; you have to play. Genuine enthusiasm for the parents-to-be covers a multitude of awkward moments.

    Conversation is easier than you fear: ask about the nursery, the name deliberations, how everyone knows the mom-to-be. Avoid the classic pitfalls — do not make it about you, do not offer unsolicited parenting advice (especially horror stories), and do not disappear into your phone. Help practically: carry gifts to the car, help set up or clean up, hold doors. Useful men at events are remembered fondly. And pace yourself on food and drink — it is a celebration, not a tailgate. The The Bump’s shower etiquette guides cover the evolving norms, including the rise of co-ed showers, and The Knot’s baby shower etiquette answers more guest questions.

    Understanding the Modern Baby Shower

    Your presence reflects a real cultural shift: baby showers are increasingly co-ed, with “baby-Qs,” couples’ showers, and dad-inclusive celebrations now common. Being the only man is less unusual every year, and many hosts deliberately include the important men in the mom-to-be’s life. You were invited because you matter to her — that is the entire context you need. There is no secret women’s-ritual you are intruding on; modern showers are parties that happen to involve gifts and games.

    If you are the partner or father-to-be, your role is slightly larger: you are a co-host in spirit. Arrive early to help set up, stay late to help clean, be visibly delighted by gifts (the mom-to-be watches your reactions), and thank people for coming. If you are a friend or family member, your job is simpler: be warm, be useful, be present. Either way, the bar is genuine kindness, not performance.

    As the only male guest at a baby shower: wear smart casual in cheerful colors (chinos, button-down or polo, clean shoes), bring a registry or practical gift ($30–$75), participate in the games enthusiastically, help with setup and cleanup, and skip unsolicited advice. You were invited because you matter — genuine warmth is the entire dress code and behavior code.

    Conclusion

    Being the only man at a baby shower is not a test — it is an invitation from someone who wants you there. Dress with cheerful effort, bring a thoughtful gift, play the games, help where you can, and enjoy celebrating the parents-to-be. Do that, and you will not just survive the afternoon — you will be genuinely glad you came. For more social occasion guidance, explore our fashion section, read about our practical philosophy, or share your own fish-out-of-water stories.

    Frequently Asked Questions

    What should a man wear to a baby shower?

    Smart casual in cheerful colors: chinos or dark jeans, a button-down shirt or quality polo, clean casual shoes. Match the venue (backyard = slightly casual, restaurant = slightly dressier). Avoid suits, gym clothes, and loud novelty items.

    Do men bring gifts to baby showers?

    Yes — buy from the registry when possible, or bring practical gifts like diapers, wipes, or gift cards ($30–$75 typical). A gift bag is perfectly acceptable. Experienced parents value practical gifts most.

    How should I act as the only man at a baby shower?

    Participate in games cheerfully, make conversation (ask about the nursery, how guests know the mom-to-be), help with setup/cleanup and carrying gifts, avoid unsolicited parenting advice, and stay off your phone. Genuine enthusiasm covers everything.

    Is it normal for men to be invited to baby showers now?

    Increasingly yes — co-ed showers, baby-Qs, and couples’ celebrations are now common. Being the only man is less unusual every year. You were invited because you matter to the mom-to-be; there is no ritual you are intruding on.

    What should the father-to-be do at the baby shower?

    Act as co-host in spirit: arrive early to help set up, stay late to clean up, react delightedly to gifts, and thank guests for coming. Your visible enthusiasm matters enormously to the mom-to-be.

    What gifts do new parents actually want?

    The unglamorous practical ones: diapers in multiple sizes, wipes, gift cards (food delivery, grocery), and freezer meals. Registry items are always correct. Skip trying to find the “perfect” cute item — usefulness wins.

  • How to Find a Small-Town Tailor for Under $30 Per Alteration

    How to Find a Small-Town Tailor for Under $30 Per Alteration

    You live in a small town. The nearest big-city tailor with a fancy storefront is an hour away, and the idea of paying $60 to hem a pair of pants feels absurd when the pants cost $40. But well-fitting clothes are not a big-city luxury — they are an alterations equation, and small towns have hidden advantages: lower prices, tailors who have served the community for decades, and dry cleaners that do basic alterations for pocket change. Finding quality alterations under $30 in a small town is absolutely doable once you know where to look and what to ask for.

    Where Small-Town Tailors Actually Hide

    Forget searching for “tailor” — in small towns, alterations live in unexpected places. Dry cleaners are the number one source: most small-town dry cleaners offer basic alterations (hemming, waist adjustments, zipper replacement) either in-house or through a seamstress they work with regularly. Ask at the counter; the prices are often written on a laminated card and have not changed in years. Fabric and quilt shops frequently know every skilled seamstress in the county — the owners are hubs of the local sewing community and will happily refer you.

    Other overlooked sources: bridal and formalwear shops (they alter everything, not just wedding dresses, and their seamstresses handle complex work), laundromats with alteration services, senior centers and community bulletin boards (retired professional seamstresses often advertise here), local Facebook groups and Nextdoor (search “seamstress” or “alterations” — small-town recommendation networks are powerful), and churches and community centers with bulletin boards. The Nextdoor neighborhood network is particularly effective in small towns where everyone knows the same handful of skilled people, and Thumbtack’s alteration cost guides show typical prices by region.

    What Alterations Cost Under $30 (and What Does Not)

    Set realistic expectations: under $30 covers the bread-and-butter alterations that transform most garments. Pant hemming: $10–$18. Taking in the waist of trousers or a skirt: $15–$25. Shortening sleeves on a shirt: $10–$15. Simple dress hemming: $15–$25. Replacing a standard zipper: $15–$25. Taking in the sides of a shirt or dress: $15–$25. These are the alterations with the highest style return per dollar, and small-town prices often sit at the low end of these ranges or below.

    What typically exceeds $30: relining a jacket ($75+), complex suit alterations ($50+), formal gown restructuring, and anything involving significant deconstruction. The strategy is to spend your alteration budget where it counts most — hems and waist adjustments on the pieces you wear constantly — and skip altering cheap fast-fashion pieces that cost less than the alteration. A $25 alteration on a $30 thrifted blazer that then looks custom is the best deal in clothing; a $25 alteration on a $12 disposable top is not.

    Vetting Quality Without a Big-City Reputation System

    Small towns lack Yelp depth, so vet differently. Ask to see finished work — any good seamstress has pieces in progress you can inspect. Check the fundamentals: straight seams, even hems, matched patterns at seams (stripes and plaids should align), and clean finishing on the inside (no raw edges or loose threads). Start with a low-stakes test garment — hem a pair of casual pants before trusting them with the wedding suit. A good tailor welcomes the test; a bad one is offended by it, which tells you what you need to know.

    Ask the right questions: how long will it take (a week is normal; same-day rush often signals corner-cutting on complex work), do they do a fitting or pin it on the spot, and what happens if the fit is not right (reputable tailors adjust their own work free). Word-of-mouth is the small-town Better Business Bureau — ask at the fabric shop, the dry cleaner, and the church bulletin board, and patterns will emerge quickly. The same two or three names coming up independently is the strongest signal available.

    DIY and Hybrid Approaches That Save More

    For the truly budget-conscious, learn the two simplest alterations yourself: basic hemming with iron-on hem tape ($5, no sewing required, lasts through many washes) handles casual pants and curtains admirably, and taking in a waistband with a simple elastic adjustment is a beginner-friendly hand-sewing project with dozens of video tutorials. These cover the most common needs for under $5.

    The hybrid approach maximizes value: do the simple stuff yourself (hem tape, taking in elastic waists, sewing buttons) and reserve the tailor’s $30 for the skilled work (structured hems, waist alterations on trousers, zipper replacement). Build a relationship with your tailor — repeat customers in small towns get better prices, faster turnaround, and honest advice (“that is not worth altering, buy the smaller size”). Bring all your alterations in one trip to save drives, and always try garments on with the shoes you will wear them with before marking hems.

    Find sub-$30 alterations in a small town through dry cleaners, fabric shop referrals, bridal shops, and Nextdoor/Facebook recommendations — not by searching for “tailor.” Hemming ($10–$18) and waist adjustments ($15–$25) are the highest-return alterations; vet with a low-stakes test garment, and DIY the simplest fixes with hem tape while reserving the tailor for skilled work.

    Conclusion

    Small towns are not alteration deserts — they are alteration bargains hiding in plain sight. The dry cleaner, the fabric shop owner, and the neighborhood Facebook group will lead you to skilled seamstresses charging half of city prices. Spend your $30 where it transforms garments, test with something low-stakes first, and build the relationship that turns a good tailor into your secret style weapon. Well-fitting clothes are not about where you live; they are about knowing who to ask. For more budget style intelligence, explore our fashion section, read about our practical philosophy, or share your small-town tailor finds.

    Frequently Asked Questions

    Where can I find a tailor in a small town?

    Check dry cleaners (most offer basic alterations), ask at fabric and quilt shops for seamstress referrals, try bridal/formalwear shops, and search local Facebook groups and Nextdoor. Community bulletin boards at churches and senior centers often list retired professional seamstresses.

    How much should basic alterations cost?

    Pant hemming $10–$18, waist adjustments $15–$25, sleeve shortening $10–$15, dress hemming $15–$25, zipper replacement $15–$25. Small-town prices often sit at or below the low end. Complex work like relining jackets or restructuring gowns exceeds $30.

    How do I know if a small-town tailor is good?

    Inspect finished work for straight seams, even hems, and clean interior finishing. Start with a low-stakes test garment. Ask about turnaround time, fittings, and free adjustments. When the same name comes up from multiple independent local recommendations, that is the strongest signal.

    What alterations are worth paying for vs. DIY?

    DIY the simple stuff: iron-on hem tape for casual hems ($5), elastic waist adjustments, buttons. Pay the tailor for structured hems, trouser waist alterations, and zipper replacement. Never pay more for an alteration than the garment’s worth to you.

    Is it worth altering thrifted clothes?

    Often yes — a $25 alteration on a $30 thrifted blazer produces a custom-looking garment for $55 total, which is the best value in clothing. Focus alterations on quality pieces you will wear often; skip altering disposable fast-fashion items.

    How long do alterations take in a small town?

    About a week is normal for basic work. Same-day service is available for simple hems at some dry cleaners but often signals rushed work on complex jobs. Bring everything in one trip and allow buffer time before events.

  • Why Your Socks Always Slide Down Inside Your Boots

    Why Your Socks Always Slide Down Inside Your Boots

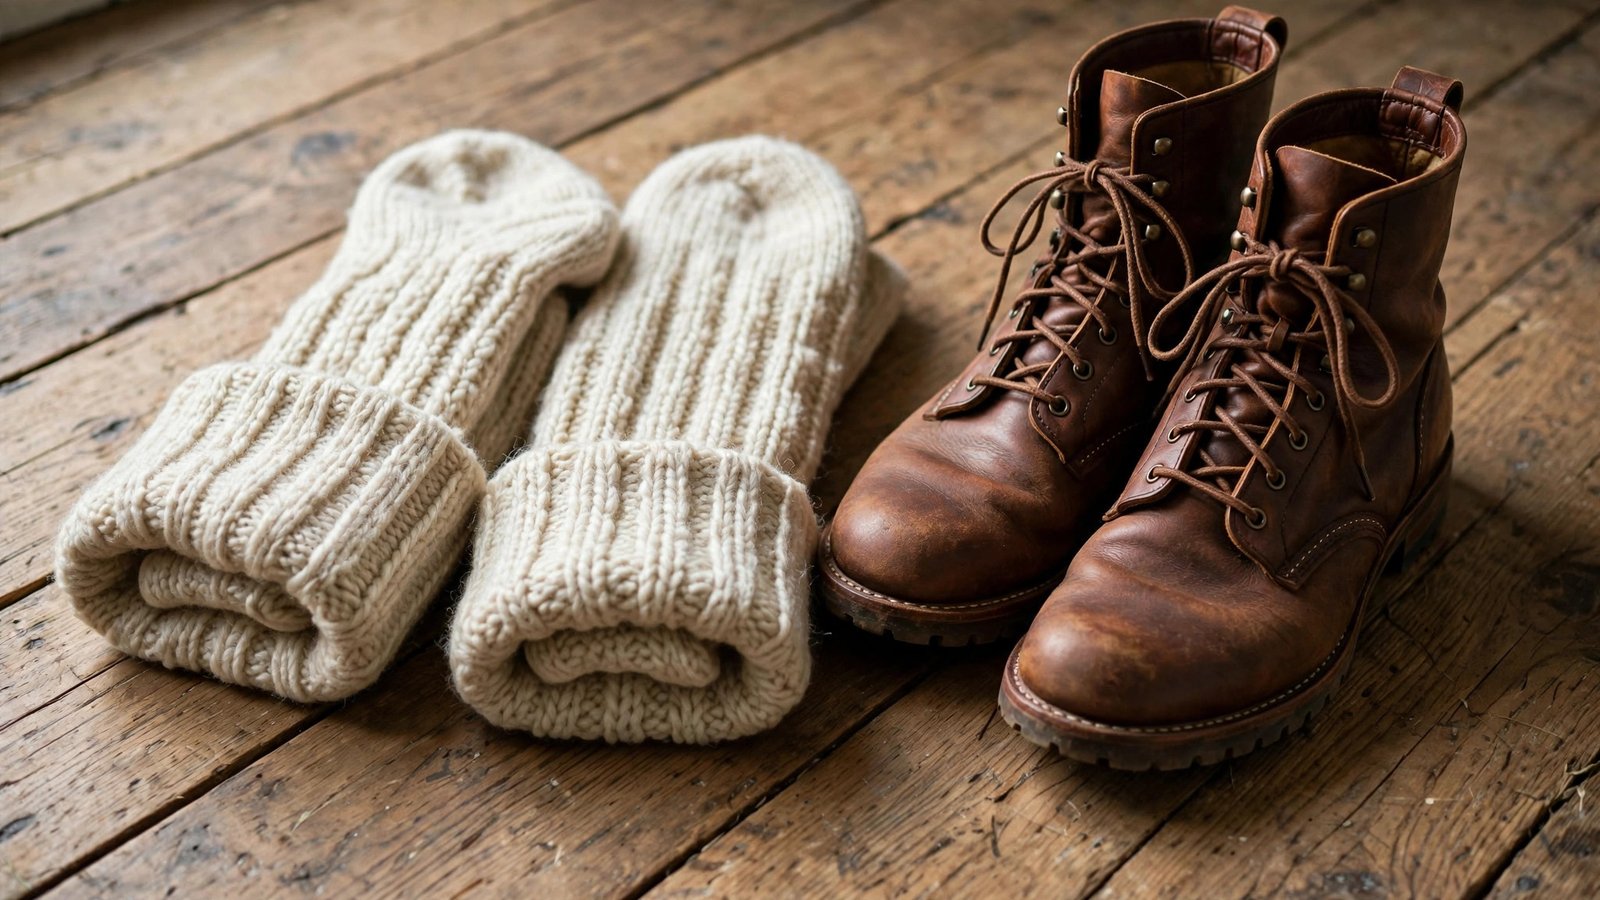
    There is a special annoyance reserved for the moment your sock slides down inside your boot and bunches under your arch — and you are nowhere near a place to fix it. Every step becomes a negotiation with the wad of fabric migrating south, and by the end of the day your feet ache in ways that have nothing to do with the boots. Socks slide inside boots for specific, fixable reasons: wrong sock construction, wrong size, wrong material, or a boot fit that lets the foot move too much. Here is how to end the slide for good.

    Why Socks Slide Down in Boots

    A sock stays up through a combination of elastic grip at the cuff, friction against the skin and boot, and structural fit around the foot. Boots disrupt all three. The tall shaft creates a long column where gravity works on the sock with every step; the roomier fit of most boots (compared to shoes) lets the foot and sock move independently, breaking the friction hold; and the stiff shaft does not flex with the ankle, creating a shear force at the ankle that gradually walks the sock downward. Add sweat — boots run warm, moisture reduces friction — and the slide becomes inevitable.

    The sock’s own construction is usually the main culprit. Thin, worn-out elastic at the cuff cannot grip the calf; smooth synthetic fabrics slide against both skin and boot lining; and a sock that is too large bunches and migrates, while one that is too small pulls down from tension. Cotton crew socks — the default for many boot wearers — are among the worst offenders: cotton absorbs moisture, gets heavy, loses shape, and slides. The fix starts with retiring the wrong socks, not fighting them.

    The Right Socks: What Actually Stays Up

    Boot socks exist as a category for a reason, and they differ from regular socks in the ways that matter. Look for: a tall cuff that reaches well above the boot shaft (over-the-calf or knee-high) — the cuff grips the calf where it is narrower, above the boot’s top edge, which anchors the whole sock; strong elastic in the cuff and arch (try the pull test — quality boot socks snap back firmly); cushioning through the foot that fills the boot’s volume and reduces internal movement; and moisture-wicking materials (merino wool blends are the gold standard — they manage sweat, cushion well, and their natural texture grips better than slick synthetics).

    Specific constructions to seek: socks with an elastic arch band (a ribbed section that hugs the midfoot and prevents the slide), Y-stitched or anatomical heels that cup the heel instead of sliding off it, and seamless toes (comfort bonus). Brands like Darn Tough, Smartwool, and Thorlo build all of this into their boot socks — they cost $18–$28 a pair, which stings until you calculate the cost-per-wear of socks that actually work versus the drawer of sliders you never reach for. Size down if between sizes: a snug sock stays up; a loose one never will. The Darn Tough fit guides explain the construction features that separate real boot socks from tall regular socks, and REI’s sock buying guide compares cushioning and height options.

    Fit Fixes: When the Boot Is Part of the Problem

    Sometimes the sock is fine and the boot is the issue. Boots with too much volume — too wide, too long, or with a shaft too loose around the calf — let the foot piston up and down with each step, and that movement drags the sock down regardless of its quality. If your heel lifts significantly when you walk, the boot is too big or needs fitting help: try a tongue pad, a heel grip, or a thicker insole to take up volume. Lace-up boots should be laced snugly through the ankle (the “heel lock” lacing technique prevents lift); pull-on boots need to fit the calf closely enough not to gap.

    Calf fit deserves special attention with tall boots: if the shaft is much wider than your calf, the sock has nothing to brace against and the boot’s movement works it down relentlessly. Boot shafts can be taken in by a cobbler, or calf-width inserts and boot shapers reduce the gap. For the common case of boots that fit the foot but gape at the calf, wearing over-the-calf socks whose cuff sits above the boot top solves it elegantly — the cuff anchors on your leg, independent of the boot shaft entirely.

    Anti-Slide Tricks and Hacks

    Beyond proper socks and boot fit, several tricks add insurance. Sock garters or sock suspenders — the old-fashioned elastic bands worn around the calf — are unfashionable and completely effective; modern versions are discreet and comfortable. Fashion tape (double-sided body tape) between sock cuff and skin holds through a full day. A light application of anti-chafe balm on the calf where the cuff sits increases grip slightly.

    Layering works too: a thin liner sock under the boot sock adds friction between layers and manages moisture — the liner stays with the foot while the outer sock stays with the boot, and the relative motion happens between sock layers instead of dragging everything down. Tucking pant legs into the socks (for work boots and outdoor use) adds compression that holds the cuff up. And the simplest hack of all: fold the sock cuff down over the boot shaft — the fold creates a mechanical lock that resists sliding, looks intentional with many boot styles, and costs nothing.

    Socks slide down inside boots because gravity, boot-shaft shear, sweat, and weak sock construction defeat the cuff’s grip. Fix it with real boot socks — over-the-calf height, strong elastic, arch bands, merino blends, sized snugly — plus boot fit that prevents heel lift. Sock garters, fashion tape, or folding the cuff over the shaft add insurance for stubborn cases.

    Conclusion

    The migrating sock is not a fact of boot-wearing life — it is a symptom of wrong socks, loose boots, or both. Invest in proper boot socks with real structure, dial in your boot fit so the foot is not pistoning, and deploy the anti-slide tricks for insurance. Your feet will stop negotiating with bunched fabric by noon, and you will wonder why you tolerated it for so long. For more footwear problem-solving, explore our fashion section, read about our practical philosophy, or share your own anti-slide discoveries.

    Frequently Asked Questions

    Why do my socks always slide down in my boots?

    Boot shafts create shear force at the ankle, roomier boot fits let the foot move independently of the sock, sweat reduces friction, and most regular socks lack the cuff elastic, arch support, and height to resist. Cotton crew socks are among the worst offenders — they absorb moisture, lose shape, and slide.

    What kind of socks stay up in boots?

    Real boot socks: over-the-calf or knee-high height (cuff grips above the boot top), strong cuff and arch elastic, cushioned foot, anatomical heel, and moisture-wicking merino wool blends. Darn Tough, Smartwool, and Thorlo are benchmark brands. Size snugly — loose socks never stay up.

    Can boot fit cause socks to slide?

    Yes — boots with excess volume let the foot piston with each step, dragging any sock down. Fix heel lift with heel-lock lacing, tongue pads, heel grips, or thicker insoles. Shafts much wider than the calf let the sock migrate; over-the-calf socks anchor above the shaft independently.

    Do sock garters actually work?

    Yes — elastic sock garters around the calf are old-fashioned and completely effective at holding cuffs up. Modern versions are discreet and comfortable. Fashion tape between cuff and skin, or folding the cuff over the boot shaft, are simpler alternatives.

    Should I wear liner socks under boot socks?

    It helps in stubborn cases: the liner stays with the foot, the outer sock stays with the boot, and relative motion happens between the layers instead of dragging everything down. It also adds moisture management — a legitimate two-sock system for work and hiking boots.

    Are expensive boot socks worth it?

    Usually yes — $18–$28 pairs from Darn Tough or Smartwool with proper construction (arch bands, anatomical heels, strong elastic, merino blends) outlast and outperform cheap multipacks dramatically. Cost-per-wear favors the good socks, and many come with lifetime guarantees.

  • How to Look Professional on Zoom From Your Kitchen

    How to Look Professional on Zoom From Your Kitchen

    Your “office” is a kitchen table with a dish rack in the peripheral vision, and your next Zoom call is with people whose judgment affects your career. Looking professional from a kitchen is not about pretending you have a corner office — it is about controlling what the camera sees, how you sound, and the small signals that say “I take this seriously” regardless of the room behind you. Remote work veterans have refined this to a science, and most of it costs nothing.

    Control the Frame: What the Camera Sees

    The camera shows a rectangle roughly from your chest up plus some background — that is your entire visual world, so curate it ruthlessly. Position yourself with a clean, uncluttered background: a plain wall is perfect; a tidy shelf or a single plant is fine; the dish rack, trash can, and refrigerator covered in magnets are not. If your kitchen layout forces a busy background, a simple room divider screen, a hung curtain, or even a neatly arranged bookshelf behind you transforms the shot. Virtual backgrounds are a last resort — they glitch around hair and movement, and everyone can tell.

    Camera angle is the most underrated professional signal. Laptop cameras shoot from below by default, which is the least flattering and least authoritative angle — it is the visual equivalent of mumbling. Elevate the camera to eye level with a stack of books, a box, or a laptop stand; the lens should be at or slightly above your eyes. Sit back an arm’s length so your head and shoulders fill the frame naturally, not looming or distant. And clean the lens — a smeared camera makes you look blurry and unprofessional before you say a word.

    Light Yourself Like You Mean It

    Bad lighting makes everyone look tired and unprofessional; good lighting is free. Face a window — natural light on your face is the single best video light available, and it costs nothing. Never sit with a bright window behind you; the camera exposes for the brightness and turns you into a silhouette. If your kitchen’s window is behind your seating position, rearrange: even swapping which side of the table you sit on can fix it.

    For windowless kitchens or evening calls, a simple setup works: a desk lamp or ring light positioned behind the camera, aimed at your face, at roughly eye level. Avoid overhead kitchen fluorescents alone — they cast harsh downward shadows that age everyone a decade. A $20 ring light or even a well-placed floor lamp eliminates the problem. Test your setup with a quick recording before important calls; what looks fine to your eye often looks different through the webcam’s harsher judgment.

    Dress for the Camera, Not the Kitchen

    The waist-up rule is real, but apply it intelligently. Wear a proper top — a collared shirt, blouse, blazer, or quality knit in a solid color or subtle pattern. Solid colors read best on camera; small busy patterns (thin stripes, tiny checks) can shimmer and moiré on video, so avoid them. Jewel tones and medium tones flatter most people on webcam; stark white can blow out the exposure, and all-black can lose definition in poor light.

    Grooming counts double on video because the camera is inches from your face: neat hair, clean and intentional facial hair or clean shave, minimal shine (blot oily skin — webcams exaggerate shine). And dress fully, not just waist-up — you might need to stand up, the doorbell might ring, and the psychological effect of being fully dressed is real and measurable. Professional on top and pajamas below is a risk with zero upside. The PCMag webcam tips cover the technical setup details that complement the styling, and Wired’s remote work setup advice covers more home-office upgrades.

    Sound and Environment: The Invisible Professionalism

    Audio quality affects perceived professionalism more than video quality — people forgive a mediocre picture but tune out bad audio. Kitchens are acoustically hostile: hard surfaces echo, refrigerators hum, and dishwashers rumble. Use earbuds or a headset with a microphone rather than the laptop’s built-in mic; the difference is dramatic. A $30 USB microphone is a career-grade upgrade for anyone on calls daily. Mute when not speaking, especially in a kitchen where background noises (the ice maker, the kettle) broadcast to everyone.

    Manage the environment: tell household members your call schedule, put the dog in another room, silence phone notifications, and close unnecessary browser tabs (screen shares reveal everything). If the kitchen is unavoidably active during your call, acknowledge it briefly and move on — “apologies, working from the kitchen today” said once with confidence beats anxious over-apologizing. Everyone has seen kitchens on Zoom for years now; normalcy, handled well, is professional.

    The Behavioral Layer: Presence on Camera

    Looking professional is half the battle; acting it is the rest. Look into the camera lens when speaking, not at the faces on screen — it creates eye contact for everyone else. Sit upright with shoulders back; kitchen chairs encourage slouching, so be deliberate. Keep water nearby but off-camera-ish, and avoid eating on camera (the kitchen proximity tempts; resist).

    Prepare like the call matters: have notes and documents open before it starts, join two minutes early, and test screen-sharing in advance. Engage visibly — nod, react, unmute promptly — since the remote participant who is visibly present gets more credit than the one who might be checking email. And build a tiny pre-call ritual: two minutes to check frame, light, audio, and appearance. Professionals in real offices do not walk into meetings mid-bite; your kitchen desk deserves the same two-minute transition.

    Looking professional on Zoom from your kitchen means controlling the small frame the camera sees (clean background, eye-level lens, face the window), dressing waist-up in solid colors with full grooming, upgrading audio with earbuds or a USB mic, muting kitchen chaos, and behaving with meeting-room presence — eye contact with the lens, upright posture, and visible engagement.

    Conclusion

    Your kitchen is not a disadvantage once you engineer it: curate the background, fix the light and angle, dress and groom for the camera, sound like you are in a studio, and show up with presence. None of this requires a renovation or expensive gear — just intention applied to the details everyone notices but few articulate. The people on your calls will register “professional” without ever thinking about your dish rack. For more remote-work guidance, explore our fashion section for video-ready style, learn about our practical philosophy, or share your own setup tips.

    Frequently Asked Questions

    How do I hide my kitchen on Zoom calls?

    Position yourself against the cleanest wall or a tidy shelf, use a room divider screen or hung curtain as a backdrop, and frame the shot chest-up so counters stay out of view. Virtual backgrounds are a last resort — they glitch and look artificial.

    What is the best lighting for video calls in a kitchen?

    Face a window for free, flattering natural light — never sit with the window behind you (it silhouettes you). For dark kitchens or evening calls, place a lamp or ring light behind the camera at eye level aimed at your face; avoid relying on overhead fluorescents alone.

    What should I wear on Zoom when working from home?

    A proper top in solid colors — collared shirt, blouse, blazer, or quality knit. Avoid small busy patterns (they shimmer on video), stark white (blows out exposure), and all-black in poor light. Dress fully, not just waist-up, in case you need to stand.

    How do I improve my audio on Zoom from a noisy kitchen?

    Use earbuds or a headset mic instead of the laptop microphone — the improvement is dramatic. A $30 USB mic is a career-grade upgrade for daily callers. Mute when not speaking, and relocate away from humming appliances when possible.

    Where should my camera be positioned?

    At eye level — elevate the laptop on books or a stand so the lens sits at or slightly above your eyes. Sit an arm’s length back so head and shoulders fill the frame. Below-eye-level angles are unflattering and read as unprofessional.

    How do I look engaged on video calls?

    Look into the lens (not the screen) when speaking to create eye contact, sit upright, nod and react visibly, unmute promptly, and join two minutes early with materials ready. Visible presence earns the same credit remotely that physical presence earns in person.