Breaking

Category: Fashion

  • When Is It Too Cold to Wear a Dress Without Tights in Chicago?

    When Is It Too Cold to Wear a Dress Without Tights in Chicago?

    Chicago does not do mild winters. When the wind comes off the lake in January, the question of whether you can wear a dress without tights stops being about fashion and becomes about survival. Every Chicago woman has her own threshold — the temperature where bare legs go from “brisk but fine” to “genuinely dangerous” — but there are real physiological and practical factors behind that number. Here is how to think about it, the actual temperature guidance, and how to keep wearing dresses all winter without frostbite.

    The Honest Temperature Answer

    For most people, the comfort threshold for bare legs is around 50°F (10°C) — below that, exposed skin starts losing heat faster than feels pleasant, especially with any wind. In Chicago terms: early fall and late spring are bare-leg territory; by November, most Chicagoans have switched to tights. The danger threshold is much lower: exposed skin can develop frostbite in 30 minutes at wind chills near 0°F, and in under 10 minutes at wind chills of -20°F or below — conditions Chicago hits most winters. Between comfort and danger lies a wide zone where bare legs are merely miserable, which is where judgment calls live.

    The wind is the real variable. Chicago’s wind chill can make a 35°F day feel like 20°F on exposed skin, and wind strips heat from bare legs far faster than still air. A calm 45°F evening might be fine for a quick walk to the restaurant; a windy 45°F day with a ten-block walk is a different proposition. Check the “feels like” temperature, not just the thermometer — for bare-leg decisions, the feels-like number is the honest one. And factor in your activity: standing on an L platform for 15 minutes exposes you far more than dashing from a heated car to a heated building.

    Why Bare Legs Get Cold So Fast (The Science)

    Legs are particularly vulnerable to cold because of blood flow patterns. In cold conditions, your body constricts blood vessels in the extremities to protect core temperature — fingers, toes, and exposed legs get less warm blood first. Bare legs also have a high surface-area-to-volume ratio with no insulation, so they radiate heat rapidly. Add wind, which strips away the thin layer of warmed air clinging to skin, and heat loss accelerates dramatically.

    Individual variation is real: circulation, body composition, acclimatization, and even what you ate and drank affect cold tolerance. Chicagoans who have lived through five winters genuinely tolerate cold better than newcomers — partial acclimatization is physiological, not just toughness. But acclimatization has limits, and no amount of local pride changes the frostbite math. Dress for the conditions, not for the reputation.

    The Tights Spectrum: Warmth Without Sacrificing the Dress

    The reason this question has a happy answer is that modern tights are not the flimsy nylons of decades past. Fleece-lined tights — the Chicago winter hero — provide genuine warmth down into the 20s and even teens, especially under a longer dress or with boots. Look for fleece-lined or thermal tights rated for cold weather; they look like regular black tights from the outside while hiding serious insulation. Merino wool tights offer excellent warmth-to-bulk ratio and regulate temperature well for variable indoor-outdoor days.

    Layer strategically: on the coldest days, thin thermal leggings under fleece-lined tights create a double barrier that handles single digits. Opaque tights (80+ denier) work for the 30s and 40s. And the dress itself matters — a midi or maxi dress with boots covers far more than a mini, effectively extending your bare-leg-free range downward by 10–15 degrees. Knee-high boots versus ankle boots make a similar difference: every inch of coverage counts. The Racked’s winter tights guides have historically offered good product roundups for serious cold, and Who What Wear’s winter styling tips include more cold-weather layering ideas.

    Styling Dresses for Chicago Winter (Looking Good, Staying Warm)

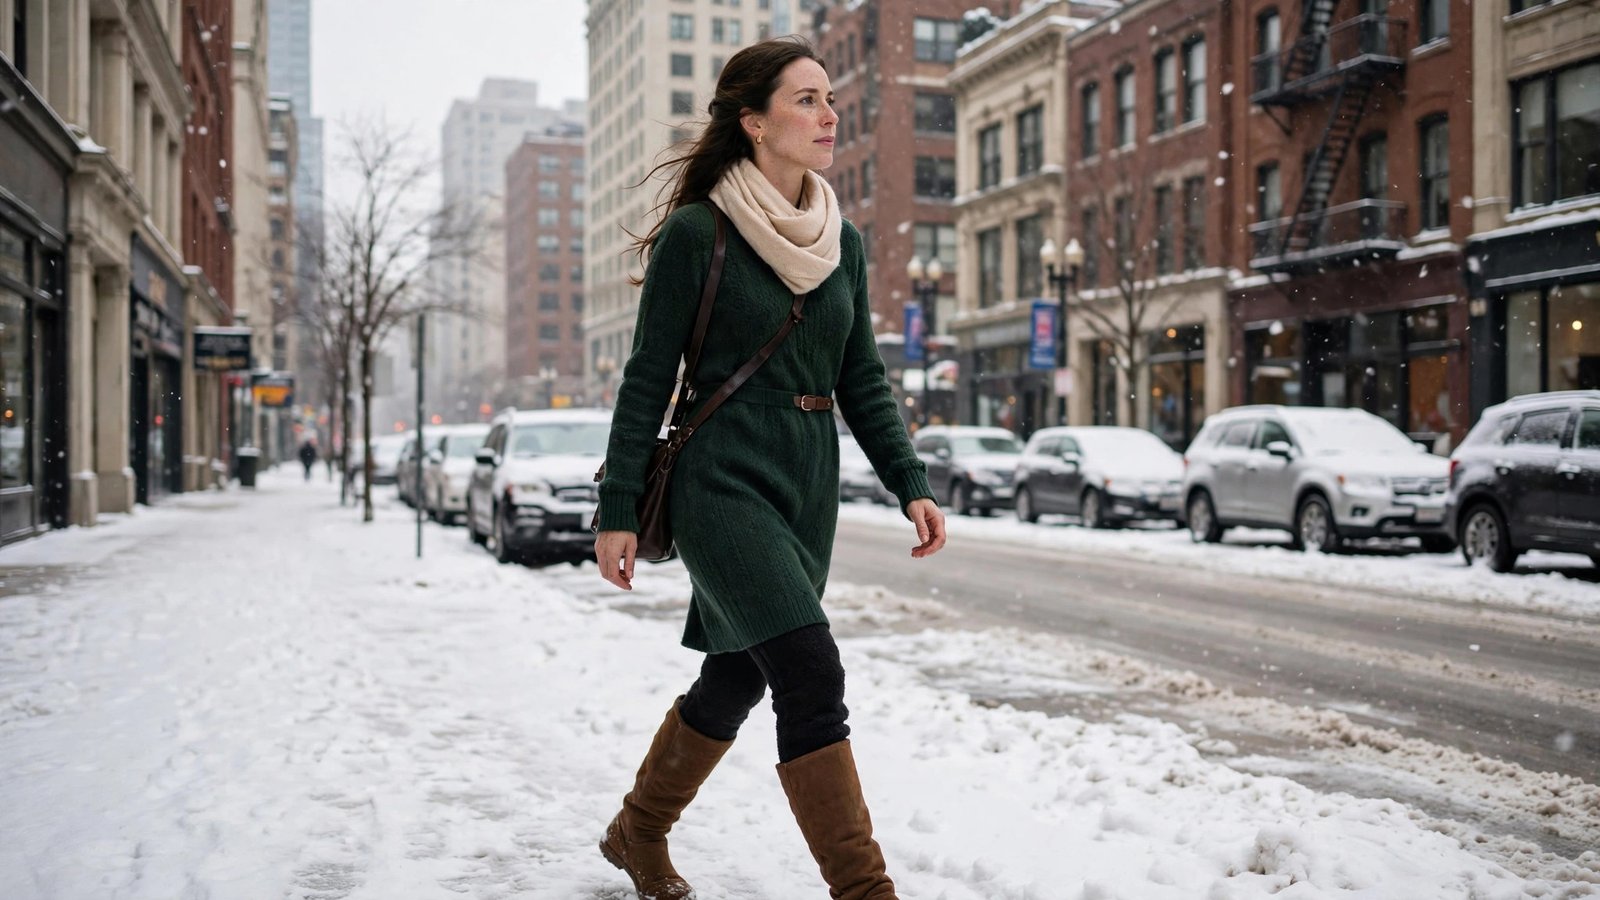
    Winter dress dressing in Chicago is a solved style problem. The formula: a dress in a heavier fabric (sweater dresses, wool blends, ponte, corduroy — fabrics with actual substance), fleece-lined or wool tights, knee-high or over-the-knee boots, and a proper coat. A sweater dress with fleece tights and over-the-knee boots is warm into the 20s and looks intentional rather than bundled. Dark tights with dark boots create a long leg line; the monochrome trick works for warmth dressing too.

    The coat is doing heavy lifting: a wool coat that covers the dress hem keeps the whole outfit’s warmth envelope intact — a cropped puffer over a dress leaks heat at the waist. For evenings, a long wool coat over a cocktail dress with fleece tights and heeled boots is the Chicago formal uniform from November to March. Keep a stylish scarf, gloves, and hat in the rotation; they are non-negotiable below freezing and complete the look rather than compromising it. Nobody in Chicago judges winter practicality — the city respects survival dressing.

    The Occasion Exceptions (Weddings, Events, Nights Out)

    Special occasions tempt bare legs in defiance of physics. The workable compromise: sheer black tights or nude-for-you tights with a slight sheen read as “dressed up” while providing a meaningful wind barrier — not warmth exactly, but significantly better than nothing. For outdoor photos, the classic Chicago move is the coat-on-between-shots strategy: arrive wrapped, shed for the two-minute photo, rewarm immediately. Brides and wedding parties do this all winter; it works.

    For the venue itself, remember that Chicago buildings are heated aggressively — the challenge is transit, not the event. A long coat, warm transit layers you shed at coat check, and tights under the dress handle the evening fine. Rideshare door-to-door instead of the L when dressed up in deep winter; the $15 fare is cheaper than frostbite. And keep emergency backup in your bag: foldable flats if heels become unbearable on icy sidewalks, because Chicago ice shows no mercy to stilettos.

    In Chicago, bare legs are comfortable to about 50°F and genuinely risky near 0°F wind chill — but fleece-lined tights, longer dresses, and knee-high boots extend dress-wearing deep into winter. Check the feels-like temperature, dress for wind as much as cold, use the coat-on-between-shots strategy for events, and remember that Chicago respects survival dressing over suffering for style.

    Conclusion

    The dress-without-tights season in Chicago runs roughly April through October, with November and March as judgment-call months depending on wind and your transit situation. Below that, the modern winter toolkit — fleece-lined tights, wool tights, sweater dresses, knee-high boots, and proper long coats — keeps dresses in rotation all winter without heroics. Dress for the feels-like temperature, layer intelligently, and save the bare legs for the months when Lake Michigan is not trying to freeze them. For more seasonal style guidance, browse our fashion section, read about our practical philosophy, or share your Chicago winter style tips.

    Frequently Asked Questions

    At what temperature is it too cold to wear a dress without tights?

    Most people find bare legs uncomfortable below about 50°F, especially with wind. In Chicago, factor in wind chill — a windy 45°F day can feel like 20°F on exposed skin. Near 0°F wind chill, exposed skin risks frostbite within 30 minutes.

    What are the warmest tights for Chicago winter?

    Fleece-lined tights are the top pick, warm into the 20s and below under a longer dress. Merino wool tights offer excellent warmth with less bulk. For single digits, layer thin thermal leggings under fleece-lined tights.

    How do Chicago women wear dresses to winter weddings?

    Sheer black tights for a dressed-up look with some wind protection, a long wool coat over the dress, heeled boots, and the coat-on-between-shots strategy for outdoor photos. Rideshare door-to-door instead of braving the L in formalwear.

    Does the dress length matter for winter warmth?

    Enormously. A midi or maxi dress with boots effectively extends your comfortable range 10–15 degrees lower than a mini, since it covers the thigh area where heat loss is greatest. Pair longer hemlines with knee-high boots for maximum coverage.

    Should I check the temperature or the wind chill for outfit decisions?

    The feels-like temperature (which includes wind chill) — it is the honest number for exposed-skin decisions. Chicago wind strips heat from bare legs far faster than still air at the same thermometer reading.

    What coat works best over a winter dress?

    A wool coat long enough to cover the dress hem, which keeps the outfit’s warmth envelope intact. Cropped puffers leak heat at the waist over dresses. For the coldest days, a long down coat over everything is the pragmatic Chicago choice.


  • How to Keep Leather Boots From Cracking in Winter

    How to Keep Leather Boots From Cracking in Winter

    Winter is brutal on leather boots. Road salt, slush, freezing temperatures, and the cycle of getting soaked then drying by the radiator conspire to turn supple leather dry, stiff, and eventually cracked — those fine lines across the toe and creases that deepen into splits. Cracked leather is not just cosmetic; cracks are structural failures where the leather’s fibers have broken, and deep cracking cannot be fully reversed. But it is almost entirely preventable, and early-stage dryness can be rescued. Here is how to keep your boots alive through winter and beyond.

    Why Leather Cracks in Winter

    Leather is skin — tanned and preserved, but still a matrix of protein fibers that needs its natural oils to stay flexible. Winter attacks on three fronts. First, water: slush and rain saturate the leather, and as water evaporates it carries away the leather’s oils with it, leaving fibers dry and brittle. Second, road salt: salt is hygroscopic and corrosive — it draws moisture out of the leather while depositing white crusty stains, a double assault that desiccates and chemically stresses the fibers. Third, heat: drying soaked boots by the radiator or with a hair dryer flash-dries the leather, shocking the fibers and guaranteeing cracks.

    The cracking mechanism is simple: dry fibers lose elasticity, and then the normal flexing of walking — thousands of bends at the toe crease — snaps the brittle fibers instead of bending them. Each winter of neglect compounds the damage. This is why boots that survived three winters suddenly crack in the fourth: the oil depletion is cumulative, and the fibers finally cross the brittleness threshold. Prevention is not a one-time treatment but a seasonal maintenance rhythm.

    The Winter Protection Routine: Before, During, After

    Before winter starts, waterproof and condition. Clean the boots first (dirt trapped under conditioner grinds into the leather), then apply a waterproofing product: silicone sprays work for most smooth leathers, while wax-based products like Sno-Seal or Obenauf’s provide heavier protection for work boots. For dress boots where appearance matters, a quality cream polish with water-resistant properties plus a separate water-repellent spray keeps them handsome and protected. Apply two light coats rather than one heavy one, buffing between coats.

    During winter, wipe boots down after every salty outing — a damp cloth removes salt before it can work into the leather, and this single habit prevents more damage than any product. Let wet boots dry slowly at room temperature, stuffed with newspaper or shoe trees to absorb moisture and hold shape; never use direct heat. Rotate boots if you can — 24 hours of rest between wears lets leather dry fully and extends life dramatically. Reapply water repellent monthly during heavy winter use; you will notice water stop beading as the signal.

    After winter (or whenever boots look dry), deep condition. Clean thoroughly, then apply a leather conditioner — Bick 4, Lexol, Saphir Renovateur, or mink oil for work boots — working it into the leather with a cloth, paying special attention to the toe creases and flex points where cracks start. Let it absorb for 15–30 minutes, then buff off the excess. Conditioning replaces the oils that winter stripped out and restores flexibility to fibers before they reach the cracking point. The Saphir leather care guides detail product selection by leather type for those who want to go deep.

    Dealing With Salt Stains (Do This Immediately)

    White salt lines are winter’s calling card, and they need prompt attention — salt left on leather keeps drawing out moisture indefinitely. Mix equal parts white vinegar and water, dampen a cloth, and wipe the salt stains gently; the mild acid dissolves the salt deposits. Follow with a clean damp cloth to remove the vinegar, let dry at room temperature, then condition the area — the salt and the cleaning both strip oils, so conditioning afterward is mandatory, not optional.

    For heavy salt exposure (boots worn through slush daily), consider this a weekly ritual rather than an occasional rescue. Some boot owners in salt-heavy cities keep a dedicated “salt kit” by the door: a cloth, a spray bottle of the vinegar solution, and conditioner. Thirty seconds of wiping when you walk in beats an hour of restoration in spring. If salt has already left dark watermarks, they often fade with cleaning and conditioning, but deep salt damage that has altered the leather’s texture may be permanent — another argument for prompt wiping.

    Rescuing Dry Boots (and Knowing When They Are Gone)

    Boots that are dry and stiff but not yet cracked can usually be saved with intensive conditioning: clean them, apply conditioner generously, let it soak in for several hours or overnight, buff, and repeat. Two or three rounds of this can restore remarkable suppleness to neglected leather. Focus on the flex zones — the toe crease area and the ankle bend — since those are where cracks will start if dryness persists.

    Surface cracking — fine lines in the finish — can be improved cosmetically with cream polish in a matching color, which fills the micro-cracks and restores an even appearance, followed by conditioning to prevent deepening. But deep cracks that go through the leather’s grain layer are structural failures; no product truly repairs broken fibers. A cobbler can sometimes patch or reinforce cracked areas, but at a certain point the economics and aesthetics argue for replacement. The lesson is always the same: the $15 bottle of conditioner and the 30-second wipe-down are infinitely cheaper than new boots. The Red Wing boot care resources offer excellent model-specific maintenance schedules.

    Leather boots crack in winter because water, road salt, and heat strip the leather’s oils until the fibers turn brittle and snap at the flex points. Prevent it with pre-winter waterproofing, salt wipe-downs after every outing, room-temperature drying (never radiators), monthly re-treatment, and deep conditioning — and rescue dry-but-uncracked boots with repeated overnight conditioning before the damage becomes structural.

    Conclusion

    Winter boot care is a simple seasonal rhythm, not a major project: protect before the snow, wipe salt the moment you come inside, dry slowly, condition deeply, and repeat. The boots that crack are almost always the boots that went unconditioned through three winters of salt and slush — not victims of bad luck but of skipped maintenance. Fifteen minutes of care per month keeps $200 boots going for a decade. For more wardrobe longevity guides, explore our fashion section, read about our practical philosophy, or share your boot care routine.

    Frequently Asked Questions

    Why do my leather boots crack in winter?

    Water, road salt, and heat strip the leather’s natural oils, leaving the protein fibers dry and brittle. Normal walking then flexes those brittle fibers until they snap — usually at the toe crease. The oil depletion is cumulative across winters, which is why cracking often appears suddenly after years of neglect.

    How do I waterproof leather boots for winter?

    Clean first, then apply silicone spray for most smooth leathers or wax-based products (Sno-Seal, Obenauf’s) for work boots — two light coats, buffed between. For dress boots, use a quality cream polish plus water-repellent spray to protect without dulling the finish. Reapply monthly in heavy use.

    How do I remove road salt stains from boots?

    Wipe with a cloth dampened in equal parts white vinegar and water, follow with a clean damp cloth, air-dry at room temperature, then condition — the salt and cleaning both strip oils. Do this promptly; salt left on leather keeps drawing out moisture. Make it a habit after every salty outing.

    Can I dry wet boots by the radiator?

    Never. Direct heat flash-dries leather, shocking the fibers and virtually guaranteeing cracks. Stuff wet boots with newspaper or shoe trees and let them dry slowly at room temperature, away from heat sources. Rotate pairs so each gets 24 hours of rest.

    Can cracked leather boots be repaired?

    Dry-but-uncracked boots can be rescued with repeated deep conditioning. Surface finish cracks improve cosmetically with matching cream polish plus conditioning. Deep structural cracks through the grain layer cannot truly be repaired — a cobbler may reinforce them, but prevention is vastly better than cure.

    How often should I condition leather boots in winter?

    Deep condition at the start of the season and again when winter ends (or whenever leather looks dry), reapply water repellent monthly during heavy use, and wipe salt after every outing. Watch for water beading — when it stops, re-treat.

  • What a Short Man Should Wear to Look Taller (No Heels)

    What a Short Man Should Wear to Look Taller (No Heels)

    Dressing to look taller as a shorter man has nothing to do with vanity and everything to do with proportion. The eye judges height by the unbroken vertical line of an outfit — and most shorter men unknowingly chop that line into segments with contrasting colors, low rises, wide breaks, and oversized fits. The fix is not heels or lifts (though those exist); it is a set of proportion principles that create one long, clean visual line from shoulder to shoe. Done right, the effect is worth several perceived inches.

    The Core Principle: One Unbroken Vertical Line

    Everything in height-illusion dressing serves a single goal: eliminate horizontal breaks. The eye travels up and down uninterrupted, and you read taller; every sharp contrast — a white shirt against dark pants, a belt that screams across the midsection, shoes that contrast violently with trousers — stops the eye and segments you into shorter pieces. This is why monochrome and tonal dressing (different shades of one color family) is the shorter man’s superpower: a navy shirt with navy trousers, or charcoal head to toe, creates a single column that the eye reads as longer.

    This does not mean dressing like a shadow — texture and subtle pattern provide visual interest without breaking the line. A navy textured knit with navy chinos, or a charcoal suit with a subtly patterned tie, keeps the column intact while avoiding monotony. The rule to internalize: contrast at the horizontal boundaries (shirt/pants, pants/shoes) shortens; continuity lengthens. Every outfit decision flows from this.

    Fit: The Make-or-Break Factor

    Oversized clothing is the enemy of the shorter man. Excess fabric — pooling trousers, sleeves past the wrist, shirt tails billowing, shoulders extending beyond your own — visually compresses you by emphasizing how much smaller you are than the clothes. The well-fitted alternative skims the body: shoulder seams at the shoulder edge, sleeves ending at the wrist bone, trousers with little to no break, jackets that cover the seat without swallowing it. Slim (not skinny) fits generally flatter shorter frames because they keep the silhouette clean.

    Two fit details punch above their weight. First, trouser rise: a mid to higher rise lengthens the perceived leg by raising the visual waistline — low-rise trousers do the opposite, shortening the legs and lengthening the torso, which reads shorter overall. Second, jacket length: traditional suit jackets cut for average heights often run long on shorter men, covering too much leg; look for “short” sizes (the S in 38S) and ensure the jacket hem hits around mid-seat, not below it. A tailor is essential — budget for hemming trousers and shortening sleeves as a matter of course, and buy “short” sizes off the rack whenever available.

    Proportions and Patterns That Add Height

    Scale everything to your frame. Oversized patterns (big checks, wide stripes) overwhelm a shorter man; smaller-scale patterns — narrow stripes, micro-checks, small prints — stay in proportion. Lapels should be narrower rather than wide; ties slimmer (around 2.75 to 3 inches) rather than broad; shoe profiles sleeker rather than chunky. The principle: every element’s scale should match the canvas. This extends to accessories — a massive watch or oversized bag visually shrinks the wearer.

    Vertical patterns genuinely help: pinstripes and vertical stripes guide the eye up and down, adding perceived length. But keep them subtle — a bold wide stripe breaks the monochrome rule and segments you. Necklines matter too: V-necks and open collars elongate the neck and upper torso, while crew necks and high collars visually compress. An open-collar shirt or a V-neck sweater over a collared shirt creates a vertical V that draws the eye downward in one line — one of the simplest height tricks in menswear.

    Color, Shoes, and the Finishing Details

    Match your shoes to your trousers — or at least stay in the same color family. Black shoes with black trousers, brown with brown or navy, creates continuity through the ankle instead of a hard stop. Avoid stark white sneakers with dark pants unless the rest of the outfit is deliberately casual; the contrast chops inches visually. Shoe profile matters: sleek, low-profile shoes with a slightly elongated toe read longer than round, chunky ones.

    Belts deserve caution: a high-contrast belt is a horizontal line drawn across your middle — match the belt to the trousers when possible, or wear trousers with side adjusters and skip the belt entirely. Tuck shirts in to define the waist at its natural (higher) point; untucked shirts must hit at the right length — mid-fly, not past it — or they shorten the legs. Hats add literal height and, worn confidently, work well; and posture is free vertical inches — standing straight with shoulders back is worth more than any clothing trick. The Primer Magazine style guides offer practical proportion advice specifically written for regular guys rather than models, and GQ’s style advice for shorter men covers similar proportion principles.

    What About Lifts and Heeled Boots?

    Elevator shoes and height-increasing insoles exist on a spectrum from subtle to obvious. A boot with a naturally higher heel (Chelsea boots, chukkas, and many dress boots add an inch legitimately) is uncontroversial — it is just footwear. Discrete lift insoles adding an inch inside regular shoes are a personal choice; they work but can affect comfort and shoe fit. Full elevator shoes with built-up hidden heels (adding 2–3 inches) are where opinions divide — they work visually but can look and feel unnatural if overdone, and getting “caught” is a social anxiety for many wearers.

    The honest assessment: lifts are a supplement, not a strategy. An inch from footwear plus strong proportion dressing beats three inches of lifts under a poorly fitted outfit every time — because proportion affects how tall you look in every photo and every room, while lifts only change the measurement. Master the visual principles first; add footwear height as a finishing touch if you want it, not as the foundation.

    Shorter men look taller through one unbroken vertical line: tonal/monochrome dressing, mid-to-high rise trousers with little break, fitted (never oversized) clothes, smaller-scale patterns, V-necks, shoes matched to trousers, and “short” sizes plus tailoring. Skip high-contrast belts and stark shoe breaks that segment the silhouette. Proportion dressing is worth more perceived height than any lift.

    Conclusion

    Looking taller is applied visual science, not wishful thinking. Build every outfit around continuity — matching tones, clean fit, right-scale details, vertical lines — and eliminate the horizontal breaks that segment you. Get “short” sizes, befriend a tailor, mind the shoe-trouser transition, and stand straight. None of this requires heels, expensive brands, or pretending to be someone else — just dressing with intention for the frame you have. For more proportion-smart style guidance, explore our fashion section, read about our practical philosophy, or send us your fit questions.

    Frequently Asked Questions

    What should a short man wear to look taller?

    Monochrome or tonal outfits (one color family head to toe), mid-to-high rise trousers with little or no break, well-fitted clothes in “short” sizes, smaller-scale patterns, V-necks, and shoes matched to trouser color. Avoid high-contrast belts and stark color breaks that segment the silhouette.

    Do vertical stripes make you look taller?

    Yes — pinstripes and subtle vertical stripes guide the eye up and down, adding perceived length. Keep them narrow and tonal; bold wide stripes break the monochrome effect and can segment rather than lengthen.

    Should short men wear skinny or slim fit?

    Slim (not skinny) generally flatters shorter frames best — clean and fitted without excess fabric, but not so tight it looks disproportionate. The key is eliminating pooling, billowing, and overhang rather than any specific fit label.

    Are elevator shoes worth it?

    They add real inches but work best as a supplement to proportion dressing, not a replacement. Boots with naturally higher heels (Chelsea, chukka) add an inch uncontroversially. Master fit, color continuity, and scale first — those affect perceived height in every situation.

    What jacket length is best for a shorter man?

    The hem should hit around mid-seat — covering the seat without extending well below it. Traditional regular-length jackets often run long; buy “short” sizes (e.g., 38S) and have a tailor adjust. Too-long jackets visually shorten the legs.

    Does tucking in your shirt make you look taller?

    Yes, when done right — tucking defines the waist at its natural point, and pairing it with a mid-to-high trouser rise lengthens the perceived leg line. Untucked shirts must end around mid-fly; longer untucked shirts shorten the legs visually.

  • How to Find Affordable Bridesmaid Dresses Under $100

    How to Find Affordable Bridesmaid Dresses Under $100

    Being asked to be a bridesmaid is an honor that comes with a price tag — and the dress is usually the biggest line item. Between the dress, alterations, shoes, hair, makeup, travel, and the bachelorette, bridesmaid costs routinely top $1,000, which is why “under $100 for the dress” is not just a preference but a necessity for many. The good news: the affordable bridesmaid dress market has never been better. Retailers have figured out that bridesmaids are price-sensitive, and the sub-$100 options now include genuinely beautiful dresses — not just the sad polyester sacks of decades past.

    Where to Find Real Dresses Under $100

    Start with the retailers built for this price point. Lulus is the reigning champion of affordable bridesmaid dresses — hundreds of styles under $100, an enormous color range (critical for matching the wedding palette), and a review ecosystem with real photos that shows how each dress looks on real bodies. ASOS offers trendy options often under $80 with frequent sales, plus tall, petite, and curve ranges. Amazon’s bridesmaid dress sellers (check reviews with photos obsessively) deliver surprising quality under $60, with the unbeatable advantage of fast shipping and free returns.

    Do not overlook the department store sale racks: Macy’s, Nordstrom Rack, and Dillard’s clearance sections regularly hide $200 dresses marked down under $100, and the fabric quality at that original price point shows. David’s Bridal runs constant promotions with many styles under $100, and their in-store try-on solves the fit guessing game. For the truly budget-strapped, thrift and secondhand: Poshmark and local consignment shops are full of once-worn bridesmaid dresses in standard colors, often under $50 — someone else’s dusty rose is your dusty rose. The The Knot’s bridesmaid dress guides track current affordable options by color and season.

    How to Nail the Color and Style Match

    The bride’s vision rules, so get specifics before shopping: exact color (get a swatch or paint chip, not just “blush” — blush varies wildly), fabric type if it matters (chiffon vs. satin photograph very differently), length, and neckline parameters. Order swatches when available — Lulus, Azazie, and many Amazon sellers offer them for a few dollars, and a $3 swatch prevents a $70 mistake. Compare the swatch to the bride’s in natural daylight, not store lighting.

    If the bride allows mix-and-match (increasingly common and a gift to your wallet), choose a universally flattering silhouette in the approved color rather than the cheapest option — you will rewear a simple dress, which changes the economics entirely. Convertible and wrap dresses are the budget MVP: one dress that ties a dozen ways flatters every body type in the bridal party, often under $70. When the whole party orders from one retailer like Azazie, you get color consistency plus at-home try-on programs that solve remote bridesmaid logistics.

    Fit on a Budget: Alterations Are Non-Negotiable

    A $60 dress with $40 of alterations looks like a $200 dress; a $90 dress with no alterations looks like $90. Budget for the tailor from the start — hem, strap shortening, and taking in the waist are the big three, typically $30–$60 total at a local tailor or dry cleaner. Order early enough to allow two to three weeks for alterations, and do the final fitting in the shoes and undergarments you will wear at the wedding.

    Size strategically: it is far cheaper to take in than to let out, so when between sizes, size up. Check the retailer’s size chart against your actual measurements — bridesmaid dress sizing runs notoriously small and inconsistent, and vanity sizing does not apply here. Read reviews for fit notes (“runs small in the bust,” “long torso needed”) since these save more money than any coupon. If ordering online, order two sizes when free returns are available; the return shipping is cheaper than alterations to fix the wrong size.

    The Hidden Costs (and How to Contain Them)

    The dress is just the start, so budget the full picture: alterations ($30–$60), shoes ($20–$50 — nude heels you already own are the budget answer), undergarments ($15–$30 for the right strapless bra or shapewear), and accessories. Ask the bride early what is expected for hair and makeup — professional styling can cost $100+ and is the budget item most worth discussing honestly. Many brides are understanding about budgets if you speak up early; silence followed by obvious corner-cutting helps no one.

    Contain costs with the rewear mindset: choose a dress in a color and style you would actually wear again, and the effective cost drops with each future use. A simple navy or black midi bridesmaid dress becomes a cocktail dress; a floral maxi becomes a summer event dress. The cheapest bridesmaid dress is the one you wear three times. And if the budget is truly tight, say so kindly and early — offering to do your own hair and makeup, or asking about the most affordable approved option, is completely reasonable. The Brides magazine budget guides offer scripts for the money conversation that keep friendships intact.

    Affordable bridesmaid dresses under $100 live at Lulus, ASOS, Amazon, department store clearance racks, and secondhand — get an exact color swatch before ordering, budget $30–$60 for alterations (which make a $60 dress look like $200), size up when between sizes, and choose a rewearable style so the effective cost drops with every future use.

    Conclusion

    A sub-$100 bridesmaid dress does not have to look sub-$100. Shop the retailers built for this price point, match the color with a physical swatch, invest in alterations as part of the budget, and pick something you will happily wear again. Communicate with the bride early about expectations and costs, and remember that the honor is standing beside your friend — not the price tag on the dress. For more event style guidance, browse our fashion section, read about our practical philosophy, or share your bridesmaid budget wins.

    Frequently Asked Questions

    Where is the best place to buy bridesmaid dresses under $100?

    Lulus leads on selection and color range under $100, ASOS offers trendy options under $80, Amazon sellers deliver under $60 with fast returns, and department store clearance racks (Macy’s, Nordstrom Rack) hide marked-down $200 dresses. Poshmark and consignment shops offer once-worn dresses under $50.

    How do I match the bride’s wedding color exactly?

    Get a physical swatch — not just a color name — and compare it in natural daylight. Many retailers (Lulus, Azazie, Amazon sellers) offer swatches for a few dollars. “Blush,” “dusty rose,” and similar names vary enormously between brands.

    How much do bridesmaid dress alterations cost?

    Typically $30–$60 for the common trio: hemming, strap shortening, and taking in the waist. Budget this from the start — alterations are what make a $60 dress look like a $200 dress. Allow two to three weeks before the wedding.

    Should I size up or down in bridesmaid dresses?

    Size up when between sizes — taking in is far cheaper and easier than letting out. Always check the retailer’s size chart against your actual measurements, since bridesmaid sizing runs small and inconsistent, and read reviews for fit notes.

    What are convertible bridesmaid dresses?

    Dresses with long fabric panels that wrap and tie in multiple ways, creating different necklines and silhouettes from one garment. They flatter diverse body types, suit mix-and-match bridal parties, and typically cost under $70 — the budget MVP of bridesmaid dressing.

    How do I tell the bride the dress budget is too high?

    Early, kindly, and privately — before orders are placed. Frame it around your excitement plus honesty: you want to honor her vision and need to stay within your budget. Ask about the most affordable approved option or offer to handle your own hair and makeup to offset costs. Most brides understand.

  • Why Your Jeans Always Rip at the Inner Thigh (and Fixes)

    Why Your Jeans Always Rip at the Inner Thigh (and Fixes)

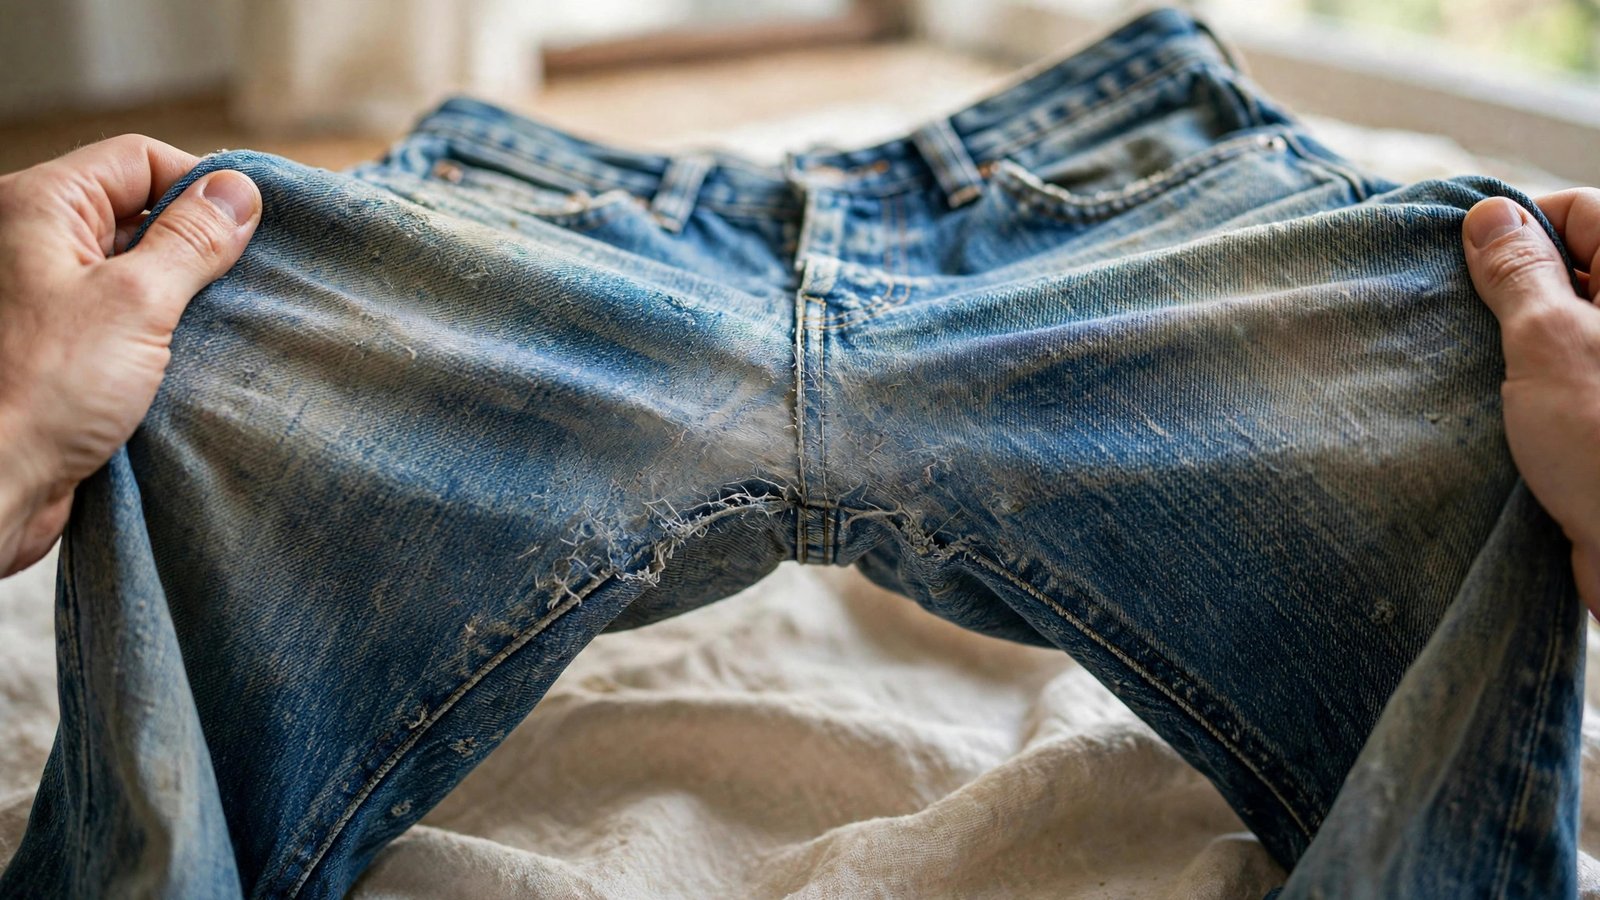
    It always happens in the same place: the inner thigh, right where your legs meet, where a small worn spot becomes a hole becomes a tear that ends the jeans. If your jeans consistently die at the inner thigh while the rest of the pair looks fine, you are not hard on clothes — you are experiencing the most predictable failure point in denim, driven by physics, fit, and friction. The good news: once you understand the mechanism, you can dramatically extend the life of every pair you own, and even rescue pairs that have already started to go.

    Why the Inner Thigh Always Goes First

    The inner thigh is where three forces converge. First, friction: your thighs rub together with every step — thousands of abrasion cycles per day, concentrated on a small area of fabric. Second, tension: when you sit, squat, or climb stairs, the fabric across the inner thigh stretches taut, stressing the same fibers that friction is already wearing thin. Third, moisture and heat: sweat and body warmth in the thigh area weaken cotton fibers over time and accelerate breakdown, which is why the failure often appears as thinning before it becomes a hole.

    Certain factors accelerate the process. Thighs that touch (extremely common and completely normal) mean constant contact friction. Stretch denim — now in the majority of jeans — fails faster here than rigid denim because the elastane fibers break down with heat and stress, and once the stretch goes, the cotton follows. Thin, lightweight denim marketed as “soft and comfortable” has less material to sacrifice before a hole appears. And frequent washing, especially hot washing and drying, weakens the fibers at the stress point faster. None of this is your fault; it is engineering meeting anatomy.

    Buying Jeans That Resist Thigh Blowout

    Fabric weight is the number one predictor of inner-thigh longevity. Denim is measured in ounces per square yard: lightweight fashion denim runs 8–10 oz, midweight 11–13 oz, and heavyweight 14 oz and up. For maximum thigh life, buy midweight or heavier — the extra material simply takes longer to abrade through. Rigid or low-stretch denim (1–2 percent elastane max, or 100 percent cotton) outlasts high-stretch blends dramatically at the stress point, because there is no elastane to break down.

    Fit matters as much as fabric. Jeans that are too tight through the thigh put the fabric under constant tension, multiplying friction damage — if you can see stress lines radiating from the inner thigh when you stand, the pair is too tight there regardless of how the waist fits. A slightly roomier thigh with a tapered leg below the knee gives you the modern silhouette without the tension. Reinforced designs exist too: some workwear and heritage brands build up the inner thigh area, and a few mainstream brands now advertise reinforced stitching. The raw denim community has extensive real-world data on which fabrics survive thigh friction longest — heavyweight Japanese denim is the perennial champion.

    Care Habits That Slow the Wear

    Washing is the silent accelerator. Every wash cycle — especially hot water and machine drying — weakens fibers at the already-stressed inner thigh. Wash jeans as infrequently as hygiene allows: spot-clean stains, air them out between wears, and wash only when they genuinely need it (many denim enthusiasts go months). When you do wash, turn them inside out, use cold water, and hang dry — the dryer is the single most destructive appliance for denim longevity, and air-drying alone can double the time to thigh failure.

    Reduce friction directly: some people swear by anti-chafe balms or powders on the thigh area, which reduce fabric-on-fabric abrasion as a side benefit of their intended purpose. Rotating between multiple pairs gives each pair’s fibers rest days to recover — wearing the same jeans daily concentrates all the wear cycles on one pair. And address the early thinning immediately (see below) rather than waiting for the hole; intervention at the thinning stage is ten times more effective than repair after the tear.

    Rescuing Jeans: From Thinning to Full Blowout

    Caught at the thinning stage — the fabric is getting translucent but has not torn — iron-on denim patches on the inside of the thigh buy months of additional life. Use a patch slightly larger than the thin area, apply with a hot iron per the package directions, and consider stitching around the edges for security. For a more durable fix, sashiko-style visible mending (decorative stitching over a patch) reinforces the area while looking intentional and stylish.

    For a full hole, you have two good options. A tailor or denim repair specialist can darn the area — weaving new thread across the hole on a sewing machine, reinforced with backing fabric. Professional darning costs $20–$40 and is nearly invisible on dark denim; specialists like Denim Surgeons or local tailors experienced with jeans do excellent work. DIY machine darning is learnable: back the hole with iron-on interfacing or denim, then zigzag stitch densely back and forth across the damaged area, extending well past the hole’s edges into healthy fabric. Either way, reinforce early — a darned repair on a small hole lasts far longer than one on a blowout the size of your palm. The iFixit repair guides include detailed denim darning walkthroughs with photos.

    The Mindset Shift: Maintenance, Not Disposal

    The inner-thigh blowout feels like a personal failing because the rest of the jeans looks fine — throwing away an otherwise perfect pair over a two-inch hole is genuinely wasteful. Reframe it as maintenance: jeans are a durable good with one known wear point, and that wear point is serviceable. A $25 darning repair on $80 jeans is obvious economics, and on beloved broken-in pairs, it is the only way to keep the fit you have spent months perfecting.

    Build the habit loop: buy heavier, lower-stretch denim with thigh room → wash rarely and cold, hang dry → rotate pairs → patch at the first sign of thinning → darn professionally when needed. Runners of this loop routinely get three to five years from a pair of jeans instead of one. Your thighs are not the problem; the system around them just needed upgrading.

    Jeans rip at the inner thigh because friction, tension, and moisture concentrate on one small area — accelerated by tight fits, high-stretch fabric, and frequent hot washing. Buy midweight or heavier low-stretch denim with thigh room, wash rarely in cold water and hang dry, iron-patch at the first sign of thinning, and get professional darning ($20–$40) for holes. It is maintenance, not a defect.

    Conclusion

    The inner-thigh blowout is physics, not fate. Choose heavier, lower-stretch denim with room in the thigh, treat washing as the fiber-killer it is, rotate your pairs, and intervene at the thinning stage with patches or professional darning. Do that, and your jeans will die of old age and changing tastes — not a hole in the same place as the last five pairs. For more wardrobe longevity guides, explore our fashion section, read about our practical philosophy, or share your denim survival stories.

    Frequently Asked Questions

    Why do my jeans always rip in the inner thigh first?

    Friction from thighs rubbing with every step, tension when sitting or climbing stairs, and moisture weakening the fibers all concentrate on the inner thigh. Tight fits, high-stretch fabrics, and frequent hot washing accelerate the process. It is the most predictable failure point in denim.

    What kind of jeans last longest at the inner thigh?

    Midweight to heavyweight denim (11+ oz), rigid or low-stretch fabric (2% elastane or less), and a fit with room through the thigh. Heavyweight Japanese denim from heritage brands is the gold standard for abrasion resistance.

    How can I prevent the inner thigh from wearing out?

    Wash rarely in cold water and hang dry (the dryer is the biggest accelerator), rotate between pairs, ensure thigh room in the fit, and iron-patch the area at the first sign of thinning — intervention before the hole is ten times more effective than repair after.

    Can a tailor fix jeans ripped at the inner thigh?

    Yes — professional darning ($20–$40) weaves new thread across the hole with backing fabric and is nearly invisible on dark denim. It works best on smaller holes; reinforce early rather than waiting for a palm-sized blowout.

    Does stretch denim rip faster at the thigh?

    Yes. The elastane fibers in stretch denim break down under heat and repeated stress, and once the stretch fails the cotton follows. Low-stretch or rigid denim significantly outlasts high-stretch blends at stress points.

    Is it worth repairing jeans or should I just replace them?

    A $20–$40 darning repair on $80+ jeans is clear economics, and on well-broken-in pairs it preserves a fit you cannot buy new. Combined with preventive buying and care, repaired jeans routinely last three to five years.

  • How to Build a 20-Piece Capsule Wardrobe for Under $500

    How to Build a 20-Piece Capsule Wardrobe for Under $500

    Twenty pieces, under $500, and an answer to “I have nothing to wear” every single morning. That is the promise of a capsule wardrobe done right — a small, intentional collection where everything works with everything else, so getting dressed becomes assembly rather than archaeology. The $500 budget is the part that makes people skeptical, but it is entirely realistic if you shop strategically: the math works out to $25 per piece on average, and with the right retailer mix and a thrift-store assist, you can build a genuinely polished wardrobe without a single splurge.

    The Capsule Wardrobe Rules (and Which Ones to Bend)

    Classic capsule wardrobes follow a few principles: a cohesive color palette (so everything mixes), versatile basics over statement pieces, quality over quantity, and pieces that suit your actual life rather than an imagined one. The traditional formula is around 30–40 pieces per season; we are going tighter at 20 total because constraints force better decisions. Every piece must earn its place by pairing with at least three others — if it only works in one outfit, it does not make the cut.

    Bend the rules where your life demands it. If you work from home, weight the capsule toward elevated casual rather than office wear. If your social life runs dressy, reserve two slots for occasion pieces. The palette rule is the one to keep strictest: pick two neutrals (say, navy and gray, or black and camel) plus white and one accent color, and buy nothing outside the family. This single discipline is what makes 20 pieces feel like 60 outfits. Shoes and outerwear count in the 20 — they are the most expensive slots, so choose them first and build around them.

    The 20-Piece List: Exactly What to Buy

    Here is a concrete 20-piece capsule for a versatile everyday life, with realistic budget pricing. Tops (6): two white/cream tees ($12 each at Target), two neutral long-sleeve tees or henleys ($15 each), one Oxford button-down in white or light blue ($25), one fine-gauge sweater in your neutral ($30). Bottoms (4): dark jeans ($35), black or navy chinos ($30), one midi skirt or tailored shorts depending on preference ($25), one pair of comfortable neutral trousers ($30). Layers (3): a denim jacket or utility jacket ($40), a neutral cardigan or zip fleece ($30), one blazer in navy or black — thrifted ($25).

    Dresses/jumpsuit (1): one simple dress in a dark neutral that dresses up or down ($35). Shoes (3): white leather-look sneakers ($40), neutral loafers or ballet flats ($35), one pair of boots or dress shoes — thrifted or on sale ($40). Outerwear (1): one versatile coat — a wool-look overcoat or quality puffer, thrifted or end-of-season sale ($60). Accessories (2): a structured neutral bag — thrifted ($20), a simple belt ($15). Total: roughly $480, with room to flex. The thrift store is doing heavy lifting on the blazer, coat, and bag — the three pieces where secondhand quality per dollar is unbeatable.

    Where to Shop the $500 Capsule

    Split your budget across three tiers. Tier one, the affordable basics workhorses: Target (A New Day, Universal Thread, All in Motion), Old Navy, and Uniqlo for tees, knits, and casual bottoms — the quality-per-dollar here is excellent for simple pieces. Tier two, the mid-range anchors: shop sales at J.Crew Factory, Banana Republic Factory, and Nordstrom Rack for the jeans, chinos, sweater, and shoes — never pay full price at these stores; their sale cycles are constant. Tier three, thrift and secondhand: Goodwill, local consignment shops, Poshmark, and ThredUp for the blazer, coat, bag, and boots — these are the pieces where $25 secondhand buys what $150 buys new.

    Timing matters: build the capsule during end-of-season sales (August for summer pieces, February for winter) when basics hit 50–70 percent off. Sign up for the factory stores’ email lists for the coupon cycles. And try everything on — at $25 a piece average, fit is what separates a capsule that looks intentional from one that looks cheap. Budget $30–$40 of the $500 for basic tailoring (hemming trousers, taking in a blazer waist); it is the highest-return spending in the entire project.

    Making 20 Pieces Feel Like 60 Outfits

    The magic is in the math of combinations. With a disciplined palette, each top works with each bottom: 6 tops × 4 bottoms is 24 combinations before layers, shoes, or the dress enter the picture. Add the layering pieces and you are past 60 distinct outfits. The styling tricks that multiply further: the French tuck (transforms every tee-and-jeans combo), rolling sleeves, swapping shoes (sneakers versus loafers completely changes an outfit’s register), and adding the blazer over anything for instant polish.

    Maintain the capsule with two rules. One in, one out: when you buy something new, something old leaves — this prevents the slow creep back to closet chaos. And the 30-day list: when you want to add a piece, write it down and wait 30 days; if you still want it and it matches the palette and pairs with three existing pieces, it earns a slot (and something else exits). Most impulse wants die within two weeks, which is exactly the point. The ThredUp style guides offer good inspiration for building secondhand capsules on tight budgets, and Who What Wear’s capsule wardrobe guides show more 20-piece combinations.

    What the $500 Capsule Cannot Do (Honest Limits)

    Set expectations honestly. This capsule covers everyday life beautifully — work (business casual), weekends, social dinners, travel — but it does not cover specialized needs: formal events, harsh winters requiring serious gear, gym clothes, or professional wardrobes with strict dress codes all need supplements. Very tall, very petite, or plus-size shoppers may need to adjust the retailer mix, since the budget tier’s size ranges vary — Old Navy and Target have the most inclusive sizing at these prices.

    Also be honest about replacement: at this budget, tees and sneakers are consumables with a one-to-two-year life. The capsule is not a one-time $500 forever — it is $500 to build and maybe $100–$150 a year to maintain as basics wear out. That is still dramatically less than the average American’s clothing spending, and every replacement is a considered choice rather than an impulse. Track cost-per-wear for fun: that $35 dress worn 40 times cost $0.88 per wear, which reframes the whole economics of getting dressed.

    A 20-piece, under-$500 capsule wardrobe works through ruthless palette discipline (two neutrals plus white plus one accent), strategic retailer tiers (Target/Uniqlo basics, factory-store sale anchors, thrifted blazer/coat/bag), and the one-in-one-out maintenance rule. Budget $30–$40 for tailoring — it is the highest-return spending in the project — and let the combination math turn 20 pieces into 60+ outfits.

    Conclusion

    Twenty pieces under $500 is not a deprivation exercise — it is a design constraint that produces a better wardrobe than most closets three times the size. Pick your palette, buy the list across the three retailer tiers, tailor the fit, thrift the expensive slots, and maintain with one-in-one-out discipline. Mornings get easier, outfits get better, and your bank account stays intact. That is the whole trick, and it works. For more budget style intelligence, browse our fashion section, read about our practical philosophy, or share your capsule wins.

    Frequently Asked Questions

    Is it really possible to build a capsule wardrobe for under $500?

    Yes — $25 per piece average across 20 pieces. The strategy: affordable basics from Target/Uniqlo/Old Navy, mid-range anchors from factory-store sales, and thrifted blazer, coat, and bag (where secondhand quality-per-dollar is unbeatable). End-of-season sales stretch the budget further.

    What 20 pieces should be in a capsule wardrobe?

    A versatile formula: 6 tops, 4 bottoms, 3 layers, 1 dress, 3 pairs of shoes, 1 coat, and 2 accessories. Adjust for your life — more casual if you work from home, one occasion piece if your social life runs dressy — but keep the palette disciplined.

    What color palette works best for a capsule wardrobe?

    Two neutrals (navy/gray or black/camel) plus white plus one accent color. Buy nothing outside the palette. This single rule is what makes 20 pieces combine into 60+ outfits, since everything mixes with everything.

    How do I keep a capsule wardrobe from getting boring?

    Styling multiplies combinations: French tucks, rolled sleeves, shoe swaps (sneakers vs. loafers change an outfit’s whole register), layering the blazer over anything, and accessories. 6 tops × 4 bottoms alone is 24 outfits before layers enter the picture.

    Should I include tailoring in a $500 budget?

    Yes — reserve $30–$40 for basic alterations like hemming trousers and taking in a blazer waist. At budget price points, fit is what separates intentional from cheap-looking, and tailoring is the highest-return spending in the project.

    How do I maintain a capsule wardrobe long-term?

    One in, one out — every new purchase means something leaves. Use the 30-day list for wants: write it down, wait, and only buy if it still appeals and pairs with three existing pieces. Budget roughly $100–$150 yearly to replace worn basics.

  • Fast Fashion vs. Sustainable Brands: The Real Differences

    Fast Fashion vs. Sustainable Brands: The Real Differences

    Walk into a Zara or Shein haul video and then into a Patagonia store, and you are looking at two fundamentally different industries that happen to sell the same category of product. Fast fashion and sustainable clothing brands differ in how clothes are made, what they cost and why, how long they last, and what they do to the planet and the people sewing them. The price tags tell part of the story — $8 versus $80 for a similar-looking shirt — but the real differences run much deeper. Understanding them helps you spend intentionally instead of just cheaply or expensively.

    Speed and Volume: The Core Business Model Difference

    Fast fashion’s defining trait is velocity. Brands like Shein, Zara, H&M, and Fashion Nova move from design to store shelf in weeks — Shein reportedly lists thousands of new items daily — chasing micro-trends spotted on social media. The model depends on enormous volume at tiny margins: sell millions of units, accept that quality is modest, and count on customers returning constantly for the next trend. The average fast fashion garment is worn a handful of times before being discarded; the business model actually requires this, because durability would slow the replacement cycle.

    Sustainable brands operate on the opposite logic: fewer, better pieces designed to last years. Patagonia, Eileen Fisher, Reformation, Pact, and similar companies release smaller collections, often built around timeless rather than trendy designs, and price to reflect real production costs. The pitch is cost-per-wear: a $90 organic cotton shirt worn 100 times costs less per wear than a $15 shirt worn five times. This is not just marketing math — it is the fundamental economic argument that makes sustainability rational for your wallet, not just your conscience.

    Materials: What Your Clothes Are Actually Made Of

    Fast fashion leans heavily on the cheapest available inputs: conventional cotton grown with heavy pesticide use, virgin polyester (a plastic derived from petroleum), and blended fabrics engineered for low cost rather than longevity or comfort. These materials have real consequences — polyester sheds microplastics in every wash, conventional cotton is among the thirstiest and most chemical-intensive crops, and cheap blends pill, stretch out, and lose shape quickly, which is why the garments look tired so fast.

    Sustainable brands prioritize materials with lower impact and higher durability: organic or regenerative cotton, recycled polyester and nylon (which perform like virgin synthetics without new petroleum), Tencel and lyocell from sustainably managed forests, hemp, and responsibly sourced wool. Certifications help you verify the claims — look for GOTS (Global Organic Textile Standard) for organic fibers, OEKO-TEX for chemical safety, and Bluesign for responsible manufacturing. The Patagonia materials philosophy is a useful benchmark for what serious material standards look like, even if you never buy the brand.

    Labor and Transparency: Who Made Your Clothes

    This is the least visible and most important difference. Fast fashion’s ultra-low prices are possible partly because of relentless pressure on garment workers — extremely low wages, excessive hours, and unsafe conditions in the producing countries, documented repeatedly by labor investigators. The supply chains are often deliberately opaque, with subcontracting layers that make it hard to know where clothes were actually sewn. When a shirt costs $8 retail, the math of what the sewer was paid does not work out to a living wage — it cannot.

    Sustainable brands typically publish supplier lists, submit to third-party labor audits (Fair Trade certification is the most recognized), and price their goods to allow decent wages. Transparency is the key signal: a brand that names its factories and publishes audit results is accountable in a way that a brand with a vague “we care about workers” page is not. No system is perfect — greenwashing exists, and certifications have limits — but the gap between a transparent audited supply chain and an opaque one is real and meaningful.

    Environmental Footprint: The Numbers

    The fashion industry is routinely cited as one of the world’s most polluting industries, and fast fashion is the engine of that impact. The widely cited figures: fashion accounts for roughly 10 percent of global carbon emissions and is a massive consumer of water — it can take thousands of liters to produce a single cotton shirt and pair of jeans. Fast fashion’s contribution is amplified by volume and disposability: the EPA has estimated that Americans throw away tens of billions of pounds of textiles yearly, with the vast majority landfilled, where synthetics persist for centuries.

    Sustainable brands attack this on multiple fronts: lower-impact materials, durable construction that keeps garments in use longer (the single biggest lever — wearing a garment twice as long roughly halves its footprint per wear), take-back and resale programs (Patagonia’s Worn Wear, Eileen Fisher Renew), and repair services that extend garment life. But honesty requires a caveat: buying a new “sustainable” shirt you do not need is still worse than wearing the fast fashion shirt you already own. The most sustainable garment is the one already in your closet. The EPA’s textile waste data underscores why keeping clothes in use longer matters more than any single purchase decision.

    How to Shop the Spectrum Practically

    You do not have to choose a side absolutely — most thoughtful wardrobes mix strategies. Buy sustainable (or at least durable) for the workhorse pieces you wear constantly: jeans, everyday shoes, coats, bags — the cost-per-wear math strongly favors quality here. Buy secondhand for trend experiments and designer access at fast fashion prices: thrift stores, Poshmark, and The RealReal let you participate in trends without funding new production. And when you do buy fast fashion, buy the pieces you will genuinely wear often, care for them properly, and keep them in use as long as possible.

    Learn to spot greenwashing: vague claims (“eco-friendly,” “conscious,” “sustainable collection”) without certifications, data, or specifics are marketing. Genuine signals are specific and verifiable — named factories, third-party certifications, published impact reports, repair and resale programs. A fast fashion brand’s small “conscious line” does not make the other 95 percent of its production sustainable, though it can be a marginally better choice within that store.

    Fast fashion competes on speed and price — thousands of new items weekly, cheap virgin materials, opaque labor, and garments designed for a handful of wears. Sustainable brands compete on durability and transparency — better materials, audited factories, and cost-per-wear economics. Shop the spectrum strategically: invest in quality for daily workhorses, buy secondhand for trends, and keep everything you own in use as long as possible.

    Conclusion

    The difference between fast fashion and sustainable brands is not really about the clothes — it is about two opposing theories of consumption. One says clothes are disposable entertainment; the other says they are durable goods. Neither extreme fits every budget or need, but understanding the trade-offs in materials, labor, environmental cost, and cost-per-wear lets you spend with your eyes open. Buy less, choose well, make it last — the old adage turns out to be the entire sustainability strategy in six words. For more conscious style coverage, explore our fashion section, read about our honest approach, or share your sustainable finds.

    Frequently Asked Questions

    What is the main difference between fast fashion and sustainable fashion?

    Fast fashion prioritizes speed and low prices — thousands of new styles weekly, cheap materials, opaque supply chains, garments meant for a few wears. Sustainable fashion prioritizes durability and responsibility — better materials, transparent audited factories, timeless design, and cost-per-wear value over time.

    Is sustainable clothing actually better quality?

    Generally yes, because durability is the business model — sustainable brands use better materials and construction since their value proposition depends on garments lasting years. The cost-per-wear math usually favors a $90 shirt worn 100 times over a $15 shirt worn five times.

    How can I tell if a brand’s sustainability claims are real?

    Look for specifics over slogans: named factories, third-party certifications (GOTS, Fair Trade, OEKO-TEX, Bluesign), published impact data, and repair/resale programs. Vague terms like “eco-friendly” or “conscious” without evidence are classic greenwashing signals.

    Is buying secondhand more sustainable than buying new sustainable brands?

    Usually yes — keeping an existing garment in use avoids new production entirely, which is the biggest impact lever. Thrifting and resale are among the most sustainable ways to shop, especially for trend pieces you might not wear for years.

    Why is fast fashion so bad for the environment?

    The combination of enormous volume, cheap synthetic and chemical-intensive materials, and designed disposability. Fashion accounts for roughly 10 percent of global carbon emissions, consumes vast water resources, and Americans discard tens of billions of pounds of textiles yearly — mostly landfilled.

    Can I shop sustainably on a tight budget?

    Absolutely: buy secondhand (thrift stores, Poshmark), invest selectively in quality for hard-wearing staples, and simply buy less and keep clothes longer. The most sustainable garment is the one already in your closet — extending wear beats any new purchase.

  • How to Remove Deodorant Stains From a Black Dress Shirt

    How to Remove Deodorant Stains From a Black Dress Shirt

    Black dress shirts look razor-sharp until the white deodorant streaks show up under the arms — those chalky white marks that appear the moment you raise your arm in a meeting. Worse, over time they can build into stiff, yellowish deposits that survive the wash and slowly ruin the shirt. Deodorant stains on black fabric are one of the most common wardrobe complaints, and they are also one of the most fixable — if you understand what the stain actually is and treat it with the right method instead of the folk remedies that make it worse.

    What Deodorant Stains Actually Are

    Those white marks are not just deodorant sitting on the surface. Antiperspirants contain aluminum compounds (like aluminum zirconium) designed to plug sweat glands; when the aluminum mixes with your sweat’s proteins and salts and then with laundry detergent, it forms a waxy, water-resistant buildup that bonds to fabric fibers. On black shirts this shows as white or grayish streaks; on white shirts the same chemistry produces the infamous yellow armpit stain. It is the same stain — just a different color presentation.

    This chemistry explains why the stains are so stubborn: you are not dealing with a simple surface mark but a bonded aluminum-protein complex that plain washing cannot dissolve. It also explains why the buildup gets worse over time — each application and each wash adds another layer. And it explains why prevention (below) matters as much as treatment: once the buildup is thick and set through dozens of wash cycles, even the best methods struggle. Treat early and treat right.

    Method 1: White Vinegar Soak (Best for Fresh Stains)

    For fresh or light deodorant marks, distilled white vinegar is the first line of attack. Soak the stained underarm area in undiluted white vinegar for 30 to 60 minutes — the mild acid dissolves the aluminum compounds without harming black dye. After soaking, rub the fabric gently against itself to loosen the residue, then launder as usual in the coldest water the care label allows. For most fresh stains, this single treatment removes them completely.

    For slightly more set-in marks, make a paste of baking soda and water, work it into the dampened stain with an old toothbrush, and let it sit for 30 minutes before the vinegar soak. The gentle abrasion plus the acid is a one-two punch that handles moderate buildup. Always test on an inside seam first if the shirt is expensive or the dye seems delicate — vinegar is color-safe for the vast majority of black fabrics, but a 30-second test costs nothing.

    Method 2: Lemon Juice, Salt, and Sun (Best for Stubborn Buildup)

    For stains that have survived multiple washes, bring out the stronger chemistry. Mix equal parts fresh lemon juice and water, saturate the stain, and sprinkle table salt over it — the salt acts as a mild abrasive while the citric acid attacks the aluminum complex. Gently scrub with a soft brush, then lay the shirt in direct sunlight for an hour. UV light has a mild bleaching effect that helps lift the residue, and the combination is remarkably effective on old, stiff deposits.

    An alternative heavy-duty approach: dissolve two tablespoons of baking soda in warm water, soak the underarm area for several hours or overnight, then wash. For truly ancient buildup, an oxygen-based bleach soak (OxiClean or similar, color-safe) for 1 to 6 hours before washing can dissolve deposits that acids alone cannot. Never use chlorine bleach on black fabric — it will strip the dye and leave a permanent orange-tinged disaster far worse than the original stain.

    The Quick Fixes (When You Are Already Dressed)

    Sometimes you spot the marks after the shirt is on and you are walking out the door. The classic emergency fix: rub the stain with a damp cloth or a baby wipe — the moisture and friction lift surface deodorant effectively. A pair of clean nylon stockings or a foam sponge rubbed over the mark works through static and friction to pull the residue off. Dryer sheets rubbed on the stain handle light marks in seconds, which is why keeping one in your desk drawer or bag is a legitimate life hack.

    For the office emergency kit, add a Tide to Go pen or similar stain stick — they are designed for exactly this kind of fresh surface stain. None of these quick fixes address deep bonded buildup, but they handle the visible white streaks that actually embarrass you in the moment. Think of them as cosmetic; do the real treatment (vinegar soak) that evening so the stain does not set further.

    Prevention: Stop the Stains Before They Start

    The highest-leverage change is switching deodorant formulas. Clear gel antiperspirants and “invisible” solid formulas transfer far less residue than traditional white sticks. Apply antiperspirant at night before bed rather than in the morning — it needs hours of dry skin contact to work properly, and nighttime application means less product sitting on the surface to transfer to your shirt. Let it dry completely before dressing; getting dressed while underarms are still tacky is the number one cause of fresh marks.

    Undershirts are the unsung heroes here: a thin black or gray crew-neck undershirt absorbs the deodorant transfer before it reaches your dress shirt, and undershirts are cheap and replaceable while dress shirts are not. Wash black dress shirts promptly rather than letting them sit in the hamper — time plus body heat sets the aluminum complex deeper. And consider whether you even need an aluminum antiperspirant daily; plain deodorant (no aluminum) does not create these bonded stains at all, though it will not stop sweating. The Tide stain removal guide confirms the vinegar-first approach for deodorant marks specifically, and Good Housekeeping’s stain removal guides offer additional deodorant-mark treatments.

    Deodorant stains on black shirts are bonded aluminum-protein buildup, not surface marks — dissolve them with a white vinegar soak (30–60 minutes) for fresh stains, or lemon juice, salt, and sunlight for stubborn ones. Never use chlorine bleach on black fabric. Prevent future stains with clear-gel formulas applied at night, full drying before dressing, and an undershirt barrier.

    Conclusion

    White deodorant marks on a black dress shirt look permanent but rarely are. Match the treatment to the stain’s age — vinegar for fresh, lemon-salt-sun or oxygen bleach soaks for the stubborn veterans — keep an emergency fix in your bag for already-dressed moments, and prevent the whole cycle with better deodorant choices and an undershirt. Your black shirts can stay black. For more wardrobe rescue guides, explore our fashion section, read about our practical standards, or share your own stain victories.

    Frequently Asked Questions

    What causes white deodorant marks on black shirts?

    Antiperspirants contain aluminum compounds that mix with sweat proteins and laundry detergent to form a waxy, bonded buildup on fabric fibers. It is the same chemistry that causes yellow stains on white shirts — just visible as white or gray on black fabric.

    What is the best way to remove fresh deodorant stains?

    Soak the stained area in undiluted distilled white vinegar for 30–60 minutes, rub the fabric gently against itself, then wash cold. The mild acid dissolves the aluminum compounds. For slightly set stains, pre-treat with a baking soda paste before the vinegar soak.

    How do I remove old, set-in deodorant buildup?

    Try lemon juice and salt scrubbed into the stain and left in sunlight for an hour, or an overnight soak in baking soda solution, or a 1–6 hour soak in color-safe oxygen bleach (OxiClean). Very old, thick buildup may not fully come out — treat stains early for best results.

    Can I use bleach on deodorant stains in black shirts?

    Never use chlorine bleach on black fabric — it strips the dye and causes permanent discoloration. Color-safe oxygen bleach is fine; chlorine bleach is a guaranteed disaster on darks.

    How do I get deodorant marks off when I am already dressed?

    Rub with a damp cloth, baby wipe, clean nylons, or a dryer sheet — friction plus slight moisture lifts surface marks. A stain-removal pen handles fresh marks. Do the real vinegar treatment that evening so the residue does not bond further.

    How can I prevent deodorant stains on black shirts?

    Switch to clear gel or “invisible” formulas, apply antiperspirant at night instead of morning, let it dry fully before dressing, wear an undershirt as a barrier, and wash shirts promptly. Plain deodorant without aluminum does not create these bonded stains at all.

  • When to Replace Running Shoes at 20 Miles a Week

    When to Replace Running Shoes at 20 Miles a Week

    At 20 miles a week, you are putting roughly 1,000 miles a year on your running shoes — well past what any pair is designed to handle. Yet most runners in this mileage range replace their shoes far too late, running hundreds of miles on dead cushioning and wondering why their knees, shins, or feet have started complaining. The 20-mile-a-week runner sits in a specific zone: serious enough that shoe wear genuinely affects your body, but not so high-mileage that replacement is obvious. Here is exactly when to retire your shoes and how to tell.

    The Mileage Rule: 300 to 500 Miles, and What That Means for You

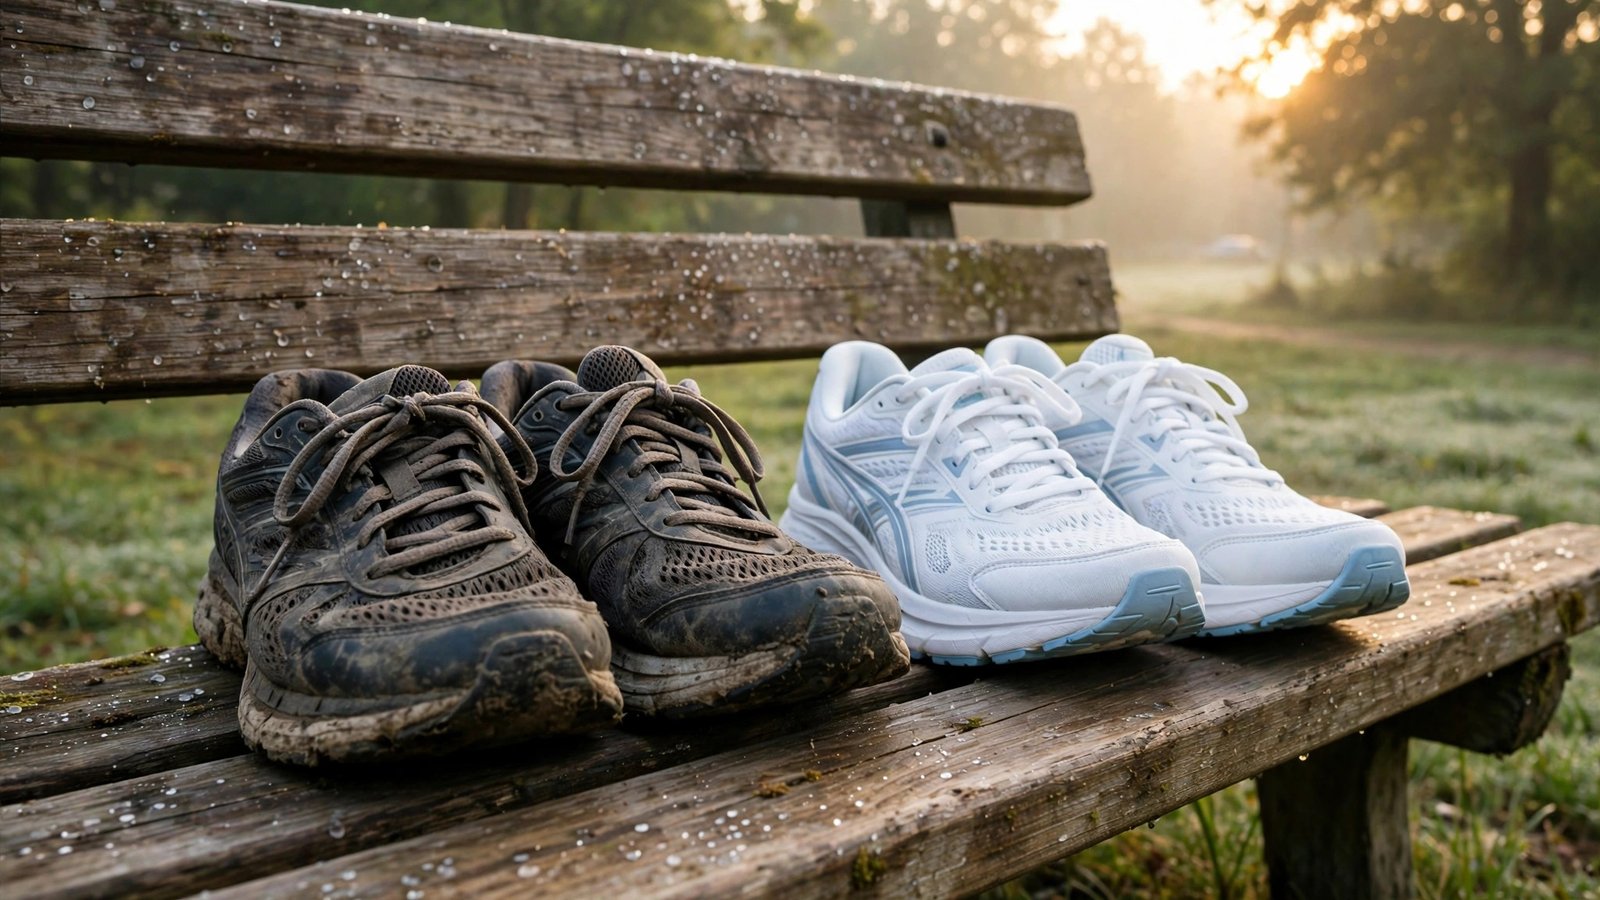
    The industry-standard guidance is to replace running shoes every 300 to 500 miles, and it exists for a reason: the EVA foam that cushions your stride permanently compresses with repeated impact, losing its shock absorption long before the upper looks worn. At 20 miles per week, 300 miles arrives in about 15 weeks — under four months — and 500 miles in about six months. If you bought your shoes in January and it is now June, they are done, even if they look fine.

    Where you fall in the 300–500 range depends on your body and your shoes. Heavier runners compress foam faster and should lean toward 300. Lighter runners with efficient form can stretch toward 500. Maximalist shoes with thick foam stacks tend to last longer than minimal racers; trail shoes wear differently than road shoes. Track your mileage per pair — most running apps and watches let you tag shoes to workouts, which removes all guesswork. The Runner’s World’s shoe lifespan guidance aligns with this range and explains the biomechanics of foam breakdown, and REI’s running shoe replacement advice covers the same mileage benchmarks.

    Reading the Wear: Physical Signs Your Shoes Are Done

    Mileage is the primary clock, but your shoes and body give confirmatory signals. Press your thumb into the midsole: fresh foam springs back; dead foam stays dented or feels hard and unresponsive. Check the outsole for worn-through patches, especially under the heel and forefoot — once you are through to the midsole, cushioning and traction are compromised. Look at the shoes on a flat table from behind: if they lean or tilt to one side, the midsole has compressed unevenly, which can subtly alter your gait.

    Your body is the most honest wear indicator. New aches that appear without training changes — achy knees after easy runs, shin tightness, foot soreness, or lower back complaints — are classic dead-shoe symptoms. Many runners discover their shoes were the problem only when the aches vanish within a week of switching to a fresh pair. The tricky part is that foam death is gradual, so you adapt to the declining cushioning without noticing — which is why the mileage log matters more than feel. If you are at 450 miles and everything feels fine, replace them anyway; the damage from worn shoes accumulates silently.

    The Rotation Strategy: Why Two Pairs Beat One

    At 20 miles a week, the single smartest move is rotating two pairs. Foam needs roughly 24 to 48 hours to fully rebound between runs; running daily in the same pair never lets the cushioning recover, which shortens its life noticeably. Rotation extends each pair’s lifespan, and it gives you a built-in comparison — when the older pair starts feeling flat next to the newer one, you have your answer without any mileage math.

    Rotation also lets you specialize: a cushioned daily trainer for most miles and a lighter or more responsive shoe for tempo days, or a road pair and a trail pair if your routes vary. Buy the second pair when the first hits half its life, so you always have a broken-in backup and never face the “everything hurts and I need shoes today” emergency purchase. Staggering purchases this way also spreads the cost — two pairs a year at 20 miles a week is the realistic budget, roughly $240 to $360 annually depending on the models.

    Choosing the Replacement: Same Model or Something New?

    If your current shoes treated you well — no persistent aches, no hot spots, no blisters — the simplest and safest choice is the same model in the current version. Shoe companies update models yearly, usually with small changes, so try the new version on before assuming identical fit. If you had problems (recurring blisters, black toenails, knee pain), treat replacement as a reset: get a proper fitting at a running specialty store, where they will watch you run and match the shoe to your gait.

    For 20-mile-a-week runners, the daily trainer category is the workhorse: models like the Brooks Ghost, Nike Pegasus, ASICS Gel-Cumulus, Saucony Ride, or Hoka Clifton offer the cushioning-durability balance this mileage demands. Replace insoles if yours are aftermarket — worn insoles in new shoes defeat the purpose. And break in the new pair gradually: alternate old and new for a week or two rather than debuting fresh shoes on a long run, even though modern shoes need far less break-in than the old wisdom suggested.

    Extending Life and Knowing the Exceptions

    A few habits stretch your shoes’ useful life: untie them before removing (yanking them off breaks down the heel counter), let them air-dry fully between runs (never put them in the dryer or on a radiator — heat destroys foam), and reserve running shoes for running (walking the dog in them burns mileage that does not show in your log). Rotate, rest, and respect the mileage cap, and you will consistently get the upper end of the range.

    The exceptions: racing flats and carbon-plated super shoes have shorter lifespans (often 200 miles or less for the plate’s pop), while some maximalist trainers genuinely last past 500 for light runners. Trail shoes may need earlier replacement if the lugs wear smooth, even with live foam — traction is a safety issue, not a comfort one. And if you change your training significantly (jumping from 20 to 35 miles a week, adding marathon training), recalculate: the calendar shrinks fast when the mileage grows.

    At 20 miles a week, replace your running shoes every 300 to 500 miles — roughly every 4 to 6 months — because the cushioning foam dies long before the shoes look worn. Track mileage per pair with your running app, rotate two pairs so foam rebounds between runs, and treat new unexplained aches as a retirement signal. Budget for about two pairs a year.

    Conclusion

    Running 20 miles a week on dead shoes is one of the most common and most fixable causes of runner aches. Log your mileage, respect the 300–500 mile window, rotate two pairs, and replace on schedule rather than on feel — your knees, shins, and feet will notice the difference even if your eyes cannot see it. Shoes are the cheapest injury prevention in running; a fresh pair every few months costs far less than a single physical therapy visit. For more running and fitness guidance, explore our fashion section for gear guides, learn about our approach, or tell us your shoe rotation.

    Frequently Asked Questions

    How many miles do running shoes last?

    Most running shoes last 300 to 500 miles before the cushioning foam permanently compresses. Heavier runners and minimal shoes trend toward 300; lighter runners in maximalist trainers can reach 500. The upper often looks fine long after the foam is dead.

    How often should I replace shoes running 20 miles a week?

    About every 4 to 6 months — 300 miles arrives in roughly 15 weeks at 20 miles per week, 500 miles in about 25 weeks. Plan on roughly two pairs per year and track each pair’s mileage in your running app.

    What are the signs my running shoes are worn out?

    Midsole foam that stays dented when pressed, worn-through outsoles, shoes that tilt when placed on a flat surface, and — most tellingly — new aches in knees, shins, feet, or back that appear without training changes and vanish when you switch shoes.

    Does rotating two pairs of running shoes really help?

    Yes. Foam needs 24–48 hours to fully rebound between runs, so rotation extends each pair’s life. It also gives you a constant comparison — when the older pair feels flat next to the newer one, it is time to retire it.

    Should I buy the same model again or try something new?

    If your current shoes caused no problems, buying the same model (trying the current version for fit) is the safest choice. If you had recurring blisters, pain, or fit issues, get a professional fitting at a running specialty store and treat replacement as a fresh start.

    Can I extend my running shoes’ lifespan?

    Untie them before removing, air-dry fully between runs, never use dryer or radiator heat, reserve them for running only, and rotate pairs. These habits consistently push shoes toward the upper end of the 300–500 mile range.

  • How to Shrink a Cotton T-Shirt That Is One Size Too Big

    How to Shrink a Cotton T-Shirt That Is One Size Too Big

    You bought the shirt in the wrong size, or your favorite tee stretched out, or the “true to size” chart lied — and now you have a cotton t-shirt that is one size too big, swimming on your shoulders and hanging past your hips. Before you relegate it to sleepwear, know this: cotton is one of the easiest fabrics to shrink deliberately, and a controlled shrink can take a shirt down nearly a full size. The key word is controlled — there is a right way that gives you a perfectly fitted tee and a wrong way that gives you a crop top.

    Why Cotton Shrinks (and Why That Helps You)

    Cotton fibers are essentially tiny twisted tubes that absorb water and swell. When cotton fabric is manufactured, the fibers are stretched under tension; heat and moisture let them relax back toward their natural, shorter state — that relaxation is shrinkage. This is why new cotton shirts shrink most dramatically on the first hot wash and dry: the manufacturing tension releases all at once. Pre-shrunk shirts have had this done at the factory, which is why they barely budge — check the label, because a “pre-shrunk” tee will fight your efforts.

    The amount of shrinkage you can expect from 100-percent cotton is typically 3 to 5 percent on the first aggressive wash-dry cycle, which translates to roughly half a size to nearly a full size depending on the shirt’s cut. Cotton-polyester blends shrink much less — the synthetic fibers do not relax the way cotton does — so a 50/50 blend might only give you a quarter size. The looser the knit and the heavier the cotton, the more it tends to shrink. Understanding this helps you calibrate: one size down is realistic for pure cotton; blends need more aggressive treatment for less result.

    Method 1: The Hot Wash and High-Heat Dry (Standard Shrink)

    This is the reliable workhorse method. Wash the shirt alone (or with similar colors) in the hottest water your machine offers, using a normal amount of detergent. Hot water does the fiber-relaxing work. Then transfer immediately to the dryer on the highest heat setting and dry it completely — bone dry, not damp-dry. The dryer’s heat and tumbling do the bulk of the actual shrinking. Check the fit while the shirt is still warm; you can repeat the cycle once more if it needs a bit more.

    Expect the length to shrink slightly more than the width — shirts typically lose more in body length than in chest or shoulder width, because the knit is under more lengthwise tension from manufacturing. If the shirt is perfect in the shoulders but too long, this method actually works in your favor. One caution: high heat can fade dark colors and, over repeated cycles, weakens cotton fibers. This method is for a deliberate one-time (or two-time) shrink, not a permanent laundry routine.

    Method 2: The Boiling Water Soak (Maximum Shrink)

    For the most aggressive shrink — say the shirt is closer to two sizes too big — the boiling method delivers. Bring a large pot of water to a rolling boil, remove it from the heat, and submerge the shirt completely for 5 to 10 minutes, using tongs to keep it under. The longer the soak, the more it shrinks, with most of the effect happening in the first five minutes. Then wring it out carefully (it is hot — use tongs and let it cool), and dry on high heat.

    This method can shrink a shirt up to a full size or slightly more, but it comes with trade-offs: it is the hardest on colors (expect some fading on darks and brights), it can distort prints and graphics, and it stresses the fabric the most. Reserve it for shirts where the standard method did not do enough, and never use it on a shirt with a graphic you care about — the print may crack or warp. For white and light-colored shirts, it is the nuclear option that works beautifully.

    Method 3: Targeted Shrinking for Specific Areas

    Sometimes only part of the shirt is wrong — the body is fine but the sleeves are too long, or the length is perfect but the torso is boxy. Targeted shrinking handles this. Dampen only the area you want to shrink with hot water (a spray bottle works well), then apply direct heat with a hair dryer on high or a clothes iron with steam, working the fabric as it dries. The heat-plus-moisture combination shrinks just the treated zone.

    This is precision work: it is excellent for taking in sleeve length or tightening a loose neckline, but it is hard to shrink the whole torso evenly this way — you will get patchy results if you try. For sleeves, focus the heat on the sleeve fabric while avoiding the shoulder seam. For a stretched-out collar, hot water plus a few minutes in the dryer (just the collar area damp) can restore its shape. Think of targeted shrinking as tailoring with heat rather than a needle.

    Protecting Graphics, Colors, and the Shirt’s Future

    Graphic tees need special handling. Turn the shirt inside out before any hot wash to protect the print, avoid the boiling method entirely on printed shirts, and know that some shrinkage will still stress the graphic — vintage-style cracked prints actually handle this fine, while plastisol prints may crack further. For dark colors, add a cup of white vinegar to the wash to help set the dye and minimize fading, and always wash darks separately for the shrink cycle.

    Once the shirt fits, change your laundry habits to lock in the size: wash cold, dry low or hang-dry. Every hot cycle from here on will keep shrinking it incrementally, and the difference between “perfect” and “too small” is often just two more hot washes. If you overshoot and the shirt comes out too tight, you can sometimes stretch it back slightly: soak in lukewarm water with a tablespoon of hair conditioner (which relaxes fibers), then gently stretch and reshape by hand and lay flat to dry. It will not fully reverse a major shrink, but it can recover a half size of over-enthusiasm. The The Spruce’s laundry guides cover fabric-specific care that helps you maintain the new fit, and Hanes’ t-shirt care instructions include more cotton-specific guidance.

    To shrink a cotton t-shirt one size: wash hot and dry on high heat for a reliable half-to-full size reduction, or use a 5–10 minute boiling water soak followed by high-heat drying for maximum shrink. Turn graphic tees inside out, expect more length loss than width loss, and switch to cold wash and hang-dry once it fits to lock in the size.

    Conclusion

    A too-big cotton t-shirt is a fixable problem, not a lost cause. The hot wash and high-heat dry handles most one-size-too-big situations; the boiling soak covers the stubborn cases; targeted heat-and-moisture works for sleeves and collars. Protect your graphics, mind your colors, and — most importantly — change to gentle laundering once the fit is right so you do not shrink past perfect. In twenty minutes of laundry, you can rescue a shirt you would otherwise never wear. For more wardrobe rescue guides, browse our fashion section, read about our practical approach, or share your own clothing fixes.

    Frequently Asked Questions

    How much will a 100% cotton t-shirt shrink in hot water?

    Typically 3 to 5 percent on the first aggressive hot wash and high-heat dry cycle — roughly half a size to nearly a full size. Shirts usually lose more length than width. Cotton-poly blends shrink significantly less.

    Will boiling shrink a t-shirt more than a hot wash?

    Yes. A 5–10 minute soak in boiled water (off the heat) followed by high-heat drying is the most aggressive home method and can take a shirt down a full size or more. It is harder on colors and graphics, so reserve it for plain shirts or stubborn cases.

    Can I shrink just the sleeves of a t-shirt?

    Yes, with targeted shrinking: dampen only the sleeves with hot water and apply direct heat with a hair dryer on high or a steam iron while the fabric dries. This works well for sleeve length and collar tightening but is not practical for evenly shrinking the whole torso.

    Will shrinking ruin a graphic print?

    It can stress prints — turn the shirt inside out before hot washing, avoid the boiling method on graphic tees, and expect some additional cracking on plastisol prints. Vintage-style distressed graphics handle shrinking best; delicate prints are most at risk.

    How do I stop my shirt from shrinking further after it fits?

    Switch to cold water washes and low-heat or hang drying. Every hot wash-dry cycle shrinks cotton incrementally, and the gap between perfect and too small is often just two more hot cycles. Gentle laundering locks in the size.

    Can I un-shrink a shirt I shrank too much?

    Partially. Soak it in lukewarm water with a tablespoon of hair conditioner for 15 minutes, then gently stretch it back to shape by hand and lay flat to dry. This can recover roughly a half size but will not fully reverse an aggressive shrink.