Breaking

Author: admin

  • How Can I Stop Caring What My Coworkers Think of Me

    How Can I Stop Caring What My Coworkers Think of Me

    You replay the meeting comment for the third time. Did Sarah’s tone mean she thinks your idea was stupid? Why did Mark not laugh at your joke — does the team find you annoying? You check Slack to see who reacted to your message, and the absence of a thumbs-up feels like a verdict. If your emotional weather is controlled by your coworkers’ perceived opinions, you are not alone — and you are not shallow. Humans are wired to monitor social standing; it kept our ancestors alive. But in the modern workplace, this ancient radar misfires constantly, turning neutral moments into anxiety spirals. The goal is not to become someone who cares about nothing — it is to care about the right things, from the right people, in the right proportion.

    Why Coworker Opinions Feel So Enormous

    Your brain treats social rejection like physical pain — literally. Neuroimaging studies show that social exclusion activates some of the same brain regions as physical injury. This made sense when exile from the tribe meant death; it makes less sense when “exile” means a colleague did not cc you on an email. At work, the effect intensifies because colleagues control things that matter: assignments, promotions, daily comfort. Your threat-detection system cannot distinguish between “my coworker dislikes me” and “my livelihood is at risk,” so it treats both as emergencies. Add the ambiguity of professional politeness — everyone is cordial, so you scan for micro-signals — and you get a perfect anxiety machine. Understanding this is freeing: the intensity of the feeling is a hardware feature, not evidence that something is actually wrong. You feel it strongly because you are human, not because the situation warrants it. The American Psychological Association’s resources on social anxiety explain how this threat response works and how it can be recalibrated.

    The Spotlight Effect: Nobody Is Watching That Closely

    Here is the most liberating finding in social psychology: the spotlight effect. Research consistently shows that people massively overestimate how much others notice and judge their behavior — their mistakes, their appearance, their awkward moments. That presentation flub you have replayed forty times? Your coworkers forgot it by lunch. The “weird” thing you said in the meeting? Nobody registered it. Everyone is starring in their own mental movie, worrying about their own performance, which leaves remarkably little attention for yours. This is not cynicism — it is relief. The audience you imagine scrutinizing you does not exist. When you catch yourself spiraling (“they must think I’m incompetent”), ask the spotlight question: “Can I recall a single embarrassing moment of a coworker’s from last month?” You almost certainly cannot — and they cannot recall yours either. The mental energy you spend performing for an imaginary tribunal can be redirected to the actual work, which is what builds genuine reputation anyway.

    Separate Signal From Noise

    Not all coworker opinions are equal, and learning to sort them is a superpower. Signal: direct, specific feedback from someone whose judgment you respect about something you can change (“your reports would land better with an executive summary up top”). That is gold — thank them and use it. Noise: vague vibes, hallway gossip, imagined slights, one person’s offhand mood, popularity contests, and opinions from people whose values or competence you do not respect. Most of what torments you is noise. Develop a simple filter: Is it specific? Is it from someone credible? Is it actionable? If the answer to all three is yes, engage with it. Otherwise, file it under “not my problem.” This filter also handles the hardest case — legitimate criticism delivered badly. Extract the actionable kernel, discard the emotional packaging. And remember that some coworkers’ negativity is about their own insecurity, workload, or life — you are just the nearest screen they are projecting onto. Their opinion says more about them than about you.

    Build Your Internal Scorecard

    People who do not crumble under others’ opinions are not blessed with thicker skin — they have an internal scorecard. Instead of asking “do they think I am good enough?”, they ask “did I meet my own standards today?” Define yours explicitly: What does good work look like to you? What kind of colleague do you want to be? Write down three to five personal standards — things like “I prepare thoroughly,” “I follow through on commitments,” “I treat everyone with respect.” When you meet them, you have succeeded regardless of applause. When you miss them, you have useful feedback regardless of criticism. This internal scorecard does two things: it makes you less dependent on external validation, and paradoxically it improves your reputation, because people who are steady and self-directed earn more respect than people visibly chasing approval. Competence is the ultimate armor — it is very hard to be rattled by opinions when your work speaks clearly. Invest the energy you currently spend worrying into becoming undeniably good at what you do. The Mayo Clinic’s guide to building self-esteem offers practical steps for developing exactly this kind of internal validation.

    Practical Tactics for the Daily Grind

    Mindset shifts need behavioral support. Stop oversharing and over-explaining: the more you justify yourself, the more you signal that their judgment matters, inviting more of it. State your decisions calmly and move on. Limit the reassurance-seeking — asking “was that okay?” after every contribution trains both you and them to treat your work as questionable. Build genuine alliances with two or three trusted colleagues; having real allies makes the vague opinions of the crowd matter less. When anxiety spikes in the moment, use the 10-10-10 rule: will this matter in 10 minutes, 10 months, 10 years? Almost everything shrinks to the 10-minute box. And curate your inputs: if certain Slack channels, gossip sessions, or comparison traps fuel the spiral, step back from them. You cannot think your way out of an environment that constantly triggers you — sometimes the fix is behavioral, not philosophical. Protecting your attention is protecting your peace.

    Coworker opinions feel enormous because your brain treats social threats like physical ones — but the spotlight effect proves almost nobody is judging you as harshly as you fear. Sort signal from noise, build an internal scorecard, and invest the worry-energy into competence instead.

    Conclusion

    Stop trying to not care — that is impossible and not even desirable. Instead, care selectively: extract the useful signal from credible feedback, dismiss the noise of vibes and gossip, and anchor your self-assessment in your own standards rather than the crowd’s imagined verdict. Remember the spotlight effect every time you spiral, build real alliances instead of chasing universal approval, and let competence be your armor. The coworkers whose opinions actually matter will respect you more for it — and the rest were never really watching anyway. For more on thriving at work and in life, explore our personal development guides, learn about our team, or share your workplace questions.

    Frequently Asked Questions

    Is it normal to care so much what coworkers think?

    Completely. Humans are wired to monitor social standing — it is an evolutionary survival mechanism, not a character flaw. The problem is not caring; it is caring indiscriminately, treating every perceived opinion as equally important. Learning to sort signal from noise is the skill, not eliminating caring altogether.

    What if my coworkers actually dislike me?

    First, verify — anxiety fabricates dislike from neutral data. If there is real friction, address it directly and professionally with the specific person rather than ruminating. Focus on being competent, reliable, and kind; you do not need everyone to like you, just to respect working with you. Universal likability is neither achievable nor necessary.

    How do I handle direct criticism without spiraling?

    Separate the message from the delivery. Ask: is it specific, credible, and actionable? If yes, thank them and use it — that is valuable data. If it is vague or hostile, extract any kernel of truth and discard the rest. Then check it against your internal scorecard rather than letting it rewrite your self-image.

    Does caring less make me a worse team player?

    The opposite. People-pleasing and anxiety-driven over-accommodation make you less effective — you avoid necessary conflict, overcommit, and burn out. Colleagues who are steady, boundaried, and self-directed are better teammates. Caring selectively about the right things improves your work relationships.

    What is the spotlight effect?

    A well-replicated finding in social psychology: people vastly overestimate how much others notice their appearance, mistakes, and behavior. In classic studies, people wearing embarrassing shirts estimated far more observers noticed than actually did. Applied at work, it means your perceived scrutiny is mostly imagined — everyone is too busy worrying about themselves.

  • How to Calculate How Far Away Lightning Struck

    How to Calculate How Far Away Lightning Struck

    The flash splits the sky, and you start counting: one-Mississippi, two-Mississippi, three — KRAK. Was that close? Should the kids come inside? Every thunderstorm brings this moment, and most people guess. But there is a simple calculation, trusted by meteorologists and scout leaders alike, that turns your counting into a real distance measurement. Here is how to calculate how far away lightning struck from your house — the flash-to-bang method, the physics behind it, and the safety rules the distance unlocks.

    The Flash-to-Bang Method: Count, Then Divide

    Here is the technique: when you see the lightning flash, start counting seconds immediately — “one-Mississippi” pace works fine, or use a stopwatch for precision. Stop when you hear the thunder. Divide the seconds by 5 to get the distance in miles; divide by 3 for kilometers. Five seconds between flash and boom? One mile away. Fifteen seconds? Three miles. Thirty seconds? Six miles. That is the entire method — no equipment, no apps, just counting and one division. It works because light reaches you essentially instantly while sound crawls along at a fixed speed, so the delay between them is a direct measure of distance. Teach it to your kids tonight; it turns every thunderstorm into a science lesson and gives the whole family a shared safety language.

    Why It Works: A Race Between Light and Sound

    The physics is a beautiful mismatch of speeds. Light travels at 186,000 miles per second — for any earthly distance, the flash reaches your eyes instantaneously. Sound in air travels at roughly 1,100 feet per second (about 750 mph), which works out to one mile every five seconds, or one kilometer every three seconds. The thunder you hear is the sound of lightning superheating the air to 50,000°F — hotter than the sun’s surface — causing an explosive shockwave. Because the flash arrives instantly and the thunder arrives late, the gap between them is pure travel time for sound, and travel time converts directly to distance. The “divide by 5” rule is just the speed of sound expressed conveniently: 5 seconds per mile. It is one of the rare physics formulas ordinary people use in real life, and it never needs batteries.

    How Accurate Is Your Count?

    For safety purposes, remarkably accurate — within about 10 to 20 percent. The speed of sound varies slightly with temperature (faster in warm air, slower in cold) and humidity, shifting the “5 seconds per mile” figure a little. Strong winds can bend sound waves, making thunder arrive slightly early or late. Terrain matters: hills, buildings, and forests absorb and scatter thunder, sometimes making distant strikes inaudible entirely — which is why “I didn’t hear thunder” does not mean “no lightning nearby.” Human counting introduces error too; most people count slightly fast under stress. None of this matters for the method’s purpose: distinguishing “two miles, stay alert” from “eight miles, watch casually.” You are not surveying property lines; you are deciding whether the kids stay in the pool. For that decision, flash-to-bang is more than good enough.

    The 30-30 Rule: Turning Distance into Safety

    Here is where the calculation becomes a safety tool. The 30-30 rule, taught by the National Weather Service: if the flash-to-bang count is 30 seconds or less (six miles or closer), seek shelter immediately — the storm is close enough to strike you. Then the second 30: wait 30 minutes after the last thunder before going back outside, because lightning can strike from the storm’s trailing edge long after the rain passes. Most lightning injuries happen before the storm’s core arrives or after it seems to have passed — exactly the windows this rule covers. If you can hear thunder at all, you are within strike range (sound carries about 10 miles; lightning strikes up to 10 miles from the storm center, the dreaded “bolt from the blue”). The National Weather Service’s lightning safety guidance makes the core message unforgettable: when thunder roars, go indoors.

    Reading the Storm: Approaching or Leaving?

    Distance alone is half the story; the trend is the other half. Take flash-to-bang readings over several minutes: if the count is shrinking (20 seconds, then 15, then 10), the storm is approaching — tighten up safety plans and get inside. If the count is growing (10, then 15, then 25), the storm is moving away — but remember the 30-minute rule before resuming outdoor activities. A steady count means the storm is passing parallel to you; stay alert, since storm motion can shift. Multiple flashes make this tricky — match each thunderclap to its flash as best you can, using the brightest flashes. This trend-reading turns you into a competent storm watcher: you will know before the weather app updates whether the picnic is doomed or just delayed. NOAA’s lightning science explained covers storm behavior patterns that help you interpret what the counts are telling you.

    Beyond Counting: Apps and Detectors

    Modern tools complement the old method. Lightning detection apps and websites show real-time strike locations on a map, letting you verify your flash-to-bang estimates and watch the storm’s track. Handheld lightning detectors ($50–$100) estimate strike distance electronically using the same flash-to-bang principle, useful for coaches, referees, and outdoor event organizers who need objective calls. Weather radios with lightning alerts add another layer. But every tool has limits: apps depend on cell service and detection networks, detectors false-alarm on electrical noise, and none replace judgment. The counting method’s genius is its independence — it works on a mountain with no signal, with dead phone batteries, in any country, forever. Learn the apps, but master the count. The skill in your head outlasts every gadget.

    Count the seconds between lightning flash and thunder, then divide by 5 for miles (by 3 for kilometers) — light arrives instantly, sound travels one mile per five seconds. If the count is 30 or less, shelter immediately; wait 30 minutes after the last thunder before going back out. Shrinking counts mean the storm is approaching.

    Conclusion

    Calculating how far away lightning struck is beautifully simple: count the flash-to-bang seconds and divide by five for miles. The physics — light’s instant arrival versus sound’s lazy mile-per-five-seconds — makes your count a genuine measurement. Use it with the 30-30 rule, read the trend to judge the storm’s motion, and back it up with apps when you have signal. The next thunderstorm becomes a laboratory instead of a guessing game. For more weather science and safety, visit our science section, meet our team, or share your storm stories.

    Frequently Asked Questions

    How do you calculate lightning distance in miles?

    Count the seconds between the flash and the thunder, then divide by 5. Five seconds equals one mile, fifteen seconds equals three miles, thirty seconds equals six miles. For kilometers, divide the seconds by 3 instead.

    Why do you see lightning before hearing thunder?

    Light travels at 186,000 miles per second — effectively instantaneous — while sound crawls at about 1,100 feet per second. The flash reaches your eyes immediately; the thunder arrives seconds later, with the delay directly proportional to the strike’s distance.

    What is the 30-30 lightning rule?

    If the flash-to-bang count is 30 seconds or less (about 6 miles), seek shelter immediately. Then wait 30 minutes after the last thunder before resuming outdoor activities. The rule covers the most dangerous windows: before the storm arrives and after it seems to pass.

    Can lightning strike if you cannot hear thunder?

    Yes — terrain, buildings, and wind can muffle thunder from strikes still within range. Lightning can strike up to 10 miles from the storm center. Never assume silence means safety; if storms are in the area, stay sheltered regardless of what you hear.

    Is it safe to be in a car during lightning?

    Yes — a hard-topped metal vehicle is a safe shelter (the metal shell channels lightning around occupants, not the rubber tires as myth claims). Convertibles, golf carts, and open vehicles are not safe. Get inside a substantial building or hard-topped vehicle and wait out the storm.

  • How to Find a Personal Trainer Who Works With Seniors

    How to Find a Personal Trainer Who Works With Seniors

    You are 68, your doctor says strength training would transform your health, and every trainer at the big-box gym looks 24 and trains people for beach season. Finding a personal trainer who genuinely works with seniors — not someone who just tolerates older clients between athletes — is one of the highest-value health decisions you can make after 60. The right trainer understands aging joints, builds balance that prevents falls, and progresses you safely; the wrong one hands you a generic program that hurts you in week two. Here is how to find the real specialists, what credentials actually mean, the questions that separate experts from pretenders, and what fair pricing looks like.

    Why a Senior-Specialist Trainer Is Worth Seeking Out

    Training a 70-year-old is a different profession from training a 30-year-old, and the differences are all medical. After 60, the priorities flip: balance and fall prevention outrank aesthetics, bone density and joint-friendly loading outrank max lifts, and every program must account for common realities — arthritis, joint replacements, osteoporosis, blood pressure medications, and slower recovery. A general trainer’s default program (heavy barbell squats, high-intensity intervals, “push through it”) can injure an older adult fast. A senior specialist instead leads with functional strength — sit-to-stand power, stair climbing, carrying groceries — plus balance training, flexibility, and bone-loading exercises calibrated to the individual. The CDC’s physical activity guidelines specifically urge older adults to include balance and muscle-strengthening work, and a good senior trainer builds the entire program around exactly that.

    Credentials That Actually Mean Something

    The fitness industry’s alphabet soup is confusing, so here is what to look for. Baseline: a nationally accredited certification — NASM, ACE, ACSM, or NSCA. These require exams, continuing education, and adherence to scope of practice; a trainer with none of these is a hobbyist. Next, the senior-specific layer: NASM’s Senior Fitness Specialization, ACE’s Senior Fitness Specialist, or the Functional Aging Institute’s credentials all indicate dedicated study of older-adult training. The gold standard for clinical complexity is a trainer with experience in medical fitness or physical therapy collaboration — some hold degrees in exercise science or kinesiology. Ask directly: “What percentage of your clients are over 60?” You want someone who answers “most of them” without hesitating. A trainer whose clientele is 90 percent twenty-somethings and who “also works with seniors” is not a senior specialist, whatever the certificate on the wall says.

    Where to Look: The Best Hunting Grounds

    Start with your own medical team: ask your doctor or physical therapist for referrals. Medical professionals know which local trainers handle post-rehab clients well, and some trainers specialize in the handoff from physical therapy to independent fitness — exactly what many seniors need. Next, check community centers, YMCAs, and SilverSneakers-affiliated gyms; these facilities serve older adults by design and their trainers typically have real senior experience. The SilverSneakers program, included in many Medicare Advantage plans, is both a funding source and a trainer directory of sorts. University exercise science departments sometimes run senior fitness programs with supervised student trainers at low cost. And do not overlook independent trainers who work from private studios — they often specialize precisely because they left big-box gyms, and a private studio means no waiting for equipment and no intimidation factor.

    The Interview: Questions That Reveal Everything

    Treat the first meeting as a job interview — because it is. Ask: “Walk me through what a first session with a new 68-year-old client looks like.” A good answer includes a health history review, movement screening, and starting conservatively; a bad answer jumps straight to workouts. Ask how they handle arthritis, joint replacements, or osteoporosis specifically — vague answers (“we just take it easy”) are disqualifying; specific answers (low-impact loading progressions, balance protocols, coordination with your doctor) are what you want. Ask about their oldest client and their typical client age. Ask what happens if something hurts: the right answer is “we stop, assess, and modify or refer out” — never “push through it.” Ask for two references from clients over 65 and actually call them. And trust your gut about communication style: the trainer will be correcting your form weekly, so you need someone patient and clear, not a drill sergeant.

    What Fair Pricing Looks Like (and How to Save)

    One-on-one personal training typically runs $50 to $100+ per session depending on your city, with senior specialists sometimes at the higher end — worth it for the expertise. But full-price one-on-one is not the only path. Semi-private training (two to four clients sharing a trainer) runs $25 to $45 per session and works beautifully for seniors, adding a social element many older adults love. Small-group senior fitness classes ($10-$20 per session) at YMCAs and community centers offer professional programming at a fraction of the cost. Check your Medicare Advantage plan: many include SilverSneakers or similar fitness benefits covering gym access and sometimes training sessions — call the number on your insurance card and ask specifically. And consider a hybrid approach many savvy seniors use: four to six one-on-one sessions to learn proper form and get a personalized program, then transition to independent or small-group training with monthly check-ins. You get the expertise where it matters most without the ongoing full-price commitment.

    The right senior trainer is a specialist, not a generalist who tolerates older clients: accredited certification plus senior-specific training, a clientele that’s mostly over 60, a first session built around screening rather than sweating, and a “stop and modify” philosophy on pain. Interview like you’re hiring — because your health is the job.

    Red Flags: When to Walk Away

    A few signs should end the search immediately. The trainer dismisses your medical history or does not ask about medications, surgeries, or conditions. They prescribe a one-size-fits-all program without assessing how you move. They push supplements, “required” nutrition products, or long-term contracts before you have trained together. They cannot explain why an exercise is in your program in plain language. They brag about “no pain, no gain” or frame caution as weakness. And the subtlest one: they do not coordinate with or welcome input from your doctor or physical therapist. A great senior trainer sees themselves as part of your healthcare team, not a replacement for it. The best ones will ask for your doctor’s clearance before starting and will want to know what your PT said — that collaboration is the hallmark of a true professional.

    Conclusion

    Finding a personal trainer who works with seniors comes down to specialization, verification, and fit: look for accredited credentials plus senior-specific training, hunt through medical referrals and senior-focused facilities, interview with pointed questions, and choose the pricing model — one-on-one, semi-private, or hybrid — that you will actually sustain. The payoff is enormous: strength, balance, bone density, and the confidence that comes from a body you trust. That is worth interviewing for. For more healthy-aging guidance, browse our sports and fitness section, learn about who writes these guides, or ask us your fitness question — we answer every message.

    Frequently Asked Questions

    How much does a personal trainer for seniors cost?

    One-on-one sessions typically run $50-$100+ depending on location, with senior specialists sometimes higher. Semi-private training (2-4 clients) costs $25-$45 per session, and small-group senior classes run $10-$20. Many Medicare Advantage plans include fitness benefits like SilverSneakers that reduce or eliminate costs — check your plan.

    What certifications should a senior fitness trainer have?

    At minimum, a nationally accredited certification (NASM, ACE, ACSM, or NSCA) plus a senior-specific specialization such as NASM’s Senior Fitness Specialization or ACE’s Senior Fitness Specialist. Ask what percentage of their clients are over 60 — you want “most of them,” not “a few.”

    Is strength training safe for people over 70?

    Yes — with proper programming, it is one of the healthiest things adults over 70 can do, improving bone density, balance, metabolism, and independence. The key is a qualified trainer who starts with screening, progresses gradually, uses joint-friendly exercises, and coordinates with your doctor, especially with conditions like osteoporosis or joint replacements.

    How often should a senior work with a personal trainer?

    Two sessions per week is the sweet spot for most older adults — enough stimulus to progress, enough recovery between sessions. One session per week works if you train independently once or twice more. Many seniors start with 4-6 one-on-one sessions to learn form, then shift to semi-private or small-group training.

    Can I use my Medicare plan to pay for a trainer?

    Original Medicare does not cover personal training, but many Medicare Advantage plans include fitness benefits like SilverSneakers, Renew Active, or Silver&Fit, which cover gym memberships and sometimes group training. Call your plan directly to ask what fitness benefits you have — many seniors leave this benefit unused.

  • Why Do I Keep Setting Goals I Never Finish by February

    Why Do I Keep Setting Goals I Never Finish by February

    January 1st: you are unstoppable. The goals are written, the vision board is visioning, this year will be different. February 15th: the gym membership is a donation, the journal has three entries, and the goal list feels like evidence in a trial against yourself. If this is your annual tradition, here is the liberating truth: you are not weak, lazy, or broken. Your goals are failing by design — the way you set them practically guarantees a February collapse. Understanding the mechanics of why goals die is the first step to building ones that survive. This is not about trying harder; it is about designing smarter.

    The February Cliff Is Built Into How You Set Goals

    Most New Year goals share fatal design flaws. They are vague (“get in shape,” “be more organized”) — and vague goals have no finish line, so your brain never registers progress and motivation starves. They are outcome-only (“lose 30 pounds”) with no process attached — you cannot directly do an outcome, so each day offers no clear action, just a distant intimidating number. They are all-or-nothing (“work out every day,” “never eat sugar”) — so the first missed day feels like total failure rather than a blip, and the psychology of “I already blew it” does the rest. And they are too many: five simultaneous life overhauls compete for the same limited daily willpower, so all of them lose. By February, reality has collided with this fragile design — motivation, which was carrying everything, fades as it always does, and with no system underneath, the goals collapse. The goals did not fail because you are weak. They failed because motivation was the entire plan, and motivation is a terrible plan.

    Your Brain on Big Goals: Why Enthusiasm Backfires

    There is a cruel neurological twist: announcing and visualizing big goals can actually reduce your likelihood of achieving them. Research on goal visualization shows that vividly imagining the achieved outcome gives your brain a premature hit of satisfaction — you feel as if you have already succeeded, which saps the drive to do the work. Sharing goals publicly can have a similar effect: the social congratulations (“that’s amazing, you can do it!”) deliver reward without effort. Meanwhile, big goals trigger threat responses: “write a novel” or “get fit” is so large that your brain cannot compute a first step, producing overwhelm that masquerades as laziness. You are not procrastinating because you do not care; you are freezing because the goal is too big to act on. The fix is counterintuitive: make the goal embarrassingly small. “Write 100 words.” “Put on workout clothes.” Small goals bypass the threat response, and starting is the entire battle — once in motion, you usually continue.

    The System: Replace Goals With Processes

    Here is the paradigm shift that actually works: stop setting goals and start designing systems. A goal is “lose 20 pounds.” A system is “walk 20 minutes after lunch and cook dinner at home four nights a week.” Goals are destinations; systems are the vehicle — and you cannot drive a destination. Systems work because they convert the abstract into the daily: every day offers a clear, doable action, and each completion is a small win that fuels the next day. Make the system stupidly easy to start: the workout is “drive to the gym” (you will work out once there); the writing habit is “open the document.” Use implementation intentions — the research-backed formula “when X happens, I will do Y”: “When I finish lunch, I will walk for 15 minutes.” This pre-decision bypasses the daily negotiation with yourself that you always lose. Track the process, not the outcome: a calendar with X’s for days you executed the system. After a few weeks, the streak itself becomes motivation — and streaks outlast January enthusiasm. The research on goals versus systems popularized by James Clear, and the APA’s habit formation research, explain why winners and losers share goals but differ in systems.

    Environment Beats Willpower Every Time

    Willpower is a depleting resource; environment is a permanent one. Every February failure has an environmental accomplice: the junk food in the pantry, the phone by the bed, the gym bag in the closet instead of by the door. Redesign your surroundings so the desired behavior is the path of least resistance. Want to read more? Put a book on your pillow and the phone charger in another room. Want to exercise? Sleep in workout clothes and put shoes by the bed. Want to eat better? Do not rely on resisting the cookies — do not buy the cookies. This is not weakness; it is engineering. Equally powerful is the social environment: the people around you shape your norms more than any pep talk. A workout partner, an accountability group, or even one friend with similar goals multiplies follow-through. And shrink the number of simultaneous goals ruthlessly — one or two active pursuits at a time. You can sequence goals across the year; you cannot parallelize five life overhauls. Depth beats breadth, every time.

    The Weekly Review: Your Anti-February Insurance

    The final piece is a feedback loop. Goals die in February partly because nobody notices them dying — there is no mechanism that catches the drift. A 15-minute weekly review fixes this: same time each week, look at your system tracking, note what worked and what did not, and adjust. Missed three workouts? The system needs redesigning (smaller, easier, different time) — not more self-flagellation. The review converts failure into data, which is the difference between people who eventually succeed and people who quit. Build in planned flexibility too: systems should survive travel, illness, and busy weeks. Define your “minimum viable day” — the tiny version of the system you do even on the worst day (a 5-minute walk, one paragraph written). Minimums keep the streak alive through chaos, and the streak keeps the identity alive: “I am someone who writes daily” survives a bad week when “write 1,000 words daily” would have died. Review, adjust, continue. That loop is the whole game.

    Goals die by February because they are vague, outcome-only, all-or-nothing, and powered entirely by fading motivation. Replace goals with tiny daily systems, design your environment so the right choice is the easy choice, focus on one or two pursuits, and run a weekly review — process beats willpower.

    Conclusion

    You do not keep failing your goals because you lack discipline — you fail because the goals were designed to depend on motivation, and motivation always expires by February. The fix is structural: convert vague outcomes into tiny daily systems, make starting embarrassingly easy, engineer your environment to remove friction, pursue fewer goals with more focus, and review weekly to catch drift early. This is not a lesser, compromised version of ambition — it is how ambitious things actually get done. This year, skip the grand resolutions. Build one small system, protect the streak, and watch February become just another month of quiet progress. For more on building a life that works, explore our personal development guides, learn about our team, or tell us what you are working toward.

    Frequently Asked Questions

    Is it really true that most New Year’s resolutions fail by February?

    Research consistently shows a steep drop-off: a large share of resolutions are abandoned within weeks, with February the classic graveyard. The pattern is so reliable it is studied — and the cause is structural (vague goals, motivation-dependence) rather than personal weakness, which is actually good news because structures can be fixed.

    Should I stop setting goals entirely?

    Not exactly — direction matters. Keep the big-picture direction (“I want to be fit”), but stop relying on the goal itself to drive behavior. Build the daily system underneath it and track the process. The goal gives you the compass; the system is the engine. You need both, but the system does the work.

    How small should I make my starting habit?

    Smaller than your ego wants. “Read one page,” “do one push-up,” “write one sentence” — the point is making starting so easy you cannot say no. You will almost always do more once started, but the tiny version must be genuinely completable on your worst day. Scale up only after weeks of consistency.

    What if I miss a day? Is the streak ruined?

    One missed day is nothing; the danger is the second one. The research-backed rule: never miss twice. A single miss is life happening; two misses is a new habit forming. When you miss, do the minimum viable version the next day no matter what, and the streak — and the identity behind it — survives.

    How many goals should I work on at once?

    One or two, maximum. Every additional simultaneous goal divides the same pool of daily energy and attention. Sequence bigger ambitions across the year instead: finish establishing one system, then add the next. People who focus on one change at a time dramatically outperform those chasing five.

  • Hurricane vs. Tropical Storm: What’s the Difference?

    Hurricane vs. Tropical Storm: What’s the Difference?

    Every hurricane season, the news follows the same script: a swirling mass forms off Africa, gets a name, and the graphics start flashing colors. But the terminology trips people up — tropical depression, tropical storm, hurricane, major hurricane. Are these different beasts, or the same storm wearing different labels? The answer matters, because the label determines everything from evacuation orders to insurance. Here is the difference between a hurricane and a tropical storm, how storms climb the ladder, and why the weaker-sounding one can be just as deadly.

    The One Number That Separates Them: 74 mph

    Hurricanes and tropical storms are the same phenomenon at different intensities — the dividing line is a single number: maximum sustained wind speed. A tropical depression has winds up to 38 mph. When winds reach 39 mph, it graduates to a tropical storm and earns a name from the season’s rotating list. At 74 mph, it becomes a hurricane (called a typhoon in the Northwest Pacific and a cyclone in the South Pacific and Indian Ocean — same storm, regional names). That is the entire technical difference: 73 mph is a strong tropical storm, 74 mph is a Category 1 hurricane. The threshold is somewhat arbitrary — a historical convention, not a physical cliff — which is why meteorologists stress that a 70-mph tropical storm and a 75-mph hurricane are near-twins in destructive potential. The labels organize forecasting and warnings; the wind, water, and physics do not care what we call them.

    The Saffir-Simpson Scale: Categories 1 Through 5

    Once a storm reaches hurricane strength, the Saffir-Simpson Hurricane Wind Scale ranks it by sustained winds: Category 1 (74–95 mph), Category 2 (96–110 mph), Category 3 (111–129 mph), Category 4 (130–156 mph), and Category 5 (157+ mph). Categories 3 and above earn the “major hurricane” designation. The scale measures wind only — deliberately — because wind damage scales predictably with wind speed. But the scale’s simplicity misleads: it says nothing about rainfall, storm surge, or the storm’s size, which is why a sprawling Category 1 can devastate more coastline than a compact Category 4. Meteorologists increasingly warn against “category fixation” — judging danger by the number alone. A Category 1’s surge or a tropical storm’s rainfall has killed far more people than many Category 5 winds. The National Hurricane Center’s storm classification guide details the scale and its proper interpretation.

    How These Storms Are Born

    Every tropical cyclone — the umbrella term for depressions, storms, and hurricanes — starts the same way: warm ocean water (at least 80°F) evaporates, the moist air rises, and Earth’s rotation spins the rising air into the characteristic spiral. The engine is heat: the storm is a giant heat-transfer machine, converting warm water’s energy into wind. As it strengthens, the structure organizes — spiral rainbands, a calm eye at the center, and the eyewall, the ring of most violent winds surrounding the eye. Tropical storms have the same structure in miniature, sometimes with a ragged or partial eyewall. What kills most storms: landfall (cut off from warm water), wind shear (upper winds tearing the structure apart), or cool water. Understanding the shared birth explains why forecasters track every depression closely — today’s wobbling tropical storm is tomorrow’s hurricane if conditions align.

    When a Storm Gets Its Name

    Names arrive at tropical storm strength — 39 mph sustained winds — which is why you never hear of “Hurricane” something appearing from nowhere; every hurricane was a named tropical storm first. The World Meteorological Organization maintains six rotating lists of Atlantic names, reused every six years; particularly deadly or costly storms get their names retired (Katrina, Sandy, Maria will never be reused). Naming serves communication: “Tropical Storm Helene” is clearer than “the low-pressure system at 15°N, 45°W,” and named storms get dramatically more public attention — which is precisely the point for warnings. The naming threshold also marks a forecasting shift: named storms get the full treatment of cone graphics, watches, and warnings. So when a depression becomes a tropical storm and gets its name, it is not just a label — it is the moment the storm enters the public warning system.

    The Deadly Truth: Weaker Storms Kill More

    Here is the counterintuitive reality: most hurricane deaths come from water, not wind — and tropical storms bring plenty of water. Storm surge (the ocean pushed ashore) and inland freshwater flooding from torrential rain account for the large majority of tropical cyclone fatalities in the U.S. A slow-moving tropical storm can dump 30+ inches of rain over days — Harvey (2017) made landfall as a Category 4 but did its worst damage as a stalled tropical storm, drowning Houston in 60 inches of rain. Weak, disorganized systems often surprise people who let their guard down at the “just a tropical storm” label. Wind gets the categories and the dramatic footage; water does the killing, quietly, in homes miles from the coast. Never judge a storm’s danger by its category or its label — judge it by the rainfall forecast, the surge forecast, and whether you are in the water’s path.

    What to Do for Each

    Preparation does not change much between the labels — which is exactly the point. For any named storm threatening your area: know your evacuation zone and route before the season starts, assemble a disaster kit (water, food, medications, documents, batteries, cash), secure outdoor items, protect windows if advised, and never ignore evacuation orders because “it is only a tropical storm.” The deadliest mistake is complacency at lower categories. After the storm: avoid floodwater (it hides hazards and contaminants), stay clear of downed power lines, do not run generators indoors, and wait for official all-clears. Ready.gov’s hurricane preparedness checklist covers the full before-during-after playbook. Whether the graphic says tropical storm or Category 2, the actions are the same — because water does not read labels.

    A tropical storm becomes a hurricane at 74 mph sustained winds — same phenomenon, different intensity, with names assigned at 39 mph. The Saffir-Simpson scale ranks hurricanes 1–5 by wind, but water (surge and rainfall flooding) causes most deaths, and slow tropical storms like Harvey have been among the deadliest. Never judge danger by the label; judge it by the water forecast.

    Conclusion

    The difference between a hurricane and a tropical storm is wind speed crossing 74 mph — one continuous phenomenon, one arbitrary line. Categories rank wind, but storm surge and flooding rainfall do most of the killing, which is why “just” a tropical storm deserves full respect and full preparation. Know your zone, build your kit, heed evacuations regardless of the label. For more weather science and safety, visit our science section, meet our team, or share your storm-season questions.

    Frequently Asked Questions

    What wind speed makes a tropical storm a hurricane?

    74 mph maximum sustained winds. Below that: tropical depression (up to 38 mph) or tropical storm (39–73 mph). At 74 mph it becomes a Category 1 hurricane. The threshold is a forecasting convention — a 73-mph storm and a 75-mph storm are near-identical in destructive potential.

    What is the difference between a hurricane, typhoon, and cyclone?

    Nothing but geography — they are the same phenomenon. It is called a hurricane in the Atlantic and Northeast Pacific, a typhoon in the Northwest Pacific, and a cyclone in the South Pacific and Indian Ocean. The science, structure, and dangers are identical.

    Can a tropical storm be more dangerous than a hurricane?

    Yes. Slow-moving tropical storms can produce catastrophic rainfall flooding — Harvey’s worst damage came as a tropical storm stalled over Houston. Since water causes most tropical cyclone deaths, a weak storm’s flood potential can exceed a stronger storm’s wind threat. Never dismiss a storm by its label.

    How are hurricanes named?

    The World Meteorological Organization maintains six rotating Atlantic name lists, reused every six years. Storms are named when they reach tropical storm strength (39 mph winds). Names of exceptionally deadly or costly storms are retired permanently.

    What should I do if a hurricane watch is issued for my area?

    A watch means conditions are possible within 48 hours — review your evacuation plan, assemble supplies, secure your home, and monitor updates closely. A warning (36 hours) means conditions are expected: complete preparations and evacuate if ordered. Do not wait for the category to act.

  • Why Your Hands Go Numb When You Ride Your Bike

    Why Your Hands Go Numb When You Ride Your Bike

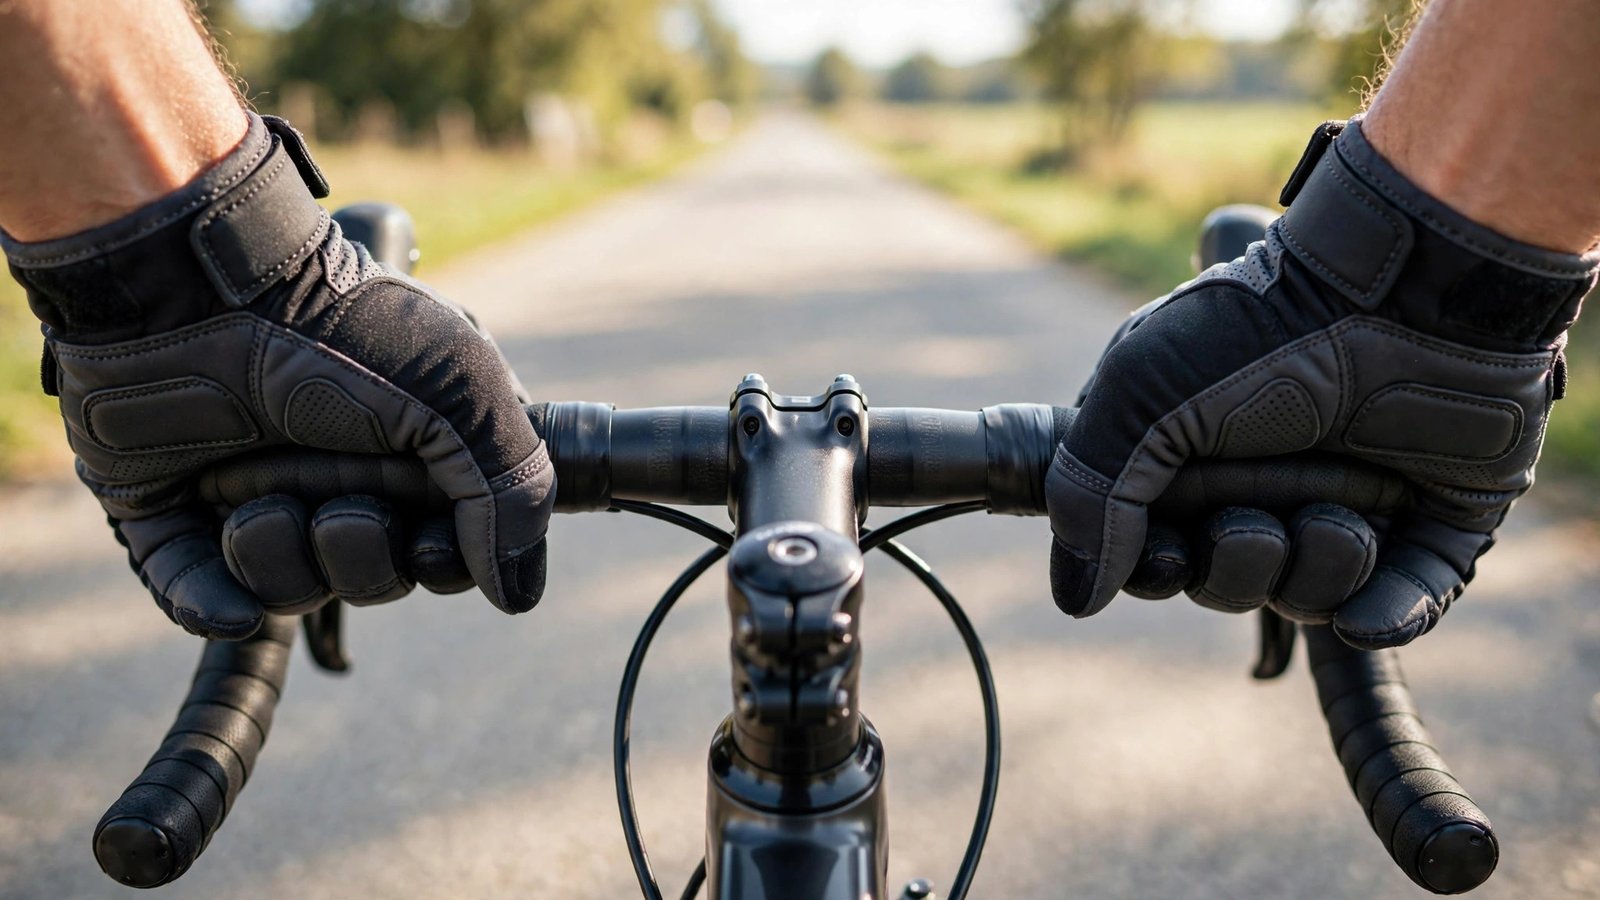
    Forty-five minutes into your ride, your pinky and ring finger start tingling. By the hour mark, both hands feel like they belong to someone else, and you are shaking them out at every stoplight. Numb hands are one of the most common complaints in cycling — and one of the most fixable. The numbness is almost always a mechanical problem, not a medical one: pressure on the ulnar and median nerves where they pass through your wrist and palm, caused by how your weight, your handlebars, and your body position interact. Here is what is actually happening in your hands, the fit and technique fixes that resolve it for most riders, and the signs that mean it is time to see a doctor instead of adjusting your stem.

    What Is Actually Going Numb: The Two Nerves Involved

    Two nerves run through high-pressure zones in a cyclist’s hand. The ulnar nerve passes through Guyon’s canal at the base of the palm — compression here numbs the pinky and ring finger, the classic “cyclist’s palsy” or handlebar palsy. The median nerve passes through the carpal tunnel at the wrist — compression here numbs the thumb, index, and middle fingers, essentially cycling-induced carpal tunnel symptoms. Which fingers go numb tells you which nerve is complaining, and that points at the cause: ulnar symptoms usually mean too much pressure on the heel of the palm (drops or flat bars with no padding variation), while median symptoms often mean a bent-back wrist position (hoods ridden with wrists kinked). Both are pressure-over-time problems, which is why symptoms take 30 to 60 minutes to appear and resolve minutes after you stop gripping.

    Fit Fix #1: Take Weight Off Your Hands

    The root cause for most riders is simple: too much body weight resting on the hands. This usually traces to bike fit — a saddle tilted nose-down slides you forward onto the bars, a saddle set too high rocks your pelvis and pushes weight forward, or handlebars set too low and too far away force a constant push-up position. The checks: your saddle should be level (use a phone level app), saddle height should allow a slight knee bend at the bottom of the stroke, and you should be able to ride with a light grip — if removing your hands for a second feels like falling forward, your fit is dumping weight onto your palms. Core strength matters too: a weak core cannot support your torso, so your arms become structural columns. The test riders love: can you comfortably tap your fingers on the bars while riding? If not, fit first, gloves second.

    Fit Fix #2: Handlebar Position, Gloves, and Grip

    Once weight distribution is reasonable, optimize the contact points. Rotate hand positions every few minutes — tops, hoods, drops — because the numbness is time-under-pressure, and movement is the antidote. Padded cycling gloves genuinely help by distributing pressure across the palm, but they are a supplement to fit, not a substitute; a $40 glove cannot fix a $0 fit problem. Consider bar tape with more cushion or gel inserts under the tape at the pressure points. For flat-bar riders, ergonomic grips with a winged platform spread load across the whole palm instead of concentrating it on the ulnar nerve zone — many chronic numbness cases resolve with this single change. And check your wrist angle: wrists should be roughly straight, not bent back like a waiter carrying a tray. If your brake hoods force a kinked wrist, rotating the bars or adjusting hood position flattens it.

    Technique: Relax the Death Grip

    Watch tense riders and you will see white knuckles — gripping the bars as if the bike might escape. That constant isometric contraction compresses nerves directly and fatigues the forearms, compounding the fit problem. Consciously relax: bend your elbows slightly (locked elbows transmit every bump straight to the hands and shoulders), keep a firm-but-light grip, and wiggle your fingers periodically. On rough roads, let the elbows act as suspension. Many riders find that dropping the death grip alone delays numbness by 30 minutes or more. It also helps to stand and pedal for 15 to 20 seconds every ten minutes on longer rides — it unloads the hands completely, restores circulation, and gives the nerves a pressure break. Think of it as the cycling equivalent of getting up from your desk.

    When Numbness Is Not Just a Fit Problem

    Most cycling hand numbness is mechanical and resolves with the fixes above within a few rides. See a doctor if numbness persists for hours after riding, occurs off the bike (typing, sleeping, driving), involves weakness like dropping objects, or affects only one hand asymmetrically — these patterns suggest true nerve entrapment or a cervical spine issue rather than handlebar pressure. Also seek evaluation if you develop persistent neck pain with the hand symptoms, which can indicate a pinched nerve root in the neck referring downward. A sports medicine physician or hand specialist can sort this out quickly, and early treatment of genuine carpal tunnel or ulnar neuropathy prevents permanent nerve damage. The American Academy of Orthopaedic Surgeons has excellent patient guides on both ulnar nerve and carpal tunnel issues, and the American Society for Surgery of the Hand covers handlebar-related nerve compression in depth.

    Numb hands while cycling are almost always pressure on the ulnar or median nerves from too much weight on the bars, a poor fit, or a death grip — not a fitness problem. Level the saddle, take weight off your hands, move hand positions often, and relax your grip. If numbness persists off the bike, get checked.

    The Professional Bike Fit: Worth Every Penny

    If you have adjusted the basics and numbness persists past the hour, get a professional fit — typically $150 to $300 for a comprehensive session. A fitter will measure your flexibility, observe you pedaling under load, and adjust saddle position, stem length and height, handlebar width, and cleat position as a system. Hand numbness is one of the most common complaints fitters resolve, often with changes the rider would never have tried alone (a shorter stem, a saddle moved back 5 millimeters). Many shops credit part of the fit cost toward parts. Given that the alternative is months of miserable rides or a medical bill, the fit is the highest-ROI purchase in cycling after the helmet.

    Conclusion

    Hands going numb on hour-long rides is your body’s fit complaint, not a life sentence. Identify which fingers go numb, take weight off your hands with proper saddle and bar position, rotate hand positions, relax your grip, and consider ergonomic grips or a professional fit if the basics do not solve it. Most riders fix this completely within a couple of weeks of adjustments. And if numbness follows you off the bike, let a doctor take a look — nerves deserve respect. For more cycling-smart guidance, explore our sports section, meet the team behind these guides, or send us your cycling question anytime.

    Frequently Asked Questions

    Why do only my pinky and ring finger go numb when cycling?

    That pattern points to the ulnar nerve, compressed at the base of the palm (Guyon’s canal) — classic handlebar palsy. It usually means too much pressure on the heel of your palm from weight distribution or hand position. Padded gloves, ergonomic grips, and taking weight off your hands typically resolve it.

    Will padded cycling gloves stop hand numbness?

    They help by distributing palm pressure, but they cannot fix a fit problem. Think of gloves as a supplement: get saddle position, bar height, and weight distribution right first, then add gloves for the remaining pressure. Many riders need both.

    How should I position my wrists on the handlebars?

    Keep wrists roughly straight and neutral — not bent sharply back or kinked down. On drop bars, this usually means riding the hoods with forearms nearly level; on flat bars, ergonomic grips help maintain the neutral angle. Bent wrists compress the carpal tunnel and cause thumb-side numbness.

    Is hand numbness from cycling dangerous?

    Temporary numbness that resolves minutes after riding is almost always benign pressure-related irritation. It becomes concerning if numbness lasts hours, happens off the bike, involves weakness or dropping things, or is sharply one-sided — those warrant a medical evaluation for true nerve entrapment.

    How much does a professional bike fit cost?

    A comprehensive fit runs $150 to $300 and typically takes 1-2 hours. For persistent numbness, pain, or anyone riding regularly, it is the best money in cycling — fitters resolve hand numbness complaints routinely with adjustments riders would not find alone.

  • How Do I Build Self-Confidence After Being Fired at 45

    How Do I Build Self-Confidence After Being Fired at 45

    Being fired at 45 hits differently than at 25. At 25, a job loss is a plot twist. At 45, it can feel like a verdict — on your competence, your relevance, your entire professional identity. The mortgage, the kids’ tuition, the two decades you invested: all of it suddenly feels precarious, and the voice in your head gets cruel fast. “Too old to start over.” “Who hires a 45-year-old?” “Maybe I was never that good.” Here is what you need to hear first: being fired is an event, not a diagnosis. And confidence after a firing is not something you wait to feel — it is something you rebuild, deliberately, through action. This is the practical roadmap.

    Separate Your Worth From the Event

    The first and hardest task is untangling your identity from what happened. A firing feels personal because work is personal — but companies fire people for restructuring, politics, budget cuts, bad managers, and a hundred reasons that have nothing to do with your value as a professional or a person. Even when performance played a role, one role at one company under one manager is not the sum of a 20-year career. Write down, literally on paper, what you know to be true about your capabilities: the projects you led, the problems you solved, the people you mentored, the years you showed up. This is not affirmation fluff; it is evidence review, and your brain needs the data because right now it is running a highlight reel of the worst day. When the shame spiral starts — and it will, at 3 a.m. — you need a written record of the full story, not just the ending. Psychologists call this cognitive restructuring: deliberately challenging the catastrophic narrative with facts. The American Psychological Association’s resilience resources explain how reframing adversity is a learnable skill, not a personality trait.

    Let Yourself Grieve — Then Set a Deadline for Action

    Toxic positivity (“everything happens for a reason!”) is poison right now. Job loss is a genuine loss — of income, routine, colleagues, status, and a future you had planned — and grief is the appropriate response. Give yourself permission to feel angry, scared, and sad without judging yourself for it. Talk to someone: a friend, a therapist, a support group. Bottled grief ferments into depression. But grief needs a container, not an open-ended lease. Set a date — two weeks, a month — after which the primary project shifts from processing to rebuilding. This is not about “getting over it” on schedule; it is about preventing the very real trap where weeks of unstructured time erode confidence further. Structure is medicine. Even before the deadline, maintain anchors: get up at a consistent time, exercise, get dressed. These sound trivial; they are not. When everything feels out of control, controlling the controllables rebuilds your sense of agency, which is the raw material of confidence.

    Rebuild With Small, Deliberate Wins

    Confidence is not a feeling you summon — it is a conclusion your brain draws from evidence of competence. After a firing, your evidence file feels empty, so you must restock it deliberately with small wins. Not “land a dream job” — smaller. Update one section of your resume today. Email one former colleague tomorrow. Learn one new skill module this week. Fix something in the house. Cook a real dinner. Each completed task is a data point your brain logs: I can still do things. This is why the “small wins” research matters — progress, even minor, is the strongest driver of motivation and self-belief. Keep a visible list and check things off; the physical act of marking progress counteracts the formless dread of unemployment. And reframe the job search itself: each application sent, each informational interview completed, each skill learned is a win regardless of outcome. You control the inputs, not the outcomes — and confidence grows from inputs.

    Update the Story You Tell (Including to Yourself)

    At 45, you will be asked “so what happened?” in interviews, and your answer matters enormously — but the person who most needs a good answer is you. Craft a honest, forward-looking narrative: what you learned, what you are looking for now, why the change ultimately makes sense. Practice saying it out loud until it feels natural, not rehearsed. The narrative should be true — interviewers smell spin — but framed around growth rather than grievance. Never badmouth the former employer; it makes listeners wonder what you will say about them. Equally important is the story you tell yourself about being 45 in the job market. Yes, ageism exists. But 45 also means two decades of judgment, relationships, crisis management, and domain knowledge that no 28-year-old has. Many employers specifically want seasoned professionals. Your experience is not a liability to apologize for; it is the product you are selling. Lead with it.

    Build Practical Momentum: Skills, Network, Health

    Confidence follows momentum, and momentum comes from a concrete plan. Audit your skills against current job postings in your field — the gaps you find are a curriculum, not an indictment. A 45-year-old who adds a current certification or learns a relevant tool signals adaptability, which demolishes the “outdated” stereotype. Activate your network systematically: most jobs come through relationships, and at 45 your network is vast — former colleagues, clients, vendors, alumni. One genuine conversation per day beats a hundred cold applications. Take care of the physical foundation: unemployment disrupts sleep, exercise, and eating, and all three directly affect mood and confidence. Walk daily, protect your sleep schedule, limit alcohol. And consider talking to a career counselor or therapist — not because something is wrong with you, but because professionals navigate transitions faster with a guide. Rebuilding at 45 is not starting over; it is starting from experience. The U.S. Department of Labor’s employment resources include programs specifically supporting experienced workers in transition.

    Being fired at 45 is an event, not a verdict on your worth. Separate your identity from what happened, allow real grief with a deadline, rebuild confidence through small daily wins, craft an honest forward-looking story, and invest in skills and network — confidence returns through action, not waiting.

    Conclusion

    Rebuilding self-confidence after being fired at 45 is a project, not a mood — and projects have plans. Challenge the catastrophic story with written evidence of your capabilities. Grieve honestly, then contain it with structure and routine. Stack small wins daily until your brain has fresh proof of your competence. Tell a true, forward-looking story about the transition. And build momentum through skills, network, and physical health. The confidence you rebuild this way is sturdier than what you had before, because it is tested. You are not starting over at 45 — you are starting from twenty years of experience, and that is an advantage. For more on navigating work and life transitions, explore our personal development guides, learn about our team, or share your story with us.

    Frequently Asked Questions

    How long does it take to recover confidence after being fired?

    There is no fixed timeline, but most people turn a corner within 2 to 3 months of deliberate rebuilding — structured days, small wins, and forward motion. The critical factor is not time but action: passive waiting extends the slump, while daily progress, however small, steadily restores self-belief. If low mood persists beyond a few months, consider talking to a therapist.

    Should I tell interviewers I was fired?

    Be honest but brief and forward-looking. A simple “the role was eliminated” or “it wasn’t the right fit, and here’s what I’m looking for now” works. Never lie — it will surface — but do not dwell or badmouth. Interviewers care far more about what you learned and where you are headed than about the details of the departure.

    Am I too old at 45 to change careers?

    No. Forty-five is young in career terms — you likely have 20+ working years ahead. Career changers at midlife bring judgment, networks, and work ethic that employers value. The key is translating existing skills to the new field and filling specific gaps with targeted learning, not starting from zero.

    How do I stop feeling ashamed about being fired?

    Shame thrives in secrecy, so tell trusted people what happened — you will discover how common it is. Separate the event from your identity with written evidence of your track record, and challenge catastrophic thoughts with facts. Shame fades as you take visible forward action; each step rebuilds the story from “fired” to “in transition.”

    Should I take the first job offered or wait for the right one?

    It depends on finances, but avoid deciding from panic. If money is tight, bridge work (contract, freelance, part-time) preserves income while you search properly. Taking a badly mismatched permanent role from desperation often leads to a second painful exit. Give yourself a financial runway plan so decisions come from strategy, not fear.

  • How to Make Invisible Ink with Lemon Juice for a Kids’ Party

    How to Make Invisible Ink with Lemon Juice for a Kids’ Party

    Every kid dreams of being a secret agent, and nothing delivers the fantasy like a message that appears from nowhere. Invisible ink made from lemon juice is the classic party trick for a reason: the supplies cost almost nothing, the science is genuinely cool, and the moment the hidden message browns into view, you will hear gasps. It is the perfect centerpiece for a spy-themed birthday or a rainy-day science adventure. Here is how to make invisible ink with lemon juice for a kids’ party — the recipe, the safe reveal, the chemistry behind it, and the games that make it unforgettable.

    The Science: Why Lemon Juice Turns Visible

    The trick is chemistry, not magic. Lemon juice contains organic compounds — sugars and acids — that are nearly invisible when dry on paper but oxidize and brown when heated, much like the way a cut apple browns in air or toast darkens in the toaster. Paper itself browns at higher temperatures, so gentle heat reveals the juice writing before the paper scorches: the message appears as brown text on still-white paper. Acids in the juice also weaken the paper fibers slightly, making them char a touch faster than the surrounding sheet. This is the same principle behind historical secret inks — spies and soldiers have used lemon juice, milk, and onion juice for centuries, with heat or chemical developers revealing the message. Telling the kids this history mid-activity doubles the cool factor: they are using real espionage chemistry. The American Chemical Society’s invisible ink chemistry explains the oxidation reactions for curious young scientists.

    What You Need (the Supply List)

    Keep it simple — everything is already in most kitchens. For each child: a small bowl, lemon juice (fresh-squeezed works best; bottled works fine), cotton swabs or small paintbrushes as pens, and white paper (thicker paper like cardstock holds up better to heat). For revealing: an adult-operated heat source — a clothes iron on low, a warm light bulb, or a hair dryer on hot all work; candles and open flames are not for kids’ parties, full stop. Extras that elevate the activity: envelopes for the finished secret messages, stickers and stamps for “classified” seals, and magnifying glasses for examining the revealed text. Prep the stations before the party: juice poured, swabs ready, paper stacked. A dozen kids can be writing within two minutes of sitting down, which matters enormously at a birthday party where attention spans are measured in seconds.

    Writing the Secret Messages

    The technique is forgiving, which makes it perfect for young kids. Dip the cotton swab in lemon juice — not dripping, just wet — and write or draw on the paper. Press lightly; heavy strokes pool juice and show faintly even before heating, spoiling the surprise. Let the writing dry completely (about 15–20 minutes, or speed it with a cool hair dryer) until it is truly invisible — hold it up to the light to verify. Tips for the best messages: write big, since fine detail gets lost; simple block letters beat cursive for young writers; drawings and treasure maps work as well as words. Have the kids write their messages, seal them in envelopes marked “TOP SECRET,” and trade with a partner — the reveal becomes a social event, not just a demo. While messages dry, run the history lesson: real spies used this. The drying wait builds delicious anticipation.

    Revealing the Messages Safely

    This is the adult’s job — heat plus kids plus excitement needs supervision. The safest method: a clothes iron on its lowest setting, pressed briefly over the paper (adult only, kids watch from a step back). The message browns into view within seconds, and the drama is unbeatable. Alternative: hold the paper near (not touching) a warm incandescent bulb for a minute or two, or blast it with a hair dryer on hot. Whatever the method, the rule is gentle heat and constant attention — the goal is browned juice, not scorched paper, and overheating ruins the reveal. Let each child present their own message for the iron moment; being the agent whose intel gets decoded is the memory they will keep. Reveal messages one at a time for maximum theater — a production line kills the magic. And photograph the revealed messages; they fade back toward invisibility over days as oxidation completes.

    Party Games That Use the Ink

    The ink is the tool; the games are the party. Classic one: the treasure hunt — hide clues around the house or yard as invisible-ink messages, each revealing the location of the next, ending at the cake or goodie bags. Spy training course: stations where kids write codenames, decode a master message, and create their own secret maps. Mystery dinner: each place setting hides an invisible-ink riddle revealing the menu or a prize. For older kids, add a twist: some messages revealed by heat, others by a second method (see below), so agents must figure out which developer each message needs. Time the hunt to end just before cake — sugar plus espionage is a perfect party arc. The ink activity fills 30–45 minutes effortlessly, which in party-planning terms is gold.

    More Invisible Inks to Try

    Once the lemon juice wows them, level up. Milk works like lemon juice (proteins brown with heat) and writes even more invisibly. Baking soda solution, revealed by painting over it with grape juice or turmeric — the acid-base color change appears instantly with no heat, which is safer for the youngest kids. White crayon on white paper, revealed by watercolor wash (the wax resists the paint), needs no heat at all and delights preschoolers. And for the grand finale: tonic water, revealed under a blacklight — the quinine fluoresces brilliantly, and a UV flashlight feels like genuine spy gear. Each ink teaches a different chemistry principle: oxidation, acid-base reactions, hydrophobic resistance, fluorescence. The Exploratorium’s secret message activities offer structured versions of each method with the science explained at kid level. One party could run the whole sequence — a complete chemistry course disguised as espionage.

    Lemon juice invisible ink works because its organic compounds brown with gentle heat before the paper does. Kids write with juice-dipped swabs, let messages dry truly invisible, then an adult reveals them with an iron on low. Add spy history, treasure-hunt games, and alternate inks (milk, baking soda, tonic water) for a complete party-worthy chemistry adventure.

    Conclusion

    Making invisible ink with lemon juice for a kids’ party is simple: juice, swabs, paper, patience while it dries, and an adult with an iron for the big reveal. The chemistry — oxidation browning the juice before the paper — is real science with a real espionage history, and the games practically plan themselves. Write big, reveal dramatically, photograph fast. For more kid-friendly science activities, visit our science section, meet our team, or share your party science wins.

    Frequently Asked Questions

    How does lemon juice invisible ink work?

    Lemon juice contains sugars and acids that dry nearly invisible but oxidize and brown when gently heated — like toast browning. Paper browns at a higher temperature, so careful heat reveals the juice writing as brown text on white paper before the sheet scorches.

    What is the safest way to reveal invisible ink with kids?

    An adult using a clothes iron on the lowest setting, with children watching from a step back. Alternatives include a hair dryer on hot or holding paper near a warm bulb. Avoid candles and open flames entirely at kids’ parties — the reveal should be thrilling, not hazardous.

    Can you use bottled lemon juice for invisible ink?

    Yes — bottled juice works, though fresh-squeezed tends to give slightly stronger reveals. The key variables are writing lightly (heavy strokes show prematurely), drying completely until truly invisible, and applying gentle, even heat for the reveal.

    How long does invisible ink last before fading?

    The revealed message is most dramatic in the first hours and gradually fades over days as oxidation completes and the contrast diminishes. Photograph revealed messages promptly if you want to keep them. Unrevealed dried messages remain developable for weeks.

    What other household items make invisible ink?

    Milk (revealed by heat, like lemon juice), baking soda solution (revealed by grape juice via acid-base color change, no heat needed), white crayon (revealed by watercolor wash), and tonic water (revealed under blacklight by fluorescence). Each demonstrates a different chemistry principle.

  • How to Stay Hydrated During a Summer Soccer Tournament

    How to Stay Hydrated During a Summer Soccer Tournament

    It is 96 degrees, you have played two games already, game three starts in forty minutes, and your kid’s face is the color of a tomato. Summer soccer tournaments are hydration obstacle courses: multiple games in brutal heat, short turnarounds, and young athletes who will not drink unless someone hands them a bottle. Dehydration does not just cause cramps — it tanks reaction time, decision-making, and sprint speed long before anyone feels truly thirsty. The families and players who handle tournament weekends well do not have better genetics; they have a system. Here is the full system: what to drink, when to drink it, how much, and the warning signs that mean stop playing.

    Start Hydrating Before the Tournament, Not During Game One

    The biggest hydration mistake is trying to catch up on game day. By the time you feel thirsty during a match, you are already one to two percent dehydrated — enough to measurably impair performance. The fix starts 24 hours out: drink water steadily the day before, eat water-rich foods (fruit, vegetables, soups), and avoid the dehydration accelerators — excess caffeine, alcohol for adult players, and very salty fast food without matching water. The morning of the tournament, drink 16 to 20 ounces of water two to three hours before the first game, then another 8 to 12 ounces 20 minutes before kickoff. Your urine is the honest gauge: pale straw color means you are ready; dark yellow means you started behind. Coaches should say this out loud at the pre-tournament meeting, because teenagers left to their own devices will show up having drunk nothing but a soda.

    Water vs. Sports Drinks: What the Science Actually Says

    For games under an hour in moderate heat, plain water is all anyone needs. But summer tournaments mean 60 to 90 minute games in extreme heat, often twice a day — and that changes the equation. When exercise exceeds an hour, especially in heat, you lose not just water but sodium and potassium through sweat, and replacing water alone dilutes blood sodium further. That is when sports drinks earn their place: the Gatorade Sports Science Institute’s research consistently shows that carbohydrate-electrolyte drinks sustain performance better than water alone in prolonged heat exercise. Practical rule: water for warm-ups and short turnarounds, sports drinks during and after games lasting over an hour or in temperatures above 85°F. Avoid energy drinks entirely — the caffeine and sugar spike followed by a crash is the opposite of what a tournament athlete needs. And for the budget-conscious, a homemade option (water, a pinch of salt, a squeeze of orange juice, a teaspoon of honey) covers the basics surprisingly well.

    The In-Game and Between-Games Protocol

    During the game, the target is 6 to 12 ounces every 15 to 20 minutes — small, frequent sips beat occasional big gulps, which slosh and cramp. Every stoppage is a drinking opportunity: goal kicks, injuries, halftime. Halftime deserves a real refuel: 12 to 16 ounces of fluid plus easily digestible carbs (banana, pretzel sticks, orange slices — the classic tournament snacks exist for a reason). Between games is where tournaments are won and lost. With 40 to 90 minutes between matches, the priority order is: fluid first (16 to 24 ounces), then food (carbs plus a little protein — a turkey sandwich, pasta, rice), then shade and cooling. Cooling matters as much as drinking: ice towels on the neck, shade tents, and cool (not ice-cold) water for drinking. Players should weigh themselves if possible — a two percent body weight drop across the day means the drinking plan is failing and needs to intensify.

    Eating for Hydration: Food Is a Fluid Strategy

    Roughly 20 percent of daily water intake comes from food, and tournament eating should exploit that. Watermelon, oranges, grapes, cucumbers, and lettuce are all over 90 percent water — the sideline cooler should look like a produce stand, not a chip aisle. Salty snacks have a legitimate role between games: pretzels, salted nuts, or pickles help the body retain the water you are drinking, which is exactly what a sweating athlete needs. What to avoid: heavy, greasy food between games (it sits in the stomach and competes with fluid absorption), huge meals right before kickoff (eat the real meal at least two to three hours before), and the all-sugar trap of candy and soda, which spike and crash young players. For multi-day tournaments, dinner the night before day two matters enormously: a real carb-rich meal with plenty of water sets up the entire next day. The teams that eat like athletes recover like athletes.

    Know the Warning Signs: Cramps, Exhaustion, and Heat Stroke

    Every parent and coach at a summer tournament must know the escalation ladder. Heat cramps — painful muscle spasms — are the first warning: stop activity, stretch gently, drink electrolyte fluids, and do not return until cramps fully resolve. Heat exhaustion is next: heavy sweating, weakness, cool and clammy skin, nausea, headache, dizziness. Move the player to shade immediately, apply cool towels, give fluids, and do not let them return that day. Heat stroke is the emergency: hot, red skin that may be dry, confusion or altered behavior, rapid pulse, body temperature above 103°F — call 911 immediately and cool aggressively (ice bath or ice towels on neck, armpits, groin) while waiting. The CDC’s extreme heat guidance is worth every coach reading before tournament season. The rule that prevents tragedies: when in doubt, sit them out. No tournament game is worth a hospital visit.

    Tournament hydration is a 24-hour system, not a water bottle: preload the day before, sip 6-12 ounces every 15-20 minutes during games, use sports drinks for long hot matches, refuel with carbs and salt between games, and know the heat illness ladder cold. The teams that hydrate like professionals play like them in game four.

    Gear That Makes Hydration Automatic

    Systems beat willpower, and gear creates systems. Every player needs their own large water bottle — 32 ounces minimum — labeled with their name, because communal jugs breed both confusion and germs. Insulated bottles keep water cool through a four-game day; warm water does not get drunk. Coaches should bring a team cooler with ice, extra water, and sports drinks, plus a pop-up shade tent — the $60 tent is the best heat-safety purchase in youth sports. Cooling towels (the evaporative kind) cost a few dollars each and genuinely help between games. And the simplest system of all: scheduled drink breaks. Do not rely on kids to self-hydrate; build water breaks into warm-ups, halftime, and every between-game routine until it is automatic.

    Conclusion

    Staying hydrated through a summer soccer tournament is not about chugging water at halftime — it is a full-day system of preloading, steady sipping, smart sports drink use, water-rich food, shade, and knowing when heat illness is starting. Set the system up before the first whistle, enforce it like any other game plan, and your team will be the one still sprinting in the final. For more tournament-smart sports guidance, visit our sports section, meet the team behind these guides, or send us your sports health question anytime.

    Frequently Asked Questions

    How much water should my child drink during a soccer tournament?

    Aim for 6 to 12 ounces every 15 to 20 minutes during play, 12 to 16 ounces at halftime, and 16 to 24 ounces between games. Over a full tournament day, most youth players need 60 to 100 ounces total depending on heat and game count. Pale-yellow urine is the best ongoing gauge.

    Are sports drinks better than water for young athletes?

    For games over an hour or temperatures above 85°F, yes — sports drinks replace the sodium and potassium lost in sweat and provide carbs for energy, which water alone does not. For shorter games in moderate heat, plain water is sufficient. Avoid energy drinks entirely for youth athletes.

    What are the signs of heat exhaustion in a soccer player?

    Heavy sweating, weakness, cool or clammy skin, nausea, headache, and dizziness. Move the player to shade, cool with wet towels, give fluids, and keep them out for the rest of the day. Confusion, hot dry skin, or fainting signals heat stroke — call 911 immediately.

    What should players eat between tournament games?

    Easily digestible carbs plus some protein and salt: turkey sandwiches, bananas, pretzels, orange slices, pasta, or rice. Eat the bigger meal at least two hours before the next game. Avoid greasy food, candy binges, and soda between games.

    Can you drink too much water during a tournament?

    Yes — drinking extreme amounts of plain water without electrolytes during prolonged exercise can cause hyponatremia (dangerously low blood sodium). The fix is simple: drink to thirst plus a sensible schedule, and use sports drinks or salty foods during long, hot tournament days rather than water alone.

  • When Should I Cut Back My Perennials for Winter in Zone 5

    When Should I Cut Back My Perennials for Winter in Zone 5

    Every October, zone 5 gardeners face the same dilemma: shears in hand, staring at a perennial bed going dormant, wondering whether to cut everything down now or leave it standing. Your neighbor scalps her garden to the ground the day after the first frost. The garden blogger you follow says never cut anything until spring. Both are confident; both cannot be right. The truth is gloriously in-between: some perennials genuinely benefit from fall cleanup, others are better left standing, and the difference comes down to the plant, the pests, and what you want from your winter garden. Here is the zone 5 playbook.

    The General Rule: Wait for Hard Frost

    The single most important timing principle: do not cut back perennials while they are still green and growing. As long as foliage is alive, the plant is photosynthesizing and sending energy down into the roots and crown — energy that powers next spring’s growth. Cutting green foliage short-circuits this process and weakens the plant. Wait until a hard frost (temperatures in the mid-20s) has killed the top growth and it has turned brown and mushy. In zone 5 — covering much of the Midwest, New England, and the Mountain West — that typically means late October through November, though it varies by year and microclimate. Once the tops are truly dead, the plant has banked everything it can, and cleanup is safe. Cutting too early is the most common fall perennial mistake, and it is entirely avoidable: put the shears down until the frost does its work. Your patience is literally feeding next year’s flowers.

    Perennials to Cut Back in Fall

    Some perennials should be cut down in fall for genuine horticultural reasons, not just tidiness. Peonies top the list: their foliage harbors botrytis blight spores over winter, so cut stems to the ground and — critically — dispose of the foliage in the trash, not the compost. Bearded iris foliage should be cut to fans a few inches tall to discourage iris borers, which overwinter in the leaves. Daylilies with mushy, diseased-looking foliage get cut back to reduce overwintering pests and disease; healthy daylily foliage can stay. Bee balm and phlox, prone to powdery mildew, benefit from fall removal of infected foliage. Hostas turn to slime after frost and are easier to clean up in fall than as a matted mess in spring — plus fall cleanup removes slug eggs hiding in the debris. Any plant that showed serious disease or pest problems during the season should be cut back and its debris discarded, breaking the pest cycle. For these plants, fall cleanup is plant health care, not just aesthetics.

    Perennials to Leave Standing Until Spring

    A long list of perennials is better left alone, and the reasons are practical. Ornamental grasses — miscanthus, switchgrass, fountain grass — provide essential winter crown protection; their foliage insulates the growing point from freeze-thaw cycles, and cutting them in fall measurably reduces zone 5 survival. They also look magnificent in snow and ice. Coneflowers, black-eyed Susans, and asters hold seed heads that feed goldfinches and other birds all winter. Sedum ‘Autumn Joy’ keeps architectural seed heads that catch frost beautifully. Russian sage, lavender, and other woody-based perennials need their stems for winter hardiness — cut them in spring once new growth emerges. Marginally hardy plants like mums and heuchera survive zone 5 winters better with their foliage intact as insulation. Butterfly bush should wait until spring since fall pruning stimulates tender growth that winter kills. The University of Minnesota Extension’s perennial care guide offers a plant-by-plant breakdown of fall versus spring cleanup, complemented by the RHS perennial growing guide.

    The Wildlife Argument for Messy Gardens

    Beyond plant health, there is a compelling ecological case for leaving perennials standing. Hollow and pithy stems — from coneflowers, bee balm, Joe Pye weed, and many others — shelter overwintering native bees, ladybugs, and beneficial insects; cutting and discarding them destroys next year’s pollinators. Leaf litter and standing stems shelter butterfly chrysalides and moth cocoons. Seed heads feed birds through the leanest months, when natural food is scarcest. A garden cut to the ground in October is an ecological desert all winter; the same garden left standing hums with life. You do not have to leave everything — a compromise works beautifully: cut back the disease-prone plants that need it, tidy the areas visible from the street if that matters to you, and leave the back borders standing wild. Even a partial messy garden supports dramatically more wildlife than a scalped one. Fallen leaves can stay as mulch in beds rather than being bagged — they insulate crowns and feed the soil as they decompose.

    How to Cut Back Properly

    When you do cut, technique matters. Use clean, sharp pruners or shears — ragged cuts invite disease, and dirty tools spread it. Cut herbaceous perennials to 2 to 3 inches above the crown; cutting flush to the ground risks damaging the crown itself. For ornamental grasses in spring, use hedge shears or even a reciprocating saw for large clumps, cutting to about 4 to 6 inches, and wear gloves and eye protection — grass blades are razor-sharp. Do not compost diseased foliage; bag it for municipal yard waste or the trash. After cutting, apply a 2- to 3-inch layer of shredded leaf or straw mulch around (not over) crowns once the ground freezes — mulch applied before freeze-up can harbor rodents and delay dormancy. Mark the locations of late-emerging perennials like butterfly weed and balloon flower before you cut, so you do not accidentally dig them up in spring thinking they died. Clean and oil your tools before storing them; sharp tools make spring cleanup a pleasure instead of a chore.

    In zone 5, cut perennials back only after hard frost kills the tops — never while foliage is green. Cut disease-prone plants like peonies and iris in fall, but leave ornamental grasses, coneflowers, and seed heads standing until spring for winter protection and wildlife food.

    Conclusion

    Fall perennial cleanup in zone 5 is not all-or-nothing. Wait for hard frost, cut back the plants that harbor disease and pests, and leave the rest standing — the grasses for crown protection, the seed heads for birds, the hollow stems for overwintering bees. You will get a garden that survives winter better, supports wildlife, and frankly looks more interesting under snow than bare mulch ever could. Spring cleanup of what remains takes an afternoon and reveals the new growth already pushing up. For more seasonal perennial care, browse our gardening guides, meet the team, or ask us your perennial questions.

    Frequently Asked Questions

    When is it too late to cut back perennials in zone 5?

    It is rarely “too late” — if winter arrives before you finish, simply leave the rest until spring. Most perennials that prefer fall cleanup tolerate spring cleanup nearly as well; the main exception is disease-prone plants like peonies, where fall removal meaningfully reduces next year’s infection. When in doubt, leave it standing.

    Should I cut back ornamental grasses in the fall?

    No — leave them until spring. Their foliage insulates the crown against zone 5 freeze-thaw cycles, and fall-cut grasses survive winter measurably worse. They also provide winter beauty and wildlife shelter. Cut them back in early spring before new growth emerges, leaving 4 to 6 inches.

    Can I leave diseased foliage over winter?

    No. Foliage with serious disease (peony blight, iris borer damage, heavy mildew) should be cut and discarded — not composted — in fall to break the pest and disease cycle. This is one of the clearest cases where fall cleanup is genuinely important for plant health.

    Does leaving perennials standing really help wildlife?

    Significantly. Seed heads feed finches, chickadees, and other birds through winter; hollow stems shelter native bees and beneficial insects; leaf litter protects butterfly chrysalides. Research consistently shows that gardens left standing support far more overwintering wildlife than gardens cut to the ground.

    When should I mulch perennials for winter in zone 5?

    After the ground freezes — typically late November to December in zone 5. Mulching too early insulates warmth, delaying dormancy and sheltering rodents that gnaw crowns. Apply 2 to 3 inches of shredded leaves or straw around (not piled on) plant crowns once sustained freezing arrives.