Breaking

Category: Gaming

  • Why Your Game Keeps Crashing on Windows 11 After the Update

    Why Your Game Keeps Crashing on Windows 11 After the Update

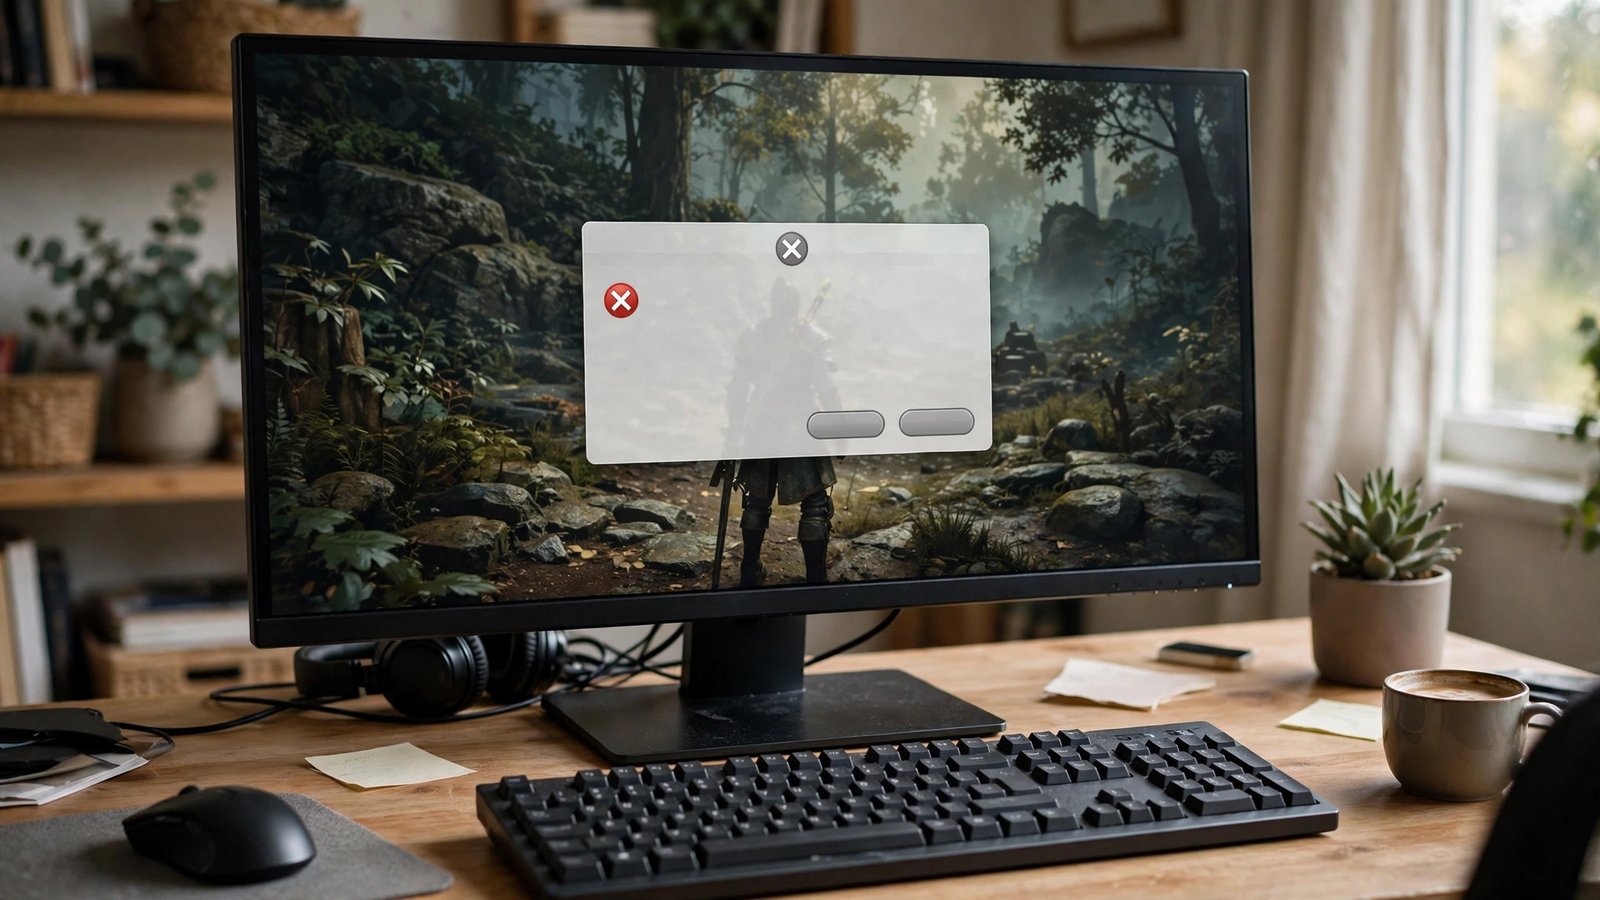
    You installed the latest Windows 11 update, launched your game, and now it crashes to desktop — every time, sometimes before the menu even loads. Few things are more infuriating, because the update was supposed to improve things. The good news is that post-update game crashes follow a predictable pattern: the update changed something underneath your games (drivers, security features, or system files), and the fix is almost always undoing or adapting to that change rather than reinstalling everything in sight. Work through these steps in order and you will find the culprit without the nuclear option.

    Step 1: Update Your GPU Drivers Cleanly

    The number one cause of post-update crashes is a driver conflict. Windows updates frequently replace or interfere with graphics drivers, leaving you with a mismatched mess. Do not just click “update” in your GPU app — do a clean install. Download Display Driver Uninstaller (DDU), boot into Safe Mode, wipe the graphics driver completely, then install the latest driver fresh from NVIDIA, AMD, or Intel’s website. This takes ten minutes and resolves a remarkable percentage of post-update crashes, because it removes the corrupted driver state the update left behind. While you are at it, check for chipset and motherboard driver updates too — Windows updates can desync those as well. The Microsoft guide to updating drivers in Windows covers the built-in path if you prefer it, though DDU plus a manual install is the more thorough route.

    Step 2: Check Windows Security Features That Break Games

    Windows 11 ships with virtualization-based security features — Memory Integrity (HVCI) and Virtual Machine Platform — that can conflict with certain games and their anti-cheat systems after an update re-enables or changes them. If your crashes started right after an update and your drivers are clean, open Windows Security, go to Device Security, Core Isolation, and check whether Memory Integrity got toggled on. Some games and anti-cheat drivers (notably older ones) crash or refuse to launch with it enabled. Similarly, check that virtualization settings in your BIOS match what your games expect — an update can reset BIOS-adjacent Windows settings. This is also the moment to verify your anti-cheat: games like Valorant, Destiny 2, and others require Secure Boot and TPM states that updates occasionally disturb. The game’s own support page usually documents its exact security requirements.

    Step 3: Roll Back the Update (Temporarily)

    If crashes began the same day as a specific update, the update itself is suspect — and Windows lets you remove it. Go to Settings, Windows Update, Update History, Uninstall Updates, and remove the most recent cumulative or feature update. Test your game. If the crashes stop, you have confirmed the cause and bought yourself time while Microsoft or the game developer ships a fix. This is a diagnostic step, not a permanent lifestyle: running an unpatched Windows indefinitely is a security risk. Set a reminder to reinstall the update in a few weeks, and check the game’s forums or the Microsoft community forums to see whether others report the same conflict and whether a patch has landed.

    Step 4: Verify Game Files and Reinstall Redistributables

    Updates can corrupt game files and shared libraries without touching the game itself. In Steam, right-click the game, Properties, Installed Files, Verify Integrity — this re-downloads anything damaged. For other launchers, use their equivalent repair or scan function. Then reinstall the Visual C++ Redistributables and DirectX: these shared libraries live outside the game folder, updates sometimes break them, and a fresh install from Microsoft’s website fixes a whole class of mysterious launch crashes. Also clear the game’s shader cache if it has one — corrupted cached shaders after a driver or OS change cause crashes that look exactly like deeper problems. These steps are boring and unglamorous, and they fix more crashes than any other single category of action.

    Step 5: Look at Overlays, RGB Software, and Background Apps

    The update may not have broken the game at all — it may have broken something running alongside it. Discord’s overlay, GeForce Experience’s overlay, MSI Afterburner with RTSS, RGB control software, and even some antivirus real-time scanners hook into games at a low level, and OS updates regularly change the interfaces they hook. Disable all overlays and close background utilities one group at a time, testing the game after each change. Pay special attention to anything that updated itself around the same time as Windows. If the game runs clean with everything off, re-enable apps one by one to find the offender, then check that app for an update — the vendor has usually patched compatibility within days. This step feels tedious, but it is pure process of elimination and it works.

    Step 6: Check Thermals, RAM, and Storage Health

    Sometimes the update is a coincidence. A Windows update stresses the system — long installs, heavy disk activity, thermal cycles — and that stress can expose hardware that was already marginal. If crashes happen across multiple games and include blue screens, run Windows Memory Diagnostic to check your RAM, check your drive’s health with CrystalDiskInfo, and monitor temperatures during gaming. A GPU creeping past 85°C or a CPU thermal-throttling will crash games regardless of software. Also confirm your drive is not full: Windows updates need breathing room, and a system drive above 90% capacity causes instability that masquerades as game-specific problems. Hardware issues do not care about your update schedule — rule them out before assuming software guilt.

    Step 7: The Targeted Reinstall (Not the Nuclear One)

    If nothing has worked, reinstall — but surgically. Uninstall the crashing game completely, including leftover folders in Documents and AppData where corrupted configs and caches hide, then reinstall fresh. If multiple games crash, consider an in-place Windows repair install (using the Media Creation Tool’s “upgrade this PC” option), which reinstalls Windows while keeping your files and apps — far less destructive than a full wipe and surprisingly effective at clearing update-induced corruption. A full clean Windows install is the absolute last resort, and honestly, if you have reached that point, the hardware checks in Step 6 deserve a second look first. Most post-update crash sagas end at Step 1 or Step 4; very few survive to Step 7.

    Post-update game crashes are almost always driver conflicts, re-enabled security features, or corrupted shared libraries — not broken games. Clean-install your GPU drivers first, check Memory Integrity and anti-cheat requirements second, and verify game files third. Reinstall Windows only after everything else has failed.

    Conclusion

    A game that crashes after a Windows 11 update is frustrating but rarely mysterious: the update disturbed drivers, security settings, or shared files, and each has a direct fix. Clean-install your GPU drivers, check virtualization-based security features against your game’s anti-cheat requirements, roll back the update to confirm the cause, verify game files and redistributables, eliminate overlay and background-app conflicts, and rule out hardware before considering any reinstall. Work the list in order and you will spend an hour troubleshooting instead of a weekend reinstalling. For more PC gaming walkthroughs, browse our gaming guides, meet the team behind them, or send us your tech questions.

    Frequently Asked Questions

    Why do Windows updates break games that worked fine before?

    Updates change low-level system components — graphics driver interfaces, security virtualization, memory management — that games and anti-cheat software depend on. Most games adapt fine, but driver mismatches and re-enabled security features cause the majority of post-update crashes.

    Is it safe to uninstall a Windows update?

    Yes, as a temporary diagnostic step. Windows keeps the option in Update History for exactly this reason. Do not stay on the uninstalled update forever, though — reinstall it once the conflict is resolved to keep receiving security patches.

    Should I disable Memory Integrity permanently for gaming?

    Only if a specific game requires it and you understand the tradeoff — Memory Integrity is a real security feature. Try updating the game and its anti-cheat first; developers usually patch compatibility. Disabling it is a workaround, not a fix, and you should re-enable it when you can.

    Can a Windows update damage my hardware?

    No — updates cannot physically damage components. But the heavy disk and CPU activity during a big update can expose already-failing hardware (bad RAM sectors, a dying drive), making it look like the update caused a hardware problem that was actually waiting to happen.

    My game crashes only in multiplayer after the update. Is that different?

    Often yes — multiplayer crashes point at anti-cheat or network components rather than graphics. Check the anti-cheat’s requirements (Secure Boot, TPM, HVCI settings), verify the game’s network ports are not blocked by a reset firewall, and confirm the game servers themselves are not having issues before troubleshooting your PC.

  • How to Play PC Games on Your Phone While Traveling

    How to Play PC Games on Your Phone While Traveling

    Your gaming PC sits at home while you are stuck in an airport, a hotel, or a relative’s guest room — but your Steam library does not have to stay behind. Playing PC games on your phone while traveling is genuinely practical in 2026, not a tech-demo gimmick. Between remote streaming from your own PC, cloud gaming services that run the game on distant servers, and a few hardware accessories that make a phone feel playable, you can get a real session in from almost anywhere with decent internet. The trick is picking the right method for your trip, because each one has different demands on your connection and your wallet.

    Option 1: Stream From Your Own PC With Steam Link or Moonlight

    If your gaming PC stays powered on at home, remote streaming turns your phone into a wireless monitor for it. Steam Link is the simplest starting point: install the app on your phone, pair it with your PC running Steam, and your whole library appears, controller support included. Moonlight paired with Sunshine (the open-source host software) is the enthusiast favorite — it uses NVIDIA’s streaming protocol, delivers lower latency and better image quality than Steam Link, and works over the internet, not just your home network. The catch is upload speed at home: your PC must push the video stream out, so you need at least 15 to 20 Mbps of upload bandwidth for smooth 1080p. Before a trip, test it from a coffee shop. If it feels good there, it will feel good from a hotel. The Steam Link setup guides on the Steam store cover pairing in a few minutes.

    Option 2: Cloud Gaming Services That Need No PC at All

    Do not want to leave your PC running for a week? Cloud gaming services run the game on their own servers and stream the video to your phone — your hardware barely matters. NVIDIA GeForce NOW lets you play games you already own on Steam, Epic, and other stores across free and paid tiers, with the paid tiers unlocking higher resolutions and longer sessions. Xbox Cloud Gaming comes bundled with Game Pass Ultimate and streams a rotating library directly through the browser or app. Amazon Luna and similar services fill out the options. The requirement here is download speed and latency on your end: 25 Mbps down and a ping under 60ms to the nearest server gives a good experience. Hotel Wi-Fi is the wildcard — always test with the service’s free tier before committing to a paid plan for a trip. The GeForce NOW system requirements page lists exactly what each tier needs.

    What Your Connection Actually Needs

    Every method lives or dies on the network, so understand the numbers. For remote streaming from your PC, home upload speed is the bottleneck — most cable plans offer far less upload than download, and 10 Mbps up will produce a blocky, stuttering mess. For cloud gaming, your current location’s download speed and latency matter most. Latency under 40ms feels nearly local; 60 to 80ms is playable for most genres; above 100ms, stick to turn-based games and strategy. Use your phone’s hotspot as a backup plan — 5G connections often outperform hotel Wi-Fi for both speed and latency, though they will chew through data fast (streaming 1080p uses roughly 8 to 10GB per hour). Download your games’ offline-capable titles as a fallback: many single-player PC games run fine with no connection at all once launched.

    The Controller Question: Touch Controls Versus Real Hardware

    Touch controls are fine for strategy games, card battlers, and point-and-click adventures — and terrible for shooters and action games. For anything demanding, bring a controller. A telescoping phone controller that clamps around your handset turns it into a convincing handheld console and packs flat in a carry-on. Alternatively, most modern Bluetooth controllers pair directly with phones: Xbox and PlayStation controllers both work, and a simple phone clip mount turns that combo into a portable rig. Pair the controller before you leave home, not in the hotel lobby — Bluetooth pairing fights with hotel captive portals in annoying ways. Whatever you bring, test the full chain (controller to phone to stream) at home first. Debugging three new links in the chain at midnight in a hotel room is nobody’s idea of a vacation.

    Picking Games That Survive Streaming

    Not every game streams equally well, and choosing wisely makes the difference between a great trip and a frustrating one. Turn-based strategy, RPGs, deck-builders, management sims, and story adventures are ideal — latency barely matters when the game waits for you. Competitive shooters and fighting games are the worst candidates; even 50ms of added latency changes outcomes. A smart travel library mixes a few streamed heavy-hitters with natively installed mobile-friendly PC ports and offline games for dead zones like airplanes. Before the trip, install your chosen games’ mobile apps where they exist, verify your cloud saves sync (Steam Cloud, Xbox cloud saves), and download anything you might want offline. Nothing kills a travel session like discovering your save is on the PC at home.

    Battery, Heat, and Data: The Practical Realities

    Streaming video for hours is one of the heaviest things a phone can do. Expect serious battery drain — a power bank or a seat with USB power is essentially mandatory for long sessions. Phones also throttle when hot, and a throttled phone drops frames; take the case off during long sessions and avoid playing with the phone sitting on a warm blanket. On data: streaming at 1080p consumes about 8 to 10GB per hour, so an “unlimited” plan with a hotspot cap can surprise you — check whether your carrier throttles hotspot data after a threshold. Drop the stream to 720p when on cellular; on a six-inch screen the difference is small and the data savings are large. These are unglamorous details, but they are what separate travelers who actually game from travelers who tried once.

    Playing PC games on your phone while traveling comes down to three choices: stream from your home PC with Moonlight or Steam Link, use a cloud service like GeForce NOW, or play offline-capable games natively. Test your full setup — connection, controller, and saves — at home before you leave.

    Conclusion

    You do not have to leave your PC library behind when you travel. Stream from your own rig with Steam Link or Moonlight if your home upload speed allows it, lean on cloud gaming services when it does not, and keep offline games ready for airplanes and dead zones. Bring a real controller, mind your data and battery, and pick genres that forgive latency. Test everything once at home and the hotel session will just work — your backlog is not going to clear itself. For more gaming setup walkthroughs, browse our gaming guides, meet the team behind them, or send us your tech questions.

    Frequently Asked Questions

    Can I play my Steam games on my phone without buying them again?

    Yes, with both main methods. Steam Link and Moonlight stream games you already own from your own PC at no extra cost. GeForce NOW lets you play many Steam games you own on their servers — you log into your existing Steam account, so there is nothing to rebuy for supported titles.

    How much upload speed do I need at home for remote streaming?

    At least 15 to 20 Mbps of upload for smooth 1080p at 60 fps. Most fiber connections handle this easily; many cable plans do not. Test from outside your home network before a trip — in-home tests hide upload bottlenecks completely.

    Will cloud gaming work on hotel Wi-Fi?

    Sometimes. Hotel Wi-Fi varies wildly — some hotels deliver 50+ Mbps with low latency, others crumble under evening load. Always test with a free tier first, prefer 5GHz networks, and keep your phone’s 5G hotspot as a backup. Wired ethernet via a USB-C adapter is the most reliable hotel option when available.

    Do I need a special controller for phone gaming?

    No. Standard Xbox and PlayStation controllers pair with phones over Bluetooth and work with most streaming apps. Telescoping phone controllers are nicer for travel since they form one unit with the phone, but any Bluetooth controller you already own is a fine start.

    How much mobile data does game streaming use?

    Roughly 8 to 10GB per hour at 1080p, or 3 to 4GB per hour at 720p. On a phone screen, 720p looks nearly as good and dramatically reduces data use. Check your carrier’s hotspot throttle threshold before a long trip.

  • When Should You Upgrade Your Graphics Card for 1440p Gaming

    When Should You Upgrade Your Graphics Card for 1440p Gaming

    1440p is the sweet spot of PC gaming — visibly sharper than 1080p without the brutal hardware demands of 4K — but it is also the resolution where graphics cards go to show their age first. One year your card cruises at 144 frames per second; the next, new releases have you dropping settings to medium just to stay above 60. The question is never whether you will upgrade eventually, but when the upgrade actually buys you something worth the money. Here is how to read the signals and time it right.

    The Performance Signals That Mean “Now”

    Your games are already telling you. The clearest signal is settings erosion: if you have dropped from high to medium presets in recent releases to hold 60 fps at 1440p, your card has fallen behind the current generation’s baseline. A second signal is the 1% lows — those stutters and hitches during busy scenes. Average frame rates can look fine while the worst 1% of frames tank, and that stutter is what makes a game feel bad. A third signal is new features you cannot use: if every discussion of a game you want mentions ray tracing, frame generation, or upscaling modes your card does not support, you are locked out of the modern toolkit. Two of these three hitting at once means the upgrade will be felt every single day.

    Check for Bottlenecks Before You Blame the GPU

    A new graphics card cannot fix a problem that is not the graphics card’s. Before spending $400 or more, confirm the GPU is actually your limiter. Run your most demanding game with a monitoring overlay and watch GPU utilization: if it sits at 95 to 100% while the CPU cruises at 50%, the GPU is the bottleneck and an upgrade will help directly. If the GPU is at 70% while one or two CPU cores are maxed out, you are CPU-limited — a faster card will sit idle waiting for data. Also check your RAM: 16GB is the realistic minimum for modern 1440p gaming, and running single-channel or slow DDR4 can cost 10 to 15% of your frame rate. The GPU database and reviews at TechPowerUp are the gold standard for comparing exactly where your current card sits.

    The Generation Cycle: Timing the Market

    Graphics cards release in generations roughly every two years, and where you buy in that cycle matters enormously. The worst time to buy is the three to six months before a new generation launches: you pay full price for soon-to-be last-gen hardware, and launch-day availability is usually terrible anyway. The best time is typically six to twelve months after a launch, when prices have settled, driver maturity has improved performance, and the used market is flooded with previous-generation cards from early adopters. If your current card is tolerable and a new generation is rumored within six months, waiting is almost always the right call. The performance-per-dollar jump between generations at the midrange is routinely 30 to 50%, which dwarfs any sale price on old stock.

    What “Enough” Looks Like for 1440p Right Now

    For high-refresh 1440p (120Hz and up) in current games at high settings, you want a card in the upper-midrange tier with at least 12GB of VRAM — 8GB cards are increasingly hitting memory limits at 1440p with high-resolution texture packs, causing stutter that no settings tweak fixes. For 60 fps at high settings, the midrange tier suffices. Upscaling (DLSS, FSR, XeSS) has changed the math: a card that renders internally at a lower resolution and upscales can punch well above its raw power, so factor in which upscaling tech a card supports — it effectively extends a card’s 1440p lifespan by a generation. Be honest about your monitor: buying a card for 165Hz when your display is 75Hz wastes money you will never see. Match the card to the monitor you actually own.

    The Used Market: Where the Real Deals Live

    The used GPU market is the budget 1440p gamer’s best friend, with one caveat: buy smart. Previous-generation cards from gamers upgrading to the latest release are often lightly used and sell for 40 to 60% of their original price. Prioritize sellers with original boxes and receipts, ask whether the card was used for mining (mining cards are not automatically bad, but they should be priced accordingly and have been run hard), and test immediately on arrival with a stress test like FurMark plus a real game session. Local marketplaces let you test before paying, which is worth a small premium. A used previous-gen upper-midrange card frequently outperforms a new current-gen budget card at the same price — the Tom’s Hardware GPU hierarchy ranks every card by real gaming performance, making used-market comparisons straightforward.

    Budget Math: The Cost-Per-Year Rule

    Think of a GPU purchase as buying years of 1440p gaming, not buying a card. A $500 card that serves you well for four years costs $125 per year; a $300 card you replace after two years costs $150 per year and delivers a worse experience throughout. The sweet spot is usually the upper-midrange card from the current or previous generation — strong enough to last three to four years at 1440p, cheap enough that the math works. Set a firm budget before shopping, then buy the best cost-per-year option inside it rather than stretching for a flagship whose extra 15% performance costs 60% more money.

    Upgrade Day Checklist

    When the new card arrives, a few steps protect your investment. Use Display Driver Uninstaller (DDU) in Safe Mode to wipe old drivers before swapping cards — leftover driver fragments cause a disproportionate share of “new GPU, weird problems” complaints. Check that your power supply has the right connectors and enough wattage headroom (add 100W to the card’s rated draw as a safety margin). Measure your case: modern cards are long, and “it should fit” has disappointed many buyers. After installation, reinstall drivers fresh, enable Resizable BAR in your BIOS if your platform supports it (a free few percent in many games), and re-run your benchmark game to confirm the gains.

    Upgrade when your card can no longer hold your target frame rate at settings you enjoy — not when a new card exists. Confirm the GPU is the real bottleneck, buy six to twelve months into a generation, target 12GB+ of VRAM for 1440p longevity, and judge every option by cost per year of good gaming.

    Conclusion

    The right time to upgrade your graphics card for 1440p gaming is when the signals converge: settings dropping to medium, 1% lows stuttering through busy scenes, and new features locked behind hardware you do not have. Verify the GPU is truly the bottleneck, time your purchase for the settled middle of a generation, buy enough VRAM to age gracefully, and let the used market stretch your budget. A well-timed upper-midrange upgrade buys three to four years of excellent 1440p gaming — which is exactly what the resolution is for. For more hardware walkthroughs, browse our gaming guides, meet the team behind them, or send us your build questions.

    Frequently Asked Questions

    Is 8GB of VRAM enough for 1440p gaming in 2026?

    It is becoming marginal. Many current releases with high texture settings exceed 8GB at 1440p, causing stutter when the card has to swap textures in and out. 12GB is the comfortable minimum for a card you intend to keep for several years; 8GB cards are now better suited to 1080p.

    Should I upgrade my GPU or my monitor first?

    The GPU first, unless your monitor is below 1440p or stuck at 60Hz with no adaptive sync. A great monitor cannot display frames your card cannot render. But if your card already pushes 100+ fps and your monitor caps at 60Hz, the monitor is wasting performance you already own.

    How much power supply do I need for a midrange upgrade?

    Most upper-midrange 1440p cards pair fine with a quality 650W power supply; budget a 750W unit if you are buying near the top of the midrange. Check the card manufacturer’s recommendation, then add headroom — and make sure the PSU has the required PCIe power connectors.

    Does DLSS/FSR really extend a card’s life?

    Yes, meaningfully. Quality-mode upscaling renders at a lower internal resolution and reconstructs the image, typically gaining 30 to 50% performance with minimal visual cost. A card with good upscaling support stays viable at 1440p roughly a year longer than its raw specs suggest.

    Is it worth waiting for the next generation if my card is struggling now?

    If launches are more than six months away, no — that is half a year of bad gaming to save a modest amount. If a launch is confirmed within three months and your card is merely mediocre rather than miserable, waiting usually pays off in either lower prices or better options.

  • How to Fix Stick Drift on Your Xbox Controller Without Buying a New One

    How to Fix Stick Drift on Your Xbox Controller Without Buying a New One

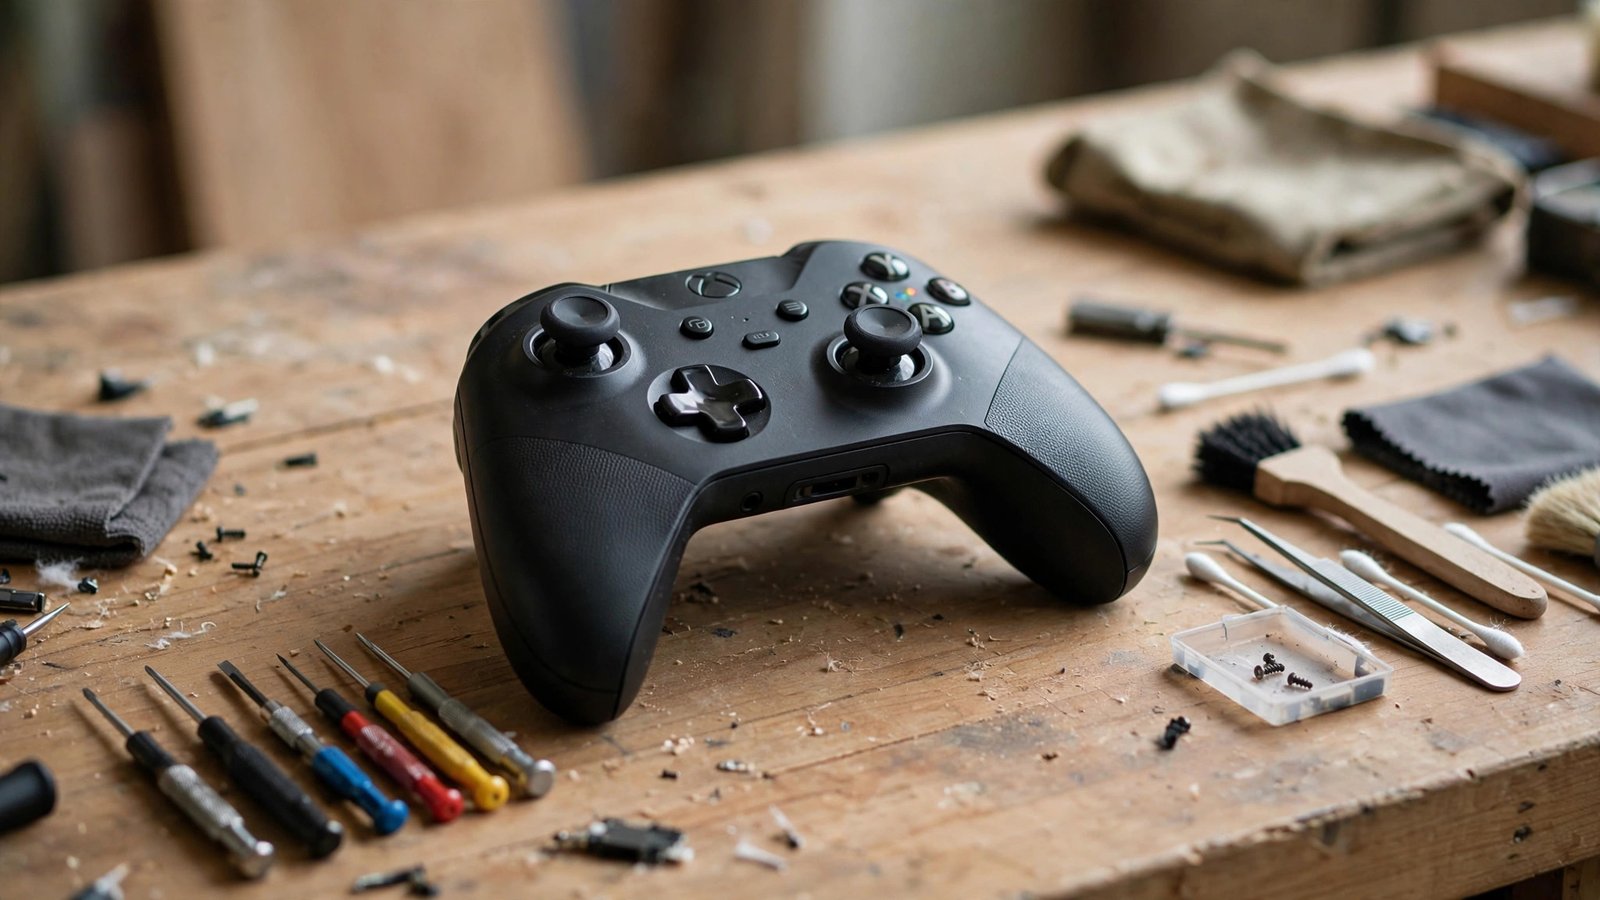
    Your character starts walking left on its own, your aim drifts in the menus, and suddenly a $70 controller feels like a liability. Stick drift — the analog stick registering movement when you are not touching it — is the most common controller failure in gaming, and Xbox controllers are not exempt. Before you buy a replacement, know this: most drift is caused by dust and worn contact surfaces, not dead electronics, and there is a real ladder of fixes worth climbing. Some take two minutes, some take an afternoon, and together they rescue far more controllers than most players expect.

    First, Confirm It Is Actually Drift

    Not every phantom movement is stick drift. Open the Xbox Accessories app on your console or PC, select the controller, and watch the stick visualization as you leave the sticks centered. If the dot sits off-center or jitters without input, that is drift. Test in two different games plus the Accessories app. If the drift follows the controller everywhere, it is hardware — and hardware is fixable. This two-minute diagnosis saves you from “fixing” a controller that was never broken.

    The Two-Minute Fixes: Clean and Recalibrate

    Start with the simplest cause: debris under the stick. Power the controller off, then use short bursts of compressed air around the base of the drifting stick while rotating it in slow circles — this dislodges dust and skin particles from the sensor well. Follow with a dry cotton swab around the stick base to pick up what the air loosened. Next, recalibrate: on PC, open the Windows game controller settings (joy.cpl), select the controller, and run the calibration wizard. On Xbox, the Accessories app lets you test and, on Elite controllers, adjust stick deadzones directly. Finally, check for firmware updates in the Accessories app — Microsoft has shipped updates that improved stick response curves. These steps fix a surprising share of mild drift, especially on controllers less than a year old. The Xbox support page for controller updates walks through the firmware process if you have never done it.

    Adjust Deadzones to Mask Minor Drift

    If cleaning helped but a small drift remains, deadzone adjustment can make the controller perfectly usable. The deadzone is the small range of stick movement the game ignores around center — increasing it slightly tells the game to ignore the phantom input. Many games, including Call of Duty and Fortnite, have deadzone sliders in their controller settings; bumping the value from the default 0.05 to 0.08 or 0.10 often erases mild drift with no perceptible cost to responsiveness. Xbox Elite controllers allow deadzone tuning at the hardware level through the Accessories app, which applies across all games. This is a mask, not a cure — the drift is still there — but for slight drift it is a legitimate long-term solution that costs nothing and takes thirty seconds.

    The Deep Clean: Isopropyl Alcohol Method

    When surface cleaning is not enough, the problem is usually grime on the potentiometer contacts inside the stick module. You can reach them without full disassembly. Dip a cotton swab in 90%+ isopropyl alcohol (higher concentration evaporates cleanly), lift the stick’s rubber skirt if possible, and work the damp swab around the base while moving the stick through its full range of motion. The alcohol dissolves the oily film that interferes with the contact wipers. Let it dry completely — at least ten minutes — before powering on. Repeat two or three times for stubborn cases. This method has revived countless controllers because the underlying failure is so often contamination rather than wear. The repair guides at iFixit show the stick module anatomy if you want to understand exactly what you are cleaning.

    Opening the Controller: When You Are Ready

    If external cleaning fails, the next level is opening the controller — which voids the warranty, so only do this on controllers outside their coverage. You will need a T8 or T9 Torx security screwdriver, a plastic pry tool, and patience. Xbox controllers open from the back after removing the battery cover, grips, and screws hidden under the side panels. Once inside, you can clean the potentiometers directly with alcohol and a swab, check for loose ribbon cables, and inspect the stick modules for visible damage. Take photos at each step — reassembly is much easier with a visual record. Dozens of detailed video walkthroughs exist for every Xbox controller revision; watch one all the way through before picking up the screwdriver. If the potentiometer’s resistive track is visibly worn or scratched, cleaning will not save it — that module needs replacing.

    Replacing the Stick Module

    A replacement analog stick module costs $10 to $15, and swapping it is the definitive fix for worn-out sticks. This requires soldering: the module is soldered to the controller’s board with around fourteen pins. If you already own a soldering iron and have basic skills, it is a thirty-minute job. If you do not, weigh the cost honestly — a basic soldering setup plus the part approaches half the price of a new controller, though the skill pays for itself across future repairs. An increasingly popular alternative is the Hall effect stick module, which uses magnets instead of physical contacts and essentially cannot develop drift. Drop-in Hall effect sticks for Xbox controllers exist from third-party makers and are worth considering if you are already opening the controller — you are fixing the problem and preventing its return in one move.

    When to Stop Fixing and Replace

    Know the exit points. If the controller is under warranty, stop at the external cleaning step and file a warranty claim — Microsoft covers stick drift under the standard warranty, and opening the controller kills that option. If drift returns within days of every cleaning, the resistive track is worn and only a module replacement will last. And if multiple buttons are failing alongside the drift, the controller has lived its life; put the repair time toward a new one. There is no shame in replacement — controllers are consumables, and a heavily used stick module simply wears out after a few thousand hours. The goal of this ladder is to rescue the controllers that can be rescued, not to perform miracles on the ones that cannot.

    Most Xbox stick drift is contamination, not death: compressed air, isopropyl alcohol, and deadzone tweaks fix or neutralize the majority of cases without opening the controller. Only reach for the screwdriver when external fixes fail — and never open a controller that is still under warranty.

    Conclusion

    Fixing Xbox stick drift without buying a new controller is a ladder, not a single trick. Confirm the drift in the Accessories app, clean around the stick with compressed air, recalibrate and update the firmware, mask residual drift with deadzone settings, and escalate to the isopropyl alcohol deep clean if needed. Opening the controller for a direct potentiometer clean or a full stick-module replacement — ideally a drift-proof Hall effect module — is the final rung for out-of-warranty controllers. Work the ladder in order and you will save most controllers long before the soldering iron comes out. For more repair walkthroughs, browse our gaming guides, meet the team behind them, or send us your hardware questions.

    Frequently Asked Questions

    Does Xbox warranty cover stick drift?

    Yes. Stick drift is covered under Microsoft’s standard controller warranty, which is typically 90 days for standalone controllers in the US (longer in some regions and for Elite models). File a claim through Xbox support rather than opening the controller, since disassembly voids the warranty.

    Will blowing into the stick with my mouth help?

    It can dislodge loose dust in a pinch, but breath moisture is the enemy of electronics — repeated use pushes humidity into the sensor. Compressed air does the same job without the moisture and costs a few dollars a can. Use the right tool.

    What are Hall effect sticks and are they worth it?

    Hall effect sticks measure position with magnets instead of physical wiper contacts, so there is nothing to wear out and drift essentially cannot develop. Third-party Hall effect modules for Xbox controllers are a genuine upgrade if you are already replacing a stick — they cost a bit more than standard modules but solve the problem permanently.

    Can deadzone settings damage my aim?

    Slightly increasing the deadzone (from 0.05 to around 0.10) has no perceptible effect for most players — you are only telling the game to ignore the tiniest phantom movements near center. Large deadzones above 0.15 will start to feel sluggish, so increase gradually and stop as soon as the drift disappears.

    How can I prevent stick drift in the future?

    Keep the controller in a case or drawer rather than out collecting dust, avoid eating over it, and give the sticks an occasional compressed-air cleaning. Drift is largely a matter of contamination and wear over thousands of hours — good storage habits meaningfully delay it.

  • What Is the Best Budget Gaming Headset Under $50

    What Is the Best Budget Gaming Headset Under $50

    Footsteps decide gunfights, and a fifty-dollar headset that lets you hear them clearly beats a two-hundred-dollar one you cannot afford. The budget headset market has quietly become one of the best values in all of gaming: the gap between a $45 headset and a $150 one is far smaller than the marketing suggests, especially if you know which corners are safe to cut. What matters at this price is not brand prestige but a short checklist — comfort for long sessions, a microphone your teammates can actually understand, and sound clear enough to place enemies by ear. Here is how to pick the right one without wasting money on junk.

    What Actually Matters in a Sub-$50 Headset

    Strip away the marketing and a budget gaming headset needs to do four things. First, it has to be comfortable for two to four hours — lightweight (under about 300 grams), with a padded headband and earcups deep enough that they sit around your ears instead of pressing on them. Second, the microphone needs to be intelligible: your squad should hear callouts, not a muffled cave. Third, the sound should have clear mids and highs so footsteps and reload sounds cut through explosions. Fourth, it has to survive — look for a braided or thick rubber cable and a headband with some flex rather than brittle plastic. Everything else — RGB lighting, “7.1 surround” badges, software suites — is decoration at this price and often a sign the money went to the wrong place.

    Stereo Beats Fake Surround at This Price

    Many budget headsets advertise 7.1 or “3D” surround sound. Treat that claim with skepticism. True surround requires multiple drivers per earcup, which does not exist at $50 — what you are getting is software that widens the stereo image, and it is usually worse than plain stereo for pinpointing footsteps. Windows Sonic, Dolby Atmos for Headphones, and Tempest 3D on PlayStation are free or cheap system-level options that do a better job, and they work with any stereo headset. Buy for driver quality and comfort, then enable your platform’s free spatial audio. The budget gaming headset reviews at RTINGS consistently show that simple, well-tuned stereo headsets outperform their “surround” rivals in positional tests at this price.

    The Standouts Worth Your Money

    A few models have earned their reputations through years of consistent reviews. The HyperX Cloud Stinger line remains the default recommendation: light, comfortable, with a swivel-to-mute mic and sound that punches above its price, frequently found under $50 on sale. Logitech’s G335 (the wired version) brings the comfort of its pricier siblings with a flip-to-mute mic and clean, balanced audio. On the ultra-budget end, headsets like the Turtle Beach Recon 70 and Corsair HS35 deliver perfectly serviceable sound and mics in the $30 to $40 range — the plastic feels cheap, but the audio does not. For console players who already own decent earbuds, a $15 to $20 attachable boom mic can turn earbuds into a legitimate gaming setup and sidestep the whole headset question. Prices fluctuate constantly, so check current listings rather than assuming any model’s sticker price — the PC Gamer headset roundup is updated regularly with street prices.

    Comfort: The Spec Nobody Lists

    A headset with great sound that hurts after ninety minutes is a bad headset. Clamping force — how hard the earcups squeeze your head — is the number one comfort factor, and it loosens with use on most models. If you wear glasses, look for headsets with softer memory-foam earcups or a channel in the padding; hard pads pressing your frames into your temples will end every session early. Over-ear (circumaural) designs beat on-ear at this price because they distribute pressure around the ear instead of on it. Weight matters more than it sounds: a 250-gram headset disappears on your head, while a 400-gram one becomes a neck workout by hour three. If possible, try the fit in a store, or buy from a retailer with easy returns — comfort is personal enough that reviews can only take you so far.

    The Microphone Test That Matters

    Almost every budget headset mic is a compromise, but the difference between usable and awful is huge. A detachable or flip-to-mute boom mic positioned near the corner of your mouth will always beat an inline cable mic. Before a ranked session, record yourself in Windows Voice Recorder or your console’s party test and listen back — you want clear voice with minimal hiss and no distortion when you get loud. Discord’s Krisp noise suppression and similar built-in filters can clean up a mediocre mic dramatically, so enable them. One caution: some ultra-cheap headsets route the mic through the same thin cable as the audio, and you can hear cable rub and handling noise. A braided cable or a separate mic boom mostly solves this.

    Wired Versus Wireless Under $50

    At this budget, wired wins on value every time. A $45 wired headset sounds like a $45 headset; a $45 wireless headset sounds like a $25 headset with a $20 radio strapped on. Budget wireless models also tend to have higher latency, shorter battery life, and cheaper-feeling builds. The one exception is if your setup genuinely demands wireless — a living-room console ten feet from the couch — in which case look for 2.4GHz wireless (not Bluetooth) for gaming, since Bluetooth adds noticeable audio delay. For desk and most couch setups, a wired headset with a long enough cable is the smarter buy, and the money saved goes into better drivers and a better mic.

    Avoiding the Junk: Red Flags

    The budget aisle is full of traps. Skip anything whose main selling point is RGB lighting or an aggressive “gamer” look at the expense of listed specs — lighting does not improve audio. Be wary of brands you cannot find real reviews for; the big marketplaces are flooded with white-label headsets that change names monthly. Check that the headset actually matches your platform: most wired 3.5mm headsets work everywhere, but USB-only headsets may not work on Xbox, and some need adapters for the Nintendo Switch’s handheld mode. Finally, ignore frequency response numbers on the box — “20Hz–20kHz” is printed on everything and tells you nothing about how it actually sounds.

    Under $50, buy for comfort, a clear microphone, and clean stereo sound — and ignore surround-sound badges and RGB lighting. A well-reviewed wired headset from an established brand, paired with your platform’s free spatial audio, will hear footsteps just as well as headsets costing three times more.

    Conclusion

    The best budget gaming headset under $50 is the one that disappears on your head, lets your team hear your callouts, and renders footsteps clearly — and several proven models do exactly that. Stick with well-reviewed wired headsets from established brands, prioritize fit and mic quality over feature badges, and let free spatial audio handle the surround effect. Try the fit if you can, test the mic before your first ranked match, and do not pay extra for lighting or fake 7.1. Fifty dollars is genuinely enough for competitive-grade audio in 2026; spend the savings on games instead. For more gear walkthroughs, browse our gaming guides, meet the team behind them, or send us your setup questions.

    Frequently Asked Questions

    Can a $50 headset really compete with expensive ones for FPS games?

    For hearing footsteps and directional cues, yes — the gap is much smaller than the price gap suggests. Expensive headsets win on build quality, comfort refinements, wireless performance, and overall sound richness for music. But positional audio, which is what wins gunfights, depends mostly on clean stereo tuning that budget models can absolutely deliver.

    Do I need a USB sound card or DAC for a budget headset?

    No. A 3.5mm headset plugged into your controller or motherboard is fine at this price. An external DAC helps high-impedance audiophile headphones, not efficient 32-ohm gaming headsets. Spend the money on a better headset instead.

    Will a budget headset work on PS5, Xbox, and PC?

    Most wired 3.5mm headsets work on all three — they plug into the DualSense, the Xbox controller, or the PC’s audio jack. USB headsets are trickier: they generally work on PS5 and PC but many do not work on Xbox. Check compatibility before buying a USB model for Xbox.

    How long should a $50 headset last?

    Two to three years of daily use is reasonable. The cable and the headband padding are the usual failure points. Detachable cables dramatically extend lifespan, so favor models that have them — replacing a $10 cable beats replacing a $50 headset.

    Are gaming earbuds a good alternative?

    They can be, especially for travel or if you dislike headsets. Earbuds with a decent mic work well for callouts, though they generally cannot match a good headset for positional audio in competitive shooters. For casual play they are a perfectly valid choice.

  • How to Reduce Input Lag on Your TV When Playing Call of Duty

    How to Reduce Input Lag on Your TV When Playing Call of Duty

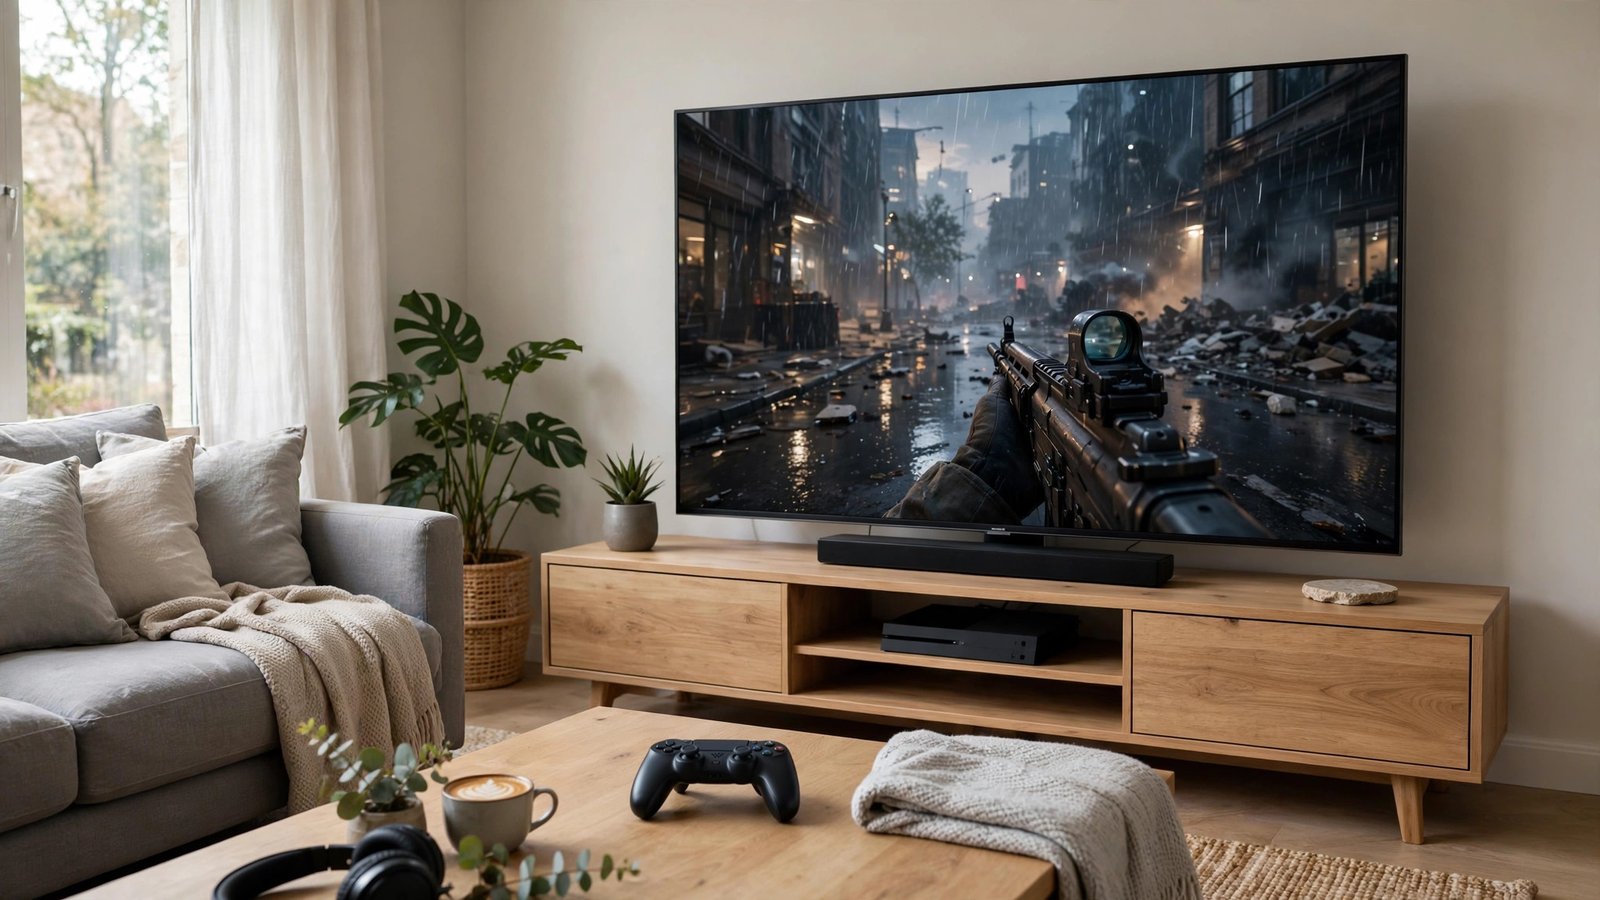
    Nothing in Call of Duty punishes you quite like a TV that is quietly working against you. You snap to a target, pull the trigger, and by the time the muzzle flash appears on screen, you are already staring at the killcam. That disconnect is called input lag, and on many living-room TVs it runs anywhere from 40 to over 100 milliseconds in the default picture mode — the difference between winning a gunfight and losing one you should have won. The good news is that you do not need a new TV to fix most of it. A handful of settings buried in your TV’s menu can cut that delay to a fraction of what it is now.

    What Input Lag Actually Is (and What It Is Not)

    Input lag is the time between your controller sending a command and the TV displaying the result. It is not your internet connection — high ping is a separate problem that feels similar but has a different cause. Input lag is purely local: the milliseconds your TV spends processing the image before showing it. A monitor marketed for gaming might add just 5 to 10 milliseconds, while a 65-inch TV in its Vivid or Cinema mode can add 80 to 120. In a game as fast as Call of Duty, where average time-to-kill is measured in a fraction of a second, those frames decide gunfights.

    Turn On Game Mode: The Single Biggest Fix

    Game Mode (sometimes labeled Gaming, Game Optimizer, or ALLM on newer sets) is the one setting that matters more than everything else combined. It tells the TV to skip most of its picture processing — the upscaling, smoothing, and noise reduction that look great on movies but add enormous delay on games. Turning it on typically drops input lag from 80-plus milliseconds down to 10 to 20. On most TVs you will find it under Picture Settings or in a dedicated gaming menu. Check the picture mode while the game is running — if it says anything other than Game, switch it manually. This single change is worth more than every other tweak in this article put together.

    Disable the Processing That Adds Lag

    Even in Game Mode, some TVs leave a few processing features on. Go through your picture settings and turn off motion smoothing — the feature with names like MotionFlow, TruMotion, Auto Motion Plus, or Smooth Motion. It creates interpolated frames that look buttery on sports but add massive delay. Turn off noise reduction, MPEG noise reduction, and any “digital clean” options, which process each frame before display. Drop sharpness to around 10 to 20 percent of the slider, because heavy sharpening is its own processing pass. The picture might look slightly less polished than the store-demo mode, but it will respond like a completely different television.

    Use the Right HDMI Port and Cable

    Not every HDMI port on your TV is equal. On many models, only one or two ports support the full-bandwidth features that consoles use — 4K at 120Hz, VRR, and auto low-latency mode. Check your TV’s manual or the small print above the ports themselves; the best port is often labeled HDMI 4 or marked with “eARC” alongside full bandwidth. Then use the high-speed HDMI cable that came with your console, or a certified Ultra High Speed cable if you are running 4K at 120 frames per second. Also, if you run the console through an AV receiver or soundbar first, test plugging it straight into the TV once — some receivers add their own delay. The gaming TV reviews at RTINGS include measured input lag for nearly every model, so you can look up exactly what your TV is capable of.

    Turn On ALLM and VRR for the Full Effect

    Two HDMI 2.1 features make a real difference beyond raw input lag numbers. Auto Low Latency Mode (ALLM) lets your console tell the TV to switch into Game Mode automatically every time you launch a game, and back out for movies — set and forget. Variable Refresh Rate (VRR) synchronizes the TV’s refresh with the console’s frame output, which smooths out the judder and tearing that happen when Call of Duty’s frame rate dips in heavy scenes. On PlayStation 5, enable VRR under Settings, Screen and Video, Video Output. On Xbox Series X|S, it is under Settings, General, TV and Display Options. Your TV may have a matching toggle in its gaming menu — turn that on too. These features help most when the game is running at 120Hz, so set your console’s output to 120Hz if the TV supports it.

    Dial In the Call of Duty Settings Themselves

    The game has its own levers. In the graphics settings, make sure the game is running in performance or fidelity mode according to your priority — the 120Hz performance mode is the competitive choice because it halves frame time versus 60Hz. Turn motion blur off entirely; it smears the image during fast turns and makes targets harder to track, adding a perceptual lag even when the TV is fast. Reduce film grain and depth of field for a cleaner image. Keep the console’s output resolution matched to what the TV handles natively so the TV is not doing extra scaling work. The official Activision support pages keep updated graphics and network settings guides for each new Call of Duty release, worth a check after every major update.

    Rule Out Your Network Before You Blame the TV

    Input lag and network lag stack, so make sure you are not fixing the wrong one. A quick test: if menus and the firing range feel sluggish, it is the TV. If only online matches feel delayed — hits not registering, enemies teleporting — it is the connection. Run Call of Duty’s built-in network stats during a match and watch the ping. If it is high, switch the console to a wired ethernet connection, which is dramatically more stable than Wi-Fi for gaming, and reboot your router. Fixing the TV when the real problem is the network is a classic misdiagnosis, so confirm which one is biting you before changing more settings.

    Game Mode alone typically cuts TV input lag from 80-plus milliseconds down to under 20. Everything else — the right HDMI port, disabled motion smoothing, VRR, and the game’s 120Hz mode — is stacking smaller wins on top of that one big fix. Start with Game Mode, verify it is active while the game is running, and only then chase the rest.

    Conclusion

    Reducing input lag on your TV for Call of Duty is mostly a settings project, not a shopping project. Enable Game Mode and confirm it is active during gameplay, turn off motion smoothing and noise reduction, use the TV’s full-bandwidth HDMI port with a good cable, and switch on ALLM and VRR so the console and TV cooperate. In the game itself, run the 120Hz performance mode with motion blur off, and wire the console to your network so ping does not compound the problem. For more setup walkthroughs, browse our gaming guides, meet the team behind them, or send us your tech questions.

    Frequently Asked Questions

    What is a good input lag number for a TV used with Call of Duty?

    Under 20 milliseconds is excellent and competitive with gaming monitors. Under 40 is playable for most people. Anything above 60 in the game’s display path is noticeable in fast shooters, and above 100 feels genuinely unresponsive. Game Mode on a modern TV usually lands between 9 and 20 milliseconds.

    Does Game Mode make the picture look worse?

    It looks different, not worse. Game Mode disables the processing that makes movies look cinematic, so colors may be slightly less punchy out of the box. You can calibrate brightness, contrast, and color inside Game Mode to get a great-looking picture that is also fast — the two goals are not mutually exclusive.

    Will a 120Hz TV automatically reduce my input lag?

    Not by itself. The refresh rate and the input lag are separate measurements. You need the TV in Game Mode (low processing delay) and the console outputting 120Hz (shorter frame times) together. A 120Hz TV stuck in Cinema mode will still feel laggy.

    Does playing on Wi-Fi increase input lag?

    Wi-Fi does not change your TV’s input lag, but it adds network latency and jitter that feel very similar during online matches. If only online games feel delayed, switch to a wired ethernet connection before touching TV settings — that is the far more likely culprit.

    Should I buy a gaming monitor instead of using my TV?

    If you have already enabled Game Mode, VRR, and 120Hz output and still want faster response, a gaming monitor (typically 1 to 5 milliseconds of lag) is the next step. But a modern TV properly configured gets within 10 to 15 milliseconds of most monitors, which is close enough that most players cannot tell the difference.

  • Why Your PS5 Overheats and Shuts Down During Long Sessions

    Why Your PS5 Overheats and Shuts Down During Long Sessions

    Three hours into an epic session, the fan sounds like a jet engine — then the screen goes black. “Your PS5 is too hot. Turn off your PS5 and wait until the temperature goes down.” The console that handled launch-day marathons now taps out after an hour, and every shutdown feels like it might be the last. PS5 overheating shutdowns are increasingly common as consoles age, but most have fixable causes — not death sentences. Here is why your PS5 overheats and shuts down during long sessions, and how to fix each cause from simplest to most involved.

    Why the PS5 Runs Hot (and Gets Hotter with Age)

    The PS5 is a powerful, compact machine — its processor can draw over 200 watts in a chassis not much bigger than a textbook, which is a serious thermal engineering challenge. Sony’s cooling solution is actually sophisticated: a large vapor chamber, a 120mm double-sided fan, and liquid metal thermal interface material (instead of traditional thermal paste) conducting heat from the chip to the heatsink. Liquid metal transfers heat superbly — when it is fresh and properly distributed. Over years of heat cycles, dust accumulation chokes airflow, and in some units the liquid metal can migrate or degrade, especially with the console stored vertically. The shutdown is the console protecting itself — annoying, but far better than the alternative of cooking the processor.

    Fix #1: Ventilation (the 10-Minute Check)

    Before anything else, audit the console’s breathing room — this resolves a large share of overheating cases. The PS5 needs at least 4 inches of clear space on all sides, especially the rear exhaust; cramming it into an enclosed TV cabinet with the doors closed is the number one cause of heat shutdowns. Heat rises, so top clearance matters. If the console lives in a cabinet, try a week with the cabinet doors open or the console relocated to the top of the unit — many “dying” PS5s are simply suffocating. Keep it away from heat sources: heating vents, direct sunlight through windows, and stacked on top of other warm electronics. Ambient room temperature matters more than people expect; a console fine in a 68°F room may shut down in an 85°F one. Fix the airflow first; it is free and frequently sufficient.

    Fix #2: Clean the Dust (the 20-Minute Job)

    Dust is the slow killer of console cooling, and the PS5 makes cleaning mercifully easy. Power down fully and unplug. Pop off the side panels (they slide off with a firm pull — no tools needed) to expose the fan and the dust-catcher ports Sony thoughtfully included. Vacuum the dust catchers — two small holes designed exactly for this — and carefully vacuum the fan blades and heatsink fins. Use short bursts of compressed air for the fins, holding the fan still so it does not spin freely (spinning generates voltage that can damage electronics). For a deeper clean, the fan removes with a few screws for thorough dusting. Do this every 3–6 months, more often with pets. Owners report dramatic temperature drops after the first real cleaning of a two-year-old console — years of dust form a felt-like blanket over the heatsink, and removing it restores the cooling the console was designed with. PlayStation’s official PS5 support pages illustrate the panel removal and dust-catcher locations with diagrams.

    Fix #3: The Liquid Metal Question

    Here is the advanced topic. The PS5 uses liquid metal between the processor and heatsink instead of thermal paste — superior when new, but it can migrate over years, particularly in vertically oriented consoles where gravity slowly pulls it downward, leaving parts of the chip with poor thermal contact. Symptoms of liquid metal problems: overheating that persists after thorough cleaning and perfect ventilation, especially sudden shutdowns rather than gradual fan ramp-up. Reapplying liquid metal is a delicate operation — it is electrically conductive, so a stray drop kills the board, and it requires complete disassembly. This is not a beginner project; if cleaning and ventilation have not solved it and the console is out of warranty, a reputable repair shop’s liquid metal service is the sane path. Note the controversy honestly: many vertical PS5s run for years without issue, and Sony designed for both orientations — but enough repair technicians report migration patterns that it belongs on the diagnostic list when simpler fixes fail.

    Fix #4: Software and Settings

    Do not overlook the digital side. Rest mode issues can leave the console warm 24/7 — if the PS5 feels hot when it should be sleeping, disable rest mode’s network features or power down fully between sessions. Performance mode versus resolution mode changes heat output; if shutdowns happen in one demanding title, try the other mode. Keep system software updated — Sony has shipped thermal management improvements in firmware updates. Rebuild the database (Safe Mode option) if the system behaves erratically; corrupted data can cause abnormal load patterns. Check that the console is not downloading or updating in the background during play, adding heat for no benefit. And manage expectations by title: some games push the hardware dramatically harder than others — a console stable for hours in one game shutting down in another points to load, not necessarily to failing hardware.

    When to Call Sony (Warranty and Repair)

    If cleaning, ventilation, and settings have all failed, it is professional time. Check your warranty status — PS5s carry a one-year manufacturer warranty, and some regions mandate longer coverage; a console overheating under normal conditions within warranty is Sony’s problem to fix, so do not open it yourself and void coverage. Out of warranty, Sony offers paid repair service with flat-rate pricing that is often reasonable compared to independent shops for board-level issues. Get a quote before committing — compare against the console’s current value, since a repair approaching replacement cost rarely makes sense. Document the pattern (which games, how long, room temperature) for the repair ticket; specific data speeds diagnosis. And back up your saves to the cloud or USB before any service — repairs sometimes involve storage replacement. iFixit’s PS5 teardown and repair guides show exactly what professional repair involves, useful whether you DIY (out of warranty, carefully) or just want to understand the quote.

    PS5 heat shutdowns are usually fixable: give the console 4+ inches of breathing room (open the cabinet), clean the dust catchers and fan every few months, and check software settings — these resolve most cases. Persistent overheating after all that points to degraded liquid metal thermal interface, a job for professionals. The shutdown itself is the console protecting its chip; respect the warning and fix the cooling.

    Conclusion

    Your PS5 overheats and shuts down during long sessions because its cooling margin has eroded — usually from dust-choked heatsinks, suffocated ventilation, or both, and occasionally from migrating liquid metal in older units. Work the fixes in order: free the airflow, clean the dust, tune the settings, and only then consider professional thermal service. Most consoles come back to marathon-ready with the simple steps. For more console care and gaming guides, visit our gaming section, meet our team, or tell us about your repair wins.

    Frequently Asked Questions

    Is it bad if my PS5 shuts down from overheating?

    The shutdown itself is a protective measure preventing chip damage — but repeated overheating stresses components over time. Treat the first shutdown as a warning: fix ventilation and clean dust promptly rather than continuing to push through shutdowns, which accelerates wear on the system.

    Should I stand my PS5 vertically or horizontally?

    Either orientation works if ventilation is good — Sony designed for both. The liquid-metal migration concern with vertical orientation is debated and appears rare, but horizontal is the slightly safer choice for long-term thermal stability. Prioritize 4+ inches of clearance on all sides over orientation fretting.

    How often should I clean my PS5’s dust?

    Every 3–6 months for the dust catchers and fan area — more often with pets or in dusty environments. The side panels pop off without tools, making it a 20-minute job. Regular cleaning prevents the gradual heat buildup that leads to shutdowns during long sessions.

    Can I replace the PS5’s liquid metal myself?

    Technically yes, but it is an advanced repair: liquid metal is electrically conductive, a stray drop destroys the board, and full disassembly is required. Unless you have electronics repair experience, use a reputable repair shop. Never attempt it on a console still under warranty — you will void the coverage.

    Why does my PS5 overheat in only one game?

    Some games push the hardware far harder than others — higher frame rates, ray tracing, and dense scenes maximize power draw and heat. If shutdowns are title-specific after cleaning and ventilation fixes, try the game’s performance mode, ensure the software is updated, and treat it as a load issue rather than hardware failure.

  • How to Build a Gaming PC for Under $800 in 2026

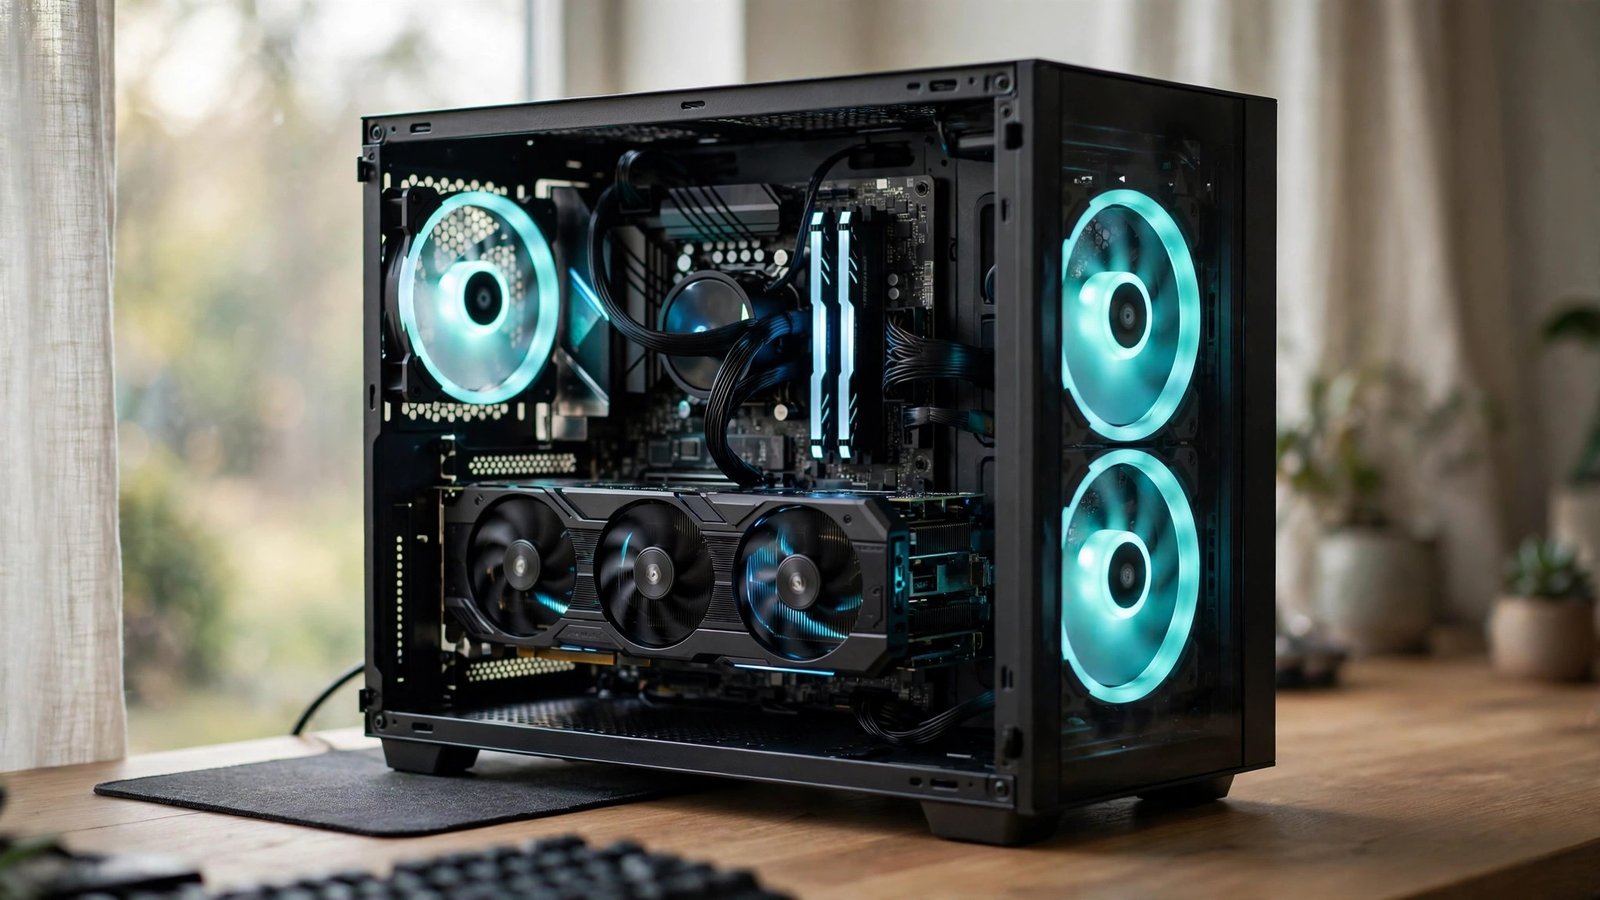
    How to Build a Gaming PC for Under $800 in 2026

    Prebuilt gaming PCs with real graphics cards still start around a thousand dollars — but the DIY route remains the budget gamer’s superpower. In 2026, $800 buys you a machine that handles modern AAA titles at 1080p high settings without breaking a sweat, provided you spend the money in the right places and skip it in the wrong ones. Building it yourself is easier than the internet makes it look: if you can follow a recipe and plug in cables, you can build a PC. Here is how to build a gaming PC for under $800 in 2026, with a complete parts philosophy, assembly walkthrough, and realistic expectations.

    The $800 Philosophy: GPU First, Everything Else Second

    Budget building is an exercise in ruthless prioritization, and the priority list has one clear king: the graphics card. In gaming performance, the GPU determines roughly 70 percent of your frame rates — a $350 GPU with a $120 CPU will demolish a $200 GPU with a $250 CPU in every game that matters. So the $800 budget allocates roughly: $300–$380 for the GPU, $120–$160 for the CPU, $70–$90 for the motherboard, $50–$60 for 16GB of RAM, $60–$70 for a 1TB NVMe SSD, $60–$70 for a quality power supply, and $50–$70 for the case. That totals around $750–$800 before tax, with wiggle room from sales. The part you never cheap out on: the power supply — a bad PSU can kill every other component. PCPartPicker’s build guides and price tracking let you assemble this exact budget and watch for price drops automatically.

    The Parts List, Explained

    CPU: a current-generation 6-core processor (AMD Ryzen 5 or Intel Core i5 tier) — the sweet spot where gaming performance plateaus and prices stay sane. Avoid older generations even at discounts; platform age kills upgrade paths. GPU: the best card your remaining budget allows after the essentials — in 2026’s market, that means an entry-to-midrange current-gen card or a previous-gen midrange card on sale. Check Tom’s Hardware GPU hierarchy charts to compare cards by actual gaming performance rather than model numbers, which are designed to confuse. Motherboard: a basic B-series board (B650/B760 tier) with the features you need — Wi-Fi if you need it, enough fan headers, and a heatsinked M.2 slot. Skip the overclocking flagships; at this budget, stability beats tuning. RAM: 16GB (2×8GB) of DDR5 at a sensible speed — the dual-channel kit matters more than the megahertz. SSD: 1TB NVMe — non-negotiable in 2026, since modern games stream assets constantly and SATA bottlenecks show. PSU: 550–650W, 80+ Bronze minimum, from a reputable manufacturer — this is your insurance policy. Case: a mesh-front budget case with included fans; airflow is free performance.

    Where to Save vs. Where to Splurge

    Smart budget builders know the traps. Save on: the case (a $55 mesh case cools as well as a $150 glass box), RGB everything (pretty, zero performance), aftermarket CPU coolers at first (stock coolers handle 6-core chips fine), and Windows licenses (run unactivated or use legitimate discounted keys — never pirate). Splurge on: the power supply (tier lists exist for a reason; a failing PSU takes the motherboard with it), the SSD (1TB minimum — 500GB fills after three modern games), and dual-channel RAM (a single stick kneecaps performance). Buy the GPU last in your planning, because prices move fastest there — and consider the used market carefully: previous-gen cards from reputable sellers can stretch $800 dramatically, but verify return policies and test immediately on arrival. Timing purchases around major sales events can shave $50–$100 off the total, which at this budget is a free SSD upgrade.

    Building It: Easier Than Furniture Assembly

    The assembly order that minimizes frustration: install the CPU, cooler, RAM, and M.2 SSD onto the motherboard first, outside the case on the motherboard box — this “breadboard” step lets you work in the open. Mount the motherboard in the case with standoffs, connect the front-panel cables (the fiddliest step — use the motherboard manual’s diagram), install the power supply and route its cables, then seat the GPU last (it is big and blocks access). First boot checklist: all power cables seated (the 24-pin, the 8-pin CPU, and the GPU power), RAM fully clicked in, monitor plugged into the GPU (not the motherboard), and the PSU switch on. If it does not boot, 90 percent of failures are a missed power cable or unseated RAM — reseat both before panicking. Install Windows via USB, grab GPU drivers directly from the manufacturer, enable XMP/EXPO in BIOS for full RAM speed, and update the motherboard BIOS. From boxes to gaming: a focused afternoon.

    What $800 Actually Gets You in 2026

    Set honest expectations and you will be delighted. This build plays virtually all modern AAA games at 1080p high settings at 60+ fps — the resolution and frame rate where most gamers actually live. Competitive titles (shooters, MOBAs, battle royales) run at high refresh rates that make a 144Hz monitor worthwhile. You will not max out ray tracing at 4K, and that is fine — those are $1,500+ pursuits with diminishing visual returns. Where the build shines: fast load times from the NVMe drive, quiet operation from modest components, and upgrade headroom. The realistic comparison: this $800 DIY machine matches or beats consoles in flexibility while offering the PC’s eternal advantages — cheaper games, mods, multitasking, and an upgrade path instead of a generational replacement. Anyone telling you PC gaming requires $2,000 is selling something.

    The Upgrade Path: Your $800 Is a Down Payment

    The final advantage of building: the machine grows. In a year or two, the highest-impact upgrade is the GPU — sell the old card, slot in a new one, instant transformation. Add a second SSD when 1TB fills. Bump to 32GB of RAM if you stream or edit. The platform (motherboard and CPU socket) you chose determines how far the path extends, which is why buying current-generation matters more than buying top-tier. Keep the case and PSU through multiple generations — quality versions of both outlast everything else. Budget PC building is not about settling; it is about entering the ecosystem at the smartest price point and upgrading surgically. That $800 box on your desk is not a compromise — it is the first chapter.

    An $800 gaming PC in 2026 means GPU-first budgeting: roughly $350 on graphics, a 6-core CPU, 16GB dual-channel RAM, a 1TB NVMe SSD, and — critically — a quality power supply. Skip RGB and glass; buy current-generation for the upgrade path. The result plays AAA games at 1080p high settings at 60+ fps, built in an afternoon with basic tools.

    Conclusion

    Building a gaming PC for under $800 in 2026 is about spending where frames come from — the GPU first, a balanced CPU, fast storage, and a trustworthy power supply — while skipping the cosmetic taxes. Assemble carefully outside the case, cable-manage for airflow, and enable your RAM’s full speed in BIOS. What you get is a 1080p high-settings AAA machine with a real upgrade path, for less than a prebuilt with weaker parts. For more PC building and gaming guides, visit our gaming section, meet our team, or share your build list for feedback.

    Frequently Asked Questions

    Is $800 enough for a good gaming PC in 2026?

    Yes, for 1080p high-settings gaming at 60+ fps in modern AAA titles. The key is GPU-first budgeting — roughly $300–$380 on the graphics card — plus a balanced 6-core CPU, 16GB RAM, and a 1TB NVMe SSD. You will not do 4K maxed ray tracing, but that is a $1,500+ tier with diminishing returns.

    Should I buy a prebuilt or build my own at $800?

    Build your own. At $800, prebuilts cut corners on the power supply, motherboard, and RAM quality to hit the price — the exact parts that determine reliability and upgradeability. DIY gets you better components, a real upgrade path, and the knowledge to maintain the machine yourself.

    What is the most important part of a budget gaming PC?

    The graphics card, by a wide margin — it determines roughly 70% of gaming performance. After the GPU, prioritize a quality power supply (it protects everything else), then a balanced CPU. RGB lighting, premium cases, and oversized CPUs contribute nothing to frame rates at this budget.

    Can I upgrade a budget PC later?

    Absolutely — that is the main advantage over consoles and cheap prebuilts. The typical path: a GPU upgrade in 1–2 years (sell the old card), a second SSD when storage fills, and more RAM if needed. Buying a current-generation platform preserves CPU upgrade options down the line.

    Do I need an aftermarket CPU cooler for a budget build?

    Not initially — stock coolers bundled with 6-core CPUs handle gaming temperatures adequately. Spend that money on the GPU instead. Consider an affordable tower cooler later if noise bothers you or if you upgrade to a hotter chip; it is one of the easiest retrofits in PC building.