Breaking

Category: Travel

  • Best Ways to Keep Kids Entertained on a 10-Hour Drive

    Best Ways to Keep Kids Entertained on a 10-Hour Drive

    A 10-hour drive with kids is the parenting equivalent of a marathon — and like a marathon, it is won with pacing, supplies, and a plan for the wall at mile 20. The families who arrive happy are not the ones with the best-behaved kids; they are the ones who broke the drive into manageable segments, packed entertainment in waves, and scheduled stops before anyone melted down. Kids do not need constant stimulation for 10 hours. They need novelty every 30 to 45 minutes, physical movement every 2 hours, and food at regular intervals. Here is the system that works.

    Break the Drive Into Segments, Not Hours

    Never present a 10-hour drive to kids (or yourself) as one block. Divide it into four 2-to-2.5-hour segments with a real stop between each — a playground, a quirky roadside attraction, a park with space to run. Announce the plan in kid terms: “We drive to the dinosaur statues, then we stop and play, then we drive to lunch.” Each segment becomes a completable mission instead of an endless sentence. Time the segments around natural anchors: leave right after breakfast, stop for a mid-morning stretch, lunch at the halfway point (a sit-down meal, not drive-through — kids need out of the car), an afternoon playground stop, and arrival before dinner. The American Academy of Pediatrics’ family travel guidance supports the every-2-hours movement rule: prolonged immobility is hard on kids’ bodies and moods alike.

    The Entertainment Wave System

    The rookie mistake is handing kids everything at once — by hour three, every toy is boring and the tablet battery is dead. Instead, pack entertainment in three waves and deploy them sequentially. Wave 1 (hours 1–3): novel quiet toys — sticker books, Wikki Stix, magnetic drawing boards, new coloring books, small Lego sets in zip bags. Wrap a few items; unwrapping buys time. Wave 2 (hours 4–7): audio entertainment — this is the secret weapon most parents underuse. Download audiobooks (the How to Train Your Dragon series, Magic Tree House), kid podcasts (Story Pirates, Brains On!), and family music playlists. Audio works when eyes are tired of screens and keeps everyone engaged together. Wave 3 (hours 8–10): screens, saved for when patience is thinnest. Downloaded movies and shows, fully charged tablets, kid headphones. Deploying screens last means they are fresh for the hardest stretch — and you arrive with no guilt because you earned it.

    Car Games That Actually Fill Time

    Between the waves, classic car games fill 20-to-30-minute gaps and — unlike solo entertainment — keep the whole car connected. License plate bingo (print cards before you leave, or use a free app) can run for hours across state lines. The alphabet game (find A-to-Z on signs and billboards) scales to any age. “I Spy” and 20 Questions need zero supplies. For older kids, try the story game: each person adds one sentence to a running tale — it gets gloriously weird by hour six. Trivia cards or a family quiz app turn the drive into a competition. And the quiet game — genuine silence competition — is both a game and a parental survival tool; deploy it strategically before naptime. Rotate games before boredom sets in; a game abandoned at peak fun can be revived later, but a game played to exhaustion is dead forever.

    Food Strategy: Graze, Don’t Just Meal

    Hunger is the hidden driver of most backseat meltdowns, and a 10-hour drive spans at least two meals plus the gaps between them. Pack a cooler with real food, not just snacks: sandwiches, fruit, cheese, yogurt pouches. Then add the grazing layer — a “snackle box” (a tackle box or muffin tin filled with small snacks) is endlessly entertaining for kids under 8 because choosing is half the fun. Schedule eating: a substantial snack every 2 hours prevents the blood-sugar crashes that turn mild whining into full crises. Avoid pure-sugar snacks as the main event — the spike-and-crash cycle is brutal in a confined space. Bring twice the water you think you need, plus a roll of paper towels and a trash bag. The car will get messy; accepting this in advance preserves everyone’s sanity.

    Comfort, Sleep, and the Overnight Question

    Physical comfort determines how long entertainment lasts. Dress kids in soft layers (car temps swing), bring their pillow and a familiar blanket, and use window shades — afternoon sun on one side of the car makes half the kids miserable. For naps, replicate the sleep cues: blanket, dimmed light, white noise or calm audio. The Safe Kids Worldwide car-seat safety guidance is also worth reviewing before a long drive — proper installation and positioning matter even more over 10 hours. Do not fight a nap when it comes — a sleeping kid is the fastest 90 minutes of the drive. One strategic question: should you split the drive overnight? For kids under 5, absolutely consider it — a hotel pool, real beds, and a reset can turn two pleasant 5-hour days into a trip highlight rather than an endurance event. The extra hotel cost is often worth more in preserved sanity than any entertainment system. If you push through, plan the final arrival for before dark — navigating an unfamiliar place with exhausted kids at night is the worst ending to a long day.

    A successful 10-hour drive with kids runs on segments, not hours: stop every 2 to 2.5 hours, deploy entertainment in waves (novel toys, then audio, then screens last), play car games between waves, graze on real food every 2 hours, and seriously consider splitting the trip overnight for kids under 5.

    Conclusion

    Keeping kids entertained on a 10-hour drive is a logistics problem with a proven solution: segment the drive with real stops, ration entertainment in waves with screens saved for last, lean on audiobooks and car games, feed them on schedule, and protect naps when they come. The families who dread the drive are the ones who wing it; the ones who plan it often say the drive became part of the vacation. For more family road-trip strategy, browse our travel guides, meet the team, or share your road-trip wins.

    Frequently Asked Questions

    How often should we stop on a 10-hour drive with kids?

    Every 2 to 2.5 hours for at least 15 to 20 minutes. Kids need physical movement — a playground, a park, even a rest-area field to run in. Stops are not delays; they are what make the driving segments peaceful.

    Should I bring a tablet for the drive?

    Yes, but save it for the final third of the drive when patience is thinnest. Download everything in advance (service is unreliable on highways), bring kid-safe headphones and a charger, and deploy it as Wave 3 after toys and audio have carried the earlier hours.

    What are the best audiobooks for a long family drive?

    For ages 4–8: Magic Tree House, Junie B. Jones, and the How to Train Your Dragon series. For 8–12: Harry Potter, Percy Jackson, and Wings of Fire. Kid podcasts like Story Pirates and Brains On! are excellent shorter-format options between books.

    Is it better to drive through the night while kids sleep?

    It works for some families — kids sleep through the drive and you arrive by morning — but the driver gets no sleep, which is a genuine safety risk. If you try it, the driver must be fully rested beforehand, and you should still plan a rest stop. For most families, splitting the drive with an overnight hotel is safer and more pleasant.

    How do I handle bathroom emergencies with kids on the highway?

    Stop at the first urge, not the second — kids’ warning time is short. Keep a portable potty or a wide-mouth bottle with a lid in the car for true emergencies, plus a full change of clothes per child in an accessible bag. Planning stops every 2 hours prevents most crises.

  • How to Avoid Motion Sickness on a Winding Mountain Road

    How to Avoid Motion Sickness on a Winding Mountain Road

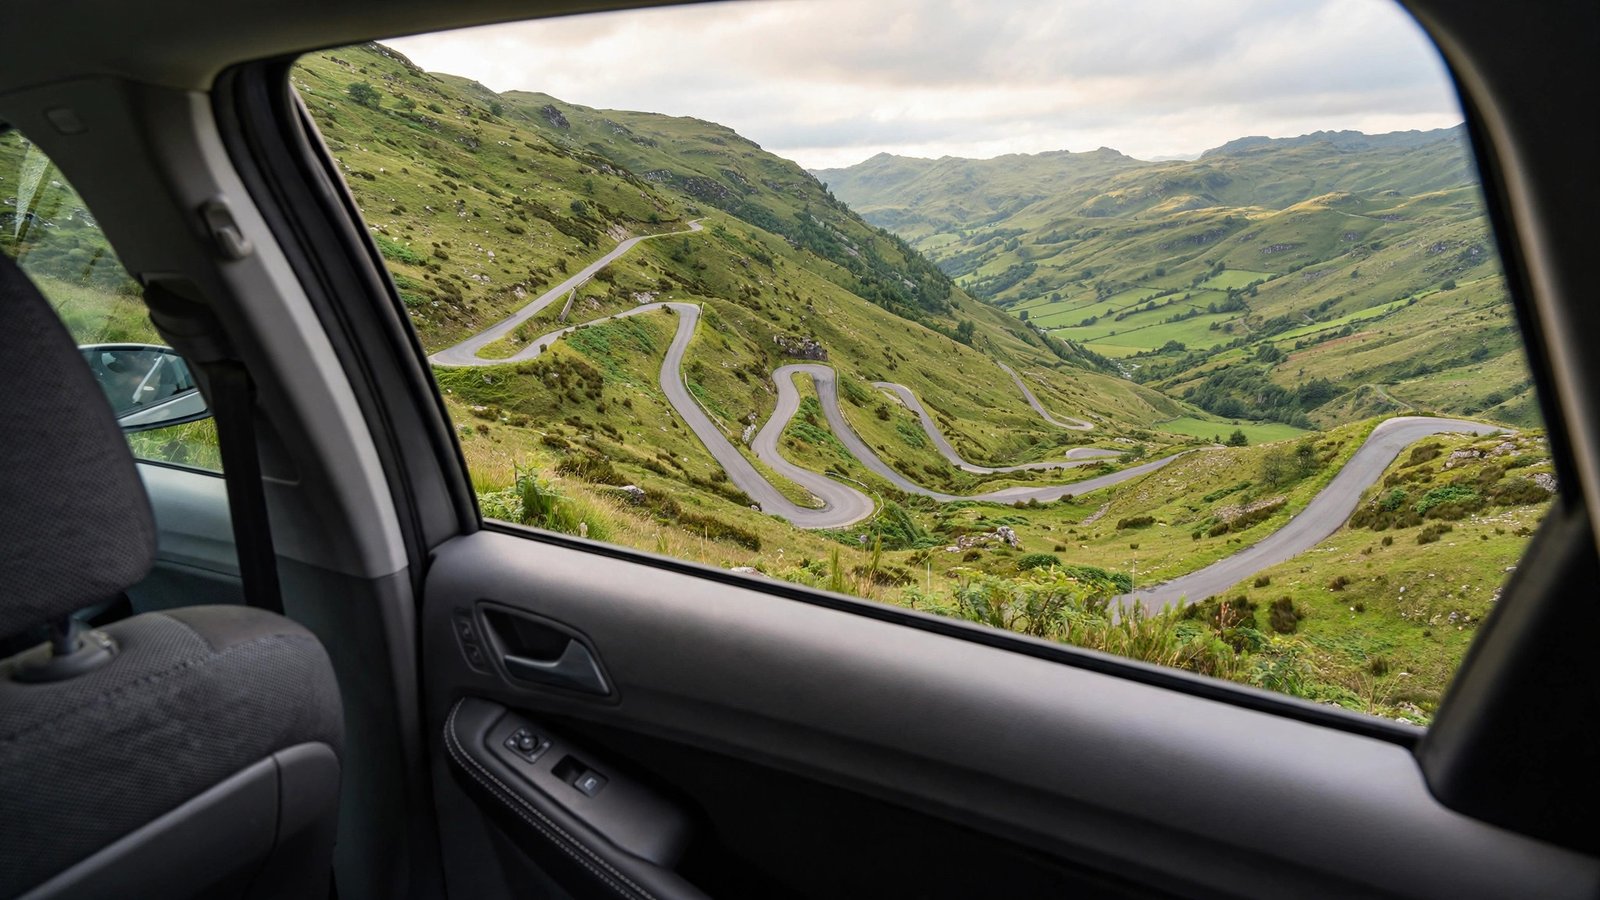
    Motion sickness is a mismatch problem: your eyes tell your brain you are sitting still in a car seat, while your inner ear reports every curve, climb, and switchback of the mountain road. The brain, confused by the conflicting signals, concludes you must have been poisoned — and responds with nausea. Winding mountain roads are the perfect storm for this because the turns are continuous, the visual reference points whip past, and passengers cannot anticipate the curves the way drivers can. The good news: motion sickness is one of the most manageable travel ailments, with remedies ranging from free seating tricks to medications that work remarkably well if timed right.

    Sit Where the Motion Is Least

    Seat position is the highest-impact free intervention. The front passenger seat is dramatically better than the back — you can see the road ahead, which lets your eyes and inner ear agree about what is happening, and the front of the vehicle experiences less lateral sway than the rear. If you must sit in back, take the middle seat so you can see through the windshield; staring at the back of the driver’s headrest while the world whips past the side windows is the worst possible visual setup. Face forward always — rear-facing seats in some SUVs and vans are motion-sickness machines. Keep your head as still as possible and lean it against the headrest; excessive head movement amplifies the inner-ear confusion. Drivers almost never get motion sick precisely because they see every curve coming and their head movements match the vehicle’s motion — mimicking that anticipation as a passenger is the goal.

    Control What Your Eyes See

    The visual side of the mismatch is fully in your control. Look at the horizon or the distant road ahead, not at the nearby scenery whipping past the side window — distant, stable reference points calm the conflict. Do not read, do not scroll your phone, and do not look down at a map for extended periods; near-focus visual tasks while the inner ear reports motion is the fastest route to nausea. If you need navigation, use audio directions. Sunglasses can help on bright mountain roads by reducing visual overstimulation. Some people swear by closing their eyes and napping — with no visual input at all, the mismatch disappears, which is why sleeping passengers rarely get sick. The CDC’s motion sickness guidance for travelers confirms that minimizing conflicting sensory input is the foundation of prevention.

    Medication: Timing Is Everything

    Over-the-counter options work well, but only if taken before symptoms start. Dimenhydrinate (Dramamine) and meclizine (Bonine) are the classic choices — take them 30 to 60 minutes before the winding section begins, not after you already feel queasy. Bonine causes less drowsiness for most people and lasts up to 24 hours, making it the better pick for a full day of mountain driving. Prescription scopolamine patches (applied behind the ear several hours before travel) are the heavy artillery for severe sufferers — ask your doctor before a trip like the Blue Ridge Parkway or Colorado’s Million Dollar Highway. Ginger — capsules, chews, or real ginger tea — has modest clinical evidence and zero drowsiness, making it a good adjunct or standalone for mild cases. What does not work: taking medication after vomiting has started (it will not stay down), and “toughing it out” — motion sickness reliably gets worse, not better, once nausea begins.

    Food, Air, and Smell Strategies

    What goes into your stomach before a mountain drive matters. Eat a light meal 1 to 2 hours before the winding section — neither a heavy greasy meal nor a completely empty stomach, both of which worsen nausea. Bland carbs (crackers, toast, plain rice) are the safest pre-drive food. Sip water steadily; dehydration amplifies every symptom. Keep the car cool with fresh air flowing — crack a window or run the AC with outside air, since stuffy warm air and strong smells (air fresheners, fast food bags, diesel fumes) are potent nausea triggers. Peppermint or ginger scent can help some people; overwhelming perfume or food odors help no one. If nausea starts despite everything, the emergency protocol is: cold air on the face, sip cold water, focus on the horizon, and ask the driver to slow down and straighten out at the next pullout — a five-minute stop on solid ground resets the system for most people.

    Acupressure Bands and Other Tools

    Acupressure wristbands (Sea-Band and similar) apply pressure to the P6 point on the inner wrist. The clinical evidence is mixed — some studies show modest benefit, others show placebo-level effects — but they are cheap, drug-free, and have no side effects, so there is no reason not to try them alongside other measures. Specialized motion-sickness glasses with liquid-filled rims (which give your peripheral vision a stable horizon reference) have a plausible mechanism and enthusiastic users, though the evidence base is thin. For children, who are more susceptible than adults (peak sensitivity is around ages 2 to 12), the seating and visual strategies matter most, plus pediatric-dosed medication if needed — consult your pediatrician for dosing. The National Institute on Deafness’s inner-ear research pages explain the vestibular science for those who want the deeper mechanism.

    Prevent motion sickness on winding mountain roads by sitting in the front seat, looking at the distant horizon (never reading or scrolling), taking Bonine or Dramamine 30–60 minutes before the curves start, eating light, keeping cool fresh air flowing, and stopping at the first sign of nausea rather than pushing through.

    Conclusion

    Avoiding motion sickness on winding mountain roads comes down to managing the sensory mismatch: sit where you can see ahead, keep your eyes on the horizon, medicate before the curves (not after), eat light, and keep the air cool and fresh. These are simple, proven measures — and they turn mountain drives from dreaded ordeals into the scenic highlights they are supposed to be. For more road-trip health and comfort advice, explore our travel guides, learn about our team, or send us your questions.

    Frequently Asked Questions

    Why do winding roads cause motion sickness but highways do not?

    Highways involve mostly straight, predictable motion that your brain adapts to quickly. Winding roads deliver continuous, unpredictable lateral forces and visual whipping that keep the eye-ear mismatch active — your inner ear reports constant turning while your eyes (especially if reading) report stillness.

    Is Dramamine or Bonine better for mountain driving?

    Bonine (meclizine) is usually the better pick: it lasts up to 24 hours and causes less drowsiness than Dramamine (dimenhydrinate) for most people. Take either one 30 to 60 minutes before the winding section — neither works well after nausea has started.

    Do those anti-nausea wristbands actually work?

    The evidence is mixed — some studies show modest benefit from P6 acupressure, others find no effect beyond placebo. They are inexpensive and side-effect-free, so they are worth trying as a complement to seating, visual, and medication strategies, not as a replacement.

    Why does the driver never get carsick?

    Drivers see every curve coming, their head and body movements anticipate the motion, and their visual and vestibular inputs agree. Passengers can mimic this by sitting in front, watching the road ahead, and keeping the head still — which is why those strategies work.

    At what age are kids most prone to motion sickness?

    Susceptibility peaks between ages 2 and 12, then typically declines. For kids, prioritize the front-middle seating position, a horizon view, no screens or books on winding sections, and pediatric-dosed medication if your pediatrician recommends it.

  • When to Arrive at the Airport for a 6 AM Domestic Flight

    When to Arrive at the Airport for a 6 AM Domestic Flight

    A 6 AM domestic flight means your alarm goes off at an hour that feels like a personal insult — and then comes the real question: how early do you actually need to be at the airport? The generic “two hours for domestic” advice was written for 10 AM flights at mid-size airports, not for the crack-of-dawn departure rush when every business traveler in the city is in the same security line. The honest answer depends on your airport, your bags, and your TSA PreCheck status. Here is how to calculate your exact arrival time.

    The Baseline: 90 Minutes, With Adjustments

    For a 6 AM domestic flight with no checked bags and TSA PreCheck, 90 minutes (arrive by 4:30 AM) is comfortable at most airports. Without PreCheck, make it 2 hours (4:00 AM arrival). Those are baselines — now adjust. Add 30 minutes if you are checking bags, because the ticket counter lines at 4:30 AM are staffed thin and move slowly. Add 30 minutes at the country’s busiest early-morning airports — Atlanta, Denver, Chicago O’Hare, Dallas-Fort Worth, LAX, JFK — where the 5 AM security rush is a genuine phenomenon. Add 15 minutes if you are parking a car (shuttle rides from economy lots at 4 AM run less frequently). Subtract 15 minutes if you are getting dropped off curbside with no bags and PreCheck at a small airport. The TSA’s official guidance still recommends two hours for domestic flights, and for a 6 AM departure without PreCheck, that recommendation is worth following literally.

    Why 6 AM Flights Have Their Own Security Problem

    Here is what the generic advice misses: the 5:00 to 6:30 AM window is the single busiest security period at most major US airports. Overnight, the checkpoint staffing is minimal; then a wave of early departures all hit at once. Unlike midday, when passenger flow is spread out, the dawn bank is compressed — dozens of flights departing between 6 and 7:30 AM, all of whose passengers arrive in the same 45-minute window. At large hubs, standard security lines at 5:15 AM can run 30 to 45 minutes. TSA PreCheck lanes are the great equalizer here: PreCheck lines at dawn are typically 5 to 10 minutes even when standard lines snake around the terminal. If you fly early mornings more than a few times a year, the $78 PreCheck fee (good for five years) pays for itself in sleep alone.

    The Night-Before Checklist That Buys You Sleep

    Every minute of morning friction is a minute stolen from sleep, so move everything possible to the night before. Check in online and download your boarding pass to your phone — do not rely on airport kiosks at 4:30 AM. Weigh and stage your bags by the door, with liquids bagged and laptop accessible for the security bin. Lay out clothes, pack snacks (airport food before 5 AM is limited to whatever is open), and fill a water bottle to get through security empty. Check your flight status before bed and set a backup alarm — a 6 AM flight has no slack for oversleeping. If you are parking, pre-book the airport parking online; it is often cheaper and guarantees a spot in the closest available lot. Program the rideshare or set the shuttle pickup for 15 minutes earlier than you think necessary — pre-dawn transportation is where delays hide.

    Checked Bags and the 45-Minute Trap

    The detail that ruins mornings: most airlines close checked-bag acceptance 45 to 60 minutes before domestic departure. For a 6 AM flight, that means the bag counter can refuse your suitcase at 5:00 to 5:15 AM — while you are still technically “on time” by the two-hour rule. At 4:30 AM, ticket counters are often staffed by a skeleton crew, so the line moves at half speed. If you are checking bags on a 6 AM flight, treat 4:00 AM arrival as mandatory, not conservative. Better yet, use curbside check-in where available — the skycap lines at dawn are usually shorter than the indoor counters, and a $2 to $5 tip per bag is money well spent at that hour. And weigh your bag at home; repacking an overweight suitcase on the curb at 4:45 AM is a miserable experience.

    The Carry-On-Only Dawn Strategy

    If you can go carry-on only, the 6 AM flight becomes dramatically more civilized. With PreCheck and no checked bags, arriving 75 to 90 minutes before departure is genuinely comfortable: straight to security, through in minutes, and at the gate with time for coffee. The carry-on strategy has one dawn-specific risk: overhead bin space. Early flights are full of business travelers who all had the same idea, and bins on popular routes fill completely — board as early as your group allows, and have a personal item that can hold your essentials if your roller gets gate-checked. The FAA’s passenger guidance notes the standard carry-on size limits, but the real constraint at 6 AM is bin space, not the sizer. Pack assuming your bag might end up under the seat.

    For a 6 AM domestic flight, arrive 90 minutes early with PreCheck and no checked bags, or a full 2 hours without PreCheck or with bags to check. The 5:00–6:30 AM security window is the day’s busiest at major airports, and bag counters close 45–60 minutes before departure — plan for the rush, not the average.

    Conclusion

    The right arrival time for a 6 AM domestic flight is 90 minutes with PreCheck and carry-on only, stretching to 2 hours with checked bags or at the busiest hubs. The dawn departure bank creates a compressed security rush that generic advice does not account for, so do your prep the night before, respect the bag-counter cutoff, and consider PreCheck if early flights are a habit. Get the timing right and even a 6 AM flight can start calmly — or at least, as calmly as 4:30 AM allows. For more air-travel strategy, browse our travel guides, learn about our team, or ask us your questions.

    Frequently Asked Questions

    Is 90 minutes enough for a 6 AM flight with TSA PreCheck?

    Yes, at most airports, if you have no checked bags. PreCheck lines at dawn are typically 5 to 10 minutes. Without PreCheck, give yourself the full 2 hours — standard security lines peak between 5:00 and 6:30 AM.

    What time do airport security lines open in the morning?

    Most major airport checkpoints operate 24 hours or open around 3:30 to 4:00 AM. Smaller airports may open checkpoints only 90 minutes to 2 hours before the first departure — check your airport’s website if you are on the very first flight out.

    When does checked baggage close for a 6 AM flight?

    Most airlines cut off checked bags 45 to 60 minutes before domestic departure — so 5:00 to 5:15 AM for a 6 AM flight. Arrive by 4:00 AM if checking bags, since dawn counter staffing is thin and lines move slowly.

    Are 6 AM flights more likely to be delayed?

    Actually, early morning flights have the best on-time record of the day — the aircraft usually spent the night at the airport, and there is no inbound delay chain yet. Weather and crew issues can still happen, but 6 AM is statistically the most reliable departure bank.

    Should I sleep at the airport hotel before a 6 AM flight?

    If you live more than 45 minutes from the airport, it is worth considering — a 3:30 AM wake-up after a short night is a safety risk on the drive. Airport hotels often cost less than the rideshare round trip, and the extra sleep is significant.

  • How to Road-Trip With a Cat From Texas to Florida Safely

    How to Road-Trip With a Cat From Texas to Florida Safely

    Moving a cat from Texas to Florida — roughly 900 to 1,100 miles depending on your route — is a very different operation from moving a dog. Dogs adapt to car travel; cats, as a species, consider the car a suspicious metal box that smells wrong and moves unpredictably. But thousands of people road-trip with cats every year, and the cats arrive fine. The difference between a miserable drive and a manageable one comes down to preparation: the right carrier setup, a practiced routine, and knowing exactly how to handle food, water, litter, and overnight stops. Here is the complete playbook.

    Start Training Weeks Before You Leave

    The biggest mistake cat road-trippers make is introducing the carrier on moving day. Start two to three weeks out: leave the carrier open in the living room with treats and a familiar blanket inside so it becomes furniture, not a trap. Once the cat naps in it voluntarily, close the door for short periods, then carry the carrier around the house, then take short drives — around the block, then 15 minutes, then 30. Pair every step with treats. This gradual desensitization is the single most effective thing you can do; a cat that has practiced car rides is dramatically calmer than one experiencing everything for the first time on I-10. If your cat is extremely anxious despite training, talk to your vet about anti-anxiety options — gabapentin is commonly prescribed for feline travel anxiety and is safe and effective when dosed by a veterinarian. Never sedate a cat with human medications or acepromazine without explicit veterinary guidance.

    The In-Car Setup That Actually Works

    Forget the tiny carrier for a 14-hour drive. For multi-day trips, the winning setup is a large wire dog crate (36-inch) secured in the back seat or cargo area, outfitted as a studio apartment: a small litter box at one end, food and water at the other, and a hiding spot (a covered bed or box) in the middle. Secure the crate with seatbelts or bungee cords so it cannot shift in a sudden stop — an unsecured crate becomes a projectile. Alternatively, use a large carrier plus scheduled stops, letting the cat use a portable litter box in the car with doors closed. Keep the car at a comfortable temperature and never, ever leave the cat alone in a parked car — Texas and Florida heat can kill in minutes, even with windows cracked. The ASPCA’s pet travel safety guidance emphasizes ventilation, temperature control, and proper restraint as the non-negotiables of car travel with animals.

    Food, Water, and Litter on the Road

    Cats often refuse to eat or drink in a moving car, and that is normal — most will eat at overnight stops. Offer water at every stop via a no-spill bowl, and feed the main meal in the evening at the hotel when the cat is calm. Bring more of your cat’s regular food than you think you need, plus a few days’ extra in case of delays; switching foods mid-trip invites digestive trouble. For litter, a disposable aluminum baking pan with a small bag of the cat’s usual litter works perfectly and can be tossed at each stop — bring a sealed bag for waste and a small scoop. Line the crate with puppy pads under the bedding as insurance against accidents. One critical rule: never open the car door with the cat unsecured. At every stop, close all doors and windows before opening the carrier — a spooked cat bolting in a strange parking lot is every road-tripper’s nightmare, and indoor cats have terrible survival instincts outdoors.

    Overnight Stops: Hotels and the Great Escape Problem

    Plan your overnights around pet-friendly hotels — chains like La Quinta, Red Roof Inn, and many Holiday Inn Express locations welcome cats, often without the pet fees that apply to dogs. Book ahead and confirm the pet policy when you reserve; “pet-friendly” sometimes means dogs only. At the hotel, set up a base camp before releasing the cat: litter box in the bathroom, food and water in a corner, and block hiding spots you cannot easily access (under heavy beds, behind immovable furniture). Keep the carrier open as a safe retreat — many cats will spend the first hour inside it, which is fine. Do a door-check ritual every time anyone enters or leaves: cat located and secured first, door second. Bring familiar-smelling items (their blanket, a worn t-shirt of yours) — scent familiarity dramatically reduces hotel-room stress. The CDC’s guidance on traveling with pets also reminds travelers to carry vaccination records, as some states and hotels require proof of current rabies vaccination.

    Vet Prep and the Paperwork

    Schedule a vet visit 1 to 2 weeks before departure. Get a health certificate if your airline-style documentation might be needed (not legally required for driving between Texas and Florida, but useful if plans change), confirm rabies vaccination is current, and discuss anti-anxiety medication. Update the microchip registration with your new Florida address and phone number — this is the step everyone forgets, and it is the difference between a lost cat coming home and not. Pack a pet first-aid kit: any regular medications plus a few days’ extra, copies of vaccination records, your vet’s phone number, and the number of an emergency vet clinic near your destination. Take a clear photo of your cat the morning you leave — if the worst happens, you will need a current picture for lost-pet alerts.

    A safe Texas-to-Florida road trip with a cat means carrier training weeks ahead, a large secured crate set up as a mini-apartment, scheduled litter and water stops with doors closed, pet-friendly hotels booked in advance, and vet prep including updated microchip info. Never leave a cat in a parked car, and never open a car door with the cat unsecured.

    Conclusion

    Road-tripping with a cat from Texas to Florida is entirely doable — it just requires respecting that cats are not small dogs. Train with the carrier early, set up a proper in-car habitat, manage food and litter with a closed-door routine, book genuinely cat-friendly hotels, and handle the vet paperwork before you go. Do that, and your cat will arrive in Florida no worse for wear — possibly even napping through the whole state of Louisiana. For more pet-inclusive travel advice, browse our travel guides, meet the team, or share your road-trip stories.

    Frequently Asked Questions

    How long can a cat go without using the litter box on a road trip?

    Most cats will hold it for 6 to 8 hours, but you should offer a litter box every 3 to 4 hours at rest stops. Many cats refuse to go in a moving car but will use a box promptly during a calm stop with the car doors closed.

    Should I sedate my cat for a long drive?

    Do not sedate without veterinary guidance. Many vets prescribe gabapentin for travel anxiety — it reduces stress without full sedation and is widely considered safe. Never use human sleep aids or tranquilizers on a cat; some are toxic to felines.

    Which hotels allow cats on the Texas-to-Florida route?

    La Quinta, Red Roof Inn, and many Holiday Inn Express and Best Western locations welcome cats, often with no pet fee. Always confirm the specific property’s policy when booking — “pet-friendly” occasionally means dogs only.

    Is it safe to let my cat roam the car while driving?

    No. A loose cat can wedge under pedals, bolt when a door opens, or become a projectile in a sudden stop. Keep the cat in a secured carrier or crate at all times while the vehicle is moving — it protects both the cat and the driver.

    What documents do I need to drive a cat across state lines?

    No state on the Texas-to-Florida route legally requires a pet health certificate for personal car travel, but carry current rabies vaccination records anyway — hotels may ask, and you will need them if you visit a vet en route. Update the microchip registration before you leave.

  • How Much to Tip a Hotel Housekeeper Per Night in the US

    Here is an awkward truth about American travel: most of us have no idea what to tip the hotel housekeeper, so we either leave nothing or toss a couple of crumpled dollars on the pillow and hope it is right. Unlike restaurant servers, whose 20 percent is drilled into us, housekeeping gratuity lives in a fog of uncertainty — and housekeepers are among the lowest-paid workers in the hospitality industry. The standard answer from etiquette experts and hotel industry groups is refreshingly specific: $3 to $5 per night for a standard room, more for suites or messy stays. But the “how” matters as much as the “how much.” Here is the full etiquette.

    The Standard: $3 to $5 Per Night

    The widely cited guideline — endorsed by the American Hotel & Lodging Association and most etiquette authorities — is $3 to $5 per night for a standard hotel room in the US. Tip daily rather than once at checkout, because different housekeepers often clean your room on different days; a single end-of-stay tip may not reach the people who actually did the work. Scale up for circumstances: $5 to $10 per night for suites, rooms with kitchenettes, or stays where you have been genuinely messy (kids, pets, extended stays with lots of laundry). At luxury properties where room rates exceed $300, $5 to $10 per night is the expected range. These are guidelines, not laws — but they represent the consensus of an industry that has thought about this more than any individual traveler needs to.

    How to Leave the Tip So It Gets to the Right Person

    Leaving money on the nightstand is not enough — housekeepers are trained not to take loose cash that could belong to the guest. The tip must be clearly identifiable as a tip. Leave it daily (not at checkout), in an obvious spot like the nightstand or desk, with a short note saying “Thank you — for housekeeping” or simply “Housekeeping — thank you.” A note on hotel stationery takes ten seconds and eliminates all ambiguity. If your room was not serviced on a particular day (many hotels now default to every-other-day or on-request cleaning), tip only for the days it was. And if you requested extra service — additional towels, a crib setup, a late checkout clean — add a dollar or two for the extras. The American Hotel & Lodging Association’s tipping guidance reinforces the daily-tipping practice as the industry standard.

    Why Housekeepers Deserve It More Than You Think

    Consider what the job actually involves: cleaning 10 to 15 rooms per shift, each in 20 to 30 minutes, including bathrooms, bedding, vacuuming, and restocking — physically demanding work, often for wages near the bottom of the hotel pay scale. Unlike servers, housekeepers have no expectation of tips built into their compensation in most markets, which means gratuities are genuinely extra rather than a wage subsidy. Yet surveys consistently show that a majority of American hotel guests tip nothing at all. The math is stark: if every guest left $4 a night, it would meaningfully change a housekeeper’s weekly income. This is not guilt — it is context for why the small daily habit matters more here than in almost any other tipping situation.

    Special Situations and Common Questions

    A few scenarios come up constantly. Extended stays: tip daily at the standard rate — the workload compounds over a week. If you decline daily cleaning for privacy or environmental reasons, leave a larger tip ($10 to $20) on the days service does occur, since the room requires more work. All-inclusive resorts: check the policy — many include gratuities, but housekeeping-specific tips are still appreciated and customary in Mexico and the Caribbean. Vacation rentals (Airbnb/Vrbo): tipping is not expected, since cleaning fees are charged separately — though a small cash thank-you for exceptional service is a kind gesture, not an obligation. Business travel: the tip is a legitimate reimbursable expense on most corporate policies. And if service was genuinely poor — room not cleaned, requests ignored — you are not obligated to tip for work that was not done; address it with the front desk instead.

    Making It Automatic: The Traveler’s System

    The reason most people undertip housekeeping is not stinginess — it is forgetfulness. Build a system: when you check in, set out the first day’s tip immediately so the habit is established. Keep small bills in a dedicated envelope in your luggage; nothing kills the habit faster than having only twenties. If you travel with a partner, agree in advance who handles it so it does not fall through the cracks. Some frequent travelers keep a small stack of thank-you notes in their toiletry bag. The whole system costs less than one airport sandwich per trip, takes seconds a day, and directs money to some of the hardest-working, lowest-paid people in the travel industry. The Emily Post Institute’s tipping guidelines cover hotel staff comprehensively if you want the full etiquette picture beyond housekeeping.

    Tip hotel housekeeping $3 to $5 per night for a standard US room ($5 to $10 for suites or luxury properties), leave it daily with a clear thank-you note, and tip only for days the room was actually serviced. Different staff clean on different days — daily tipping is how the money reaches the right people.

    Conclusion

    Tipping hotel housekeepers is one of the simplest, highest-impact habits in travel: $3 to $5 per night, left daily with a note, scaled up for suites and messy stays. It costs less than a coffee, takes ten seconds, and meaningfully supplements the income of workers who clean up to 15 rooms a day. Make it automatic with small bills and a note, and you will never again wonder whether the crumpled dollars on the pillow were enough. For more travel etiquette and tips, explore our travel guides, meet the team, or send us your questions.

    Frequently Asked Questions

    Should I tip housekeeping daily or at checkout?

    Daily. Different housekeepers typically clean your room on different days of a multi-night stay, so a single checkout tip may not reach everyone who served you. Leave $3 to $5 each morning with a thank-you note.

    Do I tip if the hotel only cleans every other day?

    Tip for the days the room is actually serviced, at the standard rate. If you declined daily service, consider a slightly larger tip ($10+) on service days, since the room requires more work after skipped days.

    Is tipping housekeeping expected at luxury hotels?

    Yes, and the expected range is higher: $5 to $10 per night at properties charging $300+ per night. Luxury guests are also expected to tip for extra services like turndown, pressing, and special requests.

    Should I tip housekeeping at an Airbnb?

    No — tipping is not expected at vacation rentals, since you already pay a separate cleaning fee. A small cash thank-you for genuinely exceptional service is a kind gesture but never an obligation.

    What if the room service was bad — do I still tip?

    No. You tip for work actually performed. If your room was not cleaned or requests were ignored, skip the tip and raise the issue with the front desk or management instead — that feedback helps more than a withheld $4.

  • How Much to Tip a Hotel Housekeeper Per Night in the US

    Here is an awkward truth about American travel: most of us have no idea what to tip the hotel housekeeper, so we either leave nothing or toss a couple of crumpled dollars on the pillow and hope it is right. Unlike restaurant servers, whose 20 percent is drilled into us, housekeeping gratuity lives in a fog of uncertainty — and housekeepers are among the lowest-paid workers in the hospitality industry. The standard answer from etiquette experts and hotel industry groups is refreshingly specific: $3 to $5 per night for a standard room, more for suites or messy stays. But the “how” matters as much as the “how much.” Here is the full etiquette.

    The Standard: $3 to $5 Per Night

    The widely cited guideline — endorsed by the American Hotel & Lodging Association and most etiquette authorities — is $3 to $5 per night for a standard hotel room in the US. Tip daily rather than once at checkout, because different housekeepers often clean your room on different days; a single end-of-stay tip may not reach the people who actually did the work. Scale up for circumstances: $5 to $10 per night for suites, rooms with kitchenettes, or stays where you have been genuinely messy (kids, pets, extended stays with lots of laundry). At luxury properties where room rates exceed $300, $5 to $10 per night is the expected range. These are guidelines, not laws — but they represent the consensus of an industry that has thought about this more than any individual traveler needs to.

    How to Leave the Tip So It Gets to the Right Person

    Leaving money on the nightstand is not enough — housekeepers are trained not to take loose cash that could belong to the guest. The tip must be clearly identifiable as a tip. Leave it daily (not at checkout), in an obvious spot like the nightstand or desk, with a short note saying “Thank you — for housekeeping” or simply “Housekeeping — thank you.” A note on hotel stationery takes ten seconds and eliminates all ambiguity. If your room was not serviced on a particular day (many hotels now default to every-other-day or on-request cleaning), tip only for the days it was. And if you requested extra service — additional towels, a crib setup, a late checkout clean — add a dollar or two for the extras. The American Hotel & Lodging Association’s tipping guidance reinforces the daily-tipping practice as the industry standard.

    Why Housekeepers Deserve It More Than You Think

    Consider what the job actually involves: cleaning 10 to 15 rooms per shift, each in 20 to 30 minutes, including bathrooms, bedding, vacuuming, and restocking — physically demanding work, often for wages near the bottom of the hotel pay scale. Unlike servers, housekeepers have no expectation of tips built into their compensation in most markets, which means gratuities are genuinely extra rather than a wage subsidy. Yet surveys consistently show that a majority of American hotel guests tip nothing at all. The math is stark: if every guest left $4 a night, it would meaningfully change a housekeeper’s weekly income. This is not guilt — it is context for why the small daily habit matters more here than in almost any other tipping situation.

    Special Situations and Common Questions

    A few scenarios come up constantly. Extended stays: tip daily at the standard rate — the workload compounds over a week. If you decline daily cleaning for privacy or environmental reasons, leave a larger tip ($10 to $20) on the days service does occur, since the room requires more work. All-inclusive resorts: check the policy — many include gratuities, but housekeeping-specific tips are still appreciated and customary in Mexico and the Caribbean. Vacation rentals (Airbnb/Vrbo): tipping is not expected, since cleaning fees are charged separately — though a small cash thank-you for exceptional service is a kind gesture, not an obligation. Business travel: the tip is a legitimate reimbursable expense on most corporate policies. And if service was genuinely poor — room not cleaned, requests ignored — you are not obligated to tip for work that was not done; address it with the front desk instead.

    Making It Automatic: The Traveler’s System

    The reason most people undertip housekeeping is not stinginess — it is forgetfulness. Build a system: when you check in, set out the first day’s tip immediately so the habit is established. Keep small bills in a dedicated envelope in your luggage; nothing kills the habit faster than having only twenties. If you travel with a partner, agree in advance who handles it so it does not fall through the cracks. Some frequent travelers keep a small stack of thank-you notes in their toiletry bag. The whole system costs less than one airport sandwich per trip, takes seconds a day, and directs money to some of the hardest-working, lowest-paid people in the travel industry. The Emily Post Institute’s tipping guidelines cover hotel staff comprehensively if you want the full etiquette picture beyond housekeeping.

    Tip hotel housekeeping $3 to $5 per night for a standard US room ($5 to $10 for suites or luxury properties), leave it daily with a clear thank-you note, and tip only for days the room was actually serviced. Different staff clean on different days — daily tipping is how the money reaches the right people.

    Conclusion

    Tipping hotel housekeepers is one of the simplest, highest-impact habits in travel: $3 to $5 per night, left daily with a note, scaled up for suites and messy stays. It costs less than a coffee, takes ten seconds, and meaningfully supplements the income of workers who clean up to 15 rooms a day. Make it automatic with small bills and a note, and you will never again wonder whether the crumpled dollars on the pillow were enough. For more travel etiquette and tips, explore our travel guides, meet the team, or send us your questions.

    Frequently Asked Questions

    Should I tip housekeeping daily or at checkout?

    Daily. Different housekeepers typically clean your room on different days of a multi-night stay, so a single checkout tip may not reach everyone who served you. Leave $3 to $5 each morning with a thank-you note.

    Do I tip if the hotel only cleans every other day?

    Tip for the days the room is actually serviced, at the standard rate. If you declined daily service, consider a slightly larger tip ($10+) on service days, since the room requires more work after skipped days.

    Is tipping housekeeping expected at luxury hotels?

    Yes, and the expected range is higher: $5 to $10 per night at properties charging $300+ per night. Luxury guests are also expected to tip for extra services like turndown, pressing, and special requests.

    Should I tip housekeeping at an Airbnb?

    No — tipping is not expected at vacation rentals, since you already pay a separate cleaning fee. A small cash thank-you for genuinely exceptional service is a kind gesture but never an obligation.

    What if the room service was bad — do I still tip?

    No. You tip for work actually performed. If your room was not cleaned or requests were ignored, skip the tip and raise the issue with the front desk or management instead — that feedback helps more than a withheld $4.

  • How to Find Last-Minute Hotel Deals in Las Vegas on a Friday Night

    How to Find Last-Minute Hotel Deals in Las Vegas on a Friday Night

    It is Friday afternoon, you are in Las Vegas (or about to be), and you need a hotel room tonight. Friday is the single most expensive night of the week in Vegas — weekend rates can run double or triple the Tuesday price, and the big Strip resorts know you are desperate. But “most expensive night” does not mean “no deals.” Vegas has more hotel rooms than any city on earth — over 150,000 — and on any given Friday, thousands sit empty. The hotels would rather fill them cheap than leave them vacant. Here is how to find those rooms.

    Start With the Same-Day Booking Apps

    Your first stop should be the apps built for tonight’s unsold inventory. HotelTonight specializes in same-day discounted rooms and consistently surfaces Vegas deals the big aggregators miss — Strip properties that would rather take $89 than leave a room empty. Check it first, then cross-reference Priceline’s Express Deals and Hotwire’s Hot Rates, where Vegas hotels sell rooms at 30 to 50 percent off without naming the property until you book (you can usually identify the hotel from the amenity list and star rating). One important Vegas quirk: always factor in the resort fee, which runs $35 to $55 per night on the Strip and is often excluded from the headline price. A $79 room with a $50 resort fee is really $129 — compare all-in totals, not teaser rates. The Las Vegas Convention and Visitors Authority’s official hotel listings can help you sanity-check which properties are legitimate and where they are located.

    Call the Hotel Directly and Ask

    This old-school move works shockingly well in Vegas on Friday nights. After checking the apps, call the hotel’s reservations desk (not the 1-800 number — the property’s direct line) and ask a simple question: “Do you have any unpublished rates or manager’s specials for tonight?” Front desks have discretion to discount unsold rooms, especially after 4 PM when it is clear the room will otherwise sit empty. Mentioning a competitor’s rate you found online gives them something to beat. This works best at off-Strip and downtown properties, where managers have more pricing freedom than the Strip mega-resorts’ centralized systems. It costs nothing to ask, takes three minutes, and regularly saves $20 to $40 off the already-discounted online rate. Be polite, be flexible on room type, and ask about waived resort fees — occasionally granted, never advertised.

    Go Off-Strip and Downtown for Real Value

    The biggest Friday-night savings come from changing your map, not your dates. Downtown’s Fremont Street area — the Golden Nugget, Circa, The D, Fremont Hotel — offers rooms at half to a third of Strip prices, often $50 to $100 on Friday nights, with no resort fees at some properties and a genuinely fun vintage-Vegas atmosphere. Off-Strip locals’ casinos (Palms, Virgin Hotels, Rio) discount aggressively to pull visitors away from the Strip. And the “just off the Strip” corridor — hotels a block or two east or west of Las Vegas Boulevard — can be 40 percent cheaper than their Strip-front neighbors for a five-minute walk difference. Unless you specifically need to be inside a Strip mega-resort, downtown and off-Strip deliver the better Friday-night deal nearly every time. The Fremont Street Experience’s official site lists the free nightly light shows and live music that sweeten the downtown value proposition further.

    Timing Tricks for Friday Check-In

    When you book matters almost as much as where. Prices for tonight typically drop in the late afternoon as hotels accept that unsold rooms are perishable — checking apps again at 4 or 5 PM often surfaces lower rates than the morning showed. If you can wait to book until you arrive, you gain leverage: walking into a hotel at 6 PM on a Friday and asking for their best available rate puts you in the strongest negotiating position of the day. The risk is sellouts during major events (fight weekends, big conventions, New Year’s), so check the city’s event calendar first — on a normal Friday, waiting works; on a fight weekend, book whatever you can find immediately. Another angle: Sunday-through-Thursday stays are so cheap in Vegas that some travelers book a Friday downtown and move to a Strip resort Saturday, when weekend rates soften slightly.

    Loyalty Programs and the Comp Game

    If you have even a few hours to play, Vegas loyalty programs are the city’s worst-kept secret. Signing up for MGM Rewards or Caesars Rewards is free and instantly unlocks member rates 10 to 20 percent below public prices — no gambling required. If you do gamble, even modestly, always use your player’s card: a couple of hours of low-stakes play can trigger discounted or comped room offers for future visits, and hosts have same-night discretion for players showing action. The myVEGAS social games (free to play on your phone) earn real-world rewards including discounted and occasionally free weeknight rooms — Friday availability is limited but worth checking. None of this requires being a high roller; Vegas comps flow to anyone who plays consistently, even at $10-a-hand blackjack.

    Friday night in Vegas rewards the flexible: check HotelTonight and Hotwire for same-day unsold inventory, call hotels directly after 4 PM, look downtown and off-Strip for half-price rooms, and always compare all-in totals including the $35 to $55 resort fee. Thousands of rooms sit empty every Friday — the hotels would rather discount than waste them.

    Conclusion

    Finding a last-minute hotel deal in Las Vegas on a Friday night is about exploiting the city’s massive oversupply: use same-day booking apps, call properties directly for unpublished rates, consider downtown and off-Strip for the deepest discounts, time your booking for late afternoon, and join the free loyalty programs for instant member pricing. Friday will never be the cheapest night in Vegas, but with these tactics it does not have to be the most painful one either. For more Vegas and travel strategy, browse our travel guides, learn about our team, or ask us your questions.

    Frequently Asked Questions

    What is the cheapest day to book a Vegas hotel?

    Tuesday and Wednesday are consistently the cheapest nights, often 50 to 70 percent below Friday and Saturday rates. If your trip is flexible by even a day, shifting a Friday arrival to Thursday night can save more than any booking trick.

    Are resort fees mandatory in Las Vegas?

    Essentially yes — nearly all Strip and many downtown hotels charge them ($35 to $55 per night), and they are rarely waived just for asking. A few off-Strip and downtown properties have no resort fee, which is a major reason their all-in prices are lower. Always compare total prices including fees.

    Is HotelTonight actually cheaper for Vegas?

    Often, for same-day bookings. HotelTonight’s model is built on hotels dumping unsold tonight-inventory at a discount, and Vegas’s huge room supply makes it one of the app’s best markets. Always cross-check against Priceline Express Deals and Hotwire before booking.

    Should I stay downtown or on the Strip to save money?

    Downtown (Fremont Street) is almost always cheaper — frequently half the price of comparable Strip rooms — with free light shows and live music as a bonus. Choose the Strip if you want the mega-resort experience; choose downtown if you want value.

    Can I negotiate hotel prices in Las Vegas?

    Yes, especially for same-day Friday arrivals. Calling the property directly after 4 PM and politely asking for unpublished rates or a manager’s special regularly yields $20 to $40 off the online price. It works best at downtown and off-Strip properties with local pricing control.

  • Why Your Phone Does Not Work in Canada — and How to Fix It

    Why Your Phone Does Not Work in Canada — and How to Fix It

    You land in Toronto, turn off airplane mode, and instead of the familiar carrier name you see “No Service” or “SOS only.” Your phone worked perfectly in Chicago an hour ago — what changed? Crossing into Canada breaks phone service for predictable, fixable reasons: roaming settings, carrier plan restrictions, network technology mismatches, or simply your phone clinging to a dead signal. The fix is usually a 2-minute settings change, not a new plan. Here is how to diagnose and fix it, in order.

    Reason 1: Data Roaming Is Turned Off (the Most Common Cause)

    This fixes the problem for most people. Many US travelers disable data roaming at some point — to avoid surprise charges on a past trip, or because a carrier rep suggested it — and forget to re-enable it. On iPhone, go to Settings, Cellular, Cellular Data Options, and toggle Data Roaming on — Apple’s official roaming setup guide walks through the exact screens. On Android, go to Settings, Network and Internet (or Connections), Mobile Network, and enable Data Roaming. Your phone should connect to a Canadian network (Rogers, Bell, or TELUS) within a minute or two. If it does not, toggle airplane mode on for 10 seconds and back off — this forces the phone to re-scan for networks. Before you celebrate, check what your plan charges for Canadian roaming: the FCC’s guide to international roaming explains your rights, but the key fact is that many “unlimited” US plans include Canada and Mexico at no extra charge, while others bill per day or per megabyte. Know your plan before you stream.

    Reason 2: Your Carrier Plan Does Not Include Canada

    Some plans — especially prepaid plans, MVNO plans (Mint, Cricket’s basic tiers, older plans), and business lines — do not include international roaming at all. On these plans, your phone simply cannot connect to Canadian networks no matter what settings you change. Check your carrier’s app or website for your plan’s international features; look specifically for “Canada roaming” or “North America roaming.” If your plan excludes it, you have three fast options: add a temporary international day pass through your carrier’s app (usually $5 to $12 per day), buy a Canadian eSIM before you leave the airport (Airalo, Ubigi, and similar sell Canada data eSIMs for a few dollars — installable over airport Wi-Fi in minutes), or grab a prepaid Canadian SIM at the airport or any convenience store. The eSIM route is the modern winner: cheap, instant, and your US number keeps working for calls over Wi-Fi.

    Reason 3: Your Phone Is Stuck on a Dead Network

    Sometimes the phone sees Canadian networks but fails to register — it shows signal bars but no service, or connects and immediately drops. The fix is manual network selection. On iPhone: Settings, Cellular, Network Selection, turn off Automatic, wait for the list, and manually choose Rogers, Bell, or TELUS (try each if one fails). On Android: Settings, Mobile Network, Network Operators, turn off automatic selection, and pick a carrier manually. This resolves the surprisingly common case where your phone keeps trying to register on a network your carrier has no roaming agreement with. If manual selection fails on all three major carriers, the problem is almost certainly your plan (see Reason 2), not the phone.

    Reason 4: Carrier Lock or Network Technology Issues

    Two rarer but real causes. First, carrier locks: if your phone is locked to a US carrier and you are trying to use a Canadian physical SIM, it will reject it. (eSIMs from travel providers usually work fine on locked phones for data, since they do not require unlocking — but a Canadian carrier’s own SIM does.) Check your lock status: on iPhone, Settings, General, About, look for “Carrier Lock: No SIM restrictions.” Second, network technology: this is mostly a solved problem on modern phones, but very old devices or some carrier-specific models may lack the LTE bands Canadian carriers use. If your phone is from the last five years, this is not your issue. One more check: make sure your phone’s software is updated — carrier settings updates, which ride along with iOS/Android updates, occasionally fix roaming registration bugs.

    The 5-Minute Airport Fix Checklist

    Work this list in order the moment you land: 1) Turn data roaming on. 2) Toggle airplane mode on and off. 3) If still nothing, manually select a Canadian network (Rogers, Bell, TELUS). 4) Restart the phone entirely — this clears more stuck states than people expect. 5) Check your carrier’s app for plan roaming status and add a day pass if needed. 6) If all else fails, connect to airport Wi-Fi and buy a Canada eSIM — you will have data within 10 minutes. Do not waste an hour at a carrier store unless you need a physical SIM for an old phone. And for future trips, the single best preparation is buying a $5 Canada eSIM before you leave home — it activates on landing and makes the entire problem disappear.

    When your phone does not work in Canada, the cause is almost always disabled data roaming, a plan without Canada coverage, or a phone stuck on the wrong network. Enable roaming, toggle airplane mode, manually select Rogers, Bell, or TELUS — and keep a cheap Canada eSIM as your backup plan.

    Conclusion

    A dead phone in Canada is a settings problem, not a broken phone. Enable data roaming, force a network re-scan with airplane mode, manually select a Canadian carrier, and verify your plan includes Canada — that sequence resolves the vast majority of cases. For everyone else, a prepaid eSIM bought over airport Wi-Fi gets you connected in minutes. Set it up before your next trip and you will never stare at “No Service” in Toronto again. For more cross-border travel tips, explore our travel guides, read about our team, or send us your tech-travel questions.

    Frequently Asked Questions

    Do I need a special plan to use my phone in Canada?

    Many major US postpaid plans include Canada and Mexico roaming at no extra charge, but prepaid and MVNO plans often do not. Check your specific plan’s international features before traveling — do not assume. When in doubt, a $5 Canada eSIM is cheap insurance.

    Will I be charged extra for using data in Canada?

    It depends entirely on your plan. Included-Canada plans charge nothing extra; others charge $5 to $12 per day for a travel pass, or pay-per-use rates that can be shockingly high (dollars per megabyte). Check your carrier’s Canada rates before you use data.

    Can I use Wi-Fi calling in Canada instead?

    Yes — Wi-Fi calling works normally in Canada over any Wi-Fi connection, letting you make and receive calls on your US number. It is a great free fallback for calls and texts, though you still need Wi-Fi or a data connection for everything else.

    What is the cheapest way to get data in Canada?

    A travel eSIM from providers like Airalo or Ubigi — typically $4 to $10 for several gigabytes, purchasable and installable over airport Wi-Fi in minutes. It is cheaper than carrier day passes for trips longer than a day or two.

    Why does my phone show signal bars but say “No Service”?

    Your phone can see a Canadian network’s signal but your carrier has no roaming agreement allowing registration on it, or your plan blocks international roaming. Manually selecting a different Canadian carrier (Rogers, Bell, or TELUS) sometimes resolves it; otherwise the issue is your plan.

  • How to Do Disney World in One Day With a 6-Year-Old

    How to Do Disney World in One Day With a 6-Year-Old

    Disney World with a 6-year-old for a single day sounds impossible — four parks, dozens of rides, and a kid whose legs give out by 3 PM. But here is the thing: a 6-year-old does not want four parks. They want the castle, a few favorite rides, a character hug, and the fireworks. One day at one park, planned around a child’s actual stamina and attention span, can deliver a genuinely magical day without the meltdowns (theirs and yours). The secret is ruthless prioritization: pick Magic Kingdom, plan five to seven experiences, and let everything else go.

    Why Magic Kingdom Is the Only Right Choice

    With one day and a 6-year-old, this is not a debate. Magic Kingdom has the castle, the classic dark rides, the parades, and the fireworks — everything a 6-year-old means when they say “Disney World.” EPCOT’s World Showcase will bore them, Hollywood Studios has too many thrill rides with height requirements they may not meet, and Animal Kingdom, while lovely, lacks the castle moment. Committing to one park also eliminates the time and money sink of park-hopper tickets and inter-park transportation, which can eat 60 to 90 minutes you do not have. Buy your ticket in advance (Disney uses date-based pricing, and buying ahead is cheaper than the gate), make it a weekday if possible, and check a crowd calendar from Undercover Tourist when choosing your date — lower crowd levels multiply everything else in this plan.

    Arrive Before Opening: The Rope-Drop Strategy

    The single highest-leverage move of your day is arriving 30 to 45 minutes before the official opening time. Disney typically lets guests onto Main Street early, and being near the front of the rope-drop crowd means you can ride two or three headliners in the first 90 minutes with minimal waits — the same rides that will have 60-plus-minute lines by noon. Head straight for Fantasyland: Seven Dwarfs Mine Train first (the longest line in the park and a perfect 6-year-old thrill level), then Peter Pan’s Flight and Under the Sea with Ariel. By 10:30 you will have done the rides other families wait hours for, and your kid will think you are a genius. Eat breakfast before you arrive or grab something quick on Main Street — do not waste the golden morning hour in a sit-down restaurant.

    The Midday Plan: Shows, Lunch, and the Nap Question

    From 11 AM to 3 PM, the park is at its hottest and most crowded — and this is when 6-year-olds fall apart. Plan this block around air-conditioned shows and a real lunch, not rides. The Hall of Presidents, Mickey’s PhilharMagic (a 3D show that 6-year-olds adore), and the Country Bear Musical Jamboree are all seated, cool, and restful. Book one table-service lunch or do a character meal if the budget allows — eating with Mickey while seated beats chasing characters in the heat, and the official Disney World dining pages let you reserve 60 days out. About naps: most 6-year-olds have dropped the nap, but the stimulation is exhausting. A 30-minute rest on a shaded bench, in a show, or even back at the hotel if you are staying nearby, can save the evening. Do not skip rest to “maximize” the day — a rested kid at fireworks beats an exhausted kid who melted down at 4 PM.

    Afternoon: The Second Wind Rides

    After the midday rest, hit the rides that suit a 6-year-old’s courage level. Big Thunder Mountain Railroad is the perfect “big kid” coaster — thrilling but not scary, with a 40-inch height requirement most 6-year-olds meet. Pirates of the Caribbean and Haunted Mansion are classics, though preview them for your specific child — the Haunted Mansion’s stretching room genuinely frightens some 6-year-olds. The PeopleMover in Tomorrowland is an underrated gem: a slow, breezy ride with great views and almost never a long line, perfect for tired legs. Use the My Disney Experience app to check wait times in real time and zigzag toward the shortest lines rather than following a fixed plan. And build in one unstructured hour — letting your kid pick the next ride, get a Mickey ice cream bar, and just be six in the Magic Kingdom is the actual point.

    End the Day: Parade, Fireworks, and the Exit Strategy

    Stake out a fireworks spot 45 to 60 minutes before showtime — Main Street or the hub in front of the castle fills up. The nighttime spectacular (currently Happily Ever After on most nights) is the emotional peak of the day for most kids; do not leave early to “beat the crowds” unless your child is truly done. After fireworks, you have two exit strategies: leave immediately with the masses and accept the crush, or linger 20 to 30 minutes — ride something nearby with no line, shop on Main Street — and stroll out as the crowds thin. The lingering strategy is calmer and often faster door-to-door. One final tip: buy the souvenir at the start of the day and have it sent to the park exit or your hotel (package pickup services exist for exactly this) — carrying a giant plush through seven rides is nobody’s idea of magic.

    One perfect Disney day with a 6-year-old means one park (Magic Kingdom), rope-drop arrival, five to seven prioritized experiences, a restful air-conditioned midday, and fireworks to close. Skip the park-hopper, skip the rigid touring plan, and protect the afternoon rest — a happy kid beats a packed itinerary.

    Conclusion

    Doing Disney World in one day with a 6-year-old is not about seeing everything — it is about seeing the right things at the right pace. Choose Magic Kingdom, rope-drop the Fantasyland headliners, rest through the hot midday with shows and lunch, ride the afternoon second wind, and close with fireworks. Plan around your child’s stamina instead of fighting it, and the day feels magical rather than grueling. For more family travel planning, browse our travel guides, learn about our team, or share your Disney tips.

    Frequently Asked Questions

    Which Disney World park is best for a 6-year-old?

    Magic Kingdom, without question. It has Cinderella Castle, the classic Fantasyland dark rides, the parades, and the fireworks — everything a young child pictures when they hear “Disney World.” The other parks skew older or lack the castle centerpiece.

    Do I need Genie+ or Lightning Lane for one day?

    It depends on crowd levels. On a busy day, buying individual Lightning Lanes for one or two headliners (like Seven Dwarfs Mine Train) can save over an hour. On a low-crowd weekday with rope-drop strategy, you may not need it. Check the app’s wait times that morning and decide.

    What height requirements should I check for a 6-year-old?

    Most 6-year-olds (typically 42 to 48 inches tall) clear the 40-inch requirement for Big Thunder Mountain Railroad. Measure your child before the trip and check current requirements on Disney’s official site — Space Mountain and Tron require 44 and 48 inches respectively.

    Should we stay for the fireworks with a tired 6-year-old?

    If they have rested midday, yes — the fireworks are the day’s emotional peak for most kids. If your child is melting down by 6 PM despite rest, leaving before fireworks for a calm exit beats forcing a miserable finale. Know your kid.

    How do character meet-and-greets work now?

    Characters appear at scheduled times and locations listed in the My Disney Experience app. Lines can be long; a character dining meal is the most time-efficient way to meet several characters at once while everyone sits and eats.

  • Best No-Annual-Fee Credit Cards for Earning Travel Rewards

    Best No-Annual-Fee Credit Cards for Earning Travel Rewards

    Travel rewards credit cards with $95, $250, or even $695 annual fees dominate the headlines, but here is the open secret of the points world: you do not need to pay an annual fee to earn meaningful travel rewards. Several no-annual-fee cards earn flexible points or miles at competitive rates, and for casual travelers — one or two trips a year — they often beat the premium cards on pure math. The trick is knowing which no-fee cards are genuinely good and which are marketing traps with rewards so weak they are barely worth the wallet slot. Here is the honest breakdown.

    What “Good” Looks Like in a No-Fee Card

    Before naming names, understand the benchmark. A worthwhile no-annual-fee travel card should earn at least 1.5 percent back on general spending (in points or miles), offer 2x or better in at least one bonus category you actually use, charge no foreign transaction fees (non-negotiable for a travel card), and let you redeem points for travel at a reasonable value — ideally 1 cent per point or better, or with transfer options to airline and hotel partners. Red flags: cards that earn “points” worth half a cent each, cards with foreign transaction fees (disqualifying for travel use), and cards whose bonus categories rotate so confusingly you never earn the headline rate. The Consumer Financial Protection Bureau’s credit card resources are worth reading before you apply for anything — understanding APRs, grace periods, and fee structures protects you regardless of which card you choose.

    The Standout Picks

    A few no-annual-fee cards consistently top independent rankings, and they do it for concrete reasons. The Wells Fargo Autograph card earns 3x points on restaurants, travel, gas, transit, and streaming with no annual fee and no foreign transaction fees — one of the richest no-fee earn structures available. The Chase Freedom Unlimited earns 1.5 percent on everything plus boosted rates on travel booked through Chase, and its points become dramatically more valuable if you later pair it with a premium Chase card. The Capital One Quicksilver earns a flat 1.5 percent cash back on everything with no foreign transaction fees — dead simple, no categories to track. For airline loyalists, cards like the Southwest Rapid Rewards Plus (low fee, not zero) or the no-fee United Gateway card earn miles directly in one program. The right pick depends on your pattern: heavy diners and travelers should favor the Autograph’s 3x categories; simplicity lovers should take flat-rate cash back; Chase ecosystem users should start with Freedom Unlimited as a foundation.

    Cash Back vs. Points: The Math That Matters

    Here is where most people go wrong: they chase “points” without checking what the points are worth. A card earning 2x points sounds better than a card earning 1.5 percent cash back — until you learn the points redeem at 0.6 cents each, making the real return 1.2 percent. Always convert to effective cash value: multiply the earn rate by the redemption value. Flexible bank points (Chase Ultimate Rewards, Capital One miles, Wells Fargo Rewards) are generally the most valuable no-fee currency because they can transfer to airline and hotel partners, where savvy redemptions can yield 1.5 to 2+ cents per point. Airline-specific miles are less flexible but can be lucrative if you are loyal to one carrier. Co-branded hotel cards with no fee exist too, but their earn rates are usually weak. Rule of thumb: if you will not learn transfer partners, take the flat cash-back card — 1.5 percent in your pocket beats 2x points you redeem poorly.

    The Traps to Avoid

    Several popular “travel” cards with no annual fee are quietly bad deals. Store credit cards that earn points only at one retailer are not travel cards, no matter what the brochure says. Cards with no foreign transaction fees but 1x earning on everything are outclassed by the flat 1.5 percent options — the “no foreign fee” feature alone does not make a card good. Beware cards whose sign-up bonuses require spending far beyond your normal budget; a $500 bonus that requires $4,000 in spending in 3 months is a debt trap for most households. And never carry a balance to chase rewards — at 20 to 29 percent APR, one month of interest wipes out a year of points. The rewards game is only profitable if you pay the statement balance in full every month, without exception. If you sometimes carry a balance, skip rewards cards entirely and get a low-APR card instead.

    How to Actually Use the Card for Travel

    Getting the card is step one; using it well is the rest. Put all spending on the card — but only spending you would do anyway — and pay in full monthly. Learn your card’s transfer partners if it has them; a single well-timed transfer to an airline partner for an international flight can be worth more than a year of cash-back redemptions. Use the card’s travel portal when the math favors it (some cards boost point values for portal bookings). Stack the card with airline and hotel loyalty programs — you earn the credit card points and the program miles on the same stay. And revisit your choice yearly: card terms change, your spending changes, and the independent card comparison tools at NerdWallet make the annual checkup quick. The best no-fee card is the one matched to your actual spending, not the one with the flashiest commercial.

    The best no-annual-fee travel cards earn 1.5 percent or better, charge no foreign transaction fees, and offer flexible points or straightforward cash back. Match the card to your spending — bonus categories you will actually use beat headline earn rates — and never carry a balance to chase rewards.

    Conclusion

    You do not need to pay an annual fee to earn solid travel rewards. Cards like the Wells Fargo Autograph, Chase Freedom Unlimited, and Capital One Quicksilver prove that no-fee options can fund real trips — if you pick based on your spending patterns, understand what your points are actually worth, and pay in full every month. Skip the gimmicky store cards and the bonuses that require overspending. Start with one good no-fee card, use it for everything, and let the rewards accumulate quietly in the background. For more money-smart travel advice, explore our travel guides, read about our team, or ask us your finance questions.

    Frequently Asked Questions

    Can a no-annual-fee card really compete with premium travel cards?

    For casual travelers, often yes. Premium cards win on perks (lounge access, travel credits) and higher earn rates, but if you take one or two trips a year, a good no-fee card’s rewards frequently exceed what you would net after paying a $95+ annual fee.

    Are points or cash back better for beginners?

    Cash back, usually. It is transparent — 1.5 percent is 1.5 percent. Points can be worth more through transfer partners, but only if you learn the system; poorly redeemed points are often worth less than simple cash back.

    Will applying for a travel card hurt my credit score?

    The hard inquiry typically costs a few points temporarily, and the new account lowers your average account age. But the added credit limit usually improves your utilization ratio, and responsible use builds score over time. The net effect for most people is neutral to positive within months.

    Do no-annual-fee cards have foreign transaction fees?

    Many of the good ones do not — no foreign transaction fees is a standard feature on the best no-fee travel cards. But some no-fee cards do charge them, which instantly disqualifies a card for travel use. Always check before applying.

    How much do I need to spend to earn a free flight?

    At 1.5 percent back, $25,000 in annual spending earns $375 — enough for a domestic flight. With bonus categories at 3x and smart redemptions through transfer partners, moderate spenders can earn one or two meaningful trips per year. Sign-up bonuses accelerate this dramatically in year one.